
Subscribe to Our Youtube Channel
Related Manuals for Veeder-Root TLS2P


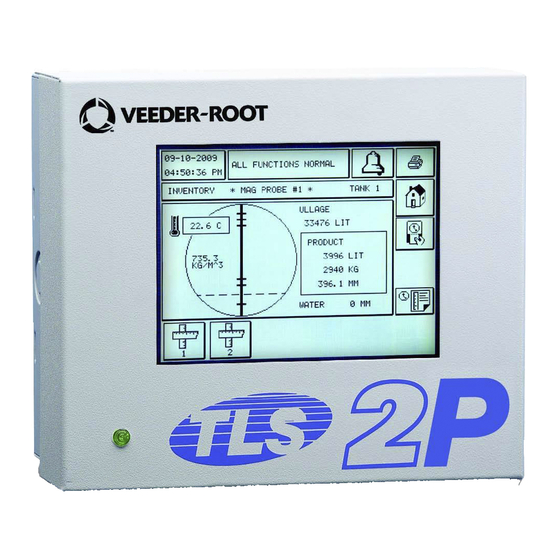
Summary of Contents for Veeder-Root TLS2P
- Page 1 Manual No: 577013-960 ● Revision: D Software Version 5 TLS2P Console Setup and Operation Manual Ethernet, USB, 3 COMS...
- Page 2 Customer Service will work with production facility to have the replacement product shipped as soon as possible. If “lost” equipment is delivered at a later date and is not needed, Veeder-Root will allow a Return to Stock without a restocking fee.
-
Page 3: Table Of Contents
[231-234] Autodial Alarm Setup Screen 2 ..............39 [235-237, 320] Autodial Alarm Setup Screen 3 ............40 [550-551] Autodial Alarm Setup Screen 4 ..............41 [256] Alarm Relay Setup Screen ................42 [254, 257-258] Temperature Setup Screen ............43 [259-262] EuroProtocol and Stick Offset Setup Screen ..........44 About TLS2P Screen ....................45... - Page 4 Probe Diagnostic Screen ..................73 Label Code Index ......................75 Accessing The TLS2P Web Server Connecting to the TLS2P in a WAN ................80 Connecting a Laptop Directly to the TLS2P ..............80 TLS2P Web Server Main Pages ..................82 Display a TLS2P RS-232 Command ................82...
- Page 5 Figure 4. Internet Protocol TCP/IP Properties dialog box ........81 Figure 5. TLS2P Web Server Home Page ............83 Figure 6. TLS2P Web Server Inventory Page ............84 Figure 7. TLS2P Web Server Delivery Page ............85 Figure 8. TLS2P Web Server Alarms Page ............86...
-
Page 6: Contractor Certification Requirements
Introduction This manual describes setup and operating procedures for the Veeder-Root TLS2P Touch-Screen console. It assumes that your system has already been set up by a Certified Contractor. This manual assumes that the console is installed and has successfully completed the Cold Boot procedure. You should begin the setup procedure with the System Setup Screens and finish with the Tank Setup Screens. -
Page 7: Safety Symbols
Introduction Safety Symbols The following safety symbols are used in this manual to alert you to important safety hazards and precautions. EXPLOSIVE FLAMMABLE Fuels and their vapors are extremely Fuels and their vapors are extremely explosive if ignited. flammable. ELECTRICITY READ ALL RELATED MANUALS High voltage exists in, and is supplied Knowledge of all related procedures... -
Page 8: Regulatory Compliance And Approvals
U.S. E.P.A. federal performance standards (0.1 gph at [P(D)] of 95% and [P(FA)] of 5%). Console The TLS2P Console features a front panel touch screen display, a dual-purpose Alarm/Normal LED, and an audible beeper for alarm and warning notification. A serial communication port is available for output to a remote printer. The TLS2P Console can monitor up to six magnetostrictive probes. -
Page 9: Alarm Message Quick Reference Index
Introduction Alarm Message Quick Reference Index Alarm Message Quick Reference Index Table 1: Alarm Message Table Alarm Type Cause Action Annual Test Fail Tank In-tank annual leak test failed Rerun in-tank leak test. If second test fails, call for service. Autodial Fail Comm System failed to connect to a remote... -
Page 10: System Setup Screens
This section describes all of the TLS2P System Setup Screens along with setup choices and explanations that you will need for data entry. Because the TLS2P Setup Displays have only English labels, Screen Label codes have been placed in brackets beneath every English label to let you quickly find a translation of the label and the page number(s) of the Screen in which the label is used. -
Page 11: Main Menu Screen
Tank Setup button - touch to display the Tank Setup Menu Screen (page 47). Diagnostics button - touch to display the Probe Diagnostic Screen (page 73). About button - touch to display the About Screen (page 45) for information about the TLS2P Console’s software and installed features. -
Page 12: System Setup - Enter Password Screen
System Setup Screens [266] System Setup - Enter Password Screen [266] System Setup - Enter Password Screen If the System Security Setup - Setup Password (page 14) is enabled, you will be required to enter that password before accessing the System Setup Screen (page 8). If the Setup Password is disabled, the System Setup - Enter Password Screen will not display. -
Page 13: System Setup Screen
System Setup Screens System Setup Screen System Setup Screen 01-01-2000 ALL FUNCTIONS NORMAL 12:00 AM Legend for numbered boxes Language button - touch to display the Language and Dialing Setup button - touch to display the System Units Setup Screen (page 9) Setup Dial Out Setup Screen (page 33). -
Page 14: [201-203, 240] System Language And Units Setup Screen
System Setup Screens [201-203, 240] System Language and Units Setup Screen [201-203, 240] System Language and Units Setup Screen 01-01-2000 ALL FUNCTIONS NORMAL 12:00 AM [201] [202] [203] ISO 3166 COUNTRY [240] Legend for numbered boxes System Language [201] - Choose from English, (default), French, Spanish, German, Portuguese, Polish, Swedish, Finnish, Russian or Chinese (Mandarin). -
Page 15: [204 - 207] Station Header Setup Screen
System Setup Screens [204 - 207] Station Header Setup Screen [204 - 207] Station Header Setup Screen 01-01-2000 ALL FUNCTIONS NORMAL 12:00 AM [204] [205] [206] [207] Legend for numbered boxes Header Line 1 [204] - Enter first line of Report header. The entry can be alphanumeric and up to 20 characters. -
Page 16: Alpha Keypad Screen
System Setup Screens Alpha Keypad Screen Alpha Keypad Screen ENTER: STATION HEADER 1 JOHNS MOBIL SAVE Legend for numbered boxes Displays Title of data to be entered. Cursor left button - touch to move the cursor one position left in the Data Entered Window (2). Data Entered Window displays data entered. -
Page 17: Numeric Keypad Screen
System Setup Screens Numeric Keypad Screen Numeric Keypad Screen ENTER: STATION HEADER 1 JOHNS MOBIL SAVE Legend for numbered boxes Displays title of data to be entered. Cursor right button - touch to move the cursor one position right in the Data Entered Window (2). Data Entered Window displays data entered. -
Page 18: System Security Setup Screen
System Setup Screens [208-209] System Security Setup Screen [208-209] System Security Setup Screen 05-29-2008 ALL FUNCTIONS NORMAL 12:00 AM SYSTEM SETUP SECURITY COMM 1 SECURITY DISABLED [208] PASSWORD 000000 [209] COMM 1 COMM 2 COMM 3 TCP/IP Legend for numbered boxes Security [208] - Select Security Enabled or Disabled for the selected COMM port (default is Disabled). -
Page 19: System Setup Security - Setup Password Screen
System Setup Screens [263-265] System Setup Security - Setup Password Screen [263-265] System Setup Security - Setup Password Screen 01-01-2010 ALL FUNCTIONS NORMAL 12:00 AM SYSTEM SETUP SECURITY - SETUP PASSWORD OLD PASSWORD [263] NEW PASSWORD [264] CONFIRM NEW [265] PASSWORD DISABLED CANCEL Legend for numbered boxes... -
Page 20: System Time/Date Setup Screen
System Setup Screens [212-214] System Time/Date Setup Screen [212-214] System Time/Date Setup Screen 10-04-01 ALL FUNCTIONS NORMAL 13:54 10-04-01 [212] 13-54 [213] TM/DATE FORMAT DD-MM-YY-HH-MM [214] Legend for numbered boxes Date [212] - Enter current date. Time [213 - Enter current time. TM/Date Format [214] - Select one of 3 formats: DD-MM-YY-HH -MM (default) -
Page 21: Current Date Entry Screen
System Setup Screens Current Date Entry Screen Current Date Entry Screen 2001 Legend for numbered boxes Month entry window - enter 01 - 12 Day entry window - enter 01 - 31 Year entry window - enter year, e.g. 2001. The remaining buttons function as described on page 12. -
Page 22: Current Time Entry Screen
System Setup Screens Current Time Entry Screen Current Time Entry Screen Legend for numbered boxes Hours entry window - enter 00 - 23, or 01 - 12 Minutes entry window - enter 01 - 59 AM/PM entry window - enter AM or PM Touch PM if after noon Touch AM if before noon The remaining buttons function as described on page... -
Page 23: System Setup Close Times Screen
System Setup Screens [500-503] System Setup Close Times Screen [500-503] System Setup Close Times Screen 01-01-2000 ALL FUNCTIONS NORMAL 12:00 AM SYSTEM SETUP CLOSE TIMES SHIFT CLOSE METHOD SNAPSHOT [500] SHIFT CLOSE TIMEOUT [501] INVENTORY LOG TIME 00:00 [502] INVENTORY LOG INTERVAL [503] Legend for numbered boxes This screen allows you to select Auto (Timed) or Manual... -
Page 24: Shift Times Setup Screen
System Setup Screens [215-218] Shift Times Setup Screen [215-218] Shift Times Setup Screen 01-01-2000 ALL FUNCTIONS NORMAL 12:00 AM SYSTEM SETUP SHIFT TIME [215] [216] [217] [218] Legend for numbered boxes At each shift start time selected below, the system automatically saves a complete inventory report in memory. -
Page 25: Daylight Savings Time Setup Screen
System Setup Screens [219-223] Daylight Savings Time Setup Screen [219-223] Daylight Savings Time Setup Screen 01-01-2000 ALL FUNCTIONS NORMAL 12:00 AM ENABLE [219] MAR WEEK 2 SUN [220] 2:00 AM [221] NOV WEEK 1 SUN [222] 2:00 AM [223] Legend for numbered boxes This feature allows you to enter Daylight Savings Start and End Date [222] - touch the Date button to the right of End Dates/Times. -
Page 26: Comm Ports 1, 2, 3 Serial Setup Screen
System Setup Screens [238-239] COMM Ports 1, 2, 3 Serial Setup Screen - Page 1 [238-239] COMM Ports 1, 2, 3 Serial Setup Screen - Page 1 COMM 1 SERIAL [238] NONE [239] Legend for numbered boxes This screen displays page 1 of the COMM 1, 2 and 3 COMM 2 button - touch to display page 1 of the Serial setup. -
Page 27: Comm Type Selection Dialog
System Setup Screens [238] Comm Type Selection Dialog [238] Comm Type Selection Dialog SELECT ENTRY COMM TYPE NONE [238] SAVE CANCEL Legend for numbered boxes Data Entry screens are similar and display when you touch the arrow next to a setup parameter. In this example, Comm Type offers multiple options, so you touch the arrow button to select an option. -
Page 28: Comm Ports 1, 2, 3 Setup Screen
System Setup Screens [249-252] COMM Ports 1, 2, 3 Setup Screen - Page 2 [249-252] COMM Ports 1, 2, 3 Setup Screen - Page 2 COMM 1 [249] [250] [251] [252] Legend for numbered boxes The screen above contains page 2 of the setups for COMM 1 Serial, Printer and Modem Comm Types, and for COMM 2 and 3 Serial Comm Types. -
Page 29: [238, 239, 241, 253] Comm Port 1 - Printer Setup Screen
System Setup Screens [238, 239, 241, 253] COMM Port 1 - Printer Setup Screen [238, 239, 241, 253] COMM Port 1 - Printer Setup Screen 01-01-2000 ALL FUNCTIONS NORMAL 12:00 AM SYSTEM SETUP COMMUNICATIONS COMM 1 [238] [241] [239] PRINTER LANG EPSON ESC/P [253] COMM 1... -
Page 30: [238, 244-246] Comm 1 Modem Setup
System Setup Screens [238, 244-246] COMM 1 Modem Setup - Page 1 [238, 244-246] COMM 1 Modem Setup - Page 1 01-01-2000 ALL FUNCTIONS NORMAL 12:00 AM SYSTEM SETUP COMMUNICATIONS COMM 1 [238] [244] [245] [246] COMM 1 COMM 2 COMM 3 TCP/IP Legend for numbered boxes... -
Page 31: Modem Advanced Communications Setup Screen
System Setup Screens [247-248] Modem Advanced Communications Setup Screen [247-248] Modem Advanced Communications Setup Screen 01-01-2000 ALL FUNCTIONS NORMAL 12:00 AM SYSTEM SETUP COMMUNICATIONS COMM 1 DIAL IN AT&B1 [247] AT&B1 [248] Legend for numbered boxes CAUTION! Entering the wrong number strings in this screen may disable the modem. -
Page 32: Tcpip Setup Guidelines
1. MAC address of the XPort device, this can be found right on the device itself inside the console 00- 20-4A-___-___-___ 2. Host IP address which will be a static IP address assigned to the TLS2P console at this location ___.___.___.___ 3. -
Page 33: Tcpip Setup
Only for 15 minutes after powerup, or after the GET button IP ADDR button - touch to enter the the associated (item 6) is touched, will the TLS2P display the actual TCPIP TCPIP parameter. parameters (280 - 283) saved in the Lantronix server (see Get button - touch this button to have the TLS2P update upper screen). -
Page 34: Ip Address Entry Dialog
System Setup Screens IP Address Entry Dialog IP Address Entry Dialog Legend for numbered boxes The IP Address Entry dialog screen is displayed above. Values for these fields must fall within the range of 0 - 255 to be accepted. Right/Left arrows - touch to select the desired field. -
Page 35: Get Tcpip Parameters Confirmation Dialog
GET button on the TCPIP setup screen (see page 28). OK button - touch to have the TLS2P get the TCPIP parameters (280 - 283) saved in the Lantronix server. The lower screen displays while the TLS2P is updating the TCPIP. -
Page 36: Set Tcpip Parameters Confirmation Dialog
SET button on the TCPIP setup screen (see page 28). OK button - touch to have the TLS2P save the TCPIP parameters (280 - 283) to the Lantronix server. The lower screen displays while the TLS2P is updating the TCPIP parameters to the Lanotronix server. -
Page 37: Usb Port Parameter Screen
System Setup Screens USB Port Parameter Screen USB Port Parameter Screen Legend for numbered boxes Touching the USB comm button displays the USB port parameter data. The parameters in this display are read only and are not programmable. To communicate through the USB port on the console you will need a standard USB printer cable as well as a USB driver for your computer or laptop for the interface to the console. -
Page 38: Auto-Dialout System Setup Dial Out Screen
System Setup Screens [270] Auto-Dialout System Setup Dial Out Screen [270] Auto-Dialout System Setup Dial Out Screen 05-29-2008 ALL FUNCTIONS NORMAL 12:00 AM SYSTEM SETUP DIAL OUT DIAL TYPE NONE [270] Legend for numbered boxes Dial Type [270] - touch the Arrow button to display the Dial Type Select Entry Diaglog and select a dial out, dial type (see page 34). -
Page 39: Select Dial Out Type Dialog
System Setup Screens Select Dial Out Type Dialog Select Dial Out Type Dialog SELECT ENTRY DIAL TYPE NONE [270] SAVE CANCEL Legend for numbered boxes Dial Type [270] - touch the Arrow button to display the Dial Type Select Entry Diaglog and select a Dial Type: •... -
Page 40: [224-226, 270] Auto-Dial Setup - Modem
System Setup Screens [224-226, 270] Auto-Dial Setup - Modem [224-226, 270] Auto-Dial Setup - Modem 05-29-2008 ALL FUNCTIONS NORMAL 12:00 AM SYSTEM SETUP DIAL OUT DIAL TYPE MODEM [270] PHONE # [224] RETRIES [225] RETRY DELAY [226] Legend for numbered boxes Dial Type [270] - Modem Phone [224] - touch the Numeric button to the right of the window and enter one phone number to which you... -
Page 41: [270-272, 277-278] Auto-Dial Setup - Tcpip
Current Remote port [272] in Lantronix server. NOTE: If any parameters have been changed but the SET Push Site ID [277] - This feature will allow the TLS2P to button was not touched to save them, the TLS2P will automatically establish a TCPIP connection to a Polling automatically save them after 5 minutes. -
Page 42: [270, 273-276] Auto-Dial Setup - Email
Legend for numbered boxes Only for 15 minutes after powerup, or after the GET button From [275] - Name (label) for the TLS2P. touch the alfpha (item 6) is touched, will the TLS2P display the actual EMAIL key button to enter label (23 characters max.) -
Page 43: Autodial Alarm Setup Screen 1
System Setup Screens [227-230] Autodial Alarm Setup Screen 1 [227-230] Autodial Alarm Setup Screen 1 01-01-2000 ALL FUNCTIONS NORMAL 12:00 AM SYSTEM SETUP AUTODIAL ALARMS TANK 1 [227] [228] [229] [230] Legend for numbered boxes This feature lets you program the system to dial out on the following alarm conditions. -
Page 44: Autodial Alarm Setup Screen 2
System Setup Screens [231-234] Autodial Alarm Setup Screen 2 [231-234] Autodial Alarm Setup Screen 2 01-01-2000 ALL FUNCTIONS NORMAL 12:00 AM SYSTEM SETUP AUTODIAL ALARMS TANK 1 [231] [232] [233] [234] Legend for numbered boxes This screen continues Autodial Alarms setup. Note: Autodial alarms continue on next page. -
Page 45: [235-237, 320] Autodial Alarm Setup Screen 3
System Setup Screens [235-237, 320] Autodial Alarm Setup Screen 3 [235-237, 320] Autodial Alarm Setup Screen 3 [235] [236] [237] [320] Legend for numbered boxes This screen continues Autodial Alarms Setup. Invalid Fuel Height [235] - touch the Down Arrow button to select On (dial out) or Off (do not dial out). -
Page 46: Autodial Alarm Setup Screen 4
System Setup Screens [550-551] Autodial Alarm Setup Screen 4 [550-551] Autodial Alarm Setup Screen 4 01-01-2000 ALL FUNCTIONS NORMAL 12:00 AM SYSTEM SETUP AUTODIAL ALARMS TANK 1 SHIFT CLOSE EVENT [550] DENSITY WARNING [551] Legend for numbered boxes This screen concludes Autodial Alarms Setup. Shift Close Event [550] - touch the Down Arrow button to select On or Off . -
Page 47: Alarm Relay Setup Screen
System Setup Screens [256] Alarm Relay Setup Screen [256] Alarm Relay Setup Screen 01-01-2000 ALL FUNCTIONS NORMAL 12:00 AM [256] Legend for numbered boxes This screen allows you to select the mode of activation for the remote beeper relay. Alarm Relay [256] - touch the Down Arrow button to the right of the window and select: None (default), Overfill, or All Alarms. -
Page 48: [254, 257-258] Temperature Setup Screen
System Setup Screens [254, 257-258] Temperature Setup Screen [254, 257-258] Temperature Setup Screen 01-01-2000 ALL FUNCTIONS NORMAL 12:00 AM 59 F [257] [258] TC DENSITY [254] Legend for numbered boxes TC Density [254] - touch the Down Arrow button to the This screen displays the Temperature Compensation Setup Screen. -
Page 49: Europrotocol And Stick Offset Setup Screen
System Setup Screens [259-262] EuroProtocol and Stick Offset Setup Screen [259-262] EuroProtocol and Stick Offset Setup Screen 01-01-2000 ALL FUNCTIONS NORMAL 12:00 AM SYSTEM SETUP EURO PROTOCOL & STICK OFFSET [259] [260] [261] [262] Legend for numbered boxes This screen contains international format options and leak test format setup. -
Page 50: About Tls2P Screen
SOFTWARE NUMBER 349820-004-A CREATED 08.05.27.14.09 SYSTEM FEATURES STATIC TANK LEAK DETECT This screen lists information about the TLS2P Console’s installed software and features: • System Software Revision Level • Software Part Number • Software Creation Date • System Features: (e.g., Static Tank Leak Detect) -
Page 51: Tank Setup Screens
Tank Setup Screens [267] Tank Setup - Enter Password Screen If the System Security Setup - Setup Password (page 14) is enabled, you will be required to enter that password before accessing the Tank Setup Menu Screen (page 47). If the Setup Password is disabled, the Tank Setup - Enter Password Screen will not display. -
Page 52: Tank Setup Menu Screen
Tank Setup Screens Tank Setup Menu Screen Tank Setup Menu Screen 01-01-2000 ALL FUNCTIONS NORMAL 12:00 AM Legend for numbered boxes This screen contains access to Tank Setup Screens. Tank Setup button - touch to display the Tank Setup Screen (page 48). Tank Alarm Limit button - Touch to display the Tank Alarm Limits Setup Screen (page 72). -
Page 53: Tank Setup Screen 1
Tank Setup Screens [119-121] Tank Setup Screen 1 [119-121] Tank Setup Screen 1 01-01-2000 ALL FUNCTIONS NORMAL 12:00 AM TANK 1 CONFIGURE [119] [120] [121] Legend for numbered boxes This screen accesses Tank Setup parameters. Configure [119] - Touch the Down Arrow button to the right of the window and select: Enabled or Disabled (default). -
Page 54: Tank Setup Screen 2
Tank Setup Screens [122-124] Tank Setup Screen 2 [122-124] Tank Setup Screen 2 01-01-2000 ALL FUNCTIONS NORMAL 12:00 AM TANK 1 [122] [123] [124] Legend for numbered boxes This screen continues Tank Setup. Diameter [122] - touch the Down Arrow button to the right of the window and enter the diameter of the tank. -
Page 55: Tank Setup Screen 3
Tank Setup Screens [125-128] Tank Setup Screen 3 [125-128] Tank Setup Screen 3 01-01-2000 ALL FUNCTIONS NORMAL 12:00 AM TANK 1 0.00070 [125] 0 IN [126] [127] [128] Legend for numbered boxes This screen continues Tank Setup. Float Size [127] - Touch the Down Arrow button to the right of the window and from the float sizes presented, Thermal Coefficient [125] - Touch the Down Arrow button enter the Mag probe float size that you installed on the... -
Page 56: Table 2: U.s. And Metric Thermal Coefficients
Tank Setup Screens [125-128] Tank Setup Screen 3 Table 2: U.S. and Metric Thermal Coefficients Thermal Thermal Coefficient Coefficient Product (U.S. Units) (Metric Units) Alcohol 0.00063 0.00114 Aviation Gas 0.00075 0.00135 Biodiesel B20 0.00045 0.00081 Biodiesel B100 0.00044 0.00079 Diesel (fuel oil #2) 0.00045 0.00081 Ethylene Glycol... -
Page 57: Table 3: Calculating Tank Tilt
Tank Setup Screens [125-128] Tank Setup Screen 3 Table 3: Calculating Tank Tilt Use the worksheet below to record measurements and perform Tank Tilt calculations for each of the tanks. 1. Stick the tank at the fill riser opening at least three times. Record the average reading in column A of the chart. 2. -
Page 58: Tank Setup Screen 4
Tank Setup Screens [131] Tank Setup Screen 4 [131] Tank Setup Screen 4 01-01-2000 ALL FUNCTIONS NORMAL 12:00 AM TANK 1 DENSITY CODE [131] Legend for numbered boxes This screen concludes Tank Setup. Density Code [131] - The density float is etched along one side of the device with a unique Density Code which must be entered in this screen to enable the console to accurately compute the density of the fuel in the tank. -
Page 59: 101-104] Tank Alarm Limits Setup Screen 1
Tank Setup Screens 101-104] Tank Alarm Limits Setup Screen 1 101-104] Tank Alarm Limits Setup Screen 1 01-01-2000 ALL FUNCTIONS NORMAL 12:00 AM [101] [102] [103] [104] Legend for numbered boxes This screen begins Tank Alarm Limits setup. Low Product [104] - Low Product warns when volume in the tank pumps down to the level you enter here. -
Page 60: Tank Alarm Limits Setup Screen 2
Tank Setup Screens [105-108] Tank Alarm Limits Setup Screen 2 [105-108] Tank Alarm Limits Setup Screen 2 01-01-2000 ALL FUNCTIONS NORMAL 12:00 AM [105] [106] [107] [108] Legend for numbered boxes This screen continues Tank Alarm Limits setup. Per Leak Test Min [108] - This value sets the minimum tank volume required to record a passed periodic leak High Water [105] - Alarms when the level of water in the test. -
Page 61: [109-111, 552] Tank Alarm Limits Setup Screen 3
Tank Setup Screens [109-111, 552] Tank Alarm Limits Setup Screen 3 [109-111, 552] Tank Alarm Limits Setup Screen 3 01-01-2000 ALL FUNCTIONS NORMAL 12:00 AM [109] [110] [111] DENSITY HIGH LIMIT 901.00 KGM3 [552] Legend for numbered boxes Annual Test Fail [111] - Annual Test Fail alarms when an This screen continues Tank Alarm Limit setup. -
Page 62: Tank Alarm Limits Setup Screen 4
Tank Setup Screens [553] Tank Alarm Limits Setup Screen 4 [553] Tank Alarm Limits Setup Screen 4 01-01-2000 ALL FUNCTIONS NORMAL 12:00 AM DENSITY LOW LIMIT 674.00 KGM3 [109] [553] Legend for numbered boxes This screen concludes Tank Alarm Limits setup. Density Low Limit [553] - touch the numeric button to enter a low limit at which you want the set the density warning. -
Page 63: Tank Leak Test Setup Screen 1
Tank Setup Screens [112-114] Tank Leak Test Setup Screen 1 [112-114] Tank Leak Test Setup Screen 1 01-01-2000 ALL FUNCTIONS NORMAL 12:00 AM SAME ALL TANKS TANK 1 0.2 GPH [112] EARLY STOP [113] [114] Legend for numbered boxes The Tank Leak Test Setup allows you to establish and enter Test Duration [114] - The maximum duration is 24 hours. -
Page 64: Same All Tanks Screen
Tank Setup Screens [115] Same All Tanks Screen [115] Same All Tanks Screen [115] SAVE Legend for numbered boxes This screen appears if you touch the SAME ALL TANKS button on the Tank Leak Test Setup screens. Confirm [115] - Select Yes to transfer the Tank 1 setup selections on the Tank Leak Test Setup screens to all configured tanks in the system. -
Page 65: Tank Leak Test Setup Screen 2
Tank Setup Screens [116-118] Tank Leak Test Setup Screen 2 [116-118] Tank Leak Test Setup Screen 2 01-01-2000 ALL FUNCTIONS NORMAL 12:00 AM TANK 1 [116] DATE/DAY [117] [118] Legend for numbered boxes This screen concludes Tank Leak Test Setup. Frequency [116] - You can choose from several Tank Leak Test frequency options: •... -
Page 66: Manually Closing A Shift
Manually Closing a Shift Manual Shift Close Screen 01-01-2000 ALL FUNCTIONS NORMAL 12:00 AM MANUAL SHIFT CLOSE: SHIFT 1 OPEN OPEN OPEN OPEN OPEN OPEN PLEASE CONFIRM SELECTION PLEASE CONFIRM SELECTION SHIFT 1 05-11-08 05:37 SHIFT 1 05-11-08 05:37 TANK VOLUME HEIGHT WATER... -
Page 67: Manually Starting/Stopping Tank Leak Tests
Manually Starting/Stopping Tank Leak Tests Use this screen to manually start or stop a Tank Leak Test. [112, 114, 129-130] Manual Test Start/Stop Screen 01-01-2000 ALL FUNCTIONS NORMAL 12:00 AM MANUAL TANK TEST TANK 1 [129] [130] 0.76 LPH [112] [114] Legend for numbered boxes Test Method [129] - Select Single Tank or All Tanks. -
Page 68: Reports
Start Date, Time, Volume; End Date, Time, Volume Amount Touch the Power Outage Delivery Report button to display deliveries to the selected tank that occurred when the TLS2P was powered down. It will contain up to 5 power outage deliveries per tank. - Page 69 Reports System Reports Table 4: System Reports Report Button Report Report Parameters CURRENT TEST RESULTS LAST RESULTS Test Type, Start Date/Time, Test Result, Hours Run, %Volume in Tank at Time of Test Touch the Last Results button to display the results of the last passed Annual, Periodic, and Gross tests.
-
Page 70: Inventory Report (Us Units And Non-Density Probe)
Reports Inventory Report (US Units and Non-Density Probe) Inventory Report (US Units and Non-Density Probe) 01-01-2000 ALL FUNCTIONS NORMAL 12:00 AM 37.3 F 5329 GAL (5413 GAL TC) 72 IN WATER 0.0 IN To see the inventory report(s) for any other tank touch the inventory report button for that tank at the bottom of the screen. -
Page 71: Inventory Report (Metric Units And Density Probe)
Reports Inventory Report (Metric Units and Density Probe) EXAMPLE REPORT PRINTOUT - INVENTORY LOG REPORT DATE VOLUME HEIGHT WATER TEMP 08-5-08 09:00 17508 1229 08-5-08 08:00 16508 1129 08-5-08 07:00 15508 1029 08-5-08 06:00 14508 08-5-08 05:00 13508 08-5-08 04:00 12508 Inventory Log Report Notes •... -
Page 72: Delivery Report (Us Units And Non-Density Probe)
Reports Delivery Report (US Units and Non-Density Probe) Delivery Report (US Units and Non-Density Probe) Touch the Tanker button at the bottom of the screen to view a delivery for that tank. EXAMPLE PRINTOUT - DELIVERY REPORT WITH NON-DENSITY PROBE T 1:REGULAR UNLEADED INCREASE DATE/TIME... -
Page 73: Delivery Report (Metric Units And Density Probe)
Reports Delivery Report (Metric Units and Density Probe) Delivery Report (Metric Units and Density Probe) Touch the Tanker button at the bottom of the screen to view a delivery for that tank. Note: If TC Density is enabled, then TC Density will be displayed instead of Density. EXAMPLE PRINTOUT - DELIVERY REPORT WITH DENSITY PROBE T 1:REGULAR UNLEADED INCREASE... -
Page 74: Active Alarm Status Screen
Reports Active Alarm Status Screen Active Alarm Status Screen 01-01-2000 ALL FUNCTIONS NORMAL 12:00 AM ACTIVE ALARM STATUS Alarm Reports Alarm reports are accessed from the Active Alarm Reports Screen above by touching the report buttons across the bottom of the screen. Table 5 describes the available reports. Table 5: Alarm Reports Button Report... -
Page 75: Information On Alarm States
Reports Alarm Reports Table 5: Alarm Reports Button Report Report Parameters HIGH PRIORITY ALARM REPORT Displays Device (T = Tank, C = Comm) number, Alarm Type, Date, Time, and status of last 50 High Priority alarms: Max Product, Overfill, Low Prod- uct, High Water, Gross Test Fail, Periodic Test Fail, Annual Test Fail, Probe Out, and Autodial Failure. - Page 76 Reports Alarm Reports 10 gallons [37.8 L] (whichever is greater), the alarm will deactivate. The Max Product value is entered as a volume with the default value equal to 0. If the Max Product value is equal to 0 or the full tank volume capacity, the alarm is disabled.
-
Page 77: Diagnostic Screens
Diagnostic Screens Function Test Menu Screen 01-01-2000 ALL FUNCTIONS NORMAL 12:00 AM RED LED GREEN LED LCD OFF Legend for numbered boxes This screen displays System Test Functions. TEST ALARM button - Touch and the console beeper will beep. TEST RELAY button - Touch and the relay is activated for 5 seconds. -
Page 78: Lcd Touch Test Screen
Diagnostic Screens LCD Touch Test Screen LCD Touch Test Screen This screen displays 5 test buttons (e.g., item 1) around the display. Touch one of these buttons and a message appears showing that button’s corresponding x/y coordinates and a look up list with the correct coordinates for all 5 buttons). Touch the Back button (item 2) to return to the Function Test Menu Screen. - Page 79 Diagnostic Screens Probe Diagnostic Screen EXAMPLE REPORT PRINTOUT - PROBE DIAGNOSTIC REPORT SOFTWARE VERSION 349nnn-nnn-n TANK PROBE TYPE MAG 1 MAG 1 MAG 1 SERIAL NUMBER 168809 50069 50069 PROBE ID 0XC000 0XC000 0XC000 PROBE LENGTH 30.00 18.0 18.0 GRADIENT 354.520 351.000 351.00...
-
Page 80: Label Code Index
Table 6 and Table 7 are included to help non-English speaking users find translations of all English labels used in the TLS2P Setup screens. Beneath each label is a unique code in brackets, e.g., [101]. This code is listed in the tables below and points to every Setup Screen in this manual where the label is used. -
Page 81: Table 7: System Setup Label Codes
Label Code Index Probe Diagnostic Screen Table 6: Tank Setup Label Codes Label Code Label Where Used Tank Tilt page 50 Float Size page 50 Stick Offset page 50 Test Method page 62 Test Control page 62 Density Code page 53 Delivery Completed page 40 Table 7:... - Page 82 Label Code Index Probe Diagnostic Screen Table 7: System Setup Label Codes Label Code Label Where Used End Time page 20 Phone Number page 35 Retries page 35 Retry Delay page 35 Max Product page 38 Overfill Limit page 38 Delivery Needed page 38 Low Product...
- Page 83 Label Code Index Probe Diagnostic Screen Table 7: System Setup Label Codes Label Code Label Where Used TC Density page 43 Alarm Relay page 42 TC Reference page 43 Print TC Volume page 43 H-Protocol Format page 44 Euro Protocol Prefix page 44 Stick Height Offset page 44...
- Page 84 Label Code Index Probe Diagnostic Screen Table 7: System Setup Label Codes Label Code Label Where Used Shift Close Event page 41 Density Warning page 41 Density High Limit page 56 Density Low Limit page 57...
-
Page 85: Accessing The Tls2P Web Server
The IP address and host port number of the TLS2P (see your network administrator) Connection Procedure: 1. Enter the IP address and host port of the TLS2P in the address window of your in browser , e.g, 12.2.1.120:10001 and click the go-to button. You should see the TLS2P Home screen. -
Page 86: Figure 2. Local Area Connection Status Screen
Accessing The TLS2P Web Server Probe Diagnostic Screen Figure 2. Local Area Connection Status Screen 3. Click the Properties button and the Local Area Connection Properties screen displays (Figure 3). Figure 3. Local Area Connection Properties Screen 4. In the ‘connections or components used check list’ window, highlight Internet Protocol (TCP/IP) and then click the Properties button to display the Internet Protocol TCP/IP Properties dialog box (Figure 4). -
Page 87: Tls2P Web Server Main Pages
Note: Prior to reconnecting your laptop to a network, you will need to select the Obtain an IP ad- dress automatically radio button shown in Figure 4 above. 6. Open your browser and enter the IP Address of the TLS2P and click the Go-To button. You should see the TLS2P Web Server Home Page. -
Page 88: Figure 5. Tls2P Web Server Home Page
Accessing The TLS2P Web Server Probe Diagnostic Screen Figure 5. TLS2P Web Server Home Page... -
Page 89: Figure 6. Tls2P Web Server Inventory Page
Accessing The TLS2P Web Server Probe Diagnostic Screen Figure 6. TLS2P Web Server Inventory Page... -
Page 90: Figure 7. Tls2P Web Server Delivery Page
Accessing The TLS2P Web Server Probe Diagnostic Screen Figure 7. TLS2P Web Server Delivery Page... -
Page 91: Figure 8. Tls2P Web Server Alarms Page
Accessing The TLS2P Web Server Probe Diagnostic Screen Figure 8. TLS2P Web Server Alarms Page... - Page 92 For technical support, sales or other assistance, please visit: www.veeder.com...
Need help?
Do you have a question about the TLS2P and is the answer not in the manual?
Questions and answers