
Related Manuals for VWR Gel Documentation Imager2


Summary of Contents for VWR Gel Documentation Imager2
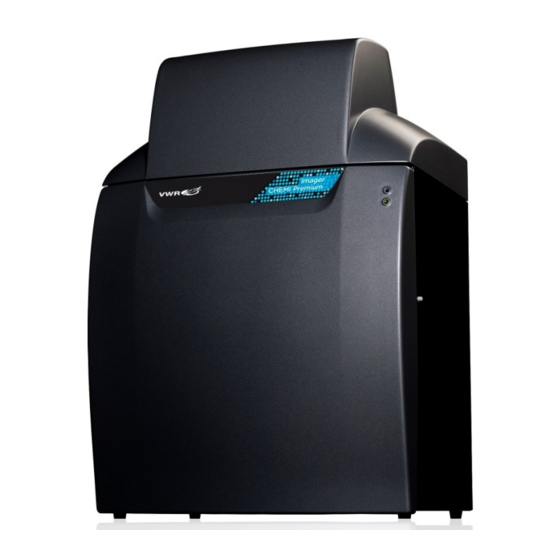
- Page 1 Instruction Manual ® Gel Documentation Imager2 EUROPEAN CATALOGUE NUMBER: 730-1458 Version 01 Issue 04/2021...
-
Page 2: Legal Address Of Manufacturer
Legal address of Manufacturer Europe ® International bv, Researchpark Haasrode 2020 Geldenaak sebaan 464 B-3001 Leuven +3216385011 http:be.vwr.com UK Importer: VWR International Ltd Hunter Boulevard, Magna Park Lutterworth, Leicestershire, LE17 4XN http://uk.vwr.com Country of origin ® vwr.com Instruction manual VWR Imager2... -
Page 3: Table Of Contents
Manual Image Capture - Image Actions Following Capture Protocols - Saving, Opening and Editing Introduction Creating and Saving a Protocol From the Home Screen In Auto Image Capture Mode In Manual Image Capture Mode ® vwr.com Instruction manual VWR Imager2... - Page 4 Common Screen Functions and Tools Saving Images Printing Operator Maintenance Looking After a Imager2 Instrument Cleaning a Imager2 Instrument Contacting VWR International User Replacable accessories and spare parts Imager2 Troubleshooting Disposal Disposing of a Imager2 The Waste Electrical and Electronic Equipment (WEEE) Directive ®...
-
Page 5: Safety Instructions
This document describes the general safety practices and precautions that must be observed when ® operating a VWR Gel Documentation Imager2 System. This advice is intended to supplement, not supersede, the normal safety codes in the user’s country. The information provided does not cover every safety procedure that should be followed. Ultimately, maintenance of a safe laboratory environment is the responsibility of the user and the user’s organisation. - Page 6 40°C. Electrical supply fluctuations not exceeding +10% of the nominal voltage. The protection provided by the equipment may be impaired if the environmental conditions do not lie within these parameters. WARNING ® 6 vwr.com Instruction manual VWR Imager2...
- Page 7 The electrical safety of the instrument is likely to be impaired if: It has any signs of visible damage. If it has been subjected to prolonged storage in unfavourable conditions. ® vwr.com Instruction manual VWR Imager2...
- Page 8 The Imager2 System is classified as a digital device used exclusively as industrial, commercial or medical test equipment. It is exempt from the technical standards specified in Part 15 of the FCC Rules and Regulations based on Section 15.103 (c). ® 8 vwr.com Instruction manual VWR Imager2...
- Page 9 To prevent potential personal injury and damage to the instrument, switch OFF all components in the system and disconnect them from the mains power supply before altering, or making any new electrical connections. WARNING ® vwr.com Instruction manual VWR Imager2...
-
Page 10: Unpacking A Imager2 System
® Unpacking a VWR Imager2 System Removing from the Packaging Visual Inspection Upon taking delivery of a new Imager2 Instrument: Check the contents of the cartons as they are unpacked against the contents listed on the packing list ... - Page 11 Darkroom to PC lead; serial lead (9-way D-type male to 9-way D-type female) plus serial/USB converter (9-way D-type male to USB Type A) Pre-ordered Emission Filters Transilluminator UltraBright LED blue light transilluminator Visible light converter screen White light pad ® vwr.com Instruction manual VWR Imager2...
-
Page 12: Overview
The screen is indexed, enabling the location and specification of each installed filter to be specified to the Gel Doc image capture software. Imager2 Instruments have a new generation of camera - having 5 million pixels, giving the system range outstanding sensitivity and versatility. ® vwr.com Instruction manual VWR Imager2... -
Page 13: Imager
57 x 84 x W x H x D (cm) Weight (kg) Supply voltage (V ac) 115 / 240 other emission filters are available other wavelengths are available other sizes and wavelengths are available including dual wavelength ® vwr.com Instruction manual VWR Imager2... - Page 14 DNA gels ● Protein gels ● Multiplex gels - 3 or more colours Colony counting ● 2D Gels (DIGE) Chemiluminescence blots Colorimetric blots ● Stain free imaging ● Films IR imaging Bioluminescence GFP plant imaging ® vwr.com Instruction manual VWR Imager2...
-
Page 15: Gel Doc Image Capture Software
Blot type; Chemiluminescence, Fluorescence, Visible Sample type; Protein, DNA, RNA Matrix type; Acrylamide, Agarose Dye types Lighting types CAMERA COVER INDICATOR LIGHTS DARKROOM DOOR DARKROOM DOOR MANUAL RELEASE BUTTON ® vwr.com Instruction manual VWR Imager2... - Page 16 TYPICAL STANDARD IMAGER2 - FRONT CAMERA MODULE INDICATOR LIGHTS ELECTROMAGNETIC DOOR CATCH UPPER LIGHT UNITS - BOTH TRANSILLUMINA SIDES TOR UNIT TYPICAL STANDARD IMAGER2 - DARKROOM DOOR OPEN ® vwr.com Instruction manual VWR Imager2...
-
Page 17: Software Installation
Install Device Drivers using the Device Driver Installation Wizard Run the Set-up Program Insert the VWR USB stick and run the Set-Up Program. The following screen will appear: SETUP – Gel Doc - WELCOME TO THE Gel Doc SETUP WIZARD SCREEN Click on the Next >... -
Page 18: Select The Instrument Hardware Information
SETUP – Gel Doc – CFR COMPLIANCE Select the Installation Folder Destination Location SETUP – Gel Doc - SELECT DESTINATION LOCATION SCREEN Select the folder in which you would like the Gel Doc software to be installed: ® vwr.com Instruction manual VWR Imager2... -
Page 19: Select The Start Menu Folder
The Device Driver Installation Wizard screen will appear. Install Device Drivers using the Device Driver Installation Wizard This part of the installation process installs the software drivers that some computers need in order to complete the installation. ® vwr.com Instruction manual VWR Imager2... - Page 20 The Setup – Gel Doc Completing the Gel Doc Setup Wizard screen will appear. This indicates that the installation process has finished successfully. SETUP – Gel Docs - COMPLETING THE Gel Doc SETUP WIZARD SCREEN Click on the Finish button to complete the Set-Up process. Remove the VWR USB stick. ® vwr.com Instruction manual VWR...
- Page 21 User and Administrator. User accounts have limited privileges within the Gel Doc software, Administrator accounts have full privileges. Check your desktop, you should have a Gel Doc icon visible, i.e. ® vwr.com Instruction manual VWR Imager2...
-
Page 22: Operating
Install the Transilluminator into the runners. Connect the flying mains lead from the back of the Darkroom to the socket on the back of the Transilluminator. Energise the Transilluminator - ON/OFF switch on the front of the unit. Startup the PC and install the Gel Doc image capture software. ® vwr.com Instruction manual VWR Imager2... -
Page 23: Operator Accessories
Serial to USB converter Imager2 Instrument (rear) - Hood removed for clarity VWR IMAGER2 INSTRUMENT - POWER AND DATA CONNECTIONS Operator Mountable Accessories Lights Additional light sources can be positioned in the Darkroom, as required. A socket is available at the back right hand corner of the Drawer to power these light sources;... -
Page 24: Filters
Tighten, but do not over-tighten, the screws on the Filter Retaining Strips. Make a note of the Filter name and the Filter Slot on the Filter Holder it is fitted into. Each Filter Slot is clearly numbered. ® vwr.com Instruction manual VWR Imager2... -
Page 25: Switching Instrument On
Gel Doc IMAGE CAPTURE SOFTWARE LAUNCHED SCREEN Once the Gel Doc image capture software has started up the Home screen will appear. At first start-up the Gel Doc software the Home screen will appear. Gel Doc HOME SCREEN ® vwr.com Instruction manual VWR Imager2... - Page 26 At various points through the image capture process the top left hand corner of the title bar is used to display icons which indicate the stage in the process that has been reached/is being actioned, e.g. when the ® vwr.com Instruction manual VWR Imager2...
- Page 27 User from the current screen, in this case: ACTIONS Quick access into the automatic image capture process for a Gel sample, from . Quick access into the automatic image capture process for a Blot sample, Accessing manual image capture . ® vwr.com Instruction manual VWR Imager2...
-
Page 28: Entering Hardware Details
Gel Doc image capture software. This must be done when the Instrument is first used and also each time additional hardware is installed. Select the Hardware icon on the Home screen. This displays the Hardware screen. ® vwr.com Instruction manual VWR Imager2... - Page 29 If you have pre-specified your exact requirements at time of order then this operation may have been performed by VWR and all the hardware may have been pre-installed. However, it is good practice to check that the hardware selections made on this screen match the actual hardware installed.
- Page 30 LIGHTS & FILTERS SCREEN - FILTER SELECTION Once all Lights & Filters options have been selected on this second Hardware window, select the Save icon Note: Ensure that you save your selections before you leave the Hardware screen. ® vwr.com Instruction manual VWR Imager2...
-
Page 31: Entering Personal Preferences
250ms. Protocols backup- check the box to ‘Enablethe back up of the protocol storage file’. select the number of backups and the time interval between back ups (in days). ® vwr.com Instruction manual VWR Imager2... - Page 32 Select to include or exclude full report details Displayed results only, incidence or quantity calibration results Export includes headers LOGGING DEFAULTS Increase Logging level-this will permit VWR Support to access more information on how the software is running on your instrument. ® vwr.com...
- Page 33 Use Dynamic Fielding checkbox in the Dynamic Fielding box on a Sample Positioning screen. If you select the Reset Dynamic Field Data button the following pop-up message is displayed: RESET DYNAMIC FIELD DATA MESSAGE POP-UP ® vwr.com Instruction manual VWR Imager2...
- Page 34 From the drop down menus select the default file format for export choose from TIFF, BMP and JPEG. Select the default DPI and the bit depth from the drop down menus. ® vwr.com Instruction manual VWR Imager2...
-
Page 35: Adjusting Basic Screen Viewing Size
Maximise/Restore Gel Doc image capture software button in the Title Bar and then resizing the display by dragging the dotted arrow icon in the bottom right hand corner. HOME SCREEN - DEFAULT HOME SCREEN - ADJUSTED ® vwr.com Instruction manual VWR Imager2... -
Page 36: Recommended Light / Dye / Accessory And Other Application Tables
Place the test sample centrally on the Transilluminator screen. White Light Pad Installed The White light pad, if required to be used, should be installed in place of the UV Transilluminator. Place the sample centrally on the White light pad screen. ® vwr.com Instruction manual VWR Imager2... -
Page 37: Automatic Gel Image Capture Mode
For the visible blot place the ‘visible converter screen’ on top of the UV transilluminator. Using this screen will give you a good background. Select the Blots icon on the Home screen. This displays the Blots drop-down list. ® vwr.com Instruction manual VWR Imager2... -
Page 38: Automatic Image Capture - Sample Positioning
The software will automatically place the emission filter back in front of the Camera when the green bouncing arrow is pressed. LENS CONTROLS Note: The lens controls that are available are Focus, Iris (aperture), and Zoom. The available lens controls appear in the Lens Control pane. ® vwr.com Instruction manual VWR Imager2... - Page 39 Pressing the Grid button calls up the grid menu. No Grid option removes the grid projection. Show Grid option displays the default grid projection, 2 rows x 2 columns. GRID MENU ® vwr.com Instruction manual VWR Imager2...
- Page 40 (saturated). Select the Select AutoExpose Area button This introduces a yellow selector box onto the sample image. The yellow box can be dragged around and resized. ® vwr.com Instruction manual VWR Imager2...
- Page 41 Automatic Capture screen and browse, view and edit previously captured images. The Exposure Timing icon remains displayed at the bottom of the screen. Selecting this icon at any time returns you to the Automatic Capture screen. ® vwr.com Instruction manual VWR Imager2...
- Page 42 Select the Histogram button . This displays a histogram or graphical representation of the distribution of grey scales recorded by the camera sensor; with black to the extreme left, white to the extreme right. ® vwr.com Instruction manual VWR Imager2...
- Page 43 Use the Contrast slider to control how bright the lightest objects in an image are displayed. Use the Brightness slider to control how bright dark objects in an image are displayed. If you make changes using the sliders you can undo the changes by selecting the Reset icon. ® vwr.com Instruction manual VWR Imager2...
-
Page 44: Automatic Image Capture - Image Actions Following Capture
Single Image - used to capture a single image of your sample. Series Images - used to capture a series (variable number) of separate images of your sample, using the same or different exposure/filter/lighting settings for each capture. ® vwr.com Instruction manual VWR Imager2... -
Page 45: Manual Image Capture - Start
To view the image capture options available select the Capture Setup menu . This displays the Image Capture options in a drop down menu. Select the type of image capture you want to make by selecting from the options in the drop down list. ® vwr.com Instruction manual VWR Imager2... -
Page 46: Manual Image Capture - Single Image
Single Image button from the Image Capture options. MANUAL CAPTURE - SINGLE IMAGE SELECTED Use the Lighting and Filters functions in the right hand pane to make your lighting and filter selections. LIGHTING AND FILTERS FUNCTIONS ® vwr.com Instruction manual VWR Imager2... - Page 47 Filters selections the Dynamic Fielding function will change to the following; Position the sample and improve the the preview sample image as much as possible using the controls/functions described below, prior to making the sample image capture to be saved. ® vwr.com Instruction manual VWR Imager2...
- Page 48 For details of Dynamic Fielding screens and lighting combinations refer to Recommended Light / Dye / Accessory and Other Application Tables. In the Dynamic Fielding box check the Use Dynamic Fielding checkbox. Follow the onscreen messages. ® vwr.com Instruction manual VWR Imager2...
- Page 49 LENS CONTROLS Note: The lens controls that are available are Focus, Iris (aperture), and Zoom. The available lens controls appear in the Lens Control pane. LENS CONTROL – IRIS, ZOOM AND FOCUS ® vwr.com Instruction manual VWR Imager2...
- Page 50 Select the Auto Capture button The Gel Doc image capture program will decide the best exposure time for the settings you have entered. This time will appear in the Exposure function in the right hand pane. The Auto ® vwr.com Instruction manual VWR Imager2...
- Page 51 If further images are captured, additional images appear in the Image Pool, stacked vertically. Images can be dismissed from the Image Pool by selecting them and then selecting the Close button . If an image has not been saved you will see a Save prompt. ® vwr.com Instruction manual VWR Imager2...
- Page 52 Once the image is captured, it appears in the left hand pane and also as a thumbnail in the central Image Pool pane. If more images are captured, these also appear in the Image Pool. When initially captured, images in the Image Pool are unsaved and are outlined in red. ® vwr.com Instruction manual VWR Imager2...
-
Page 53: Manual Image Capture - Series
Select the Series button from the Image Capture options. You must now define the number of images you want in your series. In the right hand pane the Number of images selector is displayed. ® vwr.com Instruction manual VWR Imager2... - Page 54 You must now set the interval time (time between captures in the series), the exposure times for each image in your series of images, and the lighting/filter sets for your images. The controls for these are displayed in the right hand pane. ® vwr.com Instruction manual VWR Imager2...
- Page 55 Alternatively, selecting the Auto button after you have selected the lighting and filters allows the system to automatically select the most appropriate exposure time for the image 1. ® vwr.com Instruction manual VWR Imager2...
- Page 56 To apply Dynamic Fielding check the Use Dynamic Fielding checkbox and select the Next arrow and follow the onscreen messages. The exposure/interval/lighting/filter choices that you have selected are now displayed as a set of Current Protocols in the right hand pane. SERIES PROTOCOLS ® vwr.com Instruction manual VWR Imager2...
- Page 57 The thumbnail images in the Image pane overlay and partially obscure the main image. To view the entire main image, select the minimise icon in the top right hand corner above the first ® vwr.com Instruction manual VWR Imager2...
-
Page 58: Manual Image Capture - Additive Series
Select the Additive Series button from the Image Capture options. You must now define the number of images you want in your series. In the right hand pane the Number of images selector is displayed. NUMBER OF IMAGES SELECTION ® vwr.com Instruction manual VWR Imager2... - Page 59 1. Use the Lighting and Filters functions in the right hand pane to make your lighting and filter selections as described previously. ® vwr.com Instruction manual VWR Imager2...
- Page 60 Position the sample and improve the preview sample image as much as possible using the Light / Digital Zoom / Grid / Select Autoexpose Area / Lens Controls, as described previously. Select the Capture button The Exposure Timing icon appears at the bottom of the screen. ® vwr.com Instruction manual VWR Imager2...
- Page 61 Image pane, along with the stack of series captured images, and also as a thumbnail in the central Image Pool pane. When initially captured, images in the Image Pool are unsaved and are outlined in red. ® vwr.com Instruction manual VWR Imager2...
-
Page 62: Manual Image Capture - Multiplex
NUMBER OF IMAGES SELECTION Use the + / - buttons to select the number of images you want to capture, then select the Next arrow . For this example, set to 3 by selecting the + button. ® vwr.com Instruction manual VWR Imager2... - Page 63 2. Select the Last arrow to apply the settings you have entered for image 1 to all of the remaining images in your series. Enter the settings for all the images in your series. ® vwr.com Instruction manual VWR Imager2...
- Page 64 This changes to display the progress of the exposures as concentric coloured bars progressing around the icon While the exposures are progressing, and this may take several minutes, it is possible to navigate away from the Manual Capture screen and browse, view and edit previously captured images. ® vwr.com Instruction manual VWR Imager2...
- Page 65 MINIMISE BUTTON (ii) To view the complete main image in the left hand pane, select the Minimise button above the thumbnail stack. (iii) To view the thumbnail stack once more, select the Minimise button again. ® vwr.com Instruction manual VWR Imager2...
- Page 66 SAVED IMAGE POOL IMAGE Images can be dismissed from the Image Pool by selecting them and then selecting the Close button . If an image has not been saved you will see a Save prompt. ® vwr.com Instruction manual VWR Imager2...
-
Page 67: Manual Image Capture - Image Actions Following Capture
Manual Image Capture - Image Actions Following Capture Further actions can be performed on captured images by selecting Image Action icons. The function of these is explained in other parts of this User Guide. IMAGE ACTION ICONS ® vwr.com Instruction manual VWR Imager2... -
Page 68: Protocols-Saving, Opening And Editing
Follow the prompt in the pop-up and either select an existing Protocol from those displayed (which will be overwritten by you saving your new Protocol), or enter a name for your new Protocol in the Enter configuration name here… box, e.g. Stain free gel. ® vwr.com Instruction manual VWR Imager2... - Page 69 Once the image has been captured the Saved Protocols pop-up appears. SAVED PROTOCOLS POP-UP Select the Yes button. The Save Protocol pop-up appears. SAVE PROTOCOL POP-UP ® vwr.com Instruction manual VWR Imager2...
-
Page 70: In Auto Image Capture Mode
Once the image has been captured the Saved Protocols pop-up appears. SAVED PROTOCOLS POP-UP Select the Yes button. The Save Protocol pop-up appears. ® vwr.com Instruction manual VWR Imager2... -
Page 71: In Manual Image Capture Mode
To create a Protocol in Manual Image Capture mode: Work through the Manual Image Capture process described previously and capture an image. Select the Save Protocol icon from the Image Action icons. Select the Save Protocol icon The Save Protocol pop-up appears. ® vwr.com Instruction manual VWR Imager2... -
Page 72: Using Protocols
Manual Image Capture mode the system will display the revelant Manual Capture screen with the difined protocols displayed. Position the sample and complete the the appropriate Automatic or Manual Image Capture process as described previously. ® vwr.com Instruction manual VWR Imager2... -
Page 73: Opening A Protocol
AUTOMATIC CAPTURE SAMPLE POSITIONING If the Protocol is in Manual Image Capture mode the system will display the relevant Manual Capture screen with the defined protocols displayed, typically as shown below: ® vwr.com Instruction manual VWR Imager2... -
Page 74: Deleting A Protocol
To edit a previously saved Protocol, first open the Protocol as described previously. Then use the normal controls/actions available on the Auto Image Capture Sample Positioning screen or Manual Capture screen to change the settings. For Auto Image Capture Sample Positioning screen refer to Automatic Image Capture Mode. ® vwr.com Instruction manual VWR Imager2... - Page 75 For Manual Capture screen refer to Manual Image Capture Mode. If you make changes to an existing Protocol and want to save the new Protocol as a new Protocol, refer to Creating and Saving a Protocol. ® vwr.com Instruction manual VWR Imager2...
-
Page 76: Image Functions
Images displayed in the central pane of the Load Images screen can be sorted by two parameters; Sort by Name or Sort by Date. Select one of the two icons at the top of the central image pane. SORT ICONS ® vwr.com Instruction manual VWR Imager2... - Page 77 Selecting an image or images in the central pane adds the selected image or images to the Selected Images pane. At the same time the image(s) selected in the central pane turn green, as shown below. SELECTED IMAGES ® vwr.com Instruction VWR Imager2...
-
Page 78: Image Actions From Load Images Screen
From the Classic View Home screen - by selecting the View Images icon The View Images screen can also be accessed from any other screen displaying the View Images icon in the Image Action icons. ® vwr.com Instruction manual VWR Imager2... -
Page 79: View Images Screen - Single Images
Images are displayed as thumbnails on the View Images screen. The size of the images can be changed by adjusting the Zoom Slider control. ZOOM SLIDER CHANGE LAYOUT Two options are available using the Change Layout controls. ® vwr.com Instruction VWR Imager2... - Page 80 Scroll bars allow you to view the entire area of an image. A horizontal scroll bar appears when the Zoom function is used on an image. The right hand pane contains the following controls: The Change Layout controls. The Link controls. ® vwr.com Instruction manual VWR Imager2...
- Page 81 If the graph is bunched up to the left it indicates that not many grayscale levels have been captured and the red lines on the histogram graph may need to be adjusted to see bands. If the graph ® vwr.com Instruction VWR Imager2...
- Page 82 View Images screen. MANAGE IMAGES Two options are available using the Manage Images controls. MANAGE IMAGES CONTROLS Selecting the Close button closes only the selected image file(s). Selecting the Close All button closes all image files. ® vwr.com Instruction manual VWR Imager2...
-
Page 83: View Images Screen - Combining Single Images Into A New Multiplexed Image
This shows what the multiplexed image will look like. Two options are available using the Set Type of Composite Image buttons; Create Monochrome Image or Create Colour Image. MULTIPLEXED IMAGE - COLOUR IMAGE MULTIPLEXED IMAGE - MONOCHROME IMAGE ® vwr.com Instruction VWR Imager2... -
Page 84: Image Edit Screen
By default the Image Edit screen opens in General mode. Note: Selected function buttons turn red. They stay red and the function remains active until the function button is re-selected. IMAGE EDIT SCREEN - GENERAL MODE ® vwr.com Instruction manual VWR Imager2... -
Page 85: Image Edit Screen - General Option
The Image Source function allows you to view either of these two files. To view the unchanged file select the View Original Image button . To view the changed file select the View Processed Image button ® vwr.com Instruction VWR Imager2... - Page 86 Select the Default button and select a new colour from the drop-down menu. To reject a colour and return to the original setting select Default from the drop down menu. OTHER FUNCTIONS - DEFAULT COLOUR MENU ® vwr.com Instruction manual VWR Imager2...
-
Page 87: Image Edit Screen - Annote Option
Annotate screen provides the following controls/functions: Image Source Annotation Tools Copy and Paste Edit Note: Selected function buttons turn red. They stay red and the function remains active until the function button is re-selected. ® vwr.com Instruction VWR Imager2... - Page 88 Using the Select tool you can then position the text box exactly where you want it, and resize the text box horizontally and vertically. Double clicking/tapping the text enables you to change the text and the text parameters using the pop-up dialogue boxes shown below. ® vwr.com Instruction manual VWR Imager2...
- Page 89 'handles'. This enables you to finely control the selected area of interest. Selecting the Define area to be cropped tool once more cancels the selection rectangle just made, but leaves the cursor in selection mode, allowing you to restart ® vwr.com Instruction VWR Imager2...
-
Page 90: Image Edit Screen - Enhance Option
Crop area tool The Sharpen tool applies a sharpening filter to the selected image. The sharpening filter should make the edges of bands more pronounced. However, there may also be an increase in graininess. ® vwr.com Instruction manual VWR Imager2... - Page 91 Default image resolution New selection RESOLUTION MENU The options displayed in the Resolution drop-down menu depend on the resolution that the image is captured at, an example is shown below: ® vwr.com Instruction VWR Imager2...
-
Page 92: Image Edit Screen - General / Annotate / Enhance Options Common Control
The Gamma slider changes the tone of the overall image. With reference to the histogram mentioned previously, the Gamma function changes the relative brightness of the recorded midrange tones by shifting them either towards the dark end or the white end of the graph, ® vwr.com Instruction manual VWR Imager2... - Page 93 HISTOGRAM DISPLAY The Histogram button turns red to indicate that the function has been selected. Selecting the button again cancels the Histogram function. ® vwr.com Instruction VWR Imager2...
-
Page 94: Image Edit Screen - 3D View Option
The lower left hand pane of the 3D View version of the screen provides the following controls/functions: Image Source Other Gamma Note: Selected function buttons turn red. They stay red and the function remains active until the function button is re-selected. 3D VIEW OPTION CONTROLS/FUNCTIONS ® vwr.com Instruction manual VWR Imager2... - Page 95 The central image viewing pane of the 3D View option of the Image Edit Screen provides the following functions for altering the view of the displayed image: Pan Up control Rotate Right control Reset Pan button Rotate Forward control Pan Down control Rotate Anti-clockwise control ® vwr.com Instruction VWR Imager2...
-
Page 96: Image Edit Screen - All Options Common Controls
Selecting the Load Images icon takes you back to the Browse Images screen, allowing you to search for images. Selecting the View Images icon takes you back to the View Images screen, allowing you to view and compare captured images. ® vwr.com Instruction manual VWR Imager2... -
Page 97: Common Screen Functions And Tools
Selecting the Remove All button dismisses all images from the image pool. Common Screen Functions and Tools The following general Action icons are available when using the Gel Doc image capture software: ® vwr.com Instruction VWR Imager2... -
Page 98: Saving Images
From the pop-up window the list of images that you have selected will appear. Check the box to save all images in the selected range or to include sub images. Then press ok. ® vwr.com Instruction manual VWR Imager2... - Page 99 To change the file name select the image from the list and type the new file name in the box. If you change the file name of an image that has sub images associated to it Gel Doc image capture will also automatically change the file name for the sub images too. ® vwr.com Instruction VWR Imager2...
- Page 100 From the pop-up window the list of images that you have selected will appear. Check the box to export all the images in the selected range and then ‘as displayed’ or ‘as captured’. Then press ok. ® vwr.com Instruction manual VWR Imager2...
-
Page 101: Printing
Print icon is active, using the Gel Doc image capture software you have the opportunity to print the image. Note: The Print dialogue box will change depending on the version of Windows™ that you are using. ® vwr.com Instruction VWR Imager2... - Page 102 What is printed also depends on the following: Printing from the View Images screen. Printing from the Image Edit screen. Printing a single image capture. Printing an additive series capture. Printing a multiplex capture. ® vwr.com Instruction manual VWR Imager2...
- Page 103 Select the Display button. The additive image prints (blank sheet). OPTION 3 From View Images, to print a single constituent image: Select the constituent image. Select the Print icon The selected constituent image prints. OPTION 4 ® vwr.com Instruction VWR Imager2...
- Page 104 Select the Display button. The selected constituent image prints. MULTIPLEX CAPTURES OPTION 1 From View Images, to print the multiplexed image plus the constituent images: Select the multiplex image. Select the Print icon . The Printing multiplex dialogue box is displayed. ® vwr.com Instruction manual VWR Imager2...
- Page 105 The selected constituent images print. OPTION 5 From Image Edit, to print the multiplexed image plus the constituent images: Select the multiplexed image from the thumbnails. Select the Print icon . The Printing multiplex dialogue box is displayed. ® vwr.com Instruction VWR Imager2...
- Page 106 Select the All button. The multiplexed image plus all of the constituent images print. OPTION 8 From Image Edit, to print any one constituent image: Select one of the constituent image thumbnails. Select the Print icon . The Printing series capture dialogue box is displayed. ® vwr.com Instruction manual VWR Imager2...
- Page 107 Print function without printing by selecting the Report icon at the top left of the screen and selecting Close from the drop-down menu. EXIT WITHOUT PRINTING ® vwr.com Instruction VWR Imager2...
-
Page 108: Operator Maintenance
Avoid spilling any liquid into the body of the instrument and clean any external spills immediately. If any liquid enters the main body of the instrument, make the instrument inoperative and contact the supplier. Contacting VWR International If it becomes necessary to contact VWR International the following information will be required: Unit Serial Number ... -
Page 109: User Replacable Accessories And Spare Parts
• Complete technical service contact information • Access to the VWR Online Catalogue, and information about accessories and related products • Additional product information and special offers Contact us For information or technical assistance contact your local VWR representative or visit. -
Page 110: Imager2 Troubleshooting
(2) years from date of delivery. If a defect is present, VWR will, at its option and cost, repair, replace, or refund the purchase price of this product to the customer, provided it is returned during the warranty period. -
Page 111: Disposal
By doing so, you will help to conserve natural and environmental resources and you will ensure that your equipment is recycled in a manner that protects human health. Thank you ® vwr.com Instruction VWR Imager2... - Page 112 Local VWR offices in Europe and Asia Pacific Austria Hungary Poland International GmbH Graumanngasse 7 VWR International Kft. VWR International Sp. z o.o. 1150 Vienna Simon László u. 4. Limbowa 5 Tel.: +43 1 97 002 0 4034 Debrecen 80-175 Gdansk Email: info.at@vwr.com...
Need help?
Do you have a question about the Gel Documentation Imager2 and is the answer not in the manual?
Questions and answers