
Related Manuals for Satel INTEGRA INT-TSH2


Summary of Contents for Satel INTEGRA INT-TSH2
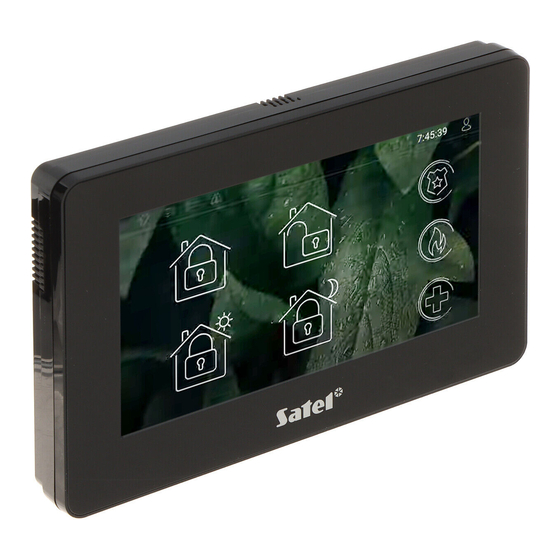
- Page 1 INT-TSH2 Keypad User manual INTEGRA Firmware version 2.00 int-tsh2_oi_en 12/21 SATEL sp. z o.o. • ul. Budowlanych 66 • 80-298 Gdańsk • POLAND tel. +48 58 320 94 00 www.satel.eu...
- Page 2 Warning This is a Class A product. In a domestic environment this product may cause radio frequency interference. The declaration of conformity may be consulted at www.satel.eu/ce Factory default codes: Service code: 12345 Object 1 master user (administrator) code: 1111...
-
Page 3: Table Of Contents
CONTENTS Introduction ........................3 Using the touch screen ..................... 3 Screensaver ........................5 Slideshow ........................6 Trigger the panic alarm ....................6 User screens ........................6 Additional screens ......................7 Status bar ......................... 8 Status icons ........................8 Widgets ..........................9 Text .......................... - Page 4 INT-TSH2 SATEL 10.8 “Events” screen ......................23 10.8.1 Filtering the event list by partitions ..............23 10.8.2 Filtering the event list by types ................ 24 10.9 “Users” screen ......................24 10.9.1 Adding a user ....................25 10.9.2 Removing a user ..................... 25 10.9.3...
-
Page 5: Introduction
In order to control the alarm system, you can use: • user screens and additional screens created for you by the installer, • user menu created by SATEL. After 10 minutes of inactivity, the keypad screen can turn off (this setting is available in the service menu). - Page 6 INT-TSH2 SATEL Tap and hold Tap on an item on the screen and hold for 3 seconds. Swipe up / down Tap the screen and slide your finger up or down to: • swipe the screen up / down (move between the screensaver / user screen / user menu home screen), •...
-
Page 7: Screensaver
SATEL INT-TSH2 Swipe right from the edge (return to the previous screen) Tap the screen close to the left edge and slide your finger right to return to the previous screen. This gesture is supported in the user menu and the service menu. You will not be able to exit the service mode by using this gesture. -
Page 8: Slideshow
INT-TSH2 SATEL The installer can add to the screen additional widgets that will indicate the alarm system status (see “Widgets” p. 9). Tap the screen to view the user screen. Swipe left to start the slideshow. Slideshow The keypad can run a slideshow of images, if the installer installed in the keypad a memory card on which the images had been saved. -
Page 9: Additional Screens
For this reason, the additional screens may be used to display site plans. If pictures other than the ones offered by SATEL are to be displayed, the installer must save them on a memory card and install the card in the keypad. -
Page 10: Status Bar
INT-TSH2 SATEL Fig. 3. Screen with a site plan (example). 6. Status bar The status bar is displayed on the top of the user screen and the additional screen. It includes: • status icons, • screen title (optionally, if added by the installer), •... -
Page 11: Widgets
SATEL INT-TSH2 If the “Grade 2” (INTEGRA) / “Grade 3” (INTEGRA Plus) option is enabled by the installer: − information about the alarm is not displayed; − the icon indicates trouble / trouble memory / alarm / alarm memory / bypassed zones. -
Page 12: Zone State
Zone state The widget displays the zone state represented by either: • icons selected by SATEL (indicator) – different states are displayed, • text messages (text) – messages inform only about normal and violated states, • icons selected by the installer (icon) – only normal and violated states are displayed. -
Page 13: Temperature
SATEL INT-TSH2 “MONO switch” / “BI switch” / “Remote switch” type output deactivated “MONO switch” / “BI switch” / “Remote switch” type output activated “Shutter up” type output deactivated “Shutter up” type output activated “Shutter down” type output deactivated “Shutter down” type output activated Temperature The widget displays the temperature. -
Page 14: On-Screen Keypad
INT-TSH2 SATEL 9. On-screen keypad The on-screen keypad is displayed when you are required to enter a code e.g. to access the user menu. You may be required to enter the code to access the user screen or the additional screen or to run a function with a widget. -
Page 15: User Menu Home Screen
SATEL INT-TSH2 10.1 User menu home screen Fig. 5. User menu home screen. The following functions are available on the user menu home screen. tap to go to the “Partitions” screen (p. 16). tap to go to the “Zones” screen (p. 20). -
Page 16: Qwerty Keyboard
INT-TSH2 SATEL 10.2 QWERTY keyboard The QWERTY keyboard is used to enter text. It is displayed when you search for items on certain screens, enter user names, etc. Fig. 6. QWERTY keyboard: letter keys mode. The text entered is displayed in the field above the keys. -
Page 17: Terminal
SATEL INT-TSH2 Fig. 7. QWERTY keyboard: number keys mode. 10.3 Terminal The terminal allows you to enter data and configure the settings in the same way as from the LCD keypad with text menu ( acts as acts as ). It is displayed if you run certain user functions or service functions. -
Page 18: Partitions" Screen
INT-TSH2 SATEL Selection from the single-choice list In the lower line of the display, the currently selected item is presented. You can scroll the list using the keys. Selection from the multiple-choice list In the lower line of the display, one of the items you can choose from is presented. You can scroll the list using the keys. - Page 19 SATEL INT-TSH2 Fig. 9. “Partitions” screen (example). The icons in the top right corner allow you to: tap to clear alarm. tap to terminate the exit delay countdown (function available if the installer enabled the exit delay clearing). tap to filter the partition list (see “Filtering the partition list” p. 20).
-
Page 20: Arming
INT-TSH2 SATEL tap to decrease the size of the icons/names on the list. tap to hide the partition names on the list. tap to display the partition names on the list. tap to hide the buttons. 10.4.1 Arming 1. Tap the partition you want to arm. The button with the... -
Page 21: Two-Code Disarming
SATEL INT-TSH2 10.4.4 Two-code disarming When two users are required to enter the code in order to disarm a partition, follow these steps: 1. Tap the partition you want to disarm. The button with the icon will appear at the bottom of the screen. -
Page 22: Filtering The Partition List
INT-TSH2 SATEL 10.4.7 Filtering the partition list 1. Tap the icon. The buttons with filtering criteria will appear. 2. Tap the buttons with the filtering criteria that you want to use. You can tap any number of buttons. 3. Tap the button with the icon. -
Page 23: Zone Inhibiting
SATEL INT-TSH2 Information about how many zones are selected is shown in brackets next to the partition name ([number of selected zones]/[number of zones]). The numbers displayed next to the following icons indicate: number of zones in normal state. number of violated zones. -
Page 24: Filtering The Zone List
INT-TSH2 SATEL 10.5.4 Filtering the zone list 1. Tap the icon. The buttons with filtering criteria will appear. 2. Tap the buttons with the filtering criteria that you want to use. You can tap any number of buttons. 3. Tap the button with the icon. -
Page 25: Output Control
SATEL INT-TSH2 If you tap the screen close to the bottom edge and swipe up, the buttons with the icons will appear at the bottom of the screen: tap to increase the size of the icons/names on the list. tap to decrease the size of the icons/names on the list. -
Page 26: Filtering The Event List By Types
INT-TSH2 SATEL 3. Tap the icon in the top right corner of the screen. The events from the selected partitions will be displayed. 10.8.2 Filtering the event list by types 1. Tap the icon. The buttons with filtering criteria will appear. -
Page 27: Adding A User
SATEL INT-TSH2 10.9.1 Adding a user 1. Tap the icon. The buttons will appear at the bottom of the screen. 2. Tap the button with the icon. The user settings panel will appear. 3. Configure the user settings. 4. Tap the icon. - Page 28 INT-TSH2 SATEL Fig. 12. “Tests” screen (example). GPRS monit.test – tap to send a test transmission to the monitoring station via cellular data network. When sending the transmission, messages on the display provide information on the currently performed operation. Messaging test – tap to test the telephone messaging (see “Messaging test” p. 27).
-
Page 29: Messaging Test
SATEL INT-TSH2 The terminal will appear upon tapping most of the functions (see p. 15). icon is displayed in the top right corner of the screen. Tap it to go back to the user menu home screen. 10.10.1 Messaging test 1. -
Page 30: Review Of Test Results
INT-TSH2 SATEL 4. Specify the test duration (maximum 50 minutes) and tap 5. Define, whether violation of the zone is to trigger CHIME in the keypad (if yes, tap any number key – the following character will be displayed: Y). - Page 31 SATEL INT-TSH2 The functions that can be available on the “Settings” screen are described below. tap to change your code. tap to change your telephone code. tap to change the normal prefix. The function available to the administrator. tap to change the duress prefix. The function available to the administrator.
-
Page 32: Keypad" Screen
INT-TSH2 SATEL tap to synchronize the control panel clock with the time server. The function available if the communication module enabling time synchronization is connected to the control panel. tap to specify the time period of installer access to the alarm system (enter the number of hours). - Page 33 SATEL INT-TSH2 Setting the screen brightness Tap the “Brightness” function. The sliders and the buttons will appear at the bottom of the screen. The sliders are marked with the icons described in the table below. screen brightness in the daytime when the keypad screen is woken up.
-
Page 34: Others" Screen
INT-TSH2 SATEL 10.12 “Others” screen Fig. 15. “Others” screen (example). The functions available on the “Others” screen are described below. tap to see which zones triggered an alarm. tap to reset the system after the verified alarm (only after the system is reset, it will be possible to arm the system again). -
Page 35: Downloading" Screen
SATEL INT-TSH2 tap to start the service mode. The function available to the installer. tap to take over the service mode (the service mode has been started from another keypad). The function available to the installer. tap to display the “Downloading” screen. -
Page 36: Service Menu
INT-TSH2 SATEL 11. Service menu Fig. 16. Service menu. On this screen you can see the service functions. Tap the function to view the list of other functions, parameters or options. If you tap the parameter name, the terminal will appear to enable you to edit data (see p.
Need help?
Do you have a question about the INTEGRA INT-TSH2 and is the answer not in the manual?
Questions and answers