Satel INTEGRA INT-TSG2 User Manual
Hide thumbs
Also See for INTEGRA INT-TSG2:
- Installer manual (61 pages) ,
- User manual (25 pages) ,
- Quick user manual (14 pages)

Related Manuals for Satel INTEGRA INT-TSG2


Summary of Contents for Satel INTEGRA INT-TSG2
- Page 1 INT-TSG2 Keypad User manual INTEGRA Firmware version 2.00 int-tsg2_oi_en 12/21 SATEL sp. z o.o. • ul. Budowlanych 66 • 80-298 Gdańsk • POLAND tel. +48 58 320 94 00 www.satel.eu...
- Page 2 Warning This is a Class A product. In a domestic environment this product may cause radio frequency interference. The declaration of conformity may be consulted at www.satel.eu/ce Factory default codes: Service code: 12345 Object 1 master user (administrator) code: 1111...
-
Page 3: Table Of Contents
CONTENTS Introduction ........................3 LED indicators ........................3 Using the touch screen ..................... 3 Screensaver ........................5 Slideshow ........................6 Trigger the panic alarm ....................6 User screens ........................6 Additional screens ......................8 Status bar ......................... 8 Widgets ..........................8 Text .......................... - Page 4 INT-TSG2 SATEL 10.8 “Events” screen ......................22 10.8.1 Filtering the event list by partitions ..............22 10.8.2 Filtering the event list by types ................ 22 10.9 “Users” screen ......................22 10.9.1 Adding a user ....................23 10.9.2 Removing a user ..................... 23 10.9.3...
-
Page 5: Introduction
In order to control the alarm system, you can use: • user screens and additional screens created for you by the installer, • user menu created by SATEL. - Page 6 INT-TSG2 SATEL After 10 minutes of inactivity, the keypad screen can turn off (this setting is available in the service menu). Use the gestures described below. Tap on an item on the screen. Tap and hold Tap on an item on the screen and hold for 3 seconds.
-
Page 7: Screensaver
SATEL INT-TSG2 Swipe right / left Tap the screen and slide your finger right or left to swipe the screen right / left (go to the previous / next screen). When the screensaver is active, swipe right / left to start / end the slideshow. -
Page 8: Slideshow
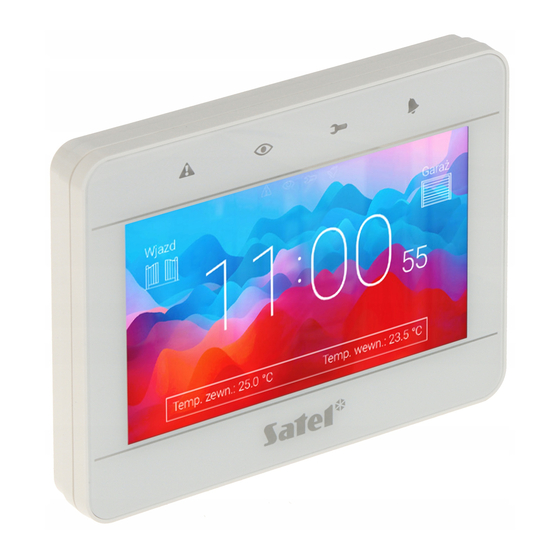
INT-TSG2 SATEL Fig. 1. Screensaver (keypad with factory default settings). The screensaver on a keypad with factory default settings (Fig. 1) shows the date and time. The installer can add to the screen additional widgets that will indicate the alarm system status (see “Widgets”... - Page 9 SATEL INT-TSG2 Fig. 2. User home screen (keypad with factory default settings). The user screen includes: • status bar (see p. 8), • widgets used to operate the alarm system, indicate the alarm system status, etc. (see “Widgets” p. 8).
-
Page 10: Additional Screens
For this reason, the additional screens may be used to display site plans. If pictures other than the ones offered by SATEL are to be displayed, the installer must save them on a memory card and install the card in the keypad. -
Page 11: Partition State
Zone state The widget displays the zone state represented by either: • icons selected by SATEL (indicator) – different states are displayed, • text messages (text) – messages inform only about normal and violated states, • icons selected by the installer (icon) – only normal and violated states are displayed. -
Page 12: Output State
The widget displays the output state represented by either: • icons selected by SATEL (indicator), • text messages (text), • icons selected by the installer (icon). The icons selected by SATEL are described in the table below. Icon Output status deactivated activated “MONO switch”... -
Page 13: Temperature
SATEL INT-TSG2 Temperature The widget displays the temperature. Information about the temperature is sourced from an ABAX 2 / ABAX wireless detector. Date/time The widget displays the date and time in the format specified by the installer. Switch The icon for the widget is selected by the installer. Tap the widget to activate / deactivate an output. -
Page 14: User Menu
INT-TSG2 SATEL Fig. 4. On-screen keypad. Enter the code using the number keys and tap . If you made a mistake when entering the code, tap and re-enter the code (if you fail to enter the valid code within one minute, it will be treated as if you entered an invalid code). -
Page 15: Qwerty Keyboard
SATEL INT-TSG2 The following functions are available on the user menu home screen. tap to go to the “Partitions” screen (p. 15). tap to go to the “Zones” screen (p. 19). tap to go to the “Outputs” screen (p. 21). -
Page 16: Terminal
INT-TSG2 SATEL tap to switch the keyboard to the lowercase mode. tap to exit the QWERTY keyboard. tap to switch the keyboard to the number keys mode. tap to switch the keyboard to the letter keys mode. tap to delete the character before the cursor. -
Page 17: Data Editing By Using The Terminal
SATEL INT-TSG2 10.3.1 Data editing by using the terminal The editing method depends on the type of data. Having completed the editing, tap save the changes. If you want to exit the function without saving the changes, tap Selection from the single-choice list In the lower line of the display, the currently selected item is presented. - Page 18 INT-TSG2 SATEL Fig. 9. “Partitions” screen (example). The icons in the top right corner allow you to: tap to clear alarm. tap to terminate the exit delay countdown (function available if the installer enabled the exit delay clearing). tap to filter the partition list (see “Filtering the partition list” p. 18).
-
Page 19: Arming
SATEL INT-TSG2 tap to hide the buttons. 10.4.1 Arming 1. Tap the partition you want to arm. The button with the icon will appear at the bottom of the screen (if the button with the icon will appear, it means that the partition is armed using two codes –... -
Page 20: Cancelling The First Code
INT-TSG2 SATEL 2. If you want to disarm several partitions that require 2 codes for disarming, tap each partition one by one. 3. Tap the button with the icon. The buttons and the slider will appear at the bottom of the screen. -
Page 21: Searching For Partitions
SATEL INT-TSG2 10.4.8 Searching for partitions 1. Tap the icon. The QWERTY keyboard will appear. 2. Enter a string of characters that is to be included in the partition / partitions name. 3. Tap the button with the icon. Partitions whose name includes the entered string of characters will be displayed. -
Page 22: Zone Inhibiting
INT-TSG2 SATEL number of tampered zones. If you tap the screen close to the bottom edge and swipe up, the buttons with the icons will appear at the bottom of the screen: tap to increase the size of the icons/names on the list. -
Page 23: Outputs" Screen
SATEL INT-TSG2 3. Tap the button with the icon. Zones whose name includes the entered string of characters will be displayed. 10.6 “Outputs” screen On this screen you can see the list of outputs in the system. The outputs are represented by icons that indicate the output state. -
Page 24: Troubles" Screen
INT-TSG2 SATEL 10.7 “Troubles” screen On this screen you can see the list of troubles. The installer defines whether only the current troubles are to be presented, or also those which have already ended (trouble memory). Each trouble poses a danger to proper functioning of the alarm system and should be repaired as soon as possible. -
Page 25: Adding A User
SATEL INT-TSG2 If you enter the service code, the administrators will be displayed on the screen as well as the users. All actions that you can perform for the users are also available for the administrators. Icon Status user requires no attention “Scheduled”... -
Page 26: Editing A User
INT-TSG2 SATEL 10.9.3 Editing a user 1. Tap the user whose settings you want to edit. 2. Tap the icon. The user settings panel will appear. 3. Change the user settings. 4. Tap the icon. A message will be displayed to confirm that the user data were saved. -
Page 27: Messaging Test
SATEL INT-TSG2 GPRS monit.test – tap to send a test transmission to the monitoring station via cellular data network. When sending the transmission, messages on the display provide information on the currently performed operation. Messaging test – tap to test the telephone messaging (see “Messaging test” p. 25). -
Page 28: Selected Zone Test
INT-TSG2 SATEL 2. Select the partitions in which you want to test zones. You can scroll the partition list using key. If you want to test zones in the partition, tap any number key (the following character will be displayed next to the partition name: Y). -
Page 29: Review Of Test Results
SATEL INT-TSG2 10.10.4 Review of test results Tap the “View results” function. The list of tested zones will be displayed. The icon that indicates the test results is displayed below the zone name: zone was not violated. zone was violated. - Page 30 INT-TSG2 SATEL tap to change the settings of temperature thresholds and hysteresis for “120: Thermostat” type outputs. The function available in the INTEGRA Plus control panel. tap to configure the partition timer. tap to temporarily disable the expansion module tamper supervision.
-
Page 31: Keypad" Screen
SATEL INT-TSG2 10.11.1 “Keypad” screen Fig. 14. “Keypad” screen. The functions available on the “Keypad” screen are described below. tap to set the screen brightness (see “Setting the screen brightness” p. 29). tap to set the keypad volume (see “Setting the keypad volume” p. 30). -
Page 32: Others" Screen
INT-TSG2 SATEL Tap the button with the icon to confirm changes. Tap the button with the icon to cancel changes. Setting the keypad volume Tap the “Loudness” function. The sliders and the buttons will appear at the bottom of the screen. -
Page 33: Downloading" Screen
SATEL INT-TSG2 tap to check the system status. If the “Grade 2” / “Grade 3” option is enabled, the information on troubles, alarms, zone bypasses and partition status is displayed. If the “Grade 2” / “Grade 3” option is disabled, only the information on troubles is displayed. -
Page 34: Service Menu
INT-TSG2 SATEL establish communication via Ethernet fails, an attempt will be made to establish communication via the cellular data network. ETHM-1 >GUARDX – tap when you want to start the communication with the GUARDX program via the ETHM-1 / ETHM-1 Plus module. The communication will be via Ethernet.
Need help?
Do you have a question about the INTEGRA INT-TSG2 and is the answer not in the manual?
Questions and answers