Table of Contents
Advertisement
Quick Links
Advertisement
Table of Contents

Related Manuals for Supermicro SuperWorkstation 5038A-I


Summary of Contents for Supermicro SuperWorkstation 5038A-I
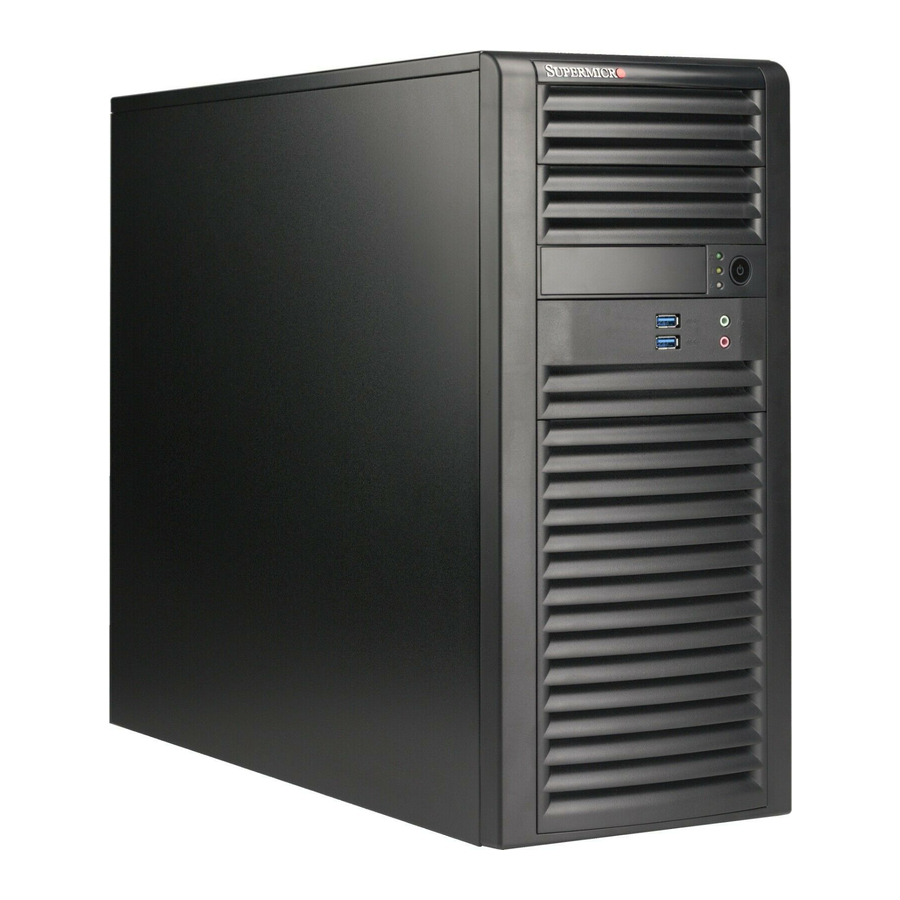
- Page 1 uper orkstation 5038A-I USER’S MANUAL 1.0a...
- Page 2 This product, including software and docu- mentation, is the property of Supermicro and/or its licensors, and is supplied only under a license. This manual is written for professional system integrators and PC technicians. It Any use or reproduction of this product is not allowed, except as expressly permitted by the terms provides information for the installation and use of the SuperWorkstation 5038A-I.
- Page 3 Preface uper orkstation 5038A-I User's Manual Chapter 5: Advanced Motherboard Setup Notes Chapter 5 provides detailed information on the X10SRA motherboard, including the locations and functions of connections, headers and jumpers. Refer to this chapter motherboard. Chapter 6: Advanced Chassis Setup Refer to Chapter 6 for detailed information on the SC732D3-903B chassis.
-
Page 4: Table Of Contents
Front Control Panel ..................1-3 Installing a CPU Heatsink ................5-7 Cooling System ....................1-3 Removing the Heatsink ................... 5-8 Contacting Supermicro ..................1-5 Installing Memory Modules ................5-9 Chapter 2 Installation Memory Population Guidelines ..............5-10 Overview ......................2-1 Adding PCI Add-On Cards ................5-11... - Page 5 uper orkstation 5038A-I User's Manual Removing and Installing Optional 2.5" Hard Drives ........6-11 Power Supply ....................6-13 Chapter 7 BIOS Introduction ...................... 7-1 Starting BIOS GUI Setup Utility ..............7-1 ............7-2 How to Start the Setup Utility ................. 7-2 Setup Home ....................
-
Page 6: Chapter 1 Introduction
One 12-cm "Whisper Quiet" system cooling fan Note: For your system to work properly, please follow the links below to download all necessary drivers/utilities and the user’s manual for your server. • Supermicro product manuals: http://www.supermicro.com/support/manuals/ • Product drivers and utilities: ftp://ftp.supermicro.com... -
Page 7: Motherboard Features
Motherboard Features Chassis Features At the heart of the SuperWorkstation 5038A-I lies the X10SRA, a single processor The 5038A-I is a mid-tower chassis with Whisper Quiet operation. The following is motherboard based on the Intel® C612 Express chipset. Below are the main fea- a general outline of the main features of the SC743D3-903B chassis. -
Page 8: Contacting Supermicro
Note: This is a general block diagram. Please see Chapter 5 for details. 980 Rock Ave. San Jose, CA 95131 U.S.A. Tel: +1 (408) 503-8000 Fax: +1 (408) 503-8008 Email: marketing@supermicro.com (General Information) 9.6G support@supermicro.com (Technical Support) DDR-IV DDR-IV Website: www.supermicro.com DMI2 DMI2 9.6G... - Page 9 uper orkstation 5038A-I User's Manual Notes...
-
Page 10: Chapter 2 Installation
Chapter 2 Installation Overview This chapter provides a quick setup checklist to get your SuperWorkstation 5038A-I up and running. Following these steps in the order given should enable you to have the system operational within a minimum amount of time. - Page 11 uper orkstation 5038A-I User's Manual Notes...
-
Page 12: Chapter 3 System Interface
Chapter 3: System Interface Chapter 3 System Interface Overview The control panel on the 5038A-I has several LEDs and a power button. These LEDs keep you constantly informed of the overall status of the system and the Control Panel Buttons There is single power on/off push-button located on the front of the chassis. -
Page 13: Hdd
uper orkstation 5038A-I User's Manual Indicates IDE channel activity on the SATA drive and/or DVD-ROM drive when Information LED Alerts operator of several states, as noted in the table below. Information LED Status Description An overheat condition has occured. Continuously on and red (This may be caused by cable congestion.) Blinking red (1Hz) Fan failure, check for an inoperative fan. -
Page 14: Chapter 4 Standardized Warning Statements For Ac Systems
Should you have questions or experience difficulty, contact Supermicro's Technical Support department components. Supermicro chassis. These warnings may also be found on our web site at http://www.supermicro.com/ about/policies/safety_information.cfm. Warning! This warning symbol means danger. You are in a situation that could cause bodily injury. - Page 15 Warning Statements for AC Systems uper orkstation 5038A-I User's Manual Warnung WICHTIGE SICHERHEITSHINWEISE Verletzungen führen kann. Machen Sie sich vor der Arbeit mit Geräten mit den Gefahren elektrischer Schaltungen und den üblichen Verfahren zur Vorbeugung vor Unfällen vertraut. Suchen Sie mit der am Ende jeder Warnung angegebenen Anweisungsnummer nach der jeweiligen Übersetzung in den übersetzten Sicherheitshinweisen, die zusammen mit diesem Gerät ausgeliefert wurden.
-
Page 16: Installation Instructions
Chapter 4: Warning Statements for AC Systems uper orkstation 5038A-I User's Manual Installation Instructions Circuit Breaker Warning! Warning! This product relies on the building's installation for short-circuit (overcurrent) Read the installation instructions before connecting the system to the power source. protection. -
Page 17: Power Disconnection Warning
Chapter 4: Warning Statements for AC Systems uper orkstation 5038A-I User's Manual ¡Advertencia! El sistema debe ser disconnected de todas las fuentes de energía y del cable eléctrico quitado de los módulos de fuente de alimentación antes de tener acceso el interior del chasis para instalar o para quitar componentes de sistema. -
Page 18: Equipment Installation
Chapter 4: Warning Statements for AC Systems uper orkstation 5038A-I User's Manual Equipment Installation Waarschuwing Deze apparatuur mag alleen worden geïnstalleerd, vervangen of hersteld door Warning! Restricted Area this equipment. Warning! This unit is intended for installation in restricted access areas. A restricted access area can be accessed only through the use of a special tool, lock and key, or other means of security. -
Page 19: Battery Handling
Chapter 4: Warning Statements for AC Systems uper orkstation 5038A-I User's Manual Warnung Bei Einsetzen einer falschen Batterie besteht Explosionsgefahr. Ersetzen Sie die Batterie nur durch den gleichen oder vom Hersteller empfohlenen Batterietyp. Entsorgen Sie die benutzten Batterien nach den Anweisungen des Herstellers. Attention Danger d'explosion si la pile n'est pas remplacée correctement. -
Page 20: Redundant Power Supplies
Chapter 4: Warning Statements for AC Systems uper orkstation 5038A-I User's Manual Redundant Power Supplies Warning! This unit might have more than one power supply connection. All connections must be removed to de-energize the unit. Waarschuwing Deze eenheid kan meer dan één stroomtoevoeraansluiting bevatten. Alle aansluitingen dienen verwijderd te worden om het apparaat stroomloos te maken. -
Page 21: Comply With Local And National Electrical Codes
Chapter 4: Warning Statements for AC Systems uper orkstation 5038A-I User's Manual Attention L'équipement doit être installé conformément aux normes électriques nationales et locales. Waarschuwing Een gevaarlijke spanning of energie is aanwezig op de backplane wanneer het Waarschuwing systeem in gebruik is. Voorzichtigheid is geboden tijdens het onderhoud. Bij installatie van de apparatuur moet worden voldaan aan de lokale en nationale elektriciteitsvoorschriften. -
Page 22: Hot Swap Fan Warning
Chapter 4: Warning Statements for AC Systems uper orkstation 5038A-I User's Manual ¡Advertencia! Al deshacerse por completo de este producto debe seguir todas las leyes y reglamentos nacionales. Warnung Attention Die Lüfter drehen sich u. U. noch, wenn die Lüfterbaugruppe aus dem Chassis La mise au rebut ou le recyclage de ce produit sont généralement soumis à... -
Page 23: Power Cable And Ac Adapter
When installing the product, use the provided or designated connection cables, power cables and AC adaptors. Using any other cables and adaptors could cause pour tous les autres appareils électriques que les produits désignés par Supermicro seulement. other electrical devices than products designated by Supermicro only. - Page 24 uper orkstation 5038A-I User's Manual Notes 4-20...
-
Page 25: Chapter 5 Advanced Motherboard Setup
Chapter 5: Advanced Serverboard Setup Chapter 5 Advanced Motherboard Setup This chapter covers the data and power cables and add-on cards. All motherboard jumpers and connections are also described. A layout and quick reference chart are included in this chapter for your reference. Remember to completely close the protect the system. -
Page 26: Connecting Cables
Chapter 5: Advanced Serverboard Setup uper orkstation 5038A-I User's Manual Connecting Cables Figure 5-1. Control Panel Header Pins Now that the motherboard is installed, the next step is to connect the cables to the Ground board. These include the data (ribbon) cables for the peripherals and control panel and the power cables. -
Page 27: Processor And Heatsink Installation
CPU socket cap is in place and none of the socket pins are bent; keys. otherwise, contact your retailer immediately. • Refer to the Supermicro website for updates on CPU support. Installing an LGA 2011 Processor Press down on the lever labeled 'Close 1st' 1. -
Page 28: Installing A Cpu Heatsink
Caution: Remove the power cord before installing heatsinks. Do not reconnect it doesn't close properly, do not force it as it may damage your CPU. Instead, open until the installation is completed. See http://www.supermicro.com/about/policies/ the load plate again and double-check that the CPU is aligned properly. -
Page 29: Removing The Heatsink
1. Insert the desired number of DIMMs into the memory slots as follows, start- to uninstall the heatsink to prevent damage done to the CPU or the CPU socket. Additional warnings and cautions can be found on the Supermicro Web site at http:// ing with P1-DIMMA1. For best memory performance, please install memory www.supermicro.com/about/policies/safety_information.cfm. -
Page 30: Memory Population Guidelines
Speed (MT/s); Voltage (V); Slots per Channel (SPC) and 2400/2133/1866/1600/1333 memory in eight DIMM slots. For the latest memory DIMMs per Channel (DPC) updates, please refer to the product page on the Supermicro website. Ranks DIMM Capacity 2 Slots per Channel... -
Page 31: Motherboard Details
Chapter 5: Advanced Serverboard Setup uper orkstation 5038A-I User's Manual Motherboard Details Connector Description Audio FP Front Panel Audio Header Onboard Battery Fan 1,2,3,4,5 System/CPU Fan Headers (Fan1: CPU Fan) Speaker/Buzzer Header Figure 5-4. X10SRA Layout Front Control Panel Header JPW1 24-pin ATX Main Power Connector AUDIO_FP... - Page 32 Chapter 5: Advanced Serverboard Setup uper orkstation 5038A-I User's Manual Power Fail ATX Power 24-pin Connector Power Fail LED Connect an LED cable to the Power ATX Main PWR (JPW1) and CPU Fail connection to provide a warning PWR Connectors (JPW2) +3.3V +3.3V 3.3V...
- Page 33 Chapter 5: Advanced Serverboard Setup uper orkstation 5038A-I User's Manual Power LED Fan Headers Power LED The Power LED connection is located on pins 15 and 16 of JF1. Refer to the headers (Fan1 ~ Fan5). These fans +3.3V have 4-pin fan headers. Pins 1-3 of PWR LED the fan headers are backward com- Fan Header...
- Page 34 Chapter 5: Advanced Serverboard Setup uper orkstation 5038A-I User's Manual Serial Ports Trusted Platform Module Header A COM1 header is located near PCI-E slot 1 on the motherboard. The COM1 header TPM Header provides an onboard serial connection. This header is used to connect a LCLK Trusted Platform Module (TPM), which LFRAME...
-
Page 35: Jumper Settings
Chapter 5: Advanced Serverboard Setup uper orkstation 5038A-I User's Manual Jumper Settings LAN1/LAN2 Enable/Disable LAN1/2 Enable/Disable Jumper Settings Jumpers JPL1/JPL2 are used toenable Explanation of Jumpers or disable LAN ports 1/2, respectively. To modify the operation of the mother- Pins 1-2 Enabled See the table on the right for jumper board, jumpers can be used to choose... -
Page 36: 5-10 Onboard Indicators
Chapter 5: Advanced Serverboard Setup uper orkstation 5038A-I User's Manual 5-10 Onboard Indicators Manufacturing Mode Close pins 2 and 3 of jumper JPME2 Manufacture Mode LAN Port LEDs Jumper Settings LAN Port LEDs the system to operate in Manufacturing The LAN ports are located on the I/O back- Status Pins 1-2 Normal... -
Page 37: 5-11 Sata Ports
5038A-I User's Manual 5-11 SATA Ports 5-12 Installing Software The Supermicro FTP site contains drivers and utilities for your system at ftp://ftp. supermicro.com. Some of these must be installed, such as the chipset driver. SATA Ports After accessing the FTP site, go into the CDR_Images directory and locate the ISO Ten Serial ATA (SATA) 3.0 ports (I-SATA0~5, S-SATA0~3) are provided on the... -
Page 38: Superdoctor® 5
5-13 Onboard Battery SuperDoctor® 5 The Supermicro SuperDoctor 5 is a program that functions in a command-line or Please handle used batteries carefully. Do not damage the battery in any way; a web-based interface in Windows and Linux operating systems. The program moni- damaged battery may release hazardous materials into the environment. - Page 39 uper orkstation 5038A-I User's Manual Notes 5-28...
-
Page 40: Chapter 6 Advanced Chassis Setup
Put the motherboard, add-on cards and peripherals back into their antistatic bags when not in use. • For grounding purposes, make sure your computer chassis provides excellent conductivity between the power supply, the case, the mounting fasteners and the motherboard. For additional warnings and cautions, see http://www.supermicro.com/about/poli- cies/safety_information.cfm. -
Page 41: Removing The Power Cord
Chapter 6: Advanced Chassis Setup uper orkstation 5038A-I User's Manual Removing the Power Cord Before performing any setup or maintenance on the chassis, use the following procedure to ensure that power has been removed disconnected from the system. Removing the Power Cord Figure 6-1. -
Page 42: Front Control Panel
6. Slide the right cover toward the rear of the chassis 7. Lift the right cover from the chassis. Caution: Except for short periods of time, do NOT operate the system without the to prevent overheating. Additional warnings and cautions can be found on the Supermicro website at http:// www.supermicro.com/about/policies/safety_information.cfm. -
Page 43: System Fans
5. Lift the fan up and out of the chassis. Installing a New Fan 1. Replace the failed fan with an identical one (available from Supermicro) 2. Secur the fan to the bracket with four screws and secure the bracket to the chassis with two screws. -
Page 44: Drive Installation
8. Insert the new hard drive into the hard drive carrier. Figure 6-7. Removing the 3.5" Hard Drive from the Hard Drive Carrier Note: Enterprise level hard disk drives are recommended for use in Supermicro chassis and servers. For information on recommended HDDs, visit the Supermicro Web site... -
Page 45: Removing And Installing Optional 2.5" Hard Drives
Chapter 6: Advanced Chassis Setup uper orkstation 5038A-I User's Manual Removing and Installing Optional 2.5" Hard Drives Figure 6-8. Installing the Hard Drive Carrier into the Hard Drive Cage Figure 6-9. Removing the 2.5" Hard Drives Optional Screw Thumb Screw 9. -
Page 46: Power Supply
Warning: Only enterprise level HDDs are recommended for use in this chassis. Ad- 5. Replace the failed power supply with an identical power supply model. ditional warnings and cautions can be found on the Supermicro website at http://www. 6. Secure the new power supply using the screws previously set aside. - Page 47 uper orkstation 5038A-I User's Manual Notes 6-14...
-
Page 48: Chapter 7 Bios
BIOS Chapter 7 BIOS Introduction This chapter describes the AMI BIOS Setup Utility for the X10SRA/X10SRA-F motherboard. The ROM BIOS is stored in a Flash EEPROM and can be easily updated. This chapter describes the basic navigation of the AMI BIOS Setup Utility setup screens. -
Page 49: How To Start The Setup Utility
BIOS uper orkstation 5038A-I User's Manual Setup Home can always return to the Setup Home screen by clicking the Home icon on the top of the screen. The Setup Home screen is shown below. The AMI BIOS GUI Setup Utility uses a mouse pointer navigation system similar to standard graphical user interfaces. - Page 50 BIOS uper orkstation 5038A-I User's Manual Load Optimized Defaults By default, some advanced menu options are hidden from display. Clicking Expert Mode ON or OFF will display or hide these options from the menu. In this chapter, To set this feature, select Load Optimized Defaults from the Save & Load menu all Expert Mode option items are bold and underlined.
-
Page 51: System Information
BIOS uper orkstation 5038A-I User's Manual System Information Motherboard The following information are be displayed in this section: • Type and Speed of CPU - indicates the brand, model name, model number of the CPU and it's rated clock speed. The following information are displayed in this section: •... - Page 52 BIOS uper orkstation 5038A-I User's Manual Memory The following information are be displayed in this section: • Total Memory - shows the total detected system memory. The following information are be displayed in this section: • PCH Name - displays the name of the PCH chip (if detected). •...
-
Page 53: Processor (Cpu)
BIOS uper orkstation 5038A-I User's Manual Processor (CPU) Performance Set all options for the processor in this section. Information The following CPU information will be displayed: Hyper-threading [ALL] Select Enabled to support Intel Hyper-threading Technology to enhance CPU per- formance. The options are Enabled and Disabled. Execute-Disable Bit Capability (Available if supported by the OS &... - Page 54 BIOS uper orkstation 5038A-I User's Manual Adjacent Cache Line Prefetch (Available when supported by the CPU) Power Management The CPU prefetches the cache line for 64 bytes if this feature is set to Disabled. The CPU prefetches both cache lines for 128 bytes as comprised if this feature is set to Enabled.
-
Page 55: Chipset
BIOS uper orkstation 5038A-I User's Manual Package C-State limit Chipset This feature allows the user to set the limit on the C-State package register. The Set all options for the Chipset in this section. options are C0/C1 State, C2 State, C6 (Non Retention) State, and C6 (Renten- tion) State. - Page 56 BIOS uper orkstation 5038A-I User's Manual Relaxed Ordering PCH I/O Select Enable to enable Relaxed Ordering support which will allow certain transac- tions to violate the strict-ordering rules of PCI bus for a transaction to be completed prior to other transactions that have already been enqueued. The options are Dis- able and Enable.
-
Page 57: Memory
BIOS uper orkstation 5038A-I User's Manual On Board Chip Memory Set all options for the System Memory in this section. Memory Information Onboard USB Controller (USB 14/15) This feature Enables or Disables the USB controller for USB ports 14/15. The op- tions are Disabled and Enabled. -
Page 58: Hardware Monitor
BIOS uper orkstation 5038A-I User's Manual Set Throttling Mode Use this feature to activate Closed Loop Thermal Throttling (CLTT), which uses the DIMM memory temperature as input to make adjustments to the throttling based on variations in system's fan speed. The options are Disabled, and CLTT. Socket Interleave Below 4GB Select Enabled for the memory above the 4G Address space to be split between two sockets. - Page 59 BIOS uper orkstation 5038A-I User's Manual • CPU Temperature - CPU temperature reading in Celsius. Voltage • System Temperature - System temperature reading in Celsius. • Peripheral Temperature - Peripheral temperature reading in Celsius. • PCH Temperature - PCH temperature reading in Celsius. Fan Speed The Voltage section detects and displays the different detected voltage levels from different sensors within the motherboard.
- Page 60 BIOS uper orkstation 5038A-I User's Manual SATA Port 0 ~ SATA Port 5 This item displays the information detected on the installed SATA drive on the Set all options for the I/O in this section. particular SATA port. • Model number of drive and capacity SATA Port 0 ~ Port 5 Spin Up Device On an edge detect from 0 to 1, set this item to allow the PCH to initialize the...
- Page 61 BIOS uper orkstation 5038A-I User's Manual Serial ATA Port 0~ Port 5 This item displays the information detected on the installed SATA drives on the particular SATA port. options are IDE, AHCI and RAID. • Model number of drive and capacity Port 0 ~ Port 5 Spin Up Device On an edge detect from 0 to 1, set this item to allow the PCH to start a COMRE- Support Aggressive Link Power Management...
- Page 62 BIOS uper orkstation 5038A-I User's Manual Port 0 ~ Port 3 sSATA Device Type (Available when a SATA port is PCIe/PCI/PnP detected) nected to a Solid State drive or a Hard Disk Drive. The options are Hard Disk Drive and Solid State Drive. Support Aggressive Link Power Management When this item is set to Enabled, the SATA AHCI controller manages the power usage of the SATA link.
- Page 63 BIOS uper orkstation 5038A-I User's Manual CPU SLOT6 PCI-E 3.0 X16 - Gen X USB Settings The following will be displayed: Auto, Gen1 (2.5 GT/s), Gen2 (5 GT/s) and Gen3 (8 GT/s). • USB Devices - this displays a list of the detected USB devices. Detect Non-Compliant Device Legacy USB Support device installed on any of the PCIE slots.
- Page 64 BIOS uper orkstation 5038A-I User's Manual EHCI Hand-Off PCH-FW (Firmware) This item is for operating systems that do not support Enhanced Host Controller Interface (EHCI) hand-off. When this item is enabled, EHCI ownership change will be claimed by the EHCI driver. The settings are Enabled and Disabled. XHCI Mode This feature handles the operation mode for the XHCI (Extensible Host Controller Interface) controller.
-
Page 65: Booting
BIOS uper orkstation 5038A-I User's Manual Booting The different boot settings and options for the motherboard are in this section. Boot Device Settings Enable Serial Port 1 This item will Enable or Disable Serial Port 1 (COM1). Place a tick mark on the box to enable Serial Port 1. - Page 66 BIOS uper orkstation 5038A-I User's Manual • BIOS Features Dual Boot Order #5 • Dual Boot Order #6 • Dual Boot Order #7 • Dual Boot Order #8 • Dual Boot Order #9 • Dual Boot Order #10 • Dual Boot Order #11 •...
- Page 67 BIOS uper orkstation 5038A-I User's Manual tors will not capture Interrupt 19, and the drives attached to these adaptors will not Security Settings function as bootable devices. The options are Enabled and Disabled. Retry Boot Select Enabled to force the system to reboot when system fails to boot. The op- tions are Disabled and Enabled.
- Page 68 BIOS uper orkstation 5038A-I User's Manual Secure Boot Menu Key Management (if Secure Boot Mode is set to 'Custom') The following items will be displayed: Key Management allows experienced users to modify Secure Boot Variables. • System Mode - indicates the current system mode. Default Key Provision •...
- Page 69 BIOS uper orkstation 5038A-I User's Manual Set New PK 2) EFI Time Based Authenticated Variable This item uploads and installs a secure Platform Key. You may insert a factory de- Append DBT a. EFI Signature List This item uploads and adds an Authorized Signature into the Key Management. You b.
-
Page 70: 7-10 Management
BIOS uper orkstation 5038A-I User's Manual 7-10 Management Console Redirection Settings Set all options for the System Management feature in this section. ACPI Settings COM 1 Enable Console Redirection Select Enabled to enable COM Port 1 Console Redirection, which will allow a client machine to be connected to a host machine at a remote site for networking. - Page 71 BIOS uper orkstation 5038A-I User's Manual Data Bits Putty KeyPad Use this feature to set the data transmission size for Console Redirection. The This feature selects Function Keys and KeyPad settings for Putty, which is a options are 7 (Bits) and 8 (Bits). terminal emulator designed for the Windows OS.
- Page 72 BIOS uper orkstation 5038A-I User's Manual is odd. Select None if you do not want to send a parity bit with your data bits to Always Enable, legacy Console Redirection remains enabled upon OS boot. in transmission. Select Mark to add a mark as a parity bit to be sent along with The options are Always Enable and Bootloader.
-
Page 73: 7-11 Ipmi
BIOS uper orkstation 5038A-I User's Manual 7-11 IPMI Erasing Settings Erase SEL tings. This is supported on the X10SRA-F only. Select Yes, On next reset to erase all system event logs upon next system reboot. Select Yes, On every reset to erase all system event logs upon each system reboot. Select No to keep all system event logs after each system reboot. -
Page 74: 4-12 Network Stack
BIOS uper orkstation 5038A-I User's Manual 4-12 Network Stack Select Yes for the system BIOS to automatically reset the following IPMI settings at next system boot. The options are Yes and No. Use this item to select the IP address source for this computer. If Static is selected, you will need to know the IP address of this computer and enter it to the system next available IP address for this computer. - Page 75 BIOS uper orkstation 5038A-I User's Manual The two built-in Gb LAN ports will also appear: There are two options under this link: Link Speed on the actual speed supported on the connected network. The options are Auto Negotiated, 10Mbps Half, 10 Mbps Full, 100 Mbps Half and 100Mbps Full. Wake on LAN (WOL) Select Enabled to activate this feature, which enables the system to 'wake up' from sleep when it receives a LAN wake up signal through this port.
-
Page 76: 4-13 Event Logs
BIOS uper orkstation 5038A-I User's Manual 4-13 Event Logs Erasing Settings Erase Event Log Select Enabled to erase all error events in the SMBIOS (System Management BIOS) log before an event logging is initialized at bootup. The options are No and Yes. When Log is Full Select Erase Immediately to immediately erase all errors in the SMBIOS event log when the event log is full. - Page 77 uper orkstation 5038A-I User's Manual Notes 7-58...
-
Page 78: Appendix A Bios Error Beep Codes
Appendix A: POST Error Beep Codes Appendix A BIOS Error Beep Codes During the POST (Power-On Self-Test) routines, which are performed each time the system is powered on, errors may occur. Non-fatal errors are those which, in most cases, allow the system to continue with bootup. - Page 79 uper orkstation 5038A-I User's Manual Notes...
-
Page 80: Appendix B Dual Boot Block
Appendix B: Dual Boot Block Appendix B Dual Boot Block B-1 Introduction This motherboard supports the Dual Boot Block feature, which is a last-ditch mechanism to recover the BIOS boot block. This section provides an introduction to the feature. BIOS Boot Block A BIOS boot block is the minimum BIOS loader required to enable necessary BIOS block. - Page 81 uper orkstation 5038A-I User's Manual B-2 Steps to Reboot the System by switch JBR1 1. Power down the system. 2. On switch JBR1 slide switch to ON, and power on the system. 3. Follow the BIOS recovery SOP listed in the previous chapter (Appendix C). 4.
- Page 82 Appendix C Processors Single Intel Xeon E5-2600/1600 v3/v4 family or Intel Core™ i7 Series processor in an LGA2011-3 socket Note: Please refer to our web site for a complete listing of supported processors. Chipset Intel C612 BIOS 128 Mb SPI AMI BIOS® SM Flash BIOS Memory Capacity Eight DIMM slots support up to 1 TB of ECC 3DS LRDIMM, 512 GB of ECC LRDIMM, 256GB of ECC RDIMM, or 64GB of ECC/non-ECC UDIMM DDR4-...
- Page 83 uper 5038A-I Motherboard Regulatory Compliance X10SRA Electromagnetic Emissions: FCC Class B, EN 55022 Class B, EN 61000-3-2/-3- 3, CISPR 22 Class B Dimensions: 12" x 9.6" (304.8 mm x 243.84 mm) Electromagnetic Immunity: EN 55024/CISPR 24, (EN 61000-4-2, EN 61000-4-3, EN 61000-4-4, EN 61000-4-5, EN 61000-4-6, EN 61000-4-8, EN 61000-4-11) Chassis Safety: CSA/EN/IEC/UL 60950-1 Compliant, UL or CSA Listed (USA and...
- Page 84 5038A-I User's Manual (continued from front) The products sold by Supermicro are not intended for and will not be used in life support systems, medical equipment, nuclear facilities or systems, aircraft, aircraft devices, aircraft/emergency com- munication devices or other critical systems whose failure to perform be reasonably expected to claims any and all liability, and should buyer use or sell such products for use in such ultra-hazardous applications, it does so entirely at its own risk.
Need help?
Do you have a question about the SuperWorkstation 5038A-I and is the answer not in the manual?
Questions and answers