
Subscribe to Our Youtube Channel
Related Manuals for Shelters4Less SR1605


Summary of Contents for Shelters4Less SR1605
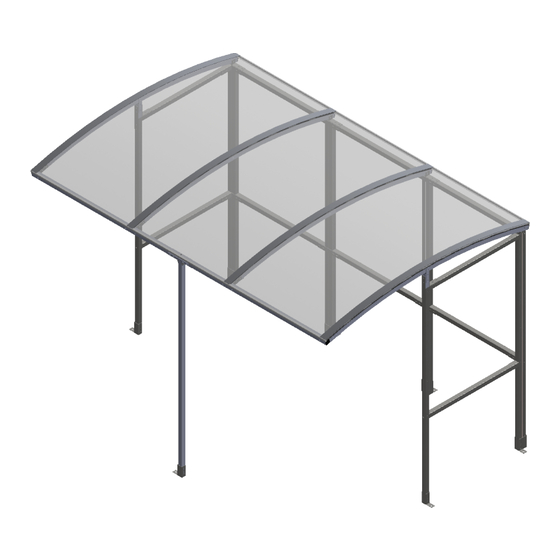
- Page 1 Assembly Instructions Shelter type: SR1605 Email : Sales@shelters4less.co.uk SR1605-03-310516-UK Web : www.shelters4less.co.uk Tel : 0800 160 1002...
-
Page 2: Exploded View
EXPLODED VIEW Tools required: Tools included: Drill/Screwdriver Spanner Mallet Torx bit Hack saw... -
Page 3: Parts List
PARTS LIST DESCRIPTION IMAGE QUANTITY. SIZE ITEM NO. PART NO. FRAME 2000 x 1035 CORNER 110 x 110 BRACKET PLATE/BRACKET 130 x 30 x 3 STUB 140 x 40 x 40 S1 STUB PLATE/BRACKET 130 x 30 BRACKET 110x46x40 RAFTER 2159 x 40 x 40 RAFTER 2159 x 40 x 40... - Page 4 Step 1 Assemble S1 frames to make up the main structure using CB1 brackets in the corners and JF1 brackets on the straight joints. Attach the S1 stub as shown using JF1, CF1 and JF3 brackets. GENERAL NOTE: THE 50MM TECH SCREWS ARE FOR FIXING ROOF STRIPS Check the (RC) ONLY...
- Page 5 Step 2 Attach first R4 and R5 rafters using RB1 brackets on the back of the shelter and ST1 stubs in the middle.
- Page 6 Step 3 Assemble the T-frame using two ST9 tie bars and a P4 post. Join the two ST9 bars together first using JF3 brackets, then attach the P4 post using two RB2 brackets. DETAIL C SCALE 1 : 4...
- Page 7 Step 4 Use L1 brackets to attach the T-bar to the front of the shelter and install the remaining R4 rafters using RB1 brackets on the rear and L1 brackets at the front. Attach the FT1 and FT3 brackets and move the shelter in to its final position before using anchor bolts to secure it to the ground.
- Page 8 Step 5 Stick sealing strips (SS) to the rafters and align the PCE2 panels to the outside of the shelter and centralise the PCC2 panel in the centre. Apply more sealing strips to the top of the roof panels, above the previous strips. GENERAL NOTE: PCE1 THE 50MM TECH SCREWS ARE...
- Page 9 Step 6 Screw down the RC2 strips directly into the rafter with the 50mm TEC screws to secure the roof panels. Next, clip on the 2MD edge trim to the edges of the roof panels. Then fit the Black plastic caps on exposed nuts and bolts.
- Page 10 Notes:...
- Page 11 PLAN VIEW OVERALL DIMENSIONS AND GROUND FIXING POSITIONS 1048.40 1088.40 1044.50 2187 Suggested size for concrete base: 200mm oversized on all sides...
-
Page 12: Maintenance
Touch up any exposed metal should it get scratched CONTACT DETAILS: Email : Sales@shelters4less.co.uk Web : www.shelters4less.co.uk Tel : 0800 160 1002 Shelters4Less, Unit 3, 2 Lansdowne Crescent, Bournemouth, BH1 1SA All Parts and Fixings checked by: Print Name: Signature:...
Need help?
Do you have a question about the SR1605 and is the answer not in the manual?
Questions and answers