
Subscribe to Our Youtube Channel
Related Manuals for Shelters4Less SR1604


Summary of Contents for Shelters4Less SR1604
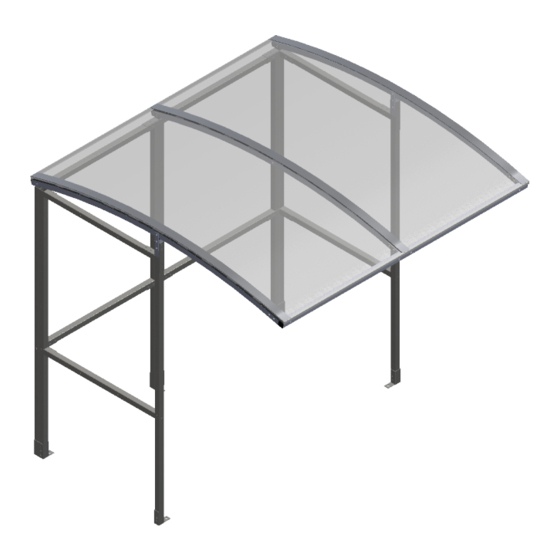
- Page 1 Assembly Instruction Shelter Type: SR1604 Email : Sales@shelters4less.com SR1604-01-220116-UK Web : www.shelters4less.com Tel : 0800 160 1002...
- Page 2 EXPLODED VIEW...
- Page 3 PARTS LIST AND FIXINGS ITEM NO. DESCRIPTION DIMENSION IMAGE QTY. PART NO. FRAME 2000 x 1035 CORNER 110 x 110 BRACKET BRACKET 220 x 40 BRACKET 110 x 46 STUB 140 x 40 x40 S1 STUB BRACKET 130 x 30 FOOT BRACKET 109 x 100 x 40 FOOT BRACKET 109 x 100 x 80 RAFTER...
- Page 4 Step 1 Assemble S1 frames to make up the main structure using CB1 brackets in the corners and JF1 brackets for the straight joints. Check shelter dimensions to ensure correct alignment. Ensure corners are aligned correctly. TOP VIEW...
- Page 5 Step 2 Move the shelter in to its final position, make sure it is square and attach FT1 and FT3 foot brackets, which screw into the ground with the concrete ttach JF2 brackets to S1 Stubs. Using CB1 and JF1brackets, secure bolts.
- Page 6 Step 3 Apply sealing strips (SS) to rafters. Align the two PCE2 roof panels with the outer edges of the shelter, leaving a gap in between the panels. PCE2 PCC2 PCE2...
- Page 7 Step 4 Apply more sealing strips (SS) to the top of the roof panels, above the fist strips. Use RC2 strips to cover the gap in the centre and the edges and screw them directly into the frame using 50mm TEC screws.
- Page 8 Plan View Suggested size for concrete base: 200mm oversized on all four sides 945.50 2187...
- Page 9 Notes...
- Page 10 Notes...
- Page 11 Notes...
- Page 12 Ensure all fittings are tight (for example after a big storm) • Touch up any exposed metal should it get scratched CONTACT DETAILS: Email : Sales@shelters4less.co.uk Web : www.shelters4less.co.uk Tel : 0800 160 1002 Unit 3, 2 Lansdowne Crescent, Bournemouth, BH1 1SA All Parts and Fixings checked by:...
Need help?
Do you have a question about the SR1604 and is the answer not in the manual?
Questions and answers