Table of Contents
Advertisement
Quick Links
Advertisement
Table of Contents

Related Manuals for LifeSpan XT-35


Summary of Contents for LifeSpan XT-35
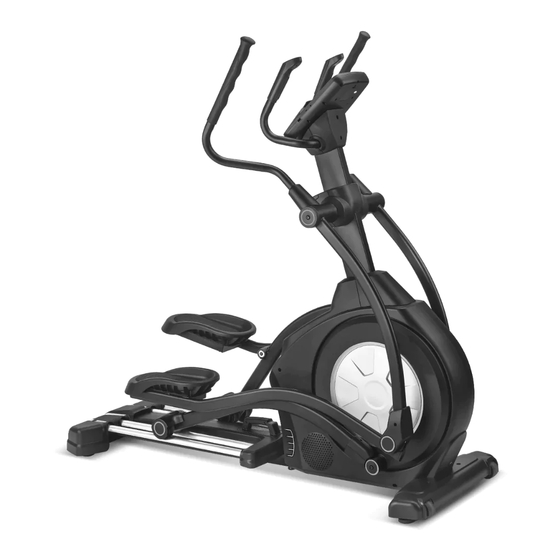
- Page 1 OWNER’S MANUAL IMPORTANT! PLEASE READ THIS MANUAL CAREFULLY BEFORE USING THE BIKE...
-
Page 2: Important Safety Information
Important Safety Information Please ensure that you read this entire manual and keep this manual in a safe place for easy reference. 1. It is important to read this entire manual before assembling and using the equipment. Safe and effective use can only be achieved if the equipment is assembled, maintained and used properly. -
Page 4: Exploded View
Exploded View 27 28 38 39 46 47 48 28 41 59 60 61 42 4146 42 41 59 60... -
Page 5: Part List
Part List Description Qty. Description Qty. Computer Arc washer d8*Φ20*R16*1.5 Computer wire Nut M8 Sensor wire (middle) 29L/R Armrest assemble Handle pulse wire Bolt M8*16 Spring washer d8 Washer d4*Φ12*1 Washer d8*Φ25*2 Bolt M4*12 Handle pulse wire Bearing 6003Z Foam grip 1 34L/R Connecting bar End cap Φ32*1.5 U seat... - Page 6 53 Nylon nut M10 L/R rail 54 Washer d10*Φ25*1.5 Connecting bar 55 Bolt ST4.2*16 Bolt M6*15 56 Bolt ST4.2*16 L shape End cap 57 L/R idler wheel cover Aluminum rail 58 End cap Φ28*1.5 Square bolt M8*90 59 Bushing 3 Front stabilizer End cap with transportation 60 Bearing 6000...
-
Page 7: Assembly Tool
Assembly tool... - Page 8 Step1: a. Secure the front stabilizer (72) to the main frame (22) by using square bolt (71), nut (28) and Arc washer (64).
- Page 9 Step2: 64 30 30 41 a. Secure the L/R rail (66L/R) to the main frame (22) by using bolt (30) and washer (64). b. Attach the connecting bar (67) to the main frame (22) with bolt (30), spring washer (31) and flat washer (41).
- Page 10 Step3: 19 18 a. Slide the decoration cover (17) off the main frame (22) and onto the front post (12), and then connect the sensor wire (lower) (21) to the sensor wire (middle) (3). b. Secure the front post (12) to the main frame (22) by using bolt (20), washers (18) and nylon nut (19).
- Page 11 Step4: 28 27 a. Secure the connecting bar (34L/R) to the armrest assemble (29L/R) by using bolt (26), Arc washer (27) and nut (28). b. Secure the handlebar (25L/R) to the armrest assemble (29L/R) by using bolt (26), Arc washer (27) and nut (28).
- Page 12 Step5: a. Assemble the connecting post (50L/R) to the main frame (22) by using nylon nut (53) and washer (54). b. Attach the left decoration cover (51) and right decoration cover (52) to the connecting post (50L/R) with bolt (55).
- Page 13 Step6: 41 42 a. Secure the connecting bar (34L/R) to the connecting post (50L/R) by using bolt (45), washer (41) and nylon nut (42). b. Secure the pedal arm (40L/R) to the connecting bar (34L/R) by using bolt (37), washer (41) and spring washer (31).
- Page 14 c. Attach the pedal(44L/R)to the pedal arm(40L/R) with bolt (43), washer (41) and nylon nut (42). Step7: a. Connect the computer wire (2) to the sensor wire (3) b. Secure the computer (1) to the top of the front post (12) by using bolt (6) and washer (5), and then plug handle pulse wire (4) into the hole of the computer(1).
-
Page 15: Warranty Registration
SERVICING: IF YOU FAIL TO COMPLY WITH LIFESPAN’S MAINTENANCE AND SERVICING STEPS ABOVE, YOU MAY VOID YOUR WARRANTY. IF YOU REQUIRE A SKILLED LIFESPAN REPRESENTATIVE TO UNDERTAKE ONE OF THE STEPS ABOVE, PLEASE EMAIL US AT lifespanfitness@hotmail.com.
Need help?
Do you have a question about the XT-35 and is the answer not in the manual?
Questions and answers