Table of Contents
Advertisement
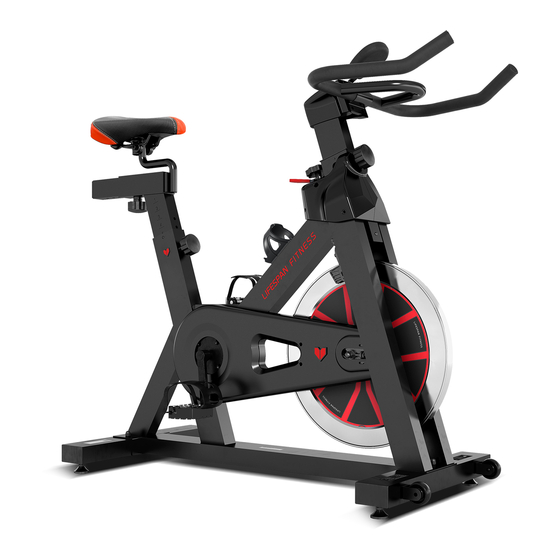
SP-310 OWNER'S MANUAL
Product may vary slightly from the item pictured due to model upgrades
Read all instructions carefully before using this product. Retain this owner's manual for
future reference.
NOTE: This manual may be subject to updates or changes. Up to date manuals are available through our website at www.lifespanfitness.com.au
Advertisement
Table of Contents

Related Manuals for LifeSpan SP-310


Summary of Contents for LifeSpan SP-310
- Page 1 SP-310 OWNER’S MANUAL Product may vary slightly from the item pictured due to model upgrades Read all instructions carefully before using this product. Retain this owner’s manual for future reference. NOTE: This manual may be subject to updates or changes. Up to date manuals are available through our website at www.lifespanfitness.com.au...
-
Page 2: Table Of Contents
TABLE OF CONTENTS IMPORTANT SAFETY INSTRUCTIONS EXPLODED DIAGRAM PARTS LIST ASSEMBLY INSTRUCTION ADJUSTMENT INSTRUCTIONS COMPUTER OPERATION EXERCISE GUIDE WARRANTY REGISTRATION SP-310... -
Page 3: Important Safety Instructions
Before using the equipment, check that the nuts and bolts are securely tightened. If you hear any unusual noises coming from the equipment during use and assemble, stop immediately. Do not use the equipment until the problem has been rectified. SP-310... - Page 4 The equipment is not suitable for therapeutic use. There are many functions of the computer, which value will show when using the equipment according the amount of exercise, here warmly remind you that the value of heart pulse just give you some reference. SP-310...
-
Page 5: Exploded Diagram
2. EXPLODED DIAGRAM SP-310... -
Page 6: Parts List
LITTLE PLASTIC RING 14*8*9 φ20*φ9*3 PLASTIC RING FIXING NUT 1 GB/T 6177.2-2000 M10*1.25 φ23*7.5 CRANK END CAP δ5 SHEET IRON LOCK NUT GB/T 889.1-2000 M8 CHAIN WHEEL A7K-16 1/2"*1/8" 16T(1.37") LEFT CRANK 170*27 φ56*28 CRANK COVER BEARING 6004ZZ RIGHT CRANK 170*27 SP-310... - Page 7 GB/T 41-2000 FIXING NUT 2 M12X1.25 H=6 φ16*φ12.1*35 FIXING TUBE BEARING 6001ZZ φ450*72(13KG) FLYWHEEL φ12*160 FLYWHEEL SHAFT WOOLLY BLOCK 78*38*6 φ25*1.5 END CAP φ23*φ29*465 FOAM GRIP FIXING NUT 27*M20*1(5mm) φ59*35 FLYWHEEL COVER SCREW 4 ST2.9*9.5 LEFT PROTECT COVER 157*73*157 (85g) SP-310...
-
Page 8: Assembly Instruction
2. Attach the Front Stabilizer (pt.15) to the Main Frame (pt.16) using two sets of Ø8 Flat Washers (pt.5), M8 Domed Nut (pt.6) and M8*42 Carriage bolt (3). 3. Attach the Rear Stabilizer (pt.4) to the Main Frame (pt.16) using two sets of Ø8 Flat Washers (pt.5), M8 Domed Nut (pt.6) and M8*42 Carriage bolt (3). SP-310... -
Page 9: Spring Adjustment Knob
Spring Adjustment Knob (pt.7) and pull the knob back and then select and align holes for the desired height. Release the knob and retighten the knurled portion. 3. Now fix the Seat (pt.13) to the Vertical Seat Post (pt.12) as shown, and tighten the bolts around the screws under the seat. SP-310... -
Page 10: Handlebar Post
2. Then fix the Handlebar (pt.18) with two sets of Ø8 the Spring Washer (pt.19) and M8*15 Bolt (pt.20). ATTENTION: YOU SHOULD SECURE THE HANDLEBAR TIGHTLY 3. Slide the Computer (pt.71) onto the Computer Holder (pt.7) 4. Plug the Sensor Wire and Pulse Wire to the back of the Computer (pt. 71), connect the plug (A1&A2), SP-310... -
Page 11: Right Crank
1. The Pedals (pt.1 L & pt.1 R) are marked "L" and "R" - Left and Right. Connect them to their appropriate crank arms. The right crank arm is on the right- hand side of the cycle as you sit on it. Note that the Right pedal should be threaded on clockwise and the Left pedal anticlockwise. SP-310... -
Page 12: Adjustment Instructions
To adjust the handlebar height, slacken the spring knob and secondary knob and pull both knobs back. Slide the handlebar post along the housing on the main frame to the desired height and, with the holes aligned correctly, tighten the spring adjusting knob and then the secondary knob. SP-310... -
Page 13: Computer Operation
Auto Scan Every 4 seconds Elapsed Time 00:00~99:59 FUNCTION Speed 0.0~99.9km/h Distance 0.00~99.99km Calorie 0.00~999.9kcal Controller 4 bit single chip microprocessor Sensor No-contace magnetic type Battery type 2 pcs of Size-AA or UM-3 Operating temperature 0°~+40℃ Storage temperature -10°~+60℃ SP-310... -
Page 14: Exercise Guide
So as you can see, the fitter you are, the healthier and greater you will feel. Warm-up Start each workout with 5 to 10 minutes of stretching and some light exercises. A proper warm-up increases your body temperature, heart rate and circulation in preparation for exercise. Ease into your exercise. SP-310... -
Page 15: Workout Guidelines
The most important factor here is the amount of effort you put in. The harder and longer you work, the more calories you will burn. Effectively this is the same as if you were training to improve your fitness, the difference is the goal. SP-310... - Page 16 For all warranty or support related enquiries an email must be sent before contacting us via any other means. Head Office and Customer Service: Global Fitness and Leisure Pty Ltd 17 Fordson Rd Campbellfield VIC, 3061 Australia PH: 03 9357 2166 SP-310...
- Page 17 This will eliminate the movement and static electricity factors. If your hands are dry, then wet them slightly (saliva works as a great conductor if this doesn’t bother you). For more information, please contact our Lifespan Technical Support Department www.lifespanfitness.com.au support@lifespanfitness.com.au...
Need help?
Do you have a question about the SP-310 and is the answer not in the manual?
Questions and answers