Advertisement
Quick Links
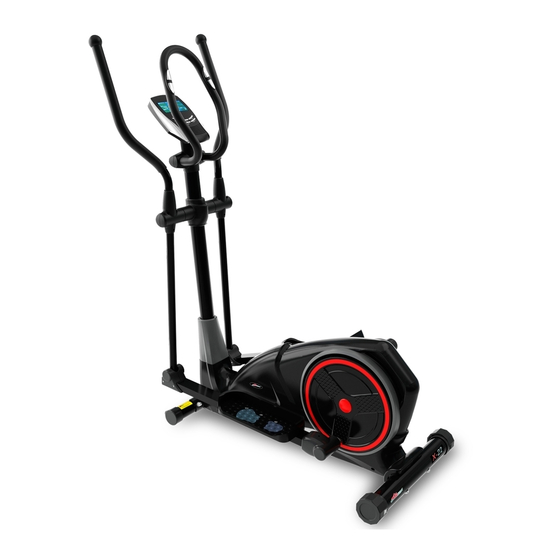
X-22 OWNER'S MANUAL
Product may vary slightly from the item pictured due to model upgrades
Read all instructions carefully before using this product. Retain this owner's manual for
future reference.
NOTE: This manual may be subject to updates or changes. Up to date manuals are available through our website at
www.lifespanfitness.com.au
Advertisement

Related Manuals for LifeSpan X-22


Summary of Contents for LifeSpan X-22
- Page 1 X-22 OWNER’S MANUAL Product may vary slightly from the item pictured due to model upgrades Read all instructions carefully before using this product. Retain this owner’s manual for future reference. NOTE: This manual may be subject to updates or changes. Up to date manuals are available through our website at...
-
Page 2: Table Of Contents
TABLE OF CONTENTS IMPORTANT SAFETY INSTRUCTIONS ASSEMBLY INSTRUCTIONS DISPLAY MANUAL EXERCISE GUIDE EXPLODED DIAGRAM PARTS LIST WARRANTY X-22... -
Page 3: Important Safety Instructions
Before using the equipment, check that the nuts and bolts are securely tightened. If you hear any unusual noises coming from the equipment during use and assembly, stop immediately. Do not use the equipment until the problem has been rectified. X-22... - Page 4 This equipment is designed for indoor and family use only Care must be taken when lifting or moving the equipment so as not to injure your back. Always keep this instruction manual and assembly tools at hand for reference. The equipment is not suitable for therapeutic use. X-22...
-
Page 5: Assembly Instructions
Cross tapping screw Extension wire ST4.2X18 Sensor wire Crank Spring washer d8 Nylon nut M8 Hex bolt M8X15 Nylon nut M10 Alloy bushing φ14Xφ Flat washerΦ8.2×Φ32×2 10.1X12.5 D-shape washer φ28Xφ16.2 X14XB5 Axle bushing Long axle Waveform washer φ17Xφ23X0.3 Carriage bolt M8X40 X-22... - Page 6 1. Attach the Front stabilizer (3) to the main frame (1) with carriage bolt (20), arc washer (21) and acorn nut (22). 2. Attach the Rear stabilizer (2) to the main frame (1) with Allen bolt (55) and arc washer (54). X-22...
- Page 7 1. Insert the front shield (14) into the handlebar post (4). 2. Connect the sensor wire (26) well with extension wire (25) 3. Fix the handlebar post (4) to the main frame (1) with Allen bolt (23) and arc washer (21). X-22...
- Page 8 (52), D-shape washer (30) and Wave washer (33). Do not tighten the bolt yet. The same way fix the Right Pedal support (5R) to the Crank (60) 4. Finally, tighten all bolts - Bolt (28), Bolt (51), Bolt (39) and Nylon nut(41). X-22...
- Page 9 STEP 4: 1. Attach the pedals (17L/R) to the pedal supports (5L/R) with hex bolts (45), flat washer (46) and nylon nuts (61). X-22...
- Page 10 STEP 5: 1. Attach the connecting cover (18L/R) onto the pedal support (5L/R) with cross screw (36) as shown. ttach the connecting joint cover (19a/b) on the connecting joint (43L/R) with cross screw (44) as shown. X-22...
- Page 11 4. Attach the armrest (8) to the handlebar post (4) with hex bolt (24), spring washer (27). 5. Now insert the handlebar pulse wire (47) through the handlebar post (4) and then out of the hole of the computer bracket. X-22...
- Page 12 (4) with cross screw (49). Attach the Handlebar post shield (58b) to the Handlebar post shield (58a) with cross screw (36) and cross tapping screw (57) as shown. PLEASE NOTE THAT THE POWER ADAPTOR CONNECTS TO THE LOWER REAR SECTION OF THE MACHINE X-22...
-
Page 13: Display Manual
SPEED: Displays your workout speed value in KM per hour. CALORIES: Your computer will estimate the cumulative calories burned at any given time during your workout. PULSE: Your computer displays your pulse rate in beats per minute during your workout. X-22... - Page 14 Note: If no pulse signal is detected computer will show “P” on the PULSE window. If the computer shows “ERR” on the message window, please re-press the PULSE RECOVERY key and please make sure your hands are holding the grips correctly. TEMPERATURE: Display the current temperature. X-22...
- Page 15 Whilst setting the Clock, press this key to confirm data entries for hour and minute. 5. BODY FAT key: Press the key to input your HEIGHT, WEKGHT, GENDER and AGE then to measure your body fat ratio, 6. PULSE RECOVERY key: Press the key to activate heart rate recovery function. X-22...
- Page 16 Operations: 1. Use the UP/DOWN keys to select one of the above programs from P2 to P13. 2. Press the ENTER key to enter your workout program. 3. The TIME window will flash, press UP or DOWN to set your workout TIME. Press the ENTER key to confirm your desired workout TIME. X-22...
- Page 17 8. The CALORIES window will flash. Press UP or DOWN keys to set target CALORIES. Press ENTER key to confirm your desired CALORIES. 9. The PULSE window will flash. Press UP or DOWN keys to set your target PULSE. Press X-22...
- Page 18 2. In this program, the WATT value will remain constant. It means that if you peddle quickly, the resistance level will decrease and if you peddle slowly, the resistance level will increase. The program will attempt to keep you in the same watt value. X-22...
- Page 19 8. After finishing the program, the computer will show the values of BMR, BMI and FAT PERCENT on the LCD display. Furthermore, the computer will show your own exercise profile for your body type. 9. Press START/STOP to begin your workout. X-22...
- Page 20 E2 immediately at power on. E3 (ERROR 3): After 4 seconds in start mode, if the computer detects the motor not leaving the zero point then the LCD bar displays “E3” or faulty motor. X-22...
- Page 21 PROGRAM 1 PROGRAM 2 PROGRAM 3 MANUAL STEPS HILL PROGRAM 4 PROGRAM 5 PROGRAM 6 ROLLING VALLEY FAT BURN PROGRAM 7 PROGRAM 8 PROGRAM 9 RAMP MOUNTAIN INTERVALS PROGRAM 10 PROGRAM 11 PROGRAM 12 RANDOM PLATEAU FARTLEK PROGRAM 13 PRECIPICE X-22...
- Page 22 USER SETTING PROGRAM PROGRAM 14 USER 1 PROGRAM 15 USER 2 PROGRAM 16 USER 3 PROGRAM 17 USER 4 Pulse control programs: X-22...
- Page 23 PROGRAM 18 55% H.R.C. PROGRAM 19 65% H.R.C. PROGRAM 20 75% H.R.C. PROGRAM 21 85% H.R.C. PROGRAM 22 TARGET H.R.C. WATT Program: PROGRAM 23 WATT CONTROL X-22...
- Page 24 BODY FAT (START MODE) One of the Following Six Profiles Will Display Automatically after Measuring Your BODY FAT: Workout Time: 40 minutes Workout Time: 40 minutes Workout time: 20 minutes Workout Time: 40 minutes Workout Time: 40 minutes Workout time: 20 minutes X-22...
-
Page 25: Exercise Guide
90% of your maximum heart rate. If just starting an exercise program, work out at the low end of your target heart rate zone. As your aerobic capacity improves, gradually increase the intensity of your workout by increasing your heart rate. X-22... - Page 26 Warm-up for two to five minutes before strength training or aerobic exercising. Perform activities that raise your heart rate and warm the working muscles. Activities may include brisk walking, jogging, jumping jacks, jump rope and running on the spot. X-22...
- Page 27 Pull the chest down to touch the thigh on the leg that is bent, and twist at the waist. Hold this position at least 10 seconds. Repeat 10 times on each side. X-22...
- Page 28 A proper cool-down slowly lowers your heart rate and allows blood to return to the heart. Your cool-down should include the stretches listed above and should be completed after each strength training session. X-22...
-
Page 29: Exploded Diagram
5. EXPLODED DIAGRAM X-22... -
Page 30: Parts List
Extension wire ST4.2X18 Sensor wire Crank Spring washer d8 Nylon nut M8 Hex bolt M8X15 Nylon nut M10 Alloy bushing φ14X12.5 X φ10.1 Flat washerΦ8.2×Φ32×2 D-shape washer φ28Xφ16.2 X14XB5 Axle bushing Long axle Waveform washer φ17Xφ23X0.3 Carriage bolt M8X40 X-22... -
Page 31: Warranty
For all warranty or support related enquiries an email must be sent before contacting us via any other means. Head Office and Customer Service: Global Fitness and Leisure Pty Ltd 17 Fordson Rd Campbellfield VIC, 3061 Australia PH: 03 9357 2166 X-22... - Page 32 Hand Pulse Technology Lifespan Fitness exercise equipment come equipped with hand pulse sensors which are used to pick up tiny EKG/ECG signals that run through the body when your heart beats. These electrical EKG/ECG signals are very small and that they must be amplified 1000 times to make the signal useful for the computer to display your pulse.
Need help?
Do you have a question about the X-22 and is the answer not in the manual?
Questions and answers