Advertisement
Table of Contents
- 1 Table of Contents
- 2 Important Safety Instructions
- 3 Care Instructions
- 4 Battery Usage
- 5 Assembly Instructions
- 6 Exploded View:
- 7 Parts List
- 8 Install the Front Stabilizer & Rear Main Frame Section.
- 9 Attach the Pedal (9L/R) to the Crank (28) Respectively.
- 10 Install the Handlebar Post.
- 11 Install the Handlebar
- 12 Computer Operation
- 13 Key Functions
- 14 Operational Procedures
- 15 Auto On/Off
- Download this manual
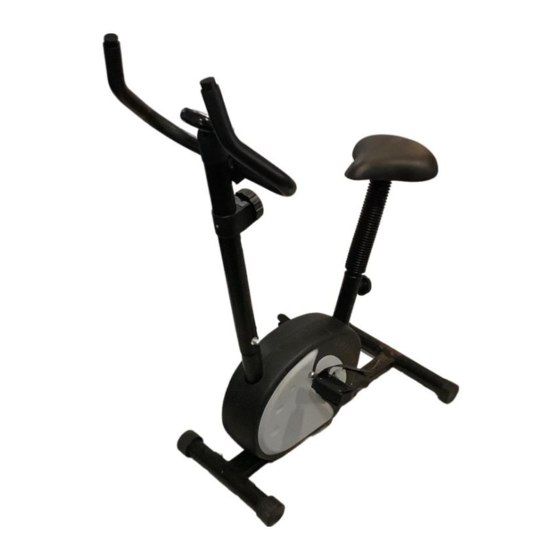
E-1 OWNER'S MANUAL
Product may vary slightly from the item pictured due to model upgrades
Read all instructions carefully before using this product. Retain this owner's manual for
future reference.
NOTE: This manual may be subject to updates or changes. Up to date manuals are available through our website at www.lifespanfitness.com.au
Advertisement
Table of Contents

Subscribe to Our Youtube Channel
Related Manuals for LifeSpan E-1


Summary of Contents for LifeSpan E-1
- Page 1 E-1 OWNER’S MANUAL Product may vary slightly from the item pictured due to model upgrades Read all instructions carefully before using this product. Retain this owner’s manual for future reference. NOTE: This manual may be subject to updates or changes. Up to date manuals are available through our website at www.lifespanfitness.com.au...
- Page 2 TABLE OF CONTENTS IMPORTANT SAFETY INSTRUCTIONS CARE INSTRUCTIONS ASSEMBLY INSTRUCTIONS COMPUTER OPERATION WARRANTY E-1 Exercise Bike...
-
Page 3: Important Safety Instructions
Do not use the equipment until the problem has been rectified. Wear suitable clothing while using the equipment. Avoid wearing loose clothing that may get caught in the equipment or that may restrict or prevent movement. E-1 Exercise Bike... - Page 4 Do not attempt to recharge non-rechargeable batteries Batteries are to be inserted with correct polarity g. The supply terminals are not to be short-circuited h. Do not dispose of batteries in fire, batteries may explode or leak E-1 Exercise Bike...
-
Page 5: Assembly Instructions
3. ASSEMBLY INSTRUCTIONS EXPLODED VIEW: E-1 Exercise Bike... - Page 6 Most of the listed assembly hardware has been packaged separately, but some hardware items have been preinstalled in the identified assembly parts. In these instances, simply remove and reinstall the hardware as assembly is required. Please reference the individual assembly steps and make note of all preinstalled hardware. E-1 Exercise Bike...
- Page 7 NOTE: The right and left Pedals (9L/R) are marked “R” for right & “L” for left. The Left pedal (9L) should be tightened in the counterclockwise direction The Right pedal (9R) should be tightened in the clockwise direction. E-1 Exercise Bike...
- Page 8 Insert the Handlebar Post (4) over the Main section (1), secure in place with the Bolts (14) and Arc Washers (32) which are pre-attached to the Main Section. 2. Ensure that ALL bolts and washers are in place and partially inserted before completely tightening any ONE bolt. E-1 Exercise Bike...
- Page 9 STEP 3: 1. Install the Handlebar. Fix Handlebar (5) to the Handlebar Post (4) with the Spring Washers (16) and Locking Bolts (17), then clip on the Decorate Cover (18). E-1 Exercise Bike...
- Page 10 (21) using the screw (35) 2. Lock the handlebar post (29) onto the up-right post (21) by the square neck bolt (26), arc washer (19) and nut (25),and then insert the pulse wire (28) into the back of the computer (32) E-1 Exercise Bike...
- Page 11 1. Feed the Upper Sensor Wire (30) through hole of the Bracket (33), and then connect the Wires to the Meter (10). 2. Insert the Bracket (33) onto the Handlebar Post (4). Attach the meter (10) onto the Bracket (33). E-1 Exercise Bike...
-
Page 12: Computer Operation
3. DISTANCE: Records total workout distance 4. CALOURIES: Records calories burnt during workout 5. ODOMETER (if included): Displays total distance accumulated on the machine. Can be rest by replacement of batteries. 6. SCAN (if included): Automatically cycles through each function E-1 Exercise Bike... - Page 13 For all warranty or support related enquiries an email must be sent before contacting us via any other means. Global Fitness and Leisure Pty Ltd 17 Fordson Rd Campbellfield VIC, 3061 PH: 03 9357 2166 E-1 Exercise Bike...
Need help?
Do you have a question about the E-1 and is the answer not in the manual?
Questions and answers