
Related Manuals for Night Owl WNIP2 Series


Summary of Contents for Night Owl WNIP2 Series
- Page 1 USER’S MANUAL WNIP2 Series WNIP2 Series Wi-Fi NVR Component Model #: WNVR-WNIP2 Firmware Version: WNIP2-20210129 Camera Component Model #: WNIP-2LTA-BS 24/7 Support.NightOwlSP.com SUPPORT English Español / Français...
- Page 2 Please see the warranty section of this manual for exclusions and additional details. WNIP2 series cameras and Wi-Fi NVR are specific to the WNIP2 series and are not backward compatible with other Night Owl Wi-Fi products. Not all features and capabilities are shared across all models.
-
Page 3: Table Of Contents
... . . Video Quality Step 1. Verify Your Package Contents IPC Upgrade Step 2. Download the Night Owl Protect App and Create Record Menu Your Account Event Settings Step 3. Connect Your System Record Step 4. -
Page 4: Fcc Warnings
• Consult the dealer or an experienced radio/TV technician for help. CAUTION The Federal Communications Commission warns the user that changes or modifications to the unit not expressly approved by the part responsible for compliance could void the user’s authority to operate the equipment. WNIP2 Series User’s Manual... -
Page 5: Safety Instructions
Safety Instructions Use the provided power adapter. Do not use this product with a power source that applies more than the specified voltage. Never insert metal into the Wi-Fi NVR case or its openings. Inserting metal into the Wi-Fi NVR case may cause electric shock. Do not operate in wet or dusty areas. -
Page 6: Initial Setup
Initial Setup Night Owl strongly recommends that you complete the following sections in the order that they are listed to quickly and easily set up your system: • Step 1. Verify Your Package Contents • Step 2. Download the Night Owl Protect App and Create Your Account •... - Page 7 Wi-Fi NVR Component Description 1. HDMI (Recommended): Connect your TV or monitor to this HDMI port using an HDMI cable. 2. LAN (Strongly Recommended): Connect your Wi-Fi NVR to the Internet using an Ethernet cable. 3. USB Ports: Connect a USB mouse or a USB flash drive to this USB port for video backup. NOTE: DO NOT CONNECT two USB mice or two USB flash drives to the Wi-Fi NVR.
- Page 8 To Enter Values: Move the cursor to a blank field and click the mouse. A virtual keyboard will appear which supports numbers, letters, and symbols. The Shift function will access symbols in addition to upper case letters. WNIP2 Series User’s Manual...
-
Page 9: Step 2. Download The Night Owl Protect App And Create Your Account
1. Download the Night Owl Protect App from the Apple App or Google Play Store. If you already have a Night Owl Protect account and connected device, proceed to Step 3 –... -
Page 10: Step 3. Connect Your System
10 feet of paired to the Wi-Fi NVR. Do not mount the cameras Repeat with each camera. the Wi-Fi NVR. until you have completed Step 4: Set Up Your Wi-Fi NVR. WNIP2 Series User’s Manual... -
Page 11: Step 4. Set Up Your Wi-Fi Nvr
Step Set Up Your Wi-Fi NVR IMPORTANT: Night Owl STRONGLY recommends that you have the Wi-Fi NVR connected to the Internet for initial setup. This connection allows the Wi-Fi NVR to easily download the latest firmware and run through the Set Up Wizard quickly. You can disconnect your Wi-Fi NVR from the Internet after your system is setup and running, if you wish. - Page 12 If your recorder is connected to the Internet, Sync Time should be automatically selected and will work to keep your system’s date and time up to date automatically. 5. Select your monitor resolution and then click Continue. 6. Click Agree & Continue at the Data & Privacy screen. WNIP2 Series User’s Manual...
- Page 13 7. If you have already created an account using the Night Owl Protect App, click Already have an account and login using your Username and Password. If you have not set up an account, it is STRONGLY encouraged that you do that now following Step 2 –...
-
Page 14: Disconnected From The Internet
10. Click Complete Setup. Your Wi-Fi NVR goes to the Live View screen. Proceed to Step 5 - Install the Cameras. Disconnected from the Internet IMPORTANT: Night Owl STRONGLY RECOMMENDS connecting the Wi-Fi NVR to the Internet for this initial setup. Please note the following limitations if you choose to NOT connect the Wi-Fi NVR to the Internet: •... - Page 15 4. Select your preferred language and click Continue. 5. Select your Time Zone and then use the scroll to select the current date and time. Then click Continue. 6. Select your monitor resolution and then click Continue. 7. Click Agree & Continue at the Data & Privacy screen. 8.
- Page 16 MUST include a number, a lowercase letter, and an uppercase letter). – Click Continue. 11. Click I still do not want to connect. Alternatively, you can click Connect to connect to the Internet and follow the steps in the Connected to the Internet section above. WNIP2 Series User’s Manual...
- Page 17 12. Click Start to complete the camera compatibility test. 13. Verify that you can see your cameras and click Continue. 14. Click Complete Setup. 15. Go to https://support.nightowlsp.com/ and type “WNIP2” in the search field to access the latest firmware. Follow the instructions that are provided with the download. 16.
-
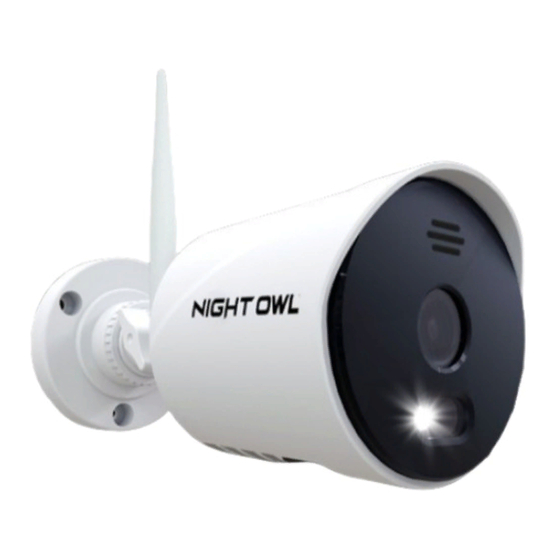
Page 18: Step 5. Install The Cameras
Mounting Surface: Ensure your mounting surface holds at least four times the camera’s total weight. Camera Angles: Use the Live View on your Wi-Fi NVR to verify that your camera will be at an ideal angle before permanently installing. WNIP2 Series User’s Manual... - Page 19 Install the Cameras 1. Use the holes in the base of each camera as a template to mark the screw positions on the surface where you plan to mount the camera. 2. Using a drill bit slightly smaller than the included screw anchors, drill into the mounting surface using the guide marks.
-
Page 20: Step 6. Pair A Replacement / Add-On Camera
Pairing the new cameras to the Wi-Fi NVR allows them to transmit video and function as intended. NOTE: When pairing a Night Owl add-on camera, refer to “Add-on cameras Quick Setup Guide” To pair a replacement camera to your Wi-Fi NVR, please use the below steps: 1. - Page 21 4. Next, you will need to reset the replacement camera. Lift the rubber piece labeled SD/ Reset. Using the included reset pin, press and hold the reset button until you hear a voice prompt indicating the camera is resetting. Reset Pin NOTE: The reset process may take up to 3 minutes.
-
Page 22: View Live Videos And Previously Detected Events
Alarm/Exception Information log where you can find specific details about the event. Date and Time: Shows the date and time of your Wi-Fi NVR. No Signal: Shows empty channels without a camera connected. WNIP2 Series User’s Manual... -
Page 23: Right-Click Menu From Live View
Right-Click Menu From Live View Right-click on the mouse from the Live View screen to bring up a tool bar. The tool bar will enable you to easily change your view layout, lock the system, adjust audio and image settings and playback video events. Callout Function Menu: Opens the Main Menu. -
Page 24: Feature
Day/Hour: Allows you to switch the timeline between a day or hour scale. Timeline: Shows the presence of a video recording and shows the progress of the video. Controls: Allows you to control (rewind, fast-forward, pause, play, etc.) a video. WNIP2 Series User’s Manual... - Page 25 By default, cameras 1 - 4 are selected. 3. Apply filters (Doorbell ring, Face, Human, Motion or Continuous) and click search. The Doorbell ring filter only applies to connected WNIP2 series doorbells. NOTE: Motion playbacks are highlighted in yellow and Continuous playbacks in green.
-
Page 26: Backing Up/Exporting Videos
3. Right-click on your USB flash drive or external HDD on the left side of the File Explorer and select Format. 4. In the File System field select FAT32 and click Start. 5. Do not unplug the USB flash drive or external HDD until formatting is complete. WNIP2 Series User’s Manual... - Page 27 Format for Mac 1. Insert the USB flash drive or connect the external HDD into your Mac. 2. Select Applications > Utilities and launch Disk Utility. 3. Select the USB flash drive or external HDD in the sidebar in Disk Utility and click Erase in the Disk Utility Bar.
-
Page 28: Hard Drive
5. Click BACKUP to save the data on a USB Flash Drive or external HDD (USB DEVICE). The backup video is in .MOV format. NOTE: You can also go to MENU > RECORD > EXPORT RECORDINGS and follow the steps below: WNIP2 Series User’s Manual... -
Page 29: Main Menus And Settings
Main Menus and Settings Copying Settings from Channel To Channel(s) Some menu screens will allow you to copy similar settings to multiple channels. Choose the channel you would like to copy information from in the first drop-down box (Copy), then select the channel you would like to copy the information to from the second drop-down box (To). -
Page 30: Main Menu Options
5. System: Will allow access to System Settings, Wi-Fi Settings, User Management, Device Info and Log and Camera Speed submenus. 6. Maintenance: Will allow access to System Maintenance, Firmware Update and Factory Default submenus. WNIP2 Series User’s Manual... -
Page 31: General Menu
General Menu The general menu will allow you to access display and network settings for your Wi-Fi NVR system. Network Find network values and optimize connectivity based on your Internet connection. In most cases the values should populate automatically once your Wi-Fi NVR is connected to the Internet. -
Page 32: Ddns
Enable or disable the usage of the DDNS service on the Wi-Fi NVR. DDNS PROVIDER Set to the NightowlNVR server when using the Night Owl free domain name server. (Default and only option). Set to the URL name you created when registering your DDNS. -
Page 33: Time Setup
Time Setup This menu will allow you to change the date and time format for your system, sync the time to your network and configure daylight savings time. Function Description DATE FORMAT Choose the display format for the date. You can select Month/Day/Year, Year/ Month/Day or Day/Month/Year. -
Page 34: Camera Menu
REFRESH Refreshes the information in the table. MAIN STREAM Shows main stream resolution in the table. SUB STREAM Shows sub stream resolution in the table. WNIP2 Series User’s Manual... -
Page 35: Add Camera
Add Camera From the Add Camera menu, you can add a new or replacement Wi-Fi IP camera or device to your Wi-Fi NVR. For the precise steps on pairing a new camera, see Step 6. Pair a Replacement / Add-On Camera. For a brief description of the options within this menu, see below. -
Page 36: Channel Osd
Shows the current name and allows you to edit the name of the selected camera. IMAGE SETTINGS Allows you to modify video image settings for the selected camera. CONNECT QUALITY Select to Enable or Disable the signal quality identifier. WNIP2 Series User’s Manual... -
Page 37: Video Quality
Image Settings Function Description BRIGHTNESS Changes how light the image appears. This feature does not extend or enhance night vision mode. SATURATION Alters how much color is displayed in the image. The higher the saturation, the more bright and vivid colors will appear. CONTRAST Increases the difference between the blackest black and the whitest white in the image. -
Page 38: Ipc Upgrade
NOTE: It is strongly recommended that you connect your Wi-Fi NVR to the Internet so you can receive new firmware as it becomes available. This will ensure your system and cameras continue to run smoothly and benefit from new features. WNIP2 Series User’s Manual... -
Page 39: Record Menu
Record Menu The Record menu will allow access to the Record Settings and Export Recordings submenus. Event Settings This menu displays the record settings for your cameras. It will show what type of events your camera is set to record, how sensitive each camera is to motion and the pre-recording times. -
Page 40: Record
Search and playback all recorded video from this menu. Choose your desired date and times from the options below, then click Play to view recorded video. Right-click to exit back to the menu screen. NOTE: See Backing Up / Exporting Videos section above for information on formatting your USB Device. WNIP2 Series User’s Manual... - Page 41 Function Description CAMERA Select which camera(s) to search for recordings. RECORD MODE Select a recording type to search for. Choose Doorbell ring, Human , Face, Motion or Continuous. SEARCH TIME Set a date and time range to search for recordings. TABLE Shows all the recordings found with current search parameters.
-
Page 42: Hard Drive Menu
OVERWRITE Old footage is automatically recorded over when the HDD becomes full. Overwrite is selected by default. FORMAT Reformats the HDD, erasing all stored recordings. If the HDD is malfunctioning, a reformat is recommended before replacement. WNIP2 Series User’s Manual... -
Page 43: System Menu
UID (Unique Identifier) and QR Code for remote connectivity. If you have not already done so, you can also log in to your Night Owl Protect account for easy remote viewing and added features and benefits. -
Page 44: Wi-Fi Setup
Lists all of the MAC addresses for connected cameras and their signal strength. Wi-Fi CHANNEL Selector for Wi-Fi channel, in a 2.4 GHz bands, Wi-Fi can transmit between 1-11 channels. AUTO ADAPT CHANNEL Manually change the Wi-Fi channel. UPDATE Refreshes the Cameras listed in the Connection Information. WNIP2 Series User’s Manual... -
Page 45: Device Info
This menu lets you see your system’s model number, software and hardware versions, UID (Unique Identifier) and QR Code for remote connectivity. If you have not already done so, you can also log in to your Night Owl Protect account for easy remote viewing and added features and benefits. -
Page 46: Log
Performs a search of the logs. All items found will appear in the table. TABLE Lists all the events found under your search parameter. Camera Speed Displays the amount of bandwidth used by each camera in real-time in Kb/s and MB/H. WNIP2 Series User’s Manual... -
Page 47: Maintenance Menu
Maintenance Menu The Maintenance menu will allow access to the Sys Maintenance, Firmware Update and Factory Default submenus. From these submenus, you can choose how often the Wi-Fi NVR will reboot (for system health), perform a firmware check and update and restore your system to the default settings. -
Page 48: Firmware Update
If you want to return the system to the factory default settings, this is where you can do that. Restore All: Restore all system settings to the factory default. When you select this, your system will confirm with you then perform a reboot. Once the reboot initializes this cannot be undone. WNIP2 Series User’s Manual... -
Page 49: Troubleshooting
Troubleshooting If a problem occurs, you may be able to easily correct it yourself. The following table describes some common issues and their most likely solutions. Please refer to the table before calling technical support. Problem Possible Causes Solutions 1. Confirm that all cables are connected correctly. - Page 50 Volume is enabled. sound. A “whirring” noise is coming The noise means the exhaust fan Fan is active. from the system. is working normal. The system beeps at startup. The beep at startup is normal. WNIP2 Series User’s Manual...
-
Page 51: Appendix
Appendix Appendix Device Status Icon Definitions The icons below keep you up to date on the Wi-Fi NVR and its Channel’s statuses. Key Lock Key unlock USB flash drive/device No USB device connected connected Timer record on Timer record off Overwrite on Overwrite off Sequence mode on... -
Page 52: Glossary
Be sure to write down all the important information below and place it in a secure location. General Wi-Fi NVR Information Username: Password: Model Number: UID: NOTE: The UID is located on the support sticker on the top of your device. WNIP2 Series User’s Manual... -
Page 53: Warranty
Night Owl directly or an Authorized Reseller and iii) return the Product to Night Owl. In its sole discretion, Night Owl will either repair or replace the Product at no additional cost to the Purchaser. - Page 54 Product or to its use for any harm, whether physical or mental related thereto. Any and all claims or statements, whether written or verbal, by salespeople, retailers, dealers or distributors to the contrary are not authorized by Night Owl and do not affect this provision of this warranty.
- Page 55 NEED HELP? Why Call? Our Support Site Has For system manuals, troubleshooting guides, FAQs, video tutorials Please visit Support.NightOwlSP.com Enter the Series listed on the Product Support Sticker into the Search bar. Access the support material needed. www.NightOwlSP.com iPhone, iPad, Mac and Mac OS X are registered trademarks of Apple Inc. Rev 210119 Windows, Windows XP, Windows Vista, Windows 7, Windows 8 and Windows 10 are registered trademarks of Microsoft Corporation in the...
Need help?
Do you have a question about the WNIP2 Series and is the answer not in the manual?
Questions and answers
I need help with getting the phone on the App
To connect your Night Owl WNIP2 Series camera to the app:
1. Open the Night Owl Protect app.
2. Tap "Add New" and select "Standalone Camera."
3. Tap "OK" to allow the app to scan the camera’s QR code.
4. Tap "Use Your Network to Discover Your Device," then tap "OK."
5. Tap "Use Your Network to Discover Your Device" again.
6. Tap on the detected device and confirm by tapping "Yes."
7. Go to your device settings, tap "Wi-Fi," and connect to the network starting with "noip."
8. Once connected (checkmark appears), return to the app.
9. The app will search for the camera automatically.
10. Select your Wi-Fi network, enter the password, and tap "Continue."
11. When the screen says "Device has been added" and the camera says "Woohoo," setup is complete.
12. Name the camera and tap "Live View" to see the live stream.
This answer is automatically generated
I have model WNIP-2LTA-BS-U stand alone camera. I previously had this device in use for my garage. we had to change routers and now have different password. I **** not able to get the camera connected
To connect the Night Owl WNIP-2LTA-BS-U camera to a new router with a different password, you need to bypass its default pairing with the NightOwl NVR. Follow these steps:
1. Configure a wireless access point (AP) with the same SSID and password (PSK) that the camera was originally paired with.
2. Set up a new VLAN on your router or firewall with the same IP range that was used by the original NVR.
3. Assign this VLAN to the AP to simulate the original NVR environment.
4. Add routing rules in your firewall so that your LAN can access the camera network.
5. The cameras will connect to the new AP using the same credentials and be accessible as standalone ONVIF-compatible cameras.
This setup removes the cameras from NightOwl's control and allows use with third-party NVRs like BlueIris or VLC.
This answer is automatically generated