Table of Contents
Advertisement
Advertisement
Table of Contents

Related Manuals for 3DGence INDUSTRY F340


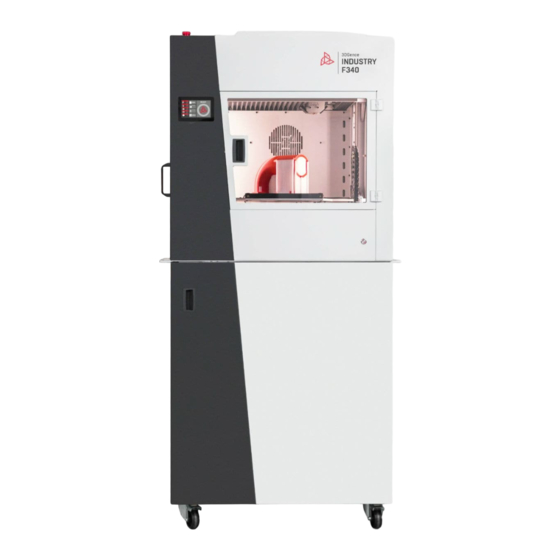
Summary of Contents for 3DGence INDUSTRY F340
- Page 1 3DGENCE INDUSTRY F340 MAINTENANCE ACTIVITIES...
-
Page 2: Table Of Contents
10. REPLACE THE AIR FILTER FROM THE TOP SIDE OF THE PRINTER..............10 11. LUBRICATION OF GUIDES AND BALL SCREWS ....................15 12. ADJUSTING TIMING BELTS ..........................19 13. BOWDEN CABLE REPLACEMENT ........................24 14. HEATBED REPLACEMENT ..........................24 page 2of 24 3DGence INDUSTRY F340 - maintenance activities | version 04.2019... -
Page 3: Hotends Cleaning
6. Clean the heatbed with a damp cloth and then wipe dry with a paper towel. 7. Degrease the heatbed with a cloth soaked in ethyl alcohol or isopropyl alcohol and wait for the alcohol to evaporate. page 3of 24 3DGence INDUSTRY F340 - maintenance activities | version 04.2019... -
Page 4: Hetabed Calibration
- in the event of a collision between the hotend and the model. The 3DGence INDUSTRY F340 printer features an advanced, ultra-sensitive automatic heatbed calibration system for easy operation. The following describes the procedure to follow to calibrate the printer heatbed correctly. The printer is calibrated prior to shipment, but during transport it may have been misaligned. -
Page 5: Dimensional Calibration Of A Printed Model In X And Y Axes
The 3DGence INDUSTRY F340 printer is one of the few to feature a unique system of precise dimensional adjustment of a printed model. When printing with the use of materials with different thermal shrinkages, it may be necessary to make dimensional adjustments. - Page 6 With this procedure, the next item printed for which calibration has been carried out will be printed with the material shrinkage compensation in the X and Y axes. page 6of 24 3DGence INDUSTRY F340 - maintenance activities | version 04.2019...
-
Page 7: Calibration Of Offset Between Hotends In The Module In The X, Y, Z Axes
The 3DGence INDUSTRY F340 printer enables automatic offset measurement in the Z axis. The measurement is carried out with the use of a strain gauge and consists in determining the difference between the height of the T0 and T1 hotends. -
Page 8: Regeneration Of Hotends In The Printing Module
The service life of the printing module hotend is at least 1000 hours of module service. Print module lifetime is at least 4000 hours of module service or 1 year. If there's a problem with the print hotends or the print module, contact the 3DGence technical support via the request form at www.3dgence.com/support... -
Page 9: Cleaning The Extruder
- every two years or after 8,000 hours of printer service, - in the case of damage. When replacement is necessary due to damage or desirable for other reasons, please contact the 3DGence Technical Support to purchase new curtains. Curtain replacement procedure: 1. -
Page 10: Replace The Air Filter On The Rear Side Of The Printer
The air filter on the back of the printer protects the user from harmful fumes and odours. If you wish to replace it, please contact the 3DGence Technical Support to purchase a new filter. Procedure for replacing the air filter on the rear side of the printer: 1. - Page 11 Fig. 11 Unscrewing 6 DIN7984-M4x6 screws from the top cover of the printer 5. Turn the top cover upside down as shown in the picture (Fig. 12). Fig. 12 Reversing the top cover page 11of 24 3DGence INDUSTRY F340 - maintenance activities | version 04.2019...
- Page 12 7. Put the sheet metal panel aside and remove the used filter (Fig. 14). Fig. 14 Removing the used filter 8. Replace the old filter with a new one (Fig. 15). Fig. 15 Inserting a new filter page 12of 24 3DGence INDUSTRY F340 - maintenance activities | version 04.2019...
- Page 13 11. Use a sharp tool or a screwdriver to make a hole in the filter to screw the panel to the top cover (Fig. 18). Fig. 18 Making holes in the filter page 13of 24 3DGence INDUSTRY F340 - maintenance activities | version 04.2019...
- Page 14 14. Tighten the 4 DIN7991-M5x12 screws fixing the top cover to the printer, use threadlocker (Fig. 21). Fig. 21 Tightening the DIN7991-M5x12 screws fixing the top cover to the printer page 14of 24 3DGence INDUSTRY F340 - maintenance activities | version 04.2019...
-
Page 15: Lubrication Of Guides And Ball Screws
➢ SKF (Fig. 24): - SKF ball screws have no grease nipples, - Linear carriages are black. Linear carriage Fig. 24 Ball screws and guide rails manufactured by SKF page 15of 24 3DGence INDUSTRY F340 - maintenance activities | version 04.2019... - Page 16 Fig. 27 Lubricating the linear guides on the left side - Repeat the operation for the right-hand carriage of the Z axis (Fig. 28). Grease nipple Fig. 28 Lubricating the linear guides on the left side page 16of 24 3DGence INDUSTRY F340 - maintenance activities | version 04.2019...
- Page 17 Push grease into the grease nipple of the front linear carriage of the X axis (Fig. 31) by pressing the lubricator nozzle firmly against the grease nipple and pressing smoothly the lubricator lever once. Grease nipple Fig. 31 Lubricating the front linear carriage of the X axis page 17of 24 3DGence INDUSTRY F340 - maintenance activities | version 04.2019...
- Page 18 Push grease out by pressing the lubricator nozzle firmly against the grease nipple of the Y axis carriage and pressing smoothly the lubricator lever once. • Move the module back and forth twice. • Remove excess grease from the linear carriages using a paper towel. page 18of 24 3DGence INDUSTRY F340 - maintenance activities | version 04.2019...
-
Page 19: Adjusting Timing Belts
Fig. 34 Tension2Go application icon 2. Run the “Tension2Go” app on your phone. 3. Select the “Please select belt” tab (Fig. 35). Fig. 35 “Please select belt” tab in Tension2Go app page 19of 24 3DGence INDUSTRY F340 - maintenance activities | version 04.2019... - Page 20 Fig. 36 Setting the parameters in the “Please select belt” tab of the Tension2Go app 5. Select the other tab and set the value to “Standard” (Fig. 37). Fig. 37 Tension2Go “Sensitivitat” tab page 20of 24 3DGence INDUSTRY F340 - maintenance activities | version 04.2019...
- Page 21 Fig. 38 Setting up the carriage Sheet metal edge set in the middle of the fifth black mounting hole of the linear guide Fig. 39 Setting up the X axis carriage page 21of 24 3DGence INDUSTRY F340 - maintenance activities | version 04.2019...
- Page 22 Make the timing belt vibrate by vigorously jerking it like a guitar string until the measuring fields in the app light up green. Fig. 42 Measuring the timing belt tension on the X1 axis page 22of 24 3DGence INDUSTRY F340 - maintenance activities | version 04.2019...
- Page 23 Make the timing belt vibrate by vigorously jerking it like a guitar string until the measuring fields in the app light up green. • Check the tension value in the app. page 23of 24 3DGence INDUSTRY F340 - maintenance activities | version 04.2019...
-
Page 24: Bowden Cable Replacement
14. HEATBED REPLACEMENT Recommended frequency: in the case of damage. In case of damage, please contact 3DGence Technical Support to purchase a new heatbed and obtain assistance. 3DGence Sp. z o.o. Branch of Przyszowice, ul. Graniczna 66, 44-178 Przyszowice +48 32 438 98 64 support@3dgence.com...
Need help?
Do you have a question about the INDUSTRY F340 and is the answer not in the manual?
Questions and answers