
Related Manuals for Humanscale efloat go


Summary of Contents for Humanscale efloat go
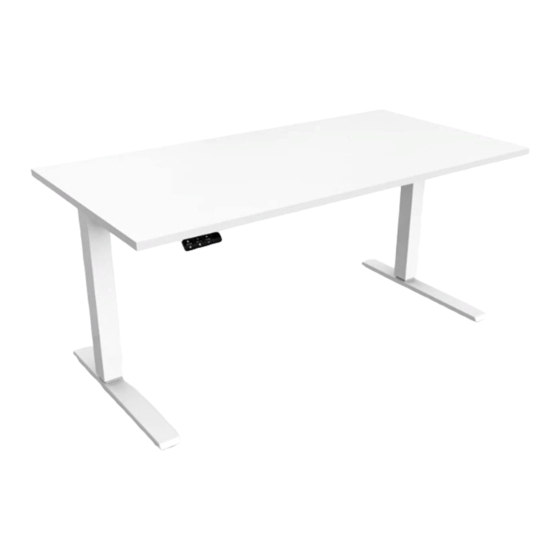
- Page 1 Assembly Instructions (Two-Column Kit, Beamless) North America: +1 800 400 0625...
-
Page 2: Important Safety Instructions
Important Safety Instructions WHEN USING AN ELECTRICAL FURNISHING, BASIC PRECAUTIONS SHOULD ALWAYS BE FOLLOWED. READ ALL INSTRUCTIONS BEFORE USING (THIS FURNISHING). HUMANSCALE CANNOT BE HELD LIABLE FOR INJURY OR DAMAGE CAUSED BY NON-COMPLIANCE WITH THESE INSTRUCTIONS. SAVE THESE INSTRUCTIONS AND PASS THEM ON TO ANY FUTURE USER. - Page 3 • The 24” feet should be used for worksurfaces 23”-24” deep and the 30” feet should be used for the worksurfaces 30” deep and less. • For loading, always put heavier items in the center and distribute the load. • Do not sit or stand on table. USE CARE WHEN OPERATING DESK: •...
-
Page 4: Before Getting Started
③ ① ② (2) Legs (2) Brackets (2) Feet ④ ⑤ ⑥ (10) Adhesive Pads Hand Switch Control Box ⑧ ⑨ ⑦ Power Supply Connecting Cable (10) Cable Ties ⑩ ⑪ Humanscale Worksurface 4mm Allen Key (CONFIGURATION SPECIFIC, PACKAGED SEPARATELY) - Page 5 Hardware Included ③ ① ② (8) M6 x 14 Machine Screws (8) M6 x 10 Machine Screws (24) ST5 x 20 Wood Screws ④ (2) ST4 X 16 Wood Screws Hardware to be Purchased ① (12) N10 X 1” Wood Screws For UL certification for Commercial Applications, customer must purchase the above screw if using a worksurface that is...
- Page 6 Align the legs to the following pilot holes highlighted below. Note: Only the four outer corner pilot holes are included for alignment. Worksurfaces come with different pilot hole options depending on the size ordered. Legend NeatTech (30” Deep Worksurfaces only) eFloat Go Base (Beamless) eFloat Go Hand Switch Not applicable with this table Keyboard Tray...
- Page 7 36-42” Wide Worksurfaces FRONT 48” Wide Worksurface FRONT...
- Page 8 B - Your Own Worksurface If using your own top, locate the table frame using the measurements listed below. To create pilot holes, mark hole locations carefully. Using a 3mm drill bit, drill a hole 10mm deep. Be careful not to drill through your worksurface.
- Page 9 Secure the Hand Switch to the worksurface in your desired location using the (2) ST4 X 16, screw along the front edge of worksurface. If using a Humanscale Universal Worksurface, Pilot holes are positioned on the left/right hand side of the worksurface in our recommended location(s).
- Page 10 Plug the Hand Switch into the Control Box. Connect the two legs to the Control Box, using the connecting cable for the leg furthest away from the Control Box. Plug the Power Cord into the Control Box. Use the provided Cable Ties to secure cables to underside of worksurface (not pictured), with either double sided tape or the (10) ST5 X 20 Wood Screws.
-
Page 11: Hand Switch
Hand Switch 29.8 LED DISPLAY UP/DOWN PRESETS MEMORY Initial Setup / Reset IMPORTANT: You must RESET the desk before use. 1. Press the DOWN button, moving the desk to its lowest position, then release. 2. Hold the DOWN button until again, the LED display reads “ “... - Page 12 One-Touch / Constant-Touch Follow the steps below to change between One-Touch and Constant - Touch. One-Touch requires only a single touch of the “1, 2 or 3” button to move the worksurface to a preset memory location. One- Touch is the default setting. Constant-Touch requires a continuous touch of the “1, 2, or 3, ” but ton to move the worksurface to a preset memory location.
- Page 13 To Set the LOWER-Limit Position: 1. Use the UP /DOWN buttons to move the base to the desired minimum-height position. 2. Press the “M” button. 3. Press the DOWN button and release. The LED display will flash “S -” . 4.
-
Page 14: Troubleshooting
Troubleshooting Error Solution Ensure all cords are fully secured and the outlet your table is plugged into has Table does not move power. Table moves at a Reset table. slow rate Hand Switch Ensure all cables are fully secured. Follow the steps to reset your table. If you are Error Codes: still encountering an error please call customer care. -
Page 16: Instructions Importantes De Sécurité
Instructions importantes de sécurité LORS DE L'UTILISATION D'UN MEUBLE AVEC COMPOSANT ÉLECTRIQUE, DES PRÉCAUTIONS DE BASE DOIVENT TOUJOURS ÊTRE RESPECTÉES. LIRE TOUTES LES INSTRUCTIONS AVANT D’UTILISER (CE MEUBLE). HUMMANSCALE NE PEUT PAS ÊTRE TENU RESPONSABLE DES BLESSURES OU DOMMAGES CAUSÉS PAR LE NON RESPECT DE CES INSTRUCTIONS. CONSERVER CES INSTRUCTIONS ET LES TRANSFÉRER AUX FUTURS UTILISATEURS. - Page 17 • Stratifié d'une épaisseur de 28 mm (1,1 po) pour des largeurs excédant 117 à 147 cm (46 à 58 po) (usage résidentiel et commercial) • Ne pas dépasser une charge maximale de 113 kg (250 lb), incluant le poids de la surface de travail. • Les pieds de 24 po doivent être utilisés pour les surfaces de travail de 23 à 24 po de profondeur tandis que les pieds de 30 po doivent être utilisés pour les surfaces de travail de 30 po de profondeur et moins.
-
Page 18: Avant De Commencer
(2) Supports (2) Pieds ④ ⑤ ⑥ (10) Coussinets adhésifs Commutateur à main Boîtier de commande ⑧ ⑨ ⑦ Alimentation électrique Câble de connexion (10) Serre-câbles ⑩ ⑪ Surface de travail Humanscale Clé hexagonale de 4 mm (CONFIGURATION SPÉCIFIQUE, CONDITIONNEMENT SÉPARÉ) - Page 19 Matériel inclus ① ② ③ (8) 14 vis à métaux M6 (8) 10 vis à métaux M6 (24) 20 vis à bois ST5 ④ (2) 16 vis à bois ST4 Matériel à acheter ① (12) Vis à bois N10 x 1 po Pour la certification UL dans le cas d'applications commerciales, le client doit acheter la vis ci-dessus s'il utilise une surface de travail d'une épaisseur égale ou...
-
Page 20: Instructions De Montage
Les surfaces de travail sont proposées avec différentes options d’avant-trous en fonction de la taille commandée. Légende NeatTech (uniquement pour les surfaces de Base eFloat Go (sans barre transversale) travail de 76 cm [30 po] de profondeur) Commutateur à main eFloat Go Non applicable à cette table... - Page 21 Surfaces de travail de 91 à 107 cm (36 à 42 po) de largeur DE FACE Surface de travail de 122 cm (48 po) de largeur DE FACE...
- Page 22 B - Votre propre surface de travail. En cas d’utilisation de votre propre plateau, positionner le cadre de la table en utilisant les mesures indiquées ci-dessous. Pour créer des avant-trous, marquer soigneusement l'emplacement des trous. À l'aide d'un foret de 3 mm, percer un trou de 10 mm de profondeur. Faire attention de ne pas percer à travers votre surface de travail.
- Page 23 Fixer le commutateur à main à la surface de travail à l’endroit désiré à l’aide des 16 vis à bois ST4 (2), le long du bord avant de la surface de travail. En cas d’utilisation d’une surface de travail universelle Humanscale, les avant-trous sont positionnés sur les côtés gauche et droit de la surface de travail, aux endroits recommandés.
- Page 24 Brancher le commutateur à main dans le boîtier de commande. Relier les deux jambes au boîtier de commande, en utilisant le câble de connexion de la jambe la plus éloignée du boîtier de commande. Brancher le cordon d’alimentation dans le boîtier de commande. Utiliser les serre- câbles fournis pour fixer les câbles au dessous de la surface de travail (non illustré), avec du ruban adhésif double face ou les (10) 20 vis à...
- Page 25 Commutateur à main 29.8 ÉCRAN À DEL HAUT/BAS PRÉRÉGLAGES MÉMOIRE Configuration/Réinitialisation initiale IMPORTANT : le bureau doit être RÉINITIALISÉ avant d'être utilisé. 1. Appuyer sur le bouton BAS, en déplaçant le bureau à sa position la plus basse, puis relâcher. 2. Maintenir le bouton BAS enfoncé jusqu’à ce que l’écran à DEL affiche à nouveau « ».
- Page 26 One-Touch / Constant-Touch Suivre les étapes ci-dessous pour passer de la touche unique à la touche constante. La fonction One- Touch ne nécessite qu’une seule pression sur le bouton « 1, 2 ou 3 » pour déplacer la surface de travail vers un emplacement de mémoire prédéfini. One-Touch est le paramètre par défaut. La fonction Constant-Touch nécessite une pression continue sur le bouton « 1, 2 ou 3 »...
- Page 27 Pour définir la position de la limite supérieure : 1. Utiliser les boutons HAUT/BAS pour déplacer la base jusqu’à la position de hauteur maximale souhaitée. 2. Appuyer sur le bouton « M ». 3. Appuyer sur le bouton HAUT. L ’écran à DEL clignotera pour afficher « S - ». 4.
-
Page 28: Dépannage
Dépannage Erreur Solution S’assurer que tous les cordons sont complètement fixés et que la prise de votre La table ne se déplace pas table est branchée sous secteur. La table se déplace Réinitialiser la table. lentement Codes d’erreur S’assurer que tous les câbles sont correctement raccordés. Suivre les étapes du commutateur de réinitialisation de votre table. - Page 32 • Connect the equipment into an outlet on a circuit different from that to which the receiver is connected. • Consult the dealer or an experienced radio/TV technician for help. Changes or modifications made to this device that are not expressly approved by Humanscale may void the user’s authority to operate the equipment.
Need help?
Do you have a question about the efloat go and is the answer not in the manual?
Questions and answers