Table of Contents
Advertisement
Available languages
Available languages
Quick Links
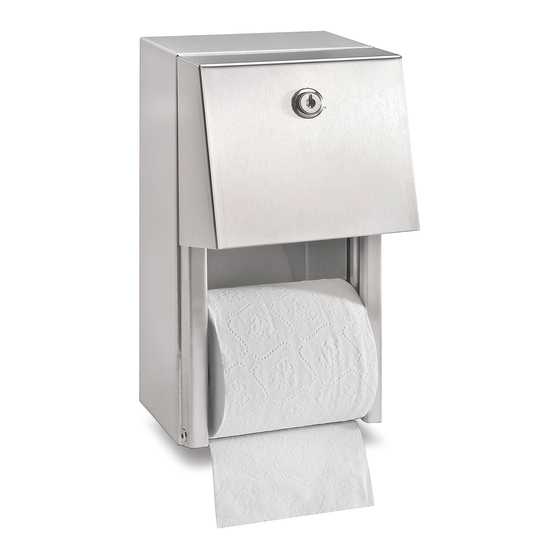
H-2546
STAINLESS STEEL
DOUBLE ROLL TOILET
TISSUE DISPENSER
TOOLS NEEDED
Drill
Drill Bit
NOTE: Recommended mounting height is 19"
from the floor to bottom of dispenser.
NOTE: Ensure that proper mounting hardware is
used for appropriate wall composition.
1.
Insert key into lock opening on front of dispenser
and turn to open cover. (See Figure 1)
Figure 1
PAGE 1 OF 9
1-800-295-5510
uline.com
Phillips Screwdriver
Level
Dispenser x 1
NOTE: Mounting hardware is not included with this item.
MOUNTING INSTRUCTIONS
Tape Measure
PARTS
Key x 1
2. Open dispenser cover and hold dispenser to ideal
mounting place on wall. (See Figure 2)
Figure 2
Para Español, vea páginas 4-6.
Pour le français, consulter les pages 7-9.
0521 IH-2546
Advertisement
Table of Contents

Summary of Contents for U-Line H-2546
- Page 1 Para Español, vea páginas 4-6. Pour le français, consulter les pages 7-9. H-2546 1-800-295-5510 uline.com STAINLESS STEEL DOUBLE ROLL TOILET TISSUE DISPENSER TOOLS NEEDED Drill Drill Bit Phillips Screwdriver Level Tape Measure PARTS Dispenser x 1 Key x 1 NOTE: Mounting hardware is not included with this item.
-
Page 2: Loading Instructions
MOUNTING INSTRUCTIONS CONTINUED 3. Mark the four holes on the wall where screws will be 4. Drill into wall at four marked locations with inserted. (See Figure 3) appropriate size drill bit. (See Figure 4) Insert wall anchors if necessary. Figure 3 Figure 4 5. - Page 3 LOADING INSTRUCTIONS CONTINUED 3. Place a roll onto each spindle and insert spindles 5. Once the first roll is nearly out, the second roll will back into dispenser by sliding in from the top. slide into view. If the second roll does not slide (See Figure 7) automatically, pull the roll down into place.
-
Page 4: Herramientas Necesarias
H-2546 800-295-5510 uline.mx DESPACHADOR DE ACERO INOXIDABLE PARA DOS ROLLOS DE PAPEL HIGIÉNICO HERRAMIENTAS NECESARIAS Taladro Broca Desarmador Nivelador Cinta de de Cruz Medir PARTES 1 Despachador 1 Llave NOTA: La tornillería de instalación no se incluye con este artículo. -
Page 5: Instrucciones De Carga
CONTINUACIÓN DE INSTRUCCIONES DE INSTALACIÓN 3. Marque los cuatro orificios en la pared donde se 4. Con la broca del tamaño adecuado perfore en la insertarán los tornillos. (Vea Diagrama 3) pared las cuatro ubicaciones marcadas. (Vea Diagrama 4) Inserte los taquetes si es necesario. Diagrama 3 Diagrama 4 5. - Page 6 CONTINUACIÓN DE INSTRUCCIONES DE CARGA 3. Coloque un rollo dentro de cada rodillo e inserte de 5. Cuando el rollo esté casi por terminarse, el segundo nuevo los rodillos en el despachador deslizándolos aparecerá a la vista. Si el segundo rollo no desliza desde arriba.
-
Page 7: Outils Requis
H-2546 1-800-295-5510 uline.ca DISTRIBUTEUR DE PAPIER HYGIÉNIQUE EN ACIER INOXYDABLE – ROULEAU DOUBLE OUTILS REQUIS Perceuse Mèche de Tournevis Niveau à Ruban à perceuse cruciforme bulles mesurer PIÈCES Distributeur x 1 Clé x 1 REMARQUE : Le matériel de montage n’est pas fourni avec cet article. - Page 8 INSTRUCTIONS DE MONTAGE SUITE 3. Marquez les quatre trous sur le mur où les vis seront 4. Percez le mur aux quatre endroits marqués à l'aide insérées. (Voir Figure 3) d'une mèche de taille appropriée. (Voir Figure 4) Insérez les ancrages muraux si nécessaire. Figure 3 Figure 4 5.
- Page 9 INSTRUCTIONS DE MONTAGE SUITE 3. Placez un rouleau sur chacune des tiges et remettez 5. Une fois que le premier rouleau sera presque celles-ci dans le distributeur en les insérant par le terminé, le deuxième rouleau se déplacera et haut. (Voir Figure 7) sera visible.


Need help?
Do you have a question about the H-2546 and is the answer not in the manual?
Questions and answers