Table of Contents
Advertisement
Available languages
Available languages
Quick Links
Para Español, vea páginas 5-8.
Pour le français, consulter les pages 9-12.
H-7858
1-800-295-5510
uline.com
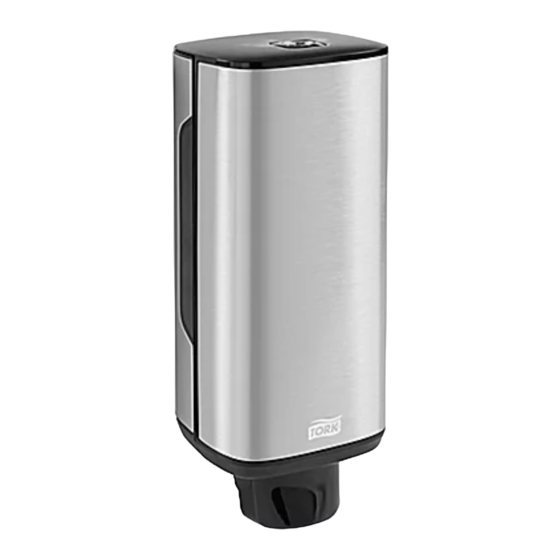
TORK
STAINLESS STEEL
®
PUSH SOAP DISPENSER
TOOLS NEEDED
Drill
1/4" Drill Bit
Phillips Screwdriver
Tape Measure
Level
PARTS
Dispenser x 1
Key x 1
Wall Anchor x 4
Screw x 4
INSTALLATION
NOTE: Install dispenser at least 6" above
2. Drill four holes using 1/4" drill bit and remove
counter or sink.
template from wall. (See Figure 2)
1. Tape included template to wall to use as a guide.
Ensure template is level. (See Figure 1)
Figure 2
Figure 1
Template
6"
PAGE 1 OF 12
0422 IH-7858
Advertisement
Table of Contents

Related Manuals for U-Line TORK H-7858


Summary of Contents for U-Line TORK H-7858
- Page 1 Para Español, vea páginas 5-8. Pour le français, consulter les pages 9-12. H-7858 1-800-295-5510 uline.com TORK STAINLESS STEEL ® PUSH SOAP DISPENSER TOOLS NEEDED Drill 1/4" Drill Bit Phillips Screwdriver Tape Measure Level PARTS Dispenser x 1 Key x 1 Wall Anchor x 4 Screw x 4 INSTALLATION...
- Page 2 INSTALLATION CONTINUED 3. Insert anchors and screws. (See Figure 3) 5. Lower dispenser onto screws. (See Figure 5) NOTE: Do not tighten screws completely until Figure 5 step 6. Figure 3 4. Open dispenser and hold up to wall. Align holes over screws.
- Page 3 INSTRUCTIONS CONTINUED 2. Flip refill upside down and load into dispenser with 4. Close cover. (See Figure 10) nozzle down. (See Figure 8) Figure 10 Figure 8 5. Push lever to dispense soap. (See Figure 11) Figure 11 3. Push refill down until it clicks into place. (See Figure 9) Figure 9 PAGE 3 OF 12...
-
Page 4: Maintenance
OPENING OPENING USING KEYED OPTION OPENING USING NON-KEYED PUSH BUTTON OPTION Insert key at position A. (See Figure 12) Insert key at position A and rotate counterclockwise to position B. (See Figure 14) Figure 12 Figure 14 2. Turn and hold key clockwise to open dispenser. (See Figure 13) 2. -
Page 5: Herramientas Necesarias
H-7858 800-295-5510 uline.mx TORK DESPACHADOR MANUAL ® PARA JABÓN EN ESPUMA DE ACERO INOXIDABLE HERRAMIENTAS NECESARIAS Taladro Broca de 1/4" Desarmador de Cruz Cinta de Medir Nivel PARTES 1 Despachador 1 Llave 4 Taquetes 4 Tornillos INSTALACIÓN NOTA: Instale el despachador por lo menos a 2. - Page 6 CONTINUACIÓN DE INSTALACIÓN 3. Inserte los taquetes y tornillos. (Vea Diagrama 3) 5. Baje el despachador por encima de los tornillos. (Vea Diagrama 5) NOTA: No apriete los tornillos completamente hasta el paso 6. Diagrama 5 Diagrama 3 4. Abra el despachador y sosténgalo contra la pared. Alinee los orificios sobre los tornillos.
- Page 7 CONTINUACIÓN DE INSTRUCCIONES 2. Voltee el repuesto y cárguelo dentro del 4. Cierre la cubierta. (Vea Diagrama 10) despachador con la boquilla hacia abajo. (Vea Diagrama 8) Diagrama 10 Diagrama 8 5. Empuje la palanca para despachar el jabón. (Vea Diagrama 11) Diagrama 11 3.
-
Page 8: Mantenimiento
ABRIR ABRIR ABRIR USANDO LA OPCIÓN DE CHAPA ABRIR USANDO LA OPCIÓN DE BOTÓN SIN LLAVE Inserte la llave en la posición A. (Vea Diagrama 12) Inserte la llave en la posición A y gire en el sentido contrario a las manecillas del reloj hacia la posición Diagrama 12 B. -
Page 9: Outils Requis
H-7858 1-800-295-5510 uline.ca TORK – DISTRIBUTEUR DE SAVON EN ACIER INOXYDABLE AVEC BOUTON POUSSOIR OUTILS REQUIS Perceuse Mèche de perceuse Tournevis Ruban à mesurer Niveau à bulles de 1/4 po cruciforme PIÈCES Distributeur x 1 Clé x 1 Ancrage mural x 4 Vis x 4 INSTALLATION REMARQUE : Installez le distributeur à... - Page 10 INSTALLATION SUITE 3. Insérez les ancrages et les vis. (Voir Figure 3) 5. Abaissez le distributeur jusqu'à ce que les têtes de vis s'insèrent dans le trou des plaques de montage. REMARQUE : Ne serrez pas à fond les vis (Voir Figure 5) avant l'Étape 6 de la marche à...
- Page 11 INSTRUCTIONS SUITE 2. Positionnez la recharge à l'envers et logez-la dans 4. Fermez le couvercle. (Voir Figure 10) le distributeur avec la buse distributrice orientée vers le bas. (Voir Figure 8) Figure 10 Figure 8 5. Appuyez sur le levier pour distribuer le savon. (Voir Figure 11) Figure 11 3.
- Page 12 OUVERTURE DU DISTRIBUTEUR OUVRIR À L'AIDE D'UNE CLÉ OUVRIR À L'AIDE D'UN BOUTON-POUSSOIR SANS CLÉ Insérez la clé en position A. (Voir Figure 12) Insérez la clé en position A et la faire tourner dans le sens antihoraire vers la position B. (Voir Figure 14) Figure 12 Figure 14 2.
Need help?
Do you have a question about the TORK H-7858 and is the answer not in the manual?
Questions and answers