Table of Contents
Advertisement
Quick Links
Advertisement
Table of Contents

Subscribe to Our Youtube Channel
Related Manuals for Insportline Ocean


Summary of Contents for Insportline Ocean
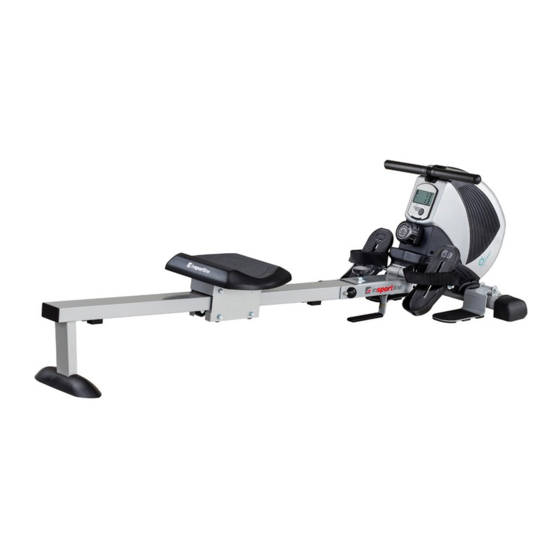
- Page 1 USER MANUAL – EN IN 1979 Rowing Machine inSPORTline Ocean...
-
Page 2: Table Of Contents
CONTENTS SAFETY INSTRUCTIONS ........................3 TECHNICAL DESCRIPTION ........................4 ASSEMBLY MATERIAL AND TOOLS ....................4 ASSEMBLY ............................. 5 PARTS ..............................6 CONSOLE ............................... 8 WARM UP ............................... 9 HOW TO EXERCISE ..........................12 MAINTENANCE ............................ 12 STORAGE ............................. 12 IMPORTANT NOTICE ........................... 13 ENVIRONMENT PROTECTION ...................... -
Page 3: Safety Instructions
SAFETY INSTRUCTIONS • Read this manual carefully before first using and retain it for future reference. • Observe all warnings and precautions including assembly steps. Use it only for intended purpose. • Assemble and use it only according to this manual to assure your safety. Inform all other users about safe usage. -
Page 4: Technical Description
TECHNICAL DESCRIPTION Flywheel weight 6 kg Resistance control Manual Resistance level Travel length 111 cm Braking system Magnetic Transport wheels yes, for unencrypted analog 5kHz signal recommended Polar T34 (range 4 m, without the possibility of Chest strap receiver replacing the battery) or Sigma 5kHz (range 1 meter, with the possibility of replacing the battery) Folding frame d 175 x š... -
Page 5: Assembly
46 – Spring washer M8 – 47 – Nut M8 – 2 pcs Hex key 6 mm 2 pcs 55 – Safety pin – 1 pcs Multi wrench + Phillips screwdriver Long Phillips screwdriver ASSEMBLY Before assembling the device, check the diagram below to be able to carry out the assembly correctly according to the numbering of the individual parts. -
Page 6: Parts
PARTS Name and specifications Qty. Name and specifications Qty. Rails Flat washer OD22 * ID8.5 * 2.0T Main frame Spring washer M8 Front stabilizer M8 nut Metal deck Flat washer OD20 * ID10.5 * 2.0 Spacer Screw M8 * 25 Pedal Nut M12 * 1.75 Seat... - Page 7 STEP 3 Remove 1x 1/2 * 100 bolt (42), 2x OD22 * ID13 * 2.0T flat washers (43), 1x 1/2 self-locking nut (44) and 1x 1/2 nut cap (52) from the main frame. Connect cables (58) and (59). Insert the rail (1) into the main frame (2), insert the locking pin (55) and secure the rail in the frame with 1x screw 1/2 * 100 (42), 2x flat washers OD22 * ID13 * 2.0T (43), 1x self-locking nut 1/2 (44) and cover the nut with the cap (52).
-
Page 8: Console
STEP 5 Pull the locking pins (54) out of the front stabilizer (3), insert the treads (6) into the holders and secure them with the pins (54). CONSOLE MODE button Press the button to select the display function Hold down the button for 2 seconds to reset all functions FUNCTIONS... -
Page 9: Warm Up
SCAN: When SCAN mode is selected, the console will automatically display the functions of time, number of pulls, total number of pulls, calories, number of pulls per minute. Each function is displayed for 6 seconds. TIME: displays the training time COUNT: displays the number of pulls per training TOTAL COUNT: displays the total number of pulls CALORIES: Displays the approximate number of calories burned... - Page 10 Inner thighs Sit on the floor with your toes together. The knees are pointing outwards. Pull your feet to your groin. Push your knees down. Hold for 30-40 seconds if possible. Calf and Achilles tendons Lean against the wall with one foot back and arms forward. Tighten your right foot and leave your left foot on the ground.
- Page 11 (Pic 1). 3) Push yourself backwards, straightening your back and legs at the same time (Pic 2). 4) Continue this movement until you are leaning slightly backwards, during this stage you should bring your arms out of the side. (Pic 3). Then return to stage 2 and repeat. See attached. Picture 1 Picture 2 Picture 3...
-
Page 12: How To Exercise
Picture 7 Picture 8 Picture 9 HOW TO EXERCISE Phase of right rowing to strengthen specific muscles: 1. Stroke (Lower Muscle Exercise): Bend your knees and stretch your arms. Grasp the handle and keep your back straight (Pic 01). 2. Movement (center muscles): Reflect the legs and bend the arms (Pic 02). 3. -
Page 13: Important Notice
IMPORTANT NOTICE • This rowing machine comes with standard safety regulations and is only suitable for home use. Any other use is prohibited and may be dangerous to users. We are not responsible for any injury caused by improper and forbidden use of the machine. •... - Page 14 The Seller provides the Buyer a 24 months Warranty for Goods Quality, unless otherwise specified in the Certificate of Warranty, Invoice, Bill of Delivery or other documents related to the Goods. The legal warranty period provided to the Consumer is not affected. By the Warranty for Goods Quality, the Seller guarantees that the delivered Goods shall be, for a certain period of time, suitable for regular or contracted use, and that the Goods shall maintain its regular or contracted features.
- Page 15 26847264 VAT ID: CZ26847264 Phone: +420 556 300 970 E-mail: eshop@insportline.cz reklamace@insportline.cz servis@insportline.cz Web: www.inSPORTline.cz inSPORTline s.r.o. Headquaters, warranty & service center: Električná 6471, Trenčín 911 01, SK CRN: 36311723 VAT ID: SK2020177082 Phone: +421(0)326 526 701 E-mail: objednavky@insportline.cz reklamacie@insportline.cz servis@insportline.cz...
Need help?
Do you have a question about the Ocean and is the answer not in the manual?
Questions and answers