Table of Contents
Advertisement
Quick Links
Advertisement
Table of Contents

Related Manuals for Insportline Thenar


Summary of Contents for Insportline Thenar
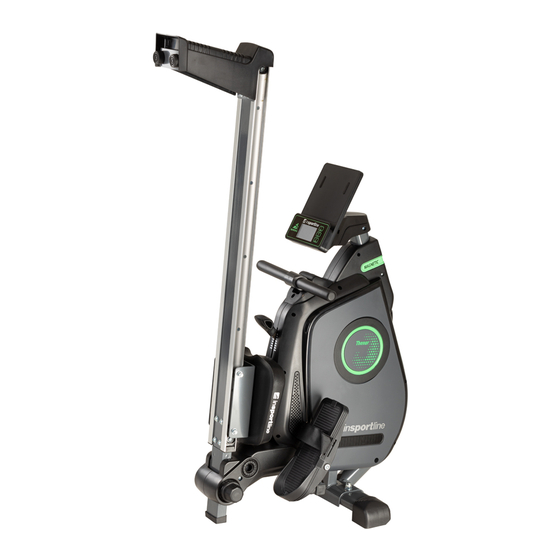
- Page 1 USER MANUAL – EN IN 20113 Rowing machine inSPORTline Thenar...
-
Page 2: Table Of Contents
CONTENTS SAFETY INSTRUCTIONS ........................3 ASSEMBLY ............................. 4 CONSOLE ............................. 11 DIAGRAM .............................. 13 PARTS LIST ............................14 HOW TO EXERCISE ..........................15 MAINTENANCE ............................ 15 STORAGE ............................. 15 IMPORTANT NOTICE ........................... 16 ENVIRONMENT PROTECTION ......................16 TERMS AND CONDITIONS OF WARRANTY, WARRANTY CLAIMS ..........16... -
Page 3: Safety Instructions
SAFETY INSTRUCTIONS • Read this manual carefully before first using and retain it for future reference. • Observe all warnings and precautions including assembly steps. Use it only for intended purpose. • Assemble and use it only according to this manual to assure your safety. Inform all other users about safe usage. -
Page 4: Assembly
ASSEMBLY No. 1 No. 3 No. 9 No. 26 No. 11 No. 14 L/R No. 69 No. 35... - Page 5 No. 28 No. 17 Name Qty. Main frame Front stabilizer Console Slide rail Seat 14L/R Pedals L/R Rear stabilizer cover Seat post Rear stabilizer Pedal support ASSEMBLY MATERIAL Name Qty. Picture Screw Flat washer Screw Screw Allen screw Rubber washer Allen screw...
- Page 6 Allen screw Flat washer Arc washer Pedal axle Flat washer Allen screw Allen key 4 mm Wrench Allen key 6 mm...
- Page 7 STEP 1 Attach the front stabilizer (3) to the main frame (1) with 2 screws (2), 2 washers (6) and 2 nuts (7). STEP 2 Connect the center console cable to sensor cable 1 (16) and sensor cable 2 (21). Attach the console bracket (29) to the main frame (1) with the screw (23) and washer (8).
- Page 8 STEP 3 Pull the safety pin out of the main frame (1). Secure the slide rail (26) with 4 screws (24) and 4 washers (25). Attach the seat (11) to the seat post (35) with 2 screws (30) and 2 washers (73) Attach the rubber washers (22) to the slide rail (26) and secure with 2 screws (23).
- Page 9 STEP 5 Attach the 2 rubber washers (22) to the back of the slide rail (26) with 2 screws (23). Attach the rear stabilizer (28) to the rear of the slide rail (26) with 4 screws (24) and 2 washers (25). STEP 6 Attach the cover (69) to the rear stabilizer (28) with 2 screws (15).
- Page 10 STEP 7 Unfold the slide rail (26) and insert the knob (53). STEP 8 Attach the left and right pedals (14 L / R) to the pedal bracket (17). Slide the pedal axes (72) through the pedals (14 L / R). Secure with 4 screws (74) and 4 washers (73).
-
Page 11: Console
STEP 9 Attach the pedal support (17) to the main frame with 2 screws (19), 2 washers (25) and 2 nuts (34). CONSOLE BUTTONS MODE Press to confirm selection Set the target time, number of repetitions, distance, calories. RESET Resets time, number of repetitions, distance, calories. - Page 12 FUNCTION SCAN Press MODE repeatedly to select SCAN. Every 5 seconds the display will display different data: time, number of repetitions, repetitions per minute and calories. The data will be displayed for 6 seconds. TIME Displays training time Press MODE repeatedly to select TIME, then press SET to set the training time.
-
Page 13: Diagram
DIAGRAM... -
Page 14: Parts List
PARTS LIST Name Qty. Name Qty. Main frame Transport wheels axle Screw Front stabilizer Seat bracket Front stabilizer end cap L Belt Front stabilizer end cap R Spring with rope Slide rail end cap L 38/L Left chain cover Slide rail end cap R 38/R Right chain cover Flat washer... -
Page 15: How To Exercise
Handlebar end cap Pedal axis Rear stabilizer end cap Flat washer Adjustable stop Allen screw Motor cable Connecting rod HOW TO EXERCISE Phase of right rowing to strengthen specific muscles: 1. Stroke (Lower Muscle Exercise): Bend your knees and stretch your arms. Grasp the handle and keep your back straight (Pic 01). -
Page 16: Important Notice
IMPORTANT NOTICE • This rowing machine comes with standard safety regulations and is only suitable for home use. Any other use is prohibited and may be dangerous to users. We are not responsible for any injury caused by improper and forbidden use of the machine. •... - Page 17 The Seller provides the Buyer a 24 months Warranty for Goods Quality, unless otherwise specified in the Certificate of Warranty, Invoice, Bill of Delivery or other documents related to the Goods. The legal warranty period provided to the Consumer is not affected. By the Warranty for Goods Quality, the Seller guarantees that the delivered Goods shall be, for a certain period of time, suitable for regular or contracted use, and that the Goods shall maintain its regular or contracted features.
- Page 18 26847264 VAT ID: CZ26847264 Phone: +420 556 300 970 E-mail: eshop@insportline.cz reklamace@insportline.cz servis@insportline.cz Web: www.inSPORTline.cz inSPORTline s.r.o. Headquaters, warranty & service center: Električná 6471, Trenčín 911 01, SK CRN: 36311723 VAT ID: SK2020177082 Phone: +421(0)326 526 701 E-mail: objednavky@insportline.cz reklamacie@insportline.cz servis@insportline.cz...