Table of Contents
Advertisement
Quick Links
Advertisement
Table of Contents

Related Manuals for Insportline IN 5564


Summary of Contents for Insportline IN 5564
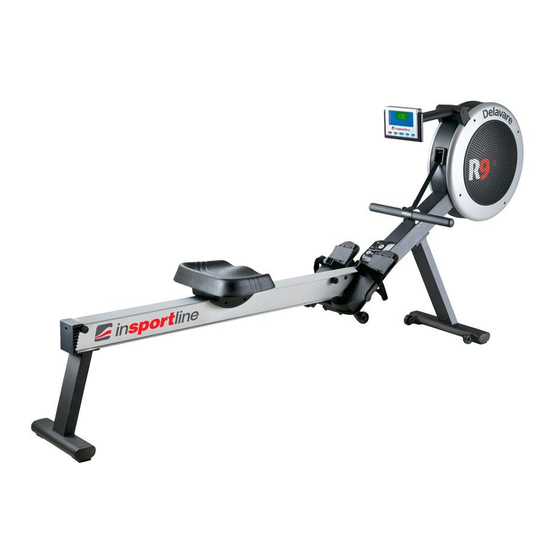
- Page 1 USER MANUAL – EN IN 5564 Air Magnetic Rower inSPORTline Delavare...
-
Page 2: Table Of Contents
CONTENTS INTRODUCTION ..............................3 BENEFITS OF EXERCISE ............................ 3 MEDICAL / SAFETY NOTICE ..........................3 CARE AND MAINTENANCE ..........................4 FEATURES OF THE AIR MAGNETIC ROWER....................4 TRAINING TIPS ..............................5 TRAINING GUIDELINES ............................. 5 SETTING UP YOUR ROWER ..........................8 CORRECT ROWING GUIDE .......................... -
Page 3: Introduction
INTRODUCTION Welcome to the world of the Air Magnetic Rower. The Air Magnetic Rower is one of the finest and most comprehensive rowing machines available. We know as we have been designing rowing machines for over a decade. By choosing Air Magnetic Rower, you have made a decision that will improve the health and fitness and well being for you and your family. -
Page 4: Care And Maintenance
3. If you experience any pain or tightness in your chest, irregular heartbeat, and shortness of breath, faintness or unusual discomfort during exercising, stop and consult a physician before continuing. 4. Adult supervision is required at all times when a child is on or near the Rower. 5. -
Page 5: Training Tips
We have faithfully duplicated the “normal” rowing action one would get when rowing on water where the oar is not pulled forward. 1. CHEST BAND TRANSMITTER (OPTIONAL) 2. REAR SEAT STOP 3. SEAT 4. FOOT STRAP 5. HANDLEBAR 6. COMPUTER 7. -
Page 6: What To Wear
Strength is the capacity of a muscle to exert a force against resistance. Strength contributes to power and speed and is of great importance to a majority of sports people. Muscular Endurance is the capacity to exert a force repeatedly over a period of time, e.g. it is the capacity of your legs to carry you 10 km without stopping. -
Page 7: Heart Rate
OVERLOAD This is where you exercise at a level above that which can be carried out comfortably. The intensity, duration and frequency of exercise should be above the training threshold and should be gradually increased as the body adapts to the increasing demands. As your fitness level improves, so the training threshold should be raised. Working through your program and gradually increasing the overload factor is important. -
Page 8: Setting Up Your Rower
accuracy, (b) the pulse count is to approximate your BMP rate at the time you are exercising. Since heart rate slows as you recover, a longer count isn’t as accurate. The target is not a magic number, but a general guide. If you are above average fitness, you may work quite comfortably a little above that suggested for your age group. - Page 9 Hold the COMPUTER with both hands as shown in the diagram above. Rotate and pivot the COMPUTER to the desired height and angle. For safety reasons, avoid the DRIVE STRAP touching the COMPUTER. GETTING ON SAFELY Getting on safely is a simple procedure. Just be careful that the SEAT is directly underneath you before sitting down.
- Page 10 4. Ensure the FOLDING KNOB at the correct position. FOLDING 1. Hold the LEFT FOOT STRAP with right hand and raise up the ALUMINUM BEAM. 2. Push down the FOLDING KNOB with left hand. 3. Pull the ALUMINUM BEAM up to the folding position till the “CLICK” sound. 4.
-
Page 11: Correct Rowing Guide
Ensure the foot strap is tight. Heel Support Adjustment The HEEL SUPPORT has a sprung loaded locking system designed for easy adjustment. Memorize the setting number best suited for future reference. With your feet tightly secured by the FOOT REST. Memorize the setting number best suited to you for future reference. - Page 12 ROWING WITH ARMS BENT INCORRECT The user starts the stroke by pulling with the arms rather than pushing with the legs. SOLUTION The user starts the stroke by pushing the legs and bracing the back with the arms fully extended and relaxed. BENT WRISTS INCORRECT The user bends their wrists at any time through the stroke.
- Page 13 SOLUTION Always row with flat wrists through the entire stroke. PULLING THE BODY TO THE HANDLE INCORRECT At the finish, the user, instead of pulling the handle to the body, pulls themselves forward to the handle. CORRECT At the finish the user leans back slightly, holds the legs down and draws the handle to the body using the upper body as a firm platform.
- Page 14 FLYING ELBOWS INCORRECT The user’s elbows are sticking out from the body at the finish and the handle is at chest level. SOLUTION Draw the handle to the body. The wrists are flat and the elbows pass close to the body. Elbows extend behind the body as the handle is drawn to the waist.
-
Page 15: Stretching
STRETCHING Stretching should be included in both your warm up and cool down, and should be performed after 3-5 minutes of low intensity aerobic activity or callisthenic type exercise. Movements should be performed slowly and smoothly, with no bouncing or jerking. Move into the stretch until slight tension, not pain, is felt in the muscle and hold for 20~30 seconds. - Page 16 Grasp elbow and pull hand toward midline of the body while maintaining an erect and upright posture. Hold for 20-30 seconds. Repeat for opposite leg. 5. Hamstring, Lower Back Stretch Holding thigh against upper body, extend leg toward ceiling. Hold for 20-30 seconds. Repeat for opposite leg.
-
Page 17: Exploded View
EXPLODED VIEW... -
Page 18: Parts List
PARTS LIST DESCRIPTION ALUMINUM BEAM MAIN FRAME PIVOT BRACKET STABILIZER - FRONT STABILIZER - REAR REAR BRACKET ALI HANDLE BAR SEAT CARRIAGE SEAT CARRIAGE SHAFT ROLLER ADJUSTMENT BOLT ROLLER ADJUSTMENT PLATE FOOT PEDAL COMPUTER ARM CLUTCH SHAFT RETURN SPRING ROLLER SPACER STOPPER BRACKET STRAP HOLDER KNOB STUD... - Page 19 SEAT STRAP COVER - RIGHT STRAP COVER - LEFT PLUG FOAM GRIP CARRIAGE STOPPER COVER VENT STRAP SLOT TRIM POLY “V” DRIVE BELT DRIVE PULLEY STRAP DRUM RETURN SPRING - DRUM RETURN SPRING - COVER RETURN SPRING - HOLDER FLYWHEEL FAN SPECIAL SEAT ROLLER HEEL REST PLUG...
- Page 20 335C BOLT 342A BOLT BOLT BOLT BOLT 359A BOLT BOLT 362A BOLT BOLT 370B BOLT BOLT 376B BOLT 386A BOLT WASHER WASHER WASHER WASHER WASHER SCREW SCREW SCREW SCREW 519A SCREW SCREW RETAINING RING TENSION CABLE MOTOR with CABLE MOTOR SENSOR CABLE COMPUTER CABLE COMPUTER CABLE SENSOR MAGNET...
-
Page 21: Assembly Instructions
BATTERY CASE with CABLE BEARING BEARING BEARING CLUTCH ASSEMBLY INSTRUCTIONS INTRODUCTION Congratulations on your purchase of this Air Magnetic Rower. This product has been designed and manufactured to meet the needs and requirements of home use. Please carefully read the instructions prior to assembly and first use. Be sure to keep the instructions for reference and/or maintenance. - Page 22 STEP 3 a) Remove the partly assembled rower from the carton lid and place it the correct way up as shown in the diagram below. b) Remove the SAFETY STRAP HOLDER and discard. Place the HANDLE BAR in its HOLDER. c) Remove 2 x BOLT (367) from the MAIN FRAME (002) and 2 x BOLT (373) with the TOOL provided.
- Page 23 STEP 5 a) Remove the ALUMINUM BEAM (001) from the carton and place it on top of the carton lid as shown in the diagram below. b) Remove 4 x BOLT (367) from ALUMINUM BEAM (001) with the TOOL provided. c) Assemble REAR STABILIZER (006) with the same 4 x BOLT (367) and tighten firmly.
- Page 24 STEP 7 a) Remove 4 x BOLT (319) from SEAT (119) with the TOOL provided. b) Assemble SEAT (119) with the same 4 x BOLT (319) and tighten firmly. STEP 8 a) Remove 4 x BOLT (304) from CARRIAGE with the TOOL provided. b) Assemble 2 x SEAT CARRIAGE COVER (117) with the same 4 x BOLT (304) and tighten firmly.
- Page 25 STEP 9 Connect the AC ADAPTOR (715) into the main power socket. STEP 10 Remove all Protective Packing Material and discard. ASSEMBLY COMPLETE! It is important to read the Owner’s Manual and all safety instructions thoroughly to familiarize yourself with the Air Magnetic Rower before using it.
-
Page 26: Terms And Conditions Of Warranty, Warranty Claims
TERMS AND CONDITIONS OF WARRANTY, WARRANTY CLAIMS General Conditions of Warranty and Definition of Terms All Warranty Conditions stated hereunder determine Warranty Coverage and Warranty Claim Procedure. Conditions of Warranty and Warranty Claims are governed by Act No. 40/1964 Coll. Civil Code, Act No. 513/1991 Coll., Commercial Code, and Act No. - Page 27 +420 556 770 190, Mobile: +420 604 853 019, servis@insportline.cz Fax: +420 556 770 192, (Service +420 556 770 191) Web: www.insportline.cz, www.worker.cz, www.worker-moto.cz INSPORTLINE, s.r.o. Bratislavska 36, 911 05 Trencin, Slovakia CRN: 36311723, VAT ID: SK2020177082 Orders: +421(0)326 526 701, +421(0)917 649 192, objednavky@insportline.sk...
Need help?
Do you have a question about the IN 5564 and is the answer not in the manual?
Questions and answers