
Related Manuals for Duplo Programatic Mark - II


Summary of Contents for Duplo Programatic Mark - II
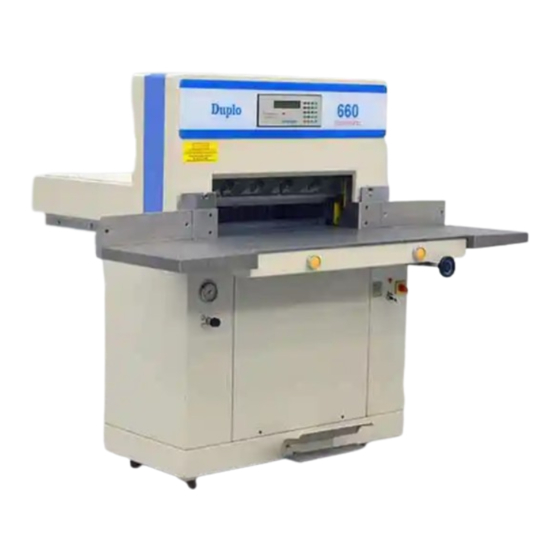
- Page 1 Duplo Programatic Mark - II Operation Manual Provided By http://www.MyBinding.com http://www.MyBindingBlog.com...
- Page 2 PROGRAMATIC MARK - II OPERATION MANUAL Duplo USA Corporation 3050 South Daimler Street Santa Ana, CA 92705 949-752-8222 N 949-752-7766...
-
Page 4: Table Of Contents
Control Panel:........................5 Display Screen:........................6 Instruction for Keys:......................7 How to use in Manual Operation: ..................9 Making a New Program: ..................... 9 How to use the Cut & Store Program: ................12 How to use Step and Repeat Program:................14 How to use Step and Repeat Program with a Gutter Trim: .......... -
Page 6: Control Panel
Control Panel: PROG BASIC SCREEN LAST NEXT PROGRAMATIC MARK - II − − FAST SLOW FAST SLOW CUT & BRAKE AUTO STORE RELS... -
Page 7: Display Screen
Display Screen: C: 26”125 PROG: 1 AUTO 1: 17”000 2: 11”000 NOTE: The “ C: ” size may very from cutter to cutter. Current cut position. The backgauges current position. PROG: Program number. There are 9 programs from 1 - 9. The PROG: 0 is for parameter setting, any changes on the parameter should be made in the configuration mode. -
Page 8: Instruction For Keys
Instruction for Keys: ( 0 - 9 ) : To key in a size. ( PROG ) : Selection programs . There are 9 programs from 1 - 9. For example: If you want to select the program number 1, press the PROG button, (the screen shows PROG: ❑), then press 1 to recall that program from memory. - Page 9 : Slow reverse. When the key is pressed and held down, the backgauge SLOW moves slowly to the rear and stops at the rear point, after the key is released the backgauge moves forward 2 mm automatically. : Brake Release. 660 model: The key need not be pressed, just push BRAKE RELS in the hand wheel and then you can make a micro adjustment.
-
Page 10: How To Use In Manual Operation
How to use in Manual Operation: Turn on the power to the cutter, wait until the backgauge moves back and will recalibrate the position and this display appears: NOTE: There will be a cursor (❑) flashing over at the last number, this is the work area. C: 26”125 PROG: 1 1: 00”00❑... - Page 11 If you want to make 3 cuts, the first cut is at 17.0”, the second cut at 15.5”, and the last cut at 15.0”, follow the procedure as listed below: Press (1)+(7)+(0)+(0)+(0) (NEXT) , the following screen appears: C: 26”125 PROG: 1 1: 17”000 2: 00”00❑...
- Page 12 After you have finished all cuts, press (AUTO) to remove the automatic backgauge movement, AUTO will disappear on the display, and screen appears: C: 17”000 PROG: 1 1: 17”00❑ 2: 15”500 NOTE: If you make a mistake and want to correct the programmed cut positions, use the (LAST) and (NEXT) keys to move the cursor to the position that you require, and re-enter new cut sizes, then press (NEXT).
-
Page 13: How To Use The Cut & Store Program
How to use the Cut & Store Program: Turn on the power to the cutter, wait until the backgauge moves back and will recalibrate the position and this display appears: NOTE: There will be a cursor (❑) flashing over at the last number, this is the work area. C: 26”125 PROG: 1 1: 00”00❑... - Page 14 Move the backgauge to the third cut position, say 13.0” and make a cut, the following screen is displayed: C: 13”000 PROG: 2 C&S 3: 13”000 4: 00”00❑ CUT & , the screen will change to: After you finish storing all cuts, press STORE C: 13”000 PROG: 2...
-
Page 15: How To Use Step And Repeat Program
How to use Step and Repeat Program: Turn on the power to the cutter, wait until the backgauge moves back and will recalibrate the position and this display appears: NOTE: There will be a cursor (❑) flashing over at the last number, this is the work area. C: 26”125 PROG: 1 1: 00”00❑... - Page 16 Press (END) it will beep 4 times, then re-press (END) to store the program, and the screen will change to: C: 26”125 PROG: 3 2: − 02”000 1: 14”00❑ If you want to start cutting, press (AUTO), the backgauge will move to the 14.0” position and the following screen appears: C: 14”000 PROG: 3 AUTO...
-
Page 17: How To Use Step And Repeat Program With A Gutter Trim
How to use Step and Repeat Program with a Gutter Trim: Turn on the power to the cutter, wait until the backgauge moves back and will recalibrate the position and this display appears: NOTE: There will be a cursor (❑) flashing over at the last number, this is the work area. C: 26”125 PROG: 1 1: 00”00❑... - Page 18 Press (END) it will beep 4 times, then re-press (END) to store the program and the screen will change to: C: 26”125 PROG: 4 2: − 02”000 1: 08”75❑ If you want to make a cut, press (AUTO) , the backgauge will move to 8.75” position and the following screen appears: C: 08”750 PROG: 4 AUTO...
-
Page 19: How To Recall Existing Programs
How to Recall Existing Programs: You can recall a program, which has been stored in your MARK-II by selecting the required program, then press (AUTO) . Please refer to previous pages for operation procedure. After you have finished all cuts, press (AUTO) to remove the automatic backgauge movement. - Page 21 Ver 1.0 7-31-1998...
Need help?
Do you have a question about the Programatic Mark - II and is the answer not in the manual?
Questions and answers
The cutter is beeping, the adjuster won't move, and the screen says "Please check the top sw.
When the Duplo Programatic Mark - II cutter beeps, the adjuster won't move, and the screen displays "Please check the top sw," it likely means there is an issue with the top switch. This may be a safety or sensor switch that is not in the correct position or not functioning, preventing the machine from operating. The system halts movement to avoid damage or injury until the issue is resolved.
This answer is automatically generated
Hello. My machine won't stop beeping. How can I stop it?
To stop the beeping on a Duplo Programatic Mark - II machine, press (END) once to make it beep four times, then press (END) again to store the program.
This answer is automatically generated
Where is the top switch