Table of Contents
Advertisement
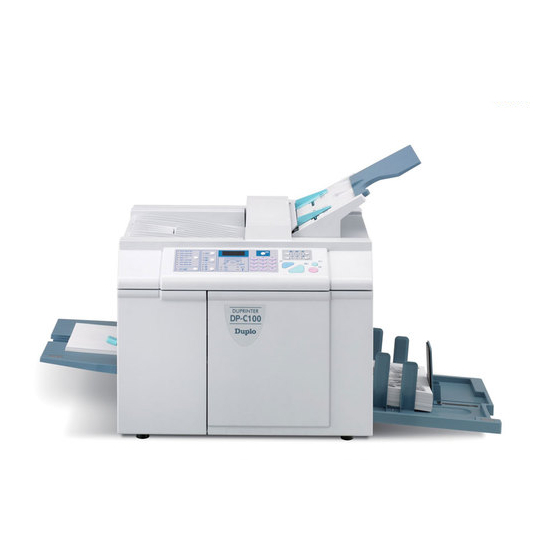
DUPRINTER
DP-C100/105/110/115/120/125
Instruction Manual
For this machine to be used safely, it MUST be
operated correctly and serviced regularly. Therefore,
read this Instruction manual thoroughly before using
the machine.
DUPLO CORPORATION
Keep this manual in a safe place where it can be consulted at any time.
Advertisement
Table of Contents
Troubleshooting

Subscribe to Our Youtube Channel
Related Manuals for Duplo DUPRINTER DP-C100


Summary of Contents for Duplo DUPRINTER DP-C100
- Page 1 DUPRINTER DP-C100/105/110/115/120/125 Instruction Manual For this machine to be used safely, it MUST be operated correctly and serviced regularly. Therefore, read this Instruction manual thoroughly before using the machine. DUPLO CORPORATION Keep this manual in a safe place where it can be consulted at any time.
- Page 2 Complies with the provisions defined by the regulations listed below. EC Low Voltage Directive ( 73 / 23 / EEC ) EC Electromagnetic Compatibility Directive ( 89 / 336 / EEC ) Copyright 2007 DUPLO SEIKO CORPORATION All Rights Reserved...
-
Page 3: Please Note
Introduction Thank you for your purchase of the DUPRINTER DP-C100/105/110/115/120/125 To ensure safe and efficient prolonged use of this machine, read and thoroughly understand this manual before using this machine. After using this manual, be sure to keep it in a place to handy reference. -
Page 4: Table Of Contents
Contents Safety Precautions . Before using the machine Part names and their functions Control panel(LEAGAL) Printing process Control panel(A/B) . Easy printing Easy printing . Platemaking and printing procedure Setting the paper tray Setting the document Setting the paper stacker Pressing the platemaking key Turning the power on Entering the number of printed copies... - Page 5 . Replacing consumables Changing the ink pack Changing the master ejection core Changing the master roll . Troubleshooting OK Monitor Removing a master(eject error) Removing a left paper jam Removing a master(set error) (feed tray side) Removing a jammed document Removing a right paper jam Trouble shooting for machine malfunction (print tray side)
-
Page 6: Safety Precautions
Safety Precautions About Machine Safety Various symbols and pictures are used in this manual and on the stickers affixed to the machine. These symbols and pictures provide warnings and instructions to prevent danger to you or other personnel, and to prevent damage to office property. - Page 7 WARNING ¡ ¡ If the machine is used after foreign matter (metal fragments, water, or other liquid) has gotten inside the machine, fire or electrical shock can result. a a Turn the main unit`s power switch to OFF. Pull the power plug from the outlet. Contact the sales distributor (or maintenance service company).
- Page 8 WARNING ¡ ¡ Do not modify the machine. Fire or electrical shock can result. ¡ ¡ Do not remove the rear lid, cabinet, or cover from the machine. The interior contains high-voltage parts, which can cause electrical shock. ¡ ¡ Do not remove or insert the power plug if your hands are wet. You can get electrically shocked.
- Page 9 WARNING ¡ ¡ Do not insert or drop metal, burnable material, or other matter through the ventilation holes into the machine interior. Fire or electrical shock can result. ¡ ¡ Do not place flower vases, flowerpots, cups, or water containers (including metal containers) on top of the machine.
- Page 10 WARNING ¡ ¡ Before moving the machine, pull the power plug from the outlet. If the cord is damaged, fire or electrical shock can result. ¡ ¡ Pull the power plug itself, not the cord. If you yank the cord, you can damage it (cause exposed conductor, disconnection, etc.), resulting in fire or electrical shock.
- Page 11 Locations of warning stickers ¡ ¡ Keep the WARNING and CAUTION stickers clean at all times.If stickers become damaged or come off, replace them with new ones. CAUTION M7-T3060 ¡Do not remove this cover. The Warning inside of the printer contains movable cutting instruments, contact with which could result in injury.
-
Page 12: Conventions Used In This Manual
GUIDE TO THIS MANUAL Conventions Used in this Manual WARNING: Indicates a high degree of potential danger. If the warning is ignored, death or serious injury may result. CAUTION: Indicates a medium degree of potential danger. If the caution is ignored, medium injury or damage to property may result. -
Page 13: Before Using The Machine
1. Before using the machine Parts Names and Their Function SUPPORT TRAY DOCUMENT GUIDE MACHINE EXTERIORS SUPPORT TRAY DOCUMENT TRAY DOCUMENT RECEIVING TRAY DOCUMENT TRAY SUPPORT TRAY CONTROL PANEL PAPER TRAY FRONT COVER POWER SWITCH DRUM HANDLE INK PACK HOLDER RELEASE LEVER FRONT COVER DRUM SECURING LEVER ¡... - Page 14 THERMAL HEAD ESCAPE LEVER MASTER SET SWITCH DOCUMENT RECEIVING TRAY MASTER HOLDER ROLL MASTER GUIDE LOCK SCREW FEED PRESSURE LEVER PAPER SET LEVER PAPER FEED ROLLER PAPER TRAY PAPER GUIDE - 12 -...
- Page 15 DOCUMENT TRAY MASTER EJECTION CORE MASTER EJECTION BOX LID RELEASE LEVER MASTER EJECTION BOX PAPER STACKER GUIDE PAPER STOPPER PAPER RECEIVING TRAY MASTER EJECTION BOX RELEASE LEVER JOG SWITCH PAPER STRIPPER FINGER PAPER EJECTION ROLLER JUMP PLATE - 13 -...
-
Page 16: Control Panel(A/B)
CONTROL PANEL(A/B) Components Functions Zoom indicator lamp indicates the position of enlargement and reduction. Enlargement and reduction key Press this key,the enlargement and reduction is changed. Document indicator lamp Indicates the documeny mode(text or photo) Each press of this key switches between the text mode and "Document"... - Page 17 (17) (15) (14) (16) (13) Components Functions Stop printing.If this key is pressed while the machine is stopped,the (12) "Stop"key number of copies and plates will be displayed. (13) Starts printing. "Print"key (14) Starts plate making. "Plate making"key (15) Used for entering the number of prints. keypad (16) When the numeber of help is set,press this key for save.
-
Page 18: Control Panel(Leagal)
CONTROL PANEL(LEAGAL) 141% 129% MINI 121% STMT 100% 1:1 STMT MINI Components Functions Zoom indicator lamp indicates the position of enlargement and reduction. Press this key,the enlargement and reduction is changed. Enlargement and reduction key Document indicator lamp Indicates the documeny mode(text or photo) Each press of this key switches between the text mode and "Document"... - Page 19 (17) (16) (15) (14) (13) Components Functions Stop printing.If this key is pressed while the machine is stopped,the (12) "Stop"key number of copies and plates will be displayed. (13) Starts printing. "Print"key (14) Starts plate making. "Plate making"key (15) Used for entering the number of prints. keypad (16) When the numeber of help is set,press this key for save.
-
Page 20: Printing Process
Printing Process The DUPRINTER goes through a process of"platemaking" and "printing". "Platemaking" In the "platemaking" process, the old master on the drum is removed while the thermal head creates the scanned image on new master and loads it on the drum. ROLL MASTER MASTER EJECTION DRUM... -
Page 21: Easy Printing
2. Easy Printing Preparation Open the paper tray, set the paper, and adjust the paper guide. (See page 19.) Open the paper receiving tray; then adjust the paper stacker guide, paper stopper, and jump plate. (See page 20.) Turn on the power; then check the indication on the control panel. - Page 22 MEMO - 20 -...
-
Page 23: Platemaking And Printing Procedure
3. Platemaking and printing procedure Setting the Paper Tray Open the paper tray toward you PAPER TRAY Lower the paper set lever. PAPER SET LEVER Place the paper in the tray, and adjust the paper guide to the width of the paper. -
Page 24: Setting The Paper Stacker
Setting the Paper Stacker Open the paper receiving tray. PAPER RECEIVING TRAY Adjust the paper stacker guide and PAPER STACKER GUIDE paper stopper to the paper size marking. PAPER STOPPER Adjust the jump plate to the paper size JUMP PLATE marking. -
Page 25: Turning The Power On
Turning the power on Turn the power switch ON. The power switch is ON when " I ", and OFF when " K ". POWER SWITCH Checking the Control Panel A / B L E A G A L 141% B5 141% 122% A4 129%... -
Page 26: Setting The Document
Setting the Document Open the support tray. SUPPORT TRAY Adjust the document guide to the size of the document; then set the document face down. Note : ¡ ¡ Up to 10 original documents can be set at one time. Pressing the Platemaking Key Press the PLATE MAKING key. -
Page 27: Entering The Number Of Printed Copies
Entering the Number of Printed Copies Using the number keys, enter the number of copies you want to print. Example:If you enter 1, 2, 3, and 4, the LCD looks like this: 1 2 3 4 Pressing the Print Key Press the PRINT key. -
Page 28: Various Functions
4. Various functions Adjusting the mode of document Press the DOCUMENT key; then select TEXT or PHOTOGRAPH TEXT TEXT appropriate documents containing characters only, and for black- and-white photograph documents that have undergone dot processing. PHOTOGRAPH PHOTOGRAPH is appropriate for photograph documents and color documents. -
Page 29: Changing The Printing Speed
Changing the Printing Speed Press for print speeds. FASTER 130shts/min STANDARD 80shts/min SLOWER 60shts/min Adjusting the Printing Position Press of the PRINTING POSITION key. Print image moves up. Print image moves down. Note : ¡ ¡ Adjustments of up to approximately 20mm (from top to bottom) can be made. -
Page 30: Setting The Enlargement And Reduction
Setting the Enlargement and Reduction Press the enlargement and reduction key; then selectthe desired enlargement and reduction; ¡ Each time you press the key, the display changes as shown in the figure. LEAGAL 94% Reduction Press the "94%" key ,then select 94% reduction,and press the "94%"... -
Page 31: When Using A Thick Paper And/ Or Misfeed Occurs
Using a thick or thin paper(Adjusting the feed pressure) Adjust the feed pressure if you encounter a feeding error with thick or thin paper: When using a thick paper and / or Misfeed occurs Set the feed pressure lever to "HEAVY PAPER". When using a thin paper and / or Double feed occurs Set the feed pressure lever to "LIGHT PAPER". -
Page 32: Confidential Safeguard Function
Confidential safeguard function By a simple procedure, the Printer can be set to protect to confidential documentation. ¡ ¡ When confidential safeguard is set, printing can not be performed with PRINT or TEST PRINT keys,in these case ,the machine displays "C001". ¡... -
Page 33: Sectional Printing(Stopping After Each Set)
Sectional printing(stopping after each set) When "number of prints number of sets are entered, printing will stop after each set; This allows you to print a document in sections. You can enter up to 15 groups of number of prints number of sets and the printing will begin in the order order that the numbers were entered. - Page 34 Print The printing will begin from the last print/set amount entry when the PRINT key is pressed. The printing will stop after the first set of printouts. Collate by inserting a paper that acts as a marker or by removing the whole set from the machine.
-
Page 35: On-Line Print Function (Model : Dp-C105/115/125 Only)
On-Line Print Function (model : DP-C105/115/125 only) This function allows you to make prints of documents directly from on-line data from personal computers. IMPORTANT : ¡ ¡ For details on connection and settings, and refer to the Printer Driver Operation Manual. On-line Print Function Check that the top menu is displayed. -
Page 36: Drum Unit
Drum unit Changing the drum unit Press the JOG switch. JOG SWITCH Hold down until the drum stops with a beep. WARNING ¡ ¡ Do NOT touch the drum or rollers when you operate the jog switch. ¡ ¡ Do NOT put hands inside machine while it is operating. -
Page 37: Setting The Drum Unit
Setting the drum unit Hold the drum level and place the drum ROLLER guide roller onto the rail in the machine. RAIL DRUM Holding the front of the drum up slightly,push in about 10cm. Hold the drum level and push it in gently until it stops. - Page 38 Push down the securing lever tightly DRUM SECURING LEVER with the drum inside the machine. Close the front cover. FRONT COVER Press the JOG switch. JOG SWITCH Keep pressing until the drum stops with a beep. WARNING ¡ ¡ Do NOT touch the drum or rollers when you operate the jog switch.
-
Page 39: Replacing Consumables
5. Replacing consumables Changing the ink pack Open the front cover. FRONT COVER Hold the ink pack holder release lever HOLDER RELEASE LEVER and pull it toward you. INK PACK Pull up and remove the empty ink pack. INK PACK Twist open the cap of the new ink pack. - Page 40 Insert the ink pack so that the groove on the LIP fits into the "U" groove of the holder. HOLDER HOLDER INK PACK INK PACK "u" GROOVE OF HOLDER Push the ink pack to the set line on the SET LINE ink pack.
-
Page 41: Changing The Master Roll
Changing the master roll Open the document receiving tray. DOCUMENT RECEIVING TRAY WARNING ¡ ¡ Do not remove the cover affixed with Warning Label 1. Personnel can get injured by the movable cutter installed inside. Turn the master holder toward you while THERMAL HEAD ESCAPE LEVER pushing the thermal head escape lever. - Page 42 Take out a new master roll from a bag. master holder Insert the master holders deeply into both ends of the master roll. (Holders are interchangeable.) Insert the master roll into the machine GREEN LINE so that the green line on the roll is facing the control panel.
- Page 43 Pull out the master and insert the arrow MASTER SET SWITCH on the yellow label until it contacts the roller. YELLOW LABEL Push the master set switch. THERMAL HEAD ESCAPE LEVER The master will be pulled in, and cut automatically. If the master does not go in, push the yellow label slightly back.
-
Page 44: Changing The Master Ejection Core
Changing the master ejection core Open the paper receiving tray.(See page MASTER EJECTION BOX RELEASE LEVER 20.) Push the master ejection box release lever. The master ejection box will open. Open the box all the way until it stops. MASTER EJECTION BOX Open the lid up by pushing the release MASTER EJECTION BOX LID RELEASE LEVER... -
Page 45: Troubleshooting
6. Troubleshooting OK MONITOR When a disposable part needs a replacement or the operator`s help is necessary due to an error, the display will shows a message and the OK MONITOR will show the area that needs attention. There is no ink. Replace the old ink pack with a new one. See p.35, "Changing the ink pack"... - Page 46 There is no drum or it is installed incorrectly. Set the drum unit on the machine. See p.30 "Setting the drum unit" for more details. Front cover is open. Close the cover. FRONT COVER The ADF cover is open. Close the cover. ADF COVER Document receiving tray is open.
- Page 47 Check the feeder side and remove the jammed paper.Follow the instructions on p.45, "Removing a left paper jam (feed tray side)". Check the delivery side and remove the jammed paper. Follow the instructions on p.46, "Removing a right paper jam (print tray side)".
- Page 48 Please restart,If the message remains,turn the power off E * * * and contact your service person. The document receive tray or the master ejection box is C 0 0 0 open by accident.Please close the tray and box,then make plate and print again.
-
Page 49: Removing A Left Paper Jam (Feed Tray Side)
Removing a left paper jam (feed tray side) If this message is indicated in the display panel,check the feeder side and remove the jammed paper by following instruction below: Push down the paper set lever to down the paper tray. PAPER SET LEVER Pull out the jammed paper as shown in the diagram. - Page 50 Removing a right paper jam (print tray side) If this message is indicated in the error display panel, check the delivery side and remove the jammed paper by following instruction below: Push the master ejection box release MASTER EJECTION BOX RELEASE LEVER lever.
- Page 51 Peel off the paper from the drum. DRUM Pull the paper toward the ejection side while pressing the JOG switch to peel the paper off. CAUTION ¡ ¡ Make sure that the peeled paper do not stick to your clothing. JOG SWITCH Press the JOG switch until the drum JOG SWITCH...
-
Page 52: Removing A Master(Eject Error)
Removing a master (eject error) If this message is indicated in the error display panel, there is an old master on the printing drum. Remove it by following instruction below: Push the master ejection box release MASTER EJECTION BOX RELEASE LEVER lever. - Page 53 Pull the front end of the master toward you and press the JOG switch intermit- tently. Continue until the master peels off. CAUTION ¡ ¡ Discard the old master, making sure that it does not touch your clothing. JOG SWITCH Press the JOG switch until the drum JOG SWITCH stops with a beep.
-
Page 54: Removing A Master(Set Error)
Removing a master (set error) If this message is indicated in the error dis- play panel, remove the master and remake the plate by following instruction below: Open the document receiving tray. DOCUMENT RECEIVING TRAY Remove the master out of the machine. - 52 -... - Page 55 Close the document receiving tray DOCUMENT RECEIVING TRAY gently.Check that the lamp on the OK monitor are turned off. Make the master and print again. - 53 -...
-
Page 56: Removing A Jammed Document
Removing a jammed document If this message is indicated in the error dis- play panel, check the ADF and remove the jammed document by following instruction below: Open the ADF cover. ADF COVER Pull out the jammed document as shown in the diagram. -
Page 57: Trouble Shooting For Machine Malfunction
Trouble shooting for machine malfunction Cannot make plates / print The machine doesn't TURN ON. Is power plug inserted? Is a Message displayed on the ERROR DISPLAY? Is any OK MONITOR lamp lit? Insert the power plug securely. See "OK MONITOR" Is power switch ON? on page 46. -
Page 58: Maintenance
7. Maintenance and inspection Maintenance Clean the exterior as described in the following procedure. Tightly wring a soft Alcohol thinner cloth that has been soaked in water or neutral detergent, and wipe dirt from the surface. Then, using a dry soft cloth, wipe away remaining moisture. -
Page 59: Total Counter
Total counter Total amount of print and platemaking can be shown on display panel. Press the STOP key while the Machine is stopped. Print and platemaking amount will be shown on Display Panel. Total counter will appear while STOP key is being pressed. Example : Print amount, P123_4567 Platemaking amount, F123_4567... -
Page 60: Specifications
Specifications Model.no DP-C series Date 070112 Specifications Rev. Duprinter Duprinter Duprinter Product name DP-C120(B4) DP-C110(Legal) DP-C100(A4) Model no. DP-C125(B4) DP-C115(Legal) DP-C105(A4) Model Table top Master making method Thermal digital master making Master making interval 27secÿ A4 100%ÿ 27secÿ LTR 100%ÿ... - Page 61 Date 070112 Specifications Rev. Duprinter Duprinter Duprinter Product name DP-C120(B4) DP-C110(Legal) DP-C100(A4) Model no. DP-C125 B4 DP-C115 Le al DP-C105(A4) * USB cable must be Option Drum unit 3m or shorter PC Interface kit (standard feature for DP-C125/115/105) USB interface (standard USB1.1) *...
-
Page 62: Original Document/Copy Paper Specification
Original document/Copy paper Specification 8 8 Acceptable Document ¡ ¡ Document Weight: 64g/m 4 128g/m , 17Ib 4 34Ib ¡ ¡ Document Size: MAX. 271mm 9 382mm, 10.6" 9 15" MIN. 100mm 9 148mm 4" 9 6" ¡ ¡ ADF Capacity: 10sheets (64g/m , 17Ib) Note :... - Page 63 MEMO - 61 -...
- Page 64 DUPLO CORPORATION Duplo building, 1-6, Oyama 4 chome, Sagamihara, Kanagawa 229-1180,Japan TEL : +81-42-775-3602 FAX : +81-42-775-3606 E-mail : info@duplo.com J8-Y1430 2007. 1...
Need help?
Do you have a question about the DUPRINTER DP-C100 and is the answer not in the manual?
Questions and answers