
Subscribe to Our Youtube Channel
Related Manuals for Kargo Master 40150


Summary of Contents for Kargo Master 40150
- Page 1 Instruction Guide 40150 Kargo Master Rancho Cordova, CA 95742 800-343-7486 CustomerService@KargoMaster.com 20210624R2 DATE: ______________...
- Page 2 Instructions – 40150 *PLEASE READ ALL INSTRUCTIONS AND WARNINGS PRIOR TO ASSEMBLING, INSTALLING, AND USING THIS PRODUCT* Warning Always check for wires, fuel tanks and lines, brake lines and other important vehicle functionality items prior to drilling and installing all products.
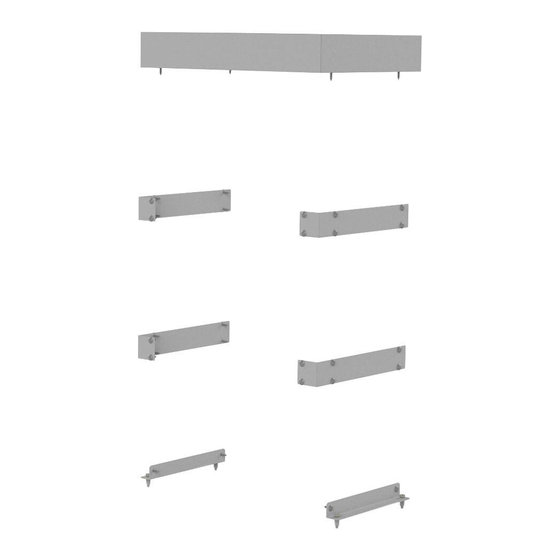
- Page 3 Instructions – 40150 Parts Hardware For Technical Support Call: 800-343-7486, Monday-Friday, 7AM - 4 PM (PST) Page 2...
- Page 4 Instructions – 40150 Step 1 – Bolt Drawer Units Together Decide if two or three drawer units will be stacked. Stack two drawer units on top of one another. Place connector brackets so that the holes from each drawer unit align with the holes in each bracket.
- Page 5 Instructions – 40150 Step 2 – Assemble Top Tray On the top-drawer unit, place the tray so the holes from both units align. If the holes do not align, drill through the top tray and into the drawer unit using a 1/8” bit in the desired locations.
- Page 6 Instructions – 40150 Step 4 – Installation into Vehicle Place the assembled drawer unit into the vehicle in the desired location. Align and square the unit as necessary. Mark through the four holes of the floor mounts onto the floor.
- Page 7 Instructions – 40150 At each marked location, drill hole using 25/64” drill bit and appropriate sized drill-bit stop collar. If 25/64” drill bit is not available, a 3/8” drill bit can be used, although it may be necessary to tap in the plus nuts.
- Page 8 Instructions – 40150 Place the assembled unit over the installed plus nuts. Bolt into place using 1/4” x 1” hex head bolt, 1/4" split lock washer and 1/4” flat washer. Repeat at all four locations. TIGHTEN.
Need help?
Do you have a question about the 40150 and is the answer not in the manual?
Questions and answers