
Related Manuals for Kargo Master 4089P


Summary of Contents for Kargo Master 4089P
- Page 1 Instruction Guide 4089P Kargo Master Rancho Cordova, CA 95742 800-343-7486 CustomerService@KargoMaster.com 20200225R2 DATE: __________________...
- Page 2 Assembly Instructions – 4089P *PLEASE READ ALL INSTRUCTIONS AND WARNINGS PRIOR TO ASSEMBLING, INSTALLING, AND USING THIS PRODUCT.* Warning Always check for wires, fuel tanks and lines, brake lines and other important vehicle functionality items prior to drilling and installing all products.
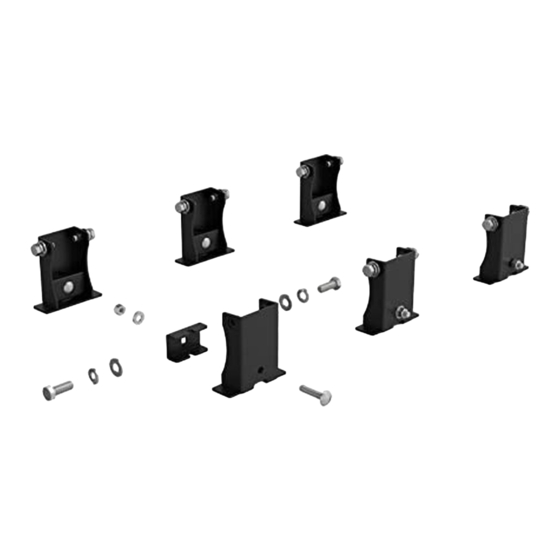
- Page 3 Assembly Instructions – 4089P Parts List Hardware 18-4089P For Technical Support Call: 800-343-7486 Monday-Friday 7AM - 4 PM (PST) Page 2...
- Page 4 Assembly Instructions – 4089P Step 1 – Find Mount Lwwocations on Roof of Van Locate the mounting studs on the roof of the van. There will be studs protruding on both sides. The farthest forward and farthest back studs will be used in all applications.
- Page 5 Assembly Instructions – 4089P Step 2 – Install Feet Place foot and mount bracket over the stud protruding from the roof in the orientation shown below. Bolt through the foot and the mount bracket using a 5/16" x 1-1/2” carriage bolt, a 5/16" flat washer, and a 5/16”...
- Page 6 Assembly Instructions – 4089P Step 3 – Measure distance between feet Measure the distance between the feet mounted in the previous step. Write these dimensions down to assist when assembling the rack. Using the distance measured, align the crossbars with the feet.
Need help?
Do you have a question about the 4089P and is the answer not in the manual?
Questions and answers