
Related Manuals for Fantasea Line FA6000


Summary of Contents for Fantasea Line FA6000
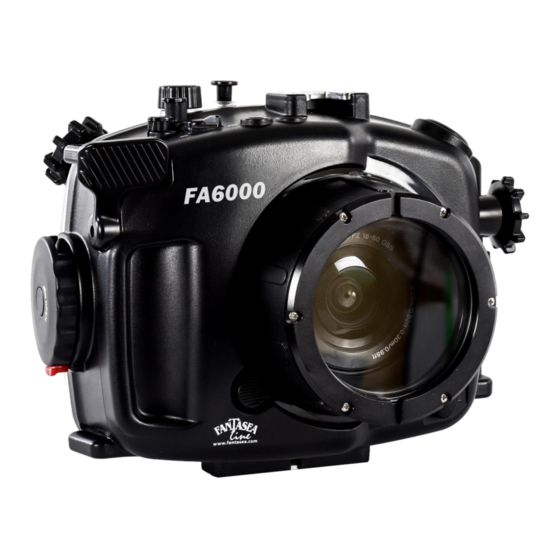
- Page 1 Fantasea Line FA6000 Housing For Sony a6000 (Cat. No. 1519) Instruction Manual FA6000 Housing Instruction Manual 20190204...
-
Page 2: Table Of Contents
CARE & MAINTENANCE .......................... 35 FANTASEA PRODUCT CONSUMER LIMITED WARRANTY ................36 FANTASEA MOISTURE DETECTOR ......................37 ............................ 37 DENTIFICATION OF ARTS ............................38 ILENCING THE LARM ............................38 EPLACING ATTERIES ..........................39 EPLACING THE LARM FA6000 Housing Instruction Manual 20190204... -
Page 3: Disclaimer
While every effort has been made in order to ensure that the information included in this instruction manual is accurate and complete, no liability will be accepted for any errors or omissions. Fantasea Line reserves the right to change product specifications and features described herein at any time without prior notice. -
Page 4: Features & Specifications
10. Silica gel packs 4. Hand lanyard 11. Silicone grease 5. Extended shutter release 12. O-ring remover 6. Anti-glare hood for LCD screen 13. Spare back door O-ring seal 7. Sticker for camera flash 14. Lens cloth FA6000 Housing Instruction Manual 20190204... - Page 5 FA6000 Housing Instruction Manual 20190204...
-
Page 6: Identification Of Housing Parts
Optic Cable Port 4. Control Dial 3. C1 Button 2. On/Off 1. Shutter Release 11. Lens Dial 15. Latch Dial Latch Dial Lock 13. Lanyard Loop 12. Interchangeable Lens Port System (Lens Ports are supplied separately) FA6000 Housing Instruction Manual 20190204... - Page 7 8. Cold-Shoe Mount for Lighting Accessories- Enables mounting a flash, video light, torch or focus light on top of the housing by using a dedicated connector. For further information regarding such connectors, please visit the Fantasea website – www.fantasea.com FA6000 Housing Instruction Manual 20190204...
- Page 8 “Underwater Flashes & Strobes” in this manual. Note that the FA6000 Housing blocks the output of the built-in flash and prevents it from being visible in images captured. This ensures that only the external strobes connected to the system illuminate the subject, thereby diminishing the effects of backscatter, as well as shadowing caused by housing lens port and lens accessories mounted on the housing.
- Page 9 For further instructions, please refer to the sections "Opening the Housing” and “Closing the Housing”. Housing View #2 – Front - Corresponding numbered descriptions are listed on the following page 16. Lens Port Lock 18. Lens Release Control 17. Tripod Mounting Screw Holes (bottom of housing) FA6000 Housing Instruction Manual 20190204...
- Page 10 This is especially useful when using exceptionally large lenses which cannot be installed on the camera prior to inserting it into the housing. In such cases, the lens should be installed and removed through the lens port. For further instructions please refer to the section “Installing the Camera”. FA6000 Housing Instruction Manual 20190204...
- Page 11 20. Menu – Pushing this control activates the camera menu button. 21. Non-Functional Lever Rotating this lever does not activate any of the camera controls. It also – doesn’t interfere with proper housing operation. Therefore, this lever can be ignored while using the housing. FA6000 Housing Instruction Manual 20190204...
- Page 12 31. Center Button - Pushing this control activates the camera center button, which is mainly used to confirm selections. 32. Drive Mode / Self Timer / Left – Pushing this control activates the camera drive mode / self timer / left button. FA6000 Housing Instruction Manual 20190204...
- Page 13 Corresponding numbered descriptions are found on the following page 39. LED Trigger Ports 34. Moisture Detector Alarm Unit 38. Lens Port Lock 35. Camera Tray Interior View 36. Moisture Sensor Unit 37. Camera Tray Port (under camera tray) FA6000 Housing Instruction Manual 20190204...
- Page 14 This spares camera battery consumption and also prevents the built-in flash recycle time from limiting continuous shooting. For LED Trigger Ports available, please visit the Fantasea website – www.fantasea.com FA6000 Housing Instruction Manual 20190204...
-
Page 15: Sony A6000 Mirrorless Digital Camera
High resolution OLED Tru-Finder offering 100% frame coverage Customizable buttons for shooting in greater speed and convenience Customizable UI (user interface) enables smooth and personalized operation Tiltable 3-inch LCD screen One-touch remote and one-touch sharing FA6000 Housing Instruction Manual 20190204... -
Page 16: Setting Up The Housing
LCD monitor doesn’t turn off automatically underwater, it is important to set the Monitor/Finder setting to Monitor (Manual) prior to installing the camera inside the housing. This should be done through the settings menu of the camera. FA6000 Housing Instruction Manual 20190204... -
Page 17: When Using The Housing For The First Time
To replace the shutter release trigger with the extended one included, complete the following steps: a. Place the housing on a protected surface. b. Identify the Extended Shutter Release Kit (image #5). FA6000 Housing Instruction Manual 20190204... - Page 18 Using the screwdriver, install the screw in order to secure the replacement extended trigger in place (image #9 on the following page). FA6000 Housing Instruction Manual 20190204...
-
Page 19: Installing M16 Port Accessories
1. To remove the M16 port cover insert a coin into the dedicated slot featured on the cover and turn the cover counterclockwise until it can be safely removed (images #11 and 12). Image #11 Image #12 FA6000 Housing Instruction Manual 20190204... -
Page 20: Mounting And Removing Lens Ports
O-ring prior to installing it on the housing. c. Place the housing on a protected surface. d. Turn the lens port lock rightwards, so it’s seated at the Image #13 “UNLOCK” position (image #13). FA6000 Housing Instruction Manual 20190204... - Page 21 If the port has been properly installed and the port lock has been completely locked, the lock is positioned in between lens port “teeth” and blocks them from turning (image #17 on the following page). FA6000 Housing Instruction Manual 20190204...
- Page 22 Insert the lens port opening tool into the dedicated slots found on the front ring of the lens port (image #18 on the following page). Use the lens port opening tool to turn the lens counterclockwise while carefully applying slight pressure FA6000 Housing Instruction Manual 20190204...
-
Page 23: Opening The Housing
2. While holding the lock dial up, turn the latch dial counterclockwise until the red latch tab is located at the top of the latch and cannot be turned any farther (image #20). There is no need to apply any force. Image #19 Image #20 FA6000 Housing Instruction Manual 20190204... -
Page 24: Checking The O-Ring
O-ring is only enough to allow it to slip into place without friction, so it does not twist or become dislodged. More grease is not necessarily better, and in some cases might interfere with the watertight seal of the housing. FA6000 Housing Instruction Manual 20190204... -
Page 25: Installing The Camera
INSTALLING THE CAMERA Since the FA6000 Housing is specifically designed for the Sony a6000 digital camera, installing the camera in the housing is quite simple. 1. If possible, it is recommended to install the camera inside the housing after the lens port has been mounted on the housing. - Page 26 Turn the Mode Dial on the camera and housing so the Auto (green symbol) shooting mode is selected and aligned with the white mark on the left of the wheel (image #26). Image #26 FA6000 Housing Instruction Manual 20190204...
- Page 27 17. Close the housing (see section “Closing the Housing”). Image #30 18. When using an exceptionally large lens, you might find FA6000 Housing Instruction Manual 20190204...
-
Page 28: Closing The Housing
Then firmly press the back door against the forward section of the housing. 3. Turn the secure dial clockwise till the lock dial clicks. The small red tab should then be pointed towards the bottom of the housing (image #33 on the following page). FA6000 Housing Instruction Manual 20190204... -
Page 29: Removing The Camera From The Housing
2. Open the housing as described in the section “Opening the Housing”. Take sufficient care that no water drips from your hair and body onto the housing and camera. FA6000 Housing Instruction Manual 20190204... - Page 30 (image #35). Once the lens has been turned, it can be removed from the camera by pulling it away from the camera body. d. Remove the camera from the housing by following steps 2-8 above. FA6000 Housing Instruction Manual 20190204...
-
Page 31: Optional Accessories
Note that the FA6000 Housing blocks the output of the built-in flash and prevents it from being visible in images captured. This ensures that only the external strobes connected to the system illuminate the subject, thereby diminishing the effects of backscatter, as well as shadowing caused by housing lens port and lens accessories mounted on the housing. - Page 32 Insert the adaptor with the end featuring the screw pointing out of the housing and then push it all the way into the port (image #40). Image #39 Image #40 FA6000 Housing Instruction Manual 20190204...
-
Page 33: Led Flash Triggers
FLASH & VIDEO LIGHTING SETS A variety of Fantasea flash and video lighting sets are available for the FA6000 Housing, enabling you to further enhance your images and videos. These sets include trays, arms, strobes, video lights, focus lights and more. -
Page 34: Lens Accessories
LENS ACCESSORIES Some lens ports compatible with the FA6000 Housing can be used in combination with a variety of “wet” conversion lenses and color correction filters. These lenses and filters are mounted over the housing lens port and can be installed and removed during the dive, providing flexibility in composition preferences and a wide range of enhancement options according to changing diving conditions. -
Page 35: Care & Maintenance
CARE & MAINTENANCE The Fantasea FA6000 Housing requires only a minimum amount of care for safe and reliable performance. The following tips will enable you to get the best results: 1. Always rinse your housing in streaming fresh water and if possible soak the housing in a fresh water tub or rinse tank for about 20 minutes after every dive in order to dissolve the salt water crystals from around the controls and openings of the housing. -
Page 36: Fantasea Product Consumer Limited Warranty
FANTASEA PRODUCT CONSUMER LIMITED WARRANTY “Fantasea” warrants this Fantasea Line branded product against defects in materials and workmanship under reasonable use for a period of ONE (1) YEAR, (two years, where required by law as determined by the origin of the authorized dealer). -
Page 37: Fantasea Moisture Detector
IDENTIFICATION OF PARTS Battery Electrical wires Black tape wrap Sound compartment Alarm Electrical plug Cylinder Battery removal 3V Lithium Unwrapped Alarm Unit groove #CR1220 Battery Wrapped Alarm Unit Red LED light Moisture Sensor Unit Sensor FA6000 Housing Instruction Manual 20190204... -
Page 38: Silencing The Alarm
5. Prepare a new 3V Lithium #CR1220 battery, widely available at any hardware store or watch repair shop. Image #45 6. IMPORTANT! The battery should be installed with the “+” symbol facing up and out of the unit! FA6000 Housing Instruction Manual 20190204... -
Page 39: Replacing The Alarm Unit
2. Expose the white electrical plug under the black tape wrap (image #43 on the previous page). 3. Disconnect the electrical wires plug from the alarm unit socket. 4. Connect the electrical wires plug to the socket of a new alarm unit. FA6000 Housing Instruction Manual 20190204... - Page 40 Once you have confirmed that the alarm is working, gently dry off the moisture sensor unit. This should silence the alarm. For further information, please visit our website www.fantasea.com or contact us at info@fantasea.com FA6000 Housing Instruction Manual 20190204...
Need help?
Do you have a question about the FA6000 and is the answer not in the manual?
Questions and answers