
Related Manuals for Fantasea Line FG7X II A VACUUM


Summary of Contents for Fantasea Line FG7X II A VACUUM
- Page 1 Fantasea Line FG7X II A VACUUM Housing (Cat. No. 1361) for Canon G7 X Mark II Instruction Manual FG7X II A VACUUM Housing Instruction Manual 20191218...
-
Page 2: Table Of Contents
FANTASEA HYBRID VACUUM SAFETY SYSTEM ..................22 OPTIONAL ACCESSORIES ........................30 ............................. 30 XTERNAL LASHES & V ..........................32 LASH IDEO IGHTING ............................. 32 CCESSORIES CARE & MAINTENANCE .......................... 33 FANTASEA PRODUCT CONSUMER LIMITED WARRANTY ................34 FG7X II A VACUUM Housing Instruction Manual 20191218... -
Page 3: Disclaimer
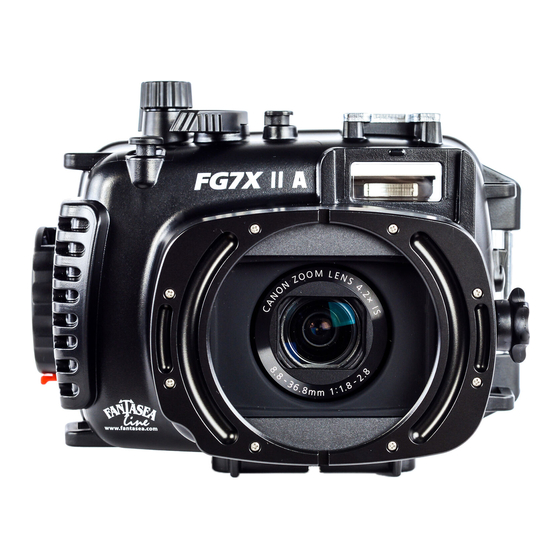
The FG7X II A VACUUM Housing features a stylish and ergonomic design, specifically created for the Canon G7 X Mark II digital camera. The FG7X II A VACUUM Housing is manufactured to the highest professional standards of function, style and durability. It is depth rated to 60m/200 feet and features ergonomically designed and labeled controls. -
Page 4: Features & Specifications
Weight (without camera on land): 830g Dimensions (without accessories): 16.5 x 14.5 x 13 cm \ 6.5 x 5.7 x 5.1 inch (W x D x H) Manufacturer's warranty included FG7X II A VACUUM Housing Instruction Manual 20191218... -
Page 5: Included In Package
5. Anti-glare hood for LCD screen 11. Diffuser quick release secure string 6. M16 port cap for Vacuum Valve (housing side) (if valve is removed) 12. Lens Port Cover Camera not included FG7X II A VACUUM Housing Instruction Manual 20191218... - Page 6 Hybrid Vacuum Safety System Components 13. Vacuum pump 14. Rubber fitting for pump 15. Wrench 16. Double-sided stickers FG7X II A VACUUM Housing Instruction Manual 20191218...
-
Page 7: Identification Of Housing Parts
Top of Housing - Corresponding numbered descriptions are found on the following page 6. Cold Shoe Mount 5. Exposure Compensation Dial 4. Mode Dial 3. On/Off 2. Shutter Release 1. Zoom Control FG7X II A VACUUM Housing Instruction Manual 20191218... - Page 8 6. Cold-Shoe Mount for Lighting Accessories- Enables mounting a flash, video light, torch or focus light on top of the housing by using a dedicated connector. For further information regarding such connectors, please visit the Fantasea website – www.fantasea.com FG7X II A VACUUM Housing Instruction Manual 20191218...
- Page 9 If using only one external flash, make sure the second fiber optic cable adaptor remains in its place to block any light coming out of the exposed adaptor hole. FG7X II A VACUUM Housing Instruction Manual 20191218...
- Page 10 12. Lanyard Loops – The 4 lanyard loops featured on the housing are used to attach a Hand Lanyard or Hand Strap to the housing, as well as to secure accessories using snap cords or secure strings. FG7X II A VACUUM Housing Instruction Manual 20191218...
- Page 11 Vacuum Valve. 14. Ring Function Selector / Delete – a. In shooting mode, press this button to reassign control ring functions. b. In playback mode, press this button to delete a single image. FG7X II A VACUUM Housing Instruction Manual 20191218...
- Page 12 25. Removable Anti-Glare Hood – The anti-glare hood enables a better view of the LCD screen when shooting in bright conditions. It can be removed and installed during the dive. For further instructions, please refer to the section “Preparing the Housing”. FG7X II A VACUUM Housing Instruction Manual 20191218...
-
Page 13: Setting Up The Housing
Install the anti-glare hood over the anti-glare hood rails at the back of the housing. First install the anti-glare hood over the top rail (image #3) and then FG7X II A VACUUM Housing Instruction Manual 20191218... - Page 14 It is important that a first dive with the housing is always made without the camera in order to verify that the housing watertight seal has not been affected during transport and after long periods of storage. Image #1 Image #2 Image #3 Image #4 FG7X II A VACUUM Housing Instruction Manual 20191218...
-
Page 15: Opening The Housing
4. Note that when opening the housing for the first time or when opening it after airplane trips, increased resistance might be encountered. Therefore, it is important not to lock the housing and to leave it slightly open when transporting by air. FG7X II A VACUUM Housing Instruction Manual 20191218... -
Page 16: Checking The O-Ring
5. When replacing the O-ring, place it back into the groove starting at one corner and gently pressing it into the groove all around the housing until it is all seated in the groove and no part of it is sticking up or out of the groove. FG7X II A VACUUM Housing Instruction Manual 20191218... -
Page 17: Installing The Camera
INSTALLING THE CAMERA Since the FG7X II A VACUUM Housing is specifically designed for the Canon G7 X Mark II digital camera, installing the camera in the housing is quite simple. 1. Make sure the camera is turned off. -
Page 18: Closing The Housing
Then firmly press the back door against the forward section of the housing. 4. Turn the secure dial clockwise till the lock dial clicks. The small red tab should then be pointed towards the bottom of the housing (image #12). FG7X II A VACUUM Housing Instruction Manual 20191218... - Page 19 10. Prior to diving with the housing, submerge it in a shallow tub of water or rinse tank. Carefully look at the housing to make sure no bubbles are escaping from it and that no water is entering. FG7X II A VACUUM Housing Instruction Manual 20191218...
-
Page 20: Removing The Camera From The Housing
(Image #14). b. Gently push the flash diffuser against the Image #14 housing lens port till it clicks. FG7X II A VACUUM Housing Instruction Manual 20191218... - Page 21 6. Note that once the camera’s built-in flash has been popped up it can be turned off using the Flash / Right control and selecting the “Off” option. Rotating the Flash Up Switch counterclockwise will not have any effect on the built-in flash. FG7X II A VACUUM Housing Instruction Manual 20191218...
-
Page 22: Fantasea Hybrid Vacuum Safety System
Identification of System Parts (Housing Front Door Interior) Main PC Board Signal Board LED Indicator Moisture Sensor FG7X II A VACUUM Housing Instruction Manual 20191218... - Page 23 10. Never apply any type of pressure on the battery, expose it to direct heat or chemicals. 11. Battery must not be charged in temperatures below freezing or above 50°C (122°F). FG7X II A VACUUM Housing Instruction Manual 20191218...
- Page 24 If the valve screws out together with its cap, use the wrench included in order to tighten the valve inside the port. This will allow for easy and safe removal of the protective cap when screwed out. Image #16 FG7X II A VACUUM Housing Instruction Manual 20191218...
- Page 25 LED indicator turns steady yellow. 8. The analysis beings once the LED Indicator turns steady yellow. Carefully disconnect the Vacuum Pump from the Vacuum Valve and reinstall the Protective Cap over the valve. FG7X II A VACUUM Housing Instruction Manual 20191218...
- Page 26 Red/Yellow 4-min. Vacuum Release Vacuum Continue Inspect housing Analysis in progress with Valve Lock for source of Pumping leakage Flashing Red = Flashing Green = Housing Failed Housing ready to Check dive FG7X II A VACUUM Housing Instruction Manual 20191218...
- Page 27 Gently wipe the Moisture Sensor unit with a soft dry cloth in order to dry it off. b. Switch the Vacuum System off using the power switch on the Signal Board. FG7X II A VACUUM Housing Instruction Manual 20191218...
- Page 28 3. Never soak or wash the interior of the housing with water. This will cause irreparable damage to all Hybrid Vacuum Safety System electronic components! FG7X II A VACUUM Housing Instruction Manual 20191218...
- Page 29 2. The Vacuum Valve port was designed to accommodate the Vacuum Valve only and any other components should not be installed on this port. FG7X II A VACUUM Housing Instruction Manual 20191218...
-
Page 30: Optional Accessories
The FG7X II A VACUUM Housing can be used with underwater slave flashes. These external flashes feature a slave sensor which triggers the external flash to fire in sync with the internal camera flash. - Page 31 Tightening the screw too much might damage the fiber optic cable. Once the fiber optic cable has been installed on the Image #26 Fiber Optic Cable Plate, install the Fiber Optic Cable FG7X II A VACUUM Housing Instruction Manual 20191218...
-
Page 32: Flash & Video Lighting Sets
FLASH & VIDEO LIGHTING SETS A variety of Fantasea flash and video lighting sets are available for the FG7X II A VACUUM Housing, enabling you to further enhance your images and videos. These sets include trays, Flex arms, slave flashes, powerful and sturdy yet stylish video lights, fiber optic cables, focus lights, padded bags and more. -
Page 33: Care & Maintenance
CARE & MAINTENANCE The Fantasea FG7X II A VACUUM Housing requires only a minimum amount of care for safe and reliable performance. The following tips will enable you to get the best results: 1. Always rinse your housing in streaming fresh water and if possible soak the housing in a fresh water tub or rinse tank for about 20 minutes after every dive in order to dissolve the salt water crystals from around the controls and openings of the housing. -
Page 34: Fantasea Product Consumer Limited Warranty
FANTASEA PRODUCT CONSUMER LIMITED WARRANTY “Fantasea” warrants this Fantasea Line branded product against defects in materials and workmanship under reasonable use for a period of ONE (1) YEAR, (two years, where required by law as determined by the origin of the authorized dealer).
Need help?
Do you have a question about the FG7X II A VACUUM and is the answer not in the manual?
Questions and answers