
Related Manuals for Fantasea Line FRX100 VI


Summary of Contents for Fantasea Line FRX100 VI
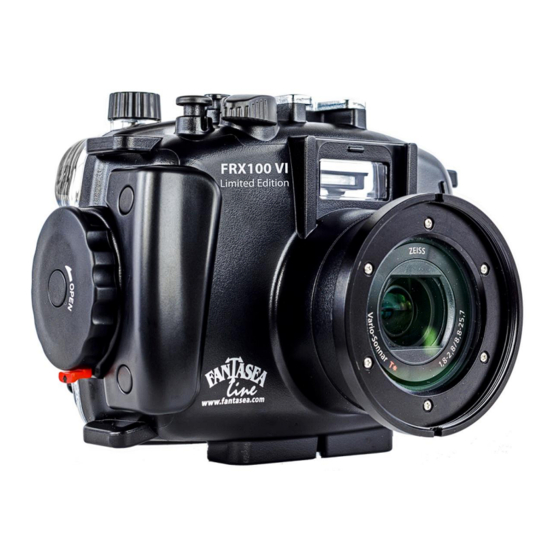
- Page 1 Fantasea Line FRX100 VI Housing Limited Edition for Sony RX100 VI (24-66mm)* (Cat. No. 1508) Instruction Manual FRX100 VI Housing Limited Edition - Instruction Manual 20181003...
-
Page 2: Table Of Contents
FANTASEA PRODUCT CONSUMER LIMITED WARRANTY ................27 FANTASEA MOISTURE DETECTOR ........................28 ............................28 DENTIFICATION OF ARTS ..............................29 ILENCING THE LARM ..............................29 EPLACING ATTERIES ............................30 EPLACING THE LARM FRX100 VI Housing Limited Edition - Instruction Manual 20181003... -
Page 3: Disclaimer
The FRX100 VI Housing Limited Edition features a flat port, which allows for mounting a wide variety of wet conversion lenses and using the camera's 24-66mm* focal range. In addition to conversion lenses, the FRX100 VI Housing Limited Edition was designed to be compatible with a complete accessory system, enabling photographers to enhance the quality of their images. -
Page 4: Features & Specifications
Dimensions (without accessories): 15.5 x 14.5 x 12 cm \ 6.25 x 5.75 x 4.75 inch (W x D x H) Manufacturer’s warranty * In depths greater than 40 meters, maximum focal length is limited to 60mm FRX100 VI Housing Limited Edition - Instruction Manual 20181003... -
Page 5: Included In Package
4. Silicone grease 10. Spare back door O-ring seal 5. Anti-glare hood for LCD screen 11. Diffuser quick release secure string 6. Hand strap (housing side) 12. Lens Port Cover Camera not included FRX100 VI Housing Limited Edition - Instruction Manual 20181003... -
Page 6: Identification Of Housing Parts
5. Cold Shoe Mount 4. Mode Dial 6. Fiber Optic Cable Plate 3. On/Off 7. Control Ring 2. Shutter Release 1. Zoom Control 9. Tripod Mounting Screw Holes 8. Lens Port (bottom) FRX100 VI Housing Limited Edition - Instruction Manual 20181003... - Page 7 The FRX100 VI Housing Limited Edition allows zooming in with the camera lens to a maximum focal length of 66mm*. Attempting to zoom in any further than 66mm might result with a lens error that can only be solved by turning the camera off and back on again.
- Page 8 Note that when photographing using the camera built-in flash only, the flash diffuser accessory should be installed, or else unwanted shading will occur in most images taken. FRX100 VI Housing Limited Edition - Instruction Manual 20181003...
- Page 9 3 adjustment positions, you can better determine how and where to position the housing on the tray. This configuration also allows for the use of 2 set screws for the tray mount, thereby preventing any swiveling of the housing on the tray. FRX100 VI Housing Limited Edition - Instruction Manual 20181003...
- Page 10 (REC) appears and displayed with the elapsed time. To record a video in HFR shooting mode, first push the Select (center) control and then the Movie Control. b. Push the Movie Control again in order to stop recording. FRX100 VI Housing Limited Edition - Instruction Manual 20181003...
- Page 11 23. Removable Anti-Glare Hood – The anti-glare hood enables a better view of the LCD screen when shooting in bright conditions. It can be removed and installed during the dive. For further instructions, please refer to the section “Preparing the Housing”. FRX100 VI Housing Limited Edition - Instruction Manual 20181003...
-
Page 12: Setting Up The Housing
Fiber Optic Cable Plate secure string is attached to as well (image #2 on the following page). Please note that this line may come assembled and then there is no need for installation. FRX100 VI Housing Limited Edition - Instruction Manual 20181003... - Page 13 It is important that a first dive with the housing is always made without the camera in order to verify that the housing watertight seal has not been affected during transport and after long periods of storage. Image #1 Image #2 FRX100 VI Housing Limited Edition - Instruction Manual 20181003...
-
Page 14: Opening The Housing
(image #6). There is no need to apply any force. 3. Carefully open the back side of the housing. Image #6 Image #5 FRX100 VI Housing Limited Edition - Instruction Manual 20181003... -
Page 15: Checking The O-Ring
O-ring is only enough to allow it to slip into place without friction, so it does not twist or become dislodged. More grease is not necessarily better, and in some cases might interfere with the watertight seal of the housing. FRX100 VI Housing Limited Edition - Instruction Manual 20181003... -
Page 16: Installing The Camera
7. The white O-ring featured on the back side of the front door shouldn’t be removed unless it’s damaged. INSTALLING THE CAMERA Since the FRX100 VI Housing Limited Edition is specifically designed for the Sony RX100 VI, installing the camera in the housing is quite simple. 1. Make sure the camera is turned off. -
Page 17: Closing The Housing
4. Turn the secure dial clockwise till the lock dial clicks. The small red tab should then be pointed towards the bottom of the housing (image #13 on the following page). FRX100 VI Housing Limited Edition - Instruction Manual 20181003... -
Page 18: Removing The Camera From The Housing
2. When opening the housing, it is important to hold it so the lens port is facing down. This will prevent the camera from slipping out of the housing while being opened. FRX100 VI Housing Limited Edition - Instruction Manual 20181003... -
Page 19: Using The Camera Built-In Flash
(image #16 on the following page). This rest-point of the diffuser eliminates the need to completely remove it from the housing during the dive. Image #15 FRX100 VI Housing Limited Edition - Instruction Manual 20181003... -
Page 20: Optional Accessories
The FRX100 VI Housing Limited Edition can be used with underwater slave flashes. These external flashes feature a slave sensor which triggers the external flash to fire in sync with the internal camera flash. - Page 21 2 fiber optic cables to the housing. If the fiber optic cable you have features a different type of adaptor, remove this adaptor from the end of the cable and use the adaptors included with the FRX100 VI Housing Limited Edition instead.
-
Page 22: Flash & Video Lighting Sets
LENS ACCESSORIES The lens port of the FRX100 VI Housing Limited Edition features a 67mm thread, which can accommodate all 67mm conversion lenses and color correction filters, such as: ... -
Page 23: Housing Hand Grip Strap
HOUSING HAND GRIP STRAP The FRX100 VI Housing Limited Edition features two hand strap loops on the “latch” side of the housing, which enable the attachment of an optional hand grip strap for the housing in order to improve hand grip, especially when using the housing during extreme sports activities. - Page 24 9. Make sure to rinse the Hand Strap in fresh water and then dry after every use. Store in a dry, shaded area. FRX100 VI Housing Limited Edition - Instruction Manual 20181003...
-
Page 25: Cold-Shoe Connector For Lighting Accessories
Cold-Shoe connector mount. MOISTURE DETECTOR The FRX100 VI Housing Limited Edition comes with a Moisture Detector installed inside (on the inner side of the housing latch dial). Moisture detectors are very sensitive, so whenever moisture is detected by the sensor located at the bottom of the housing, the moisture detector LED light begins flashing and a warning alarm starts beeping, thereby alerting the user of a possible leak. -
Page 26: Care & Maintenance
CARE & MAINTENANCE The Fantasea FRX100 VI Housing Limited Edition requires only a minimum amount of care for safe and reliable performance. The following tips will enable you to get the best results: 1. Always rinse your housing in streaming fresh water and if possible soak the housing in a fresh water tub or rinse tank for about 20 minutes after every dive in order to dissolve the salt water crystals from around the controls and openings of the housing. -
Page 27: Fantasea Product Consumer Limited Warranty
13. Always leave the housing slightly open when transporting by air. 14. Never dive with the Fantasea FRX100 VI Housing Limited Edition to a depth greater than 60 meters/200 feet. 15. It is important to carry out the first dive without the camera inside the housing. Check that the watertight seal has not been affected during transport and long periods of storage. -
Page 28: Fantasea Moisture Detector
Electrical wires Black tape wrap Sound compartment Alarm Electrical plug Cylinder Battery removal 3V Lithium Unwrapped Alarm Unit groove #CR1220 Battery Wrapped Alarm Unit Red LED light Moisture Sensor Unit Sensor FRX100 VI Housing Limited Edition - Instruction Manual 20181003... -
Page 29: Silencing The Alarm
5. Prepare a new 3V Lithium #CR1220 battery, widely available at any hardware store or watch repair shop. Image #31 6. IMPORTANT! The battery should be installed with the “+” symbol facing up and out of the unit! FRX100 VI Housing Limited Edition - Instruction Manual 20181003... -
Page 30: Replacing The Alarm Unit
2. Expose the white electrical plug under the black tape wrap (image #29 on the previous page). 3. Disconnect the electrical wires plug from the alarm unit socket. 4. Connect the electrical wires plug to the socket of a new alarm unit. FRX100 VI Housing Limited Edition - Instruction Manual 20181003... - Page 31 Once you have confirmed that the alarm is working, gently dry off the moisture sensor unit. This should silence the alarm. For further information, please visit our website www.fantasea.com or contact us at info@fantasea.com FRX100 VI Housing Limited Edition - Instruction Manual 20181003...
Need help?
Do you have a question about the FRX100 VI and is the answer not in the manual?
Questions and answers