
Related Manuals for Fantasea Line 13833


Summary of Contents for Fantasea Line 13833
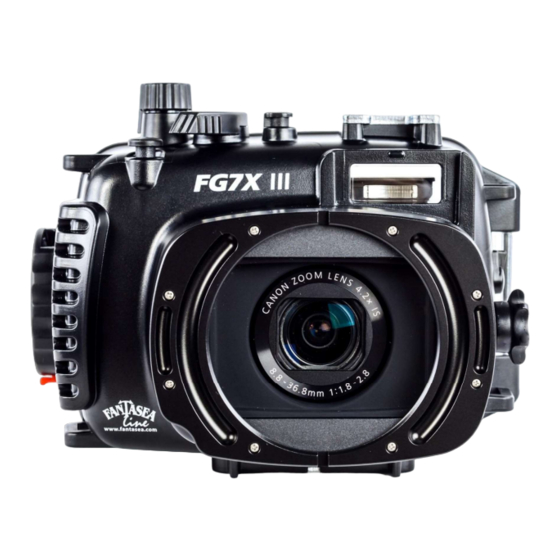
- Page 1 Fantasea Line FG7X III S Housing (Cat. No. 13833) for Canon G7 X Mark III Instruction Manual FG7X III S Housing Instruction Manual 20220601...
-
Page 2: Table Of Contents
TABLE OF CONTENTS TABLE OF CONTENTS ..........................2 DISCLAIMER ............................. 3 INTRODUCTION ............................3 ............................3 ENERAL NFORMATION & S ........................... 4 EATURES PECIFICATIONS INCLUDED IN PACKAGE ..........................5 IDENTIFICATION OF HOUSING PARTS ....................... 7 SETTING UP THE HOUSING ........................13 ............................. -
Page 3: Disclaimer
While every effort has been made in order to ensure that the information included in this instruction manual is accurate and complete, no liability will be accepted for any errors or omissions. Fantasea Line reserves the right to change product specifications and features described herein at any time without prior notice. -
Page 4: Features & Specifications
Features & Specifications Hybrid Vacuum Safety System included Moisture detector and alarm Depth rated to 60m/200 feet Ergonomic design Made from durable injection molded Polycarbonate Full access to all essential camera controls & functions with clearly marked controls ... -
Page 5: Included In Package
INCLUDED IN PACKAGE 1. FG7X III S Housing 7. Screwdriver 2. Removable flash diffuser with secure line 8. Silica gel packs 3. Hand lanyard 9. O-ring remover 4. Silicone grease 10. Spare back door O-ring seal 5. Anti-glare hood for LCD screen 11. - Page 6 Hybrid Vacuum Safety System Components 13. Vacuum pump (w/o fitting) 14. Rubber fitting for pump 15. Multi purpose key (2 parts) 16. Double-sided stickers FG7X III S Housing Instruction Manual 20220601...
-
Page 7: Identification Of Housing Parts
IDENTIFICATION OF HOUSING PARTS 1. Please refer to the Canon G7 X Mark III camera instruction manual for detailed descriptions and instructions regarding all camera controls and Note functions. 2. It is strongly recommended that you familiarize yourself with all the controls topside before using these controls underwater. - Page 8 Numbered descriptions below refer to corresponding numbers on the top housing graphic (previous page): 1. Zoom Control – Turning this control activates the camera zoom button. a. In Shooting Mode – i. Turn the zoom control clockwise to zoom out, increasing the area visible in the frame. ii.
- Page 9 Front Side of Housing - Corresponding numbered descriptions are found below the image 7. Fiber Optic Cable Plate 8. Flash Up Switch (on side) 9. Control Ring 10. Lens Port 11. Tripod Mounting Screw Holes 12. Lanyard Loop (bottom) 7. Fiber Optic Cable Plate- a.
- Page 10 8. Flash Up Switch - Rotating this control clockwise (pulling it towards the back of the housing) will pop- up the camera built-in flash. Note that once the camera built-in flash has been popped up, it can be disabled again using the Flash / Right control and selecting “flash disabled” on the flash mode menu. Rotating the Flash Up Switch counterclockwise will not have any effect on the built-in flash.
- Page 11 Back Side of Housing - Corresponding numbered descriptions are found below the image 14. AE Lock 13. Vacuum Valve 15. Movie Button 16. Drive Mode / Delete / Up 17. Flash/ Right 18. INFO / Down 25. Anti-Glare Hood 19. Macro / MF/ Left 21.
- Page 12 15. Movie (Video Control) Button – a. Push the Movie button in any shooting mode to start recording a video. The camera beeps once as recording begins and the record symbol (REC) appears with the elapsed time. a. Push the Movie button again in order to stop recording. Multi-Selector buttons (16-20) 16.
-
Page 13: Setting Up The Housing
SETTING UP THE HOUSING It is important that a first dive is always carried out with the housing empty (no camera installed inside) in order to verify that the housing Note watertight seal has not been affected during transport and after long periods of storage. - Page 14 gently and carefully stretch it downwards to install it on the bottom rail, making sure it’s sitting securely on both upper and lower rails (image #4). e. It is important that a first dive with the housing is always made without the camera in order to verify that the housing watertight seal has not been affected during transport and after long periods of storage.
-
Page 15: Opening The Housing
OPENING THE HOUSING Prior to opening a vacuumed housing, the vacuum should be released Important Notice using the Vacuum Valve. For further instructions, please refer to the section “Fantasea Hybrid Vacuum Safety System”. 1. Pull the small red tab located at the bottom of the latch dial outwards (up and away from the housing), as indicated by the arrow direction (image #5). -
Page 16: Checking The O-Ring
CHECKING THE O-RING 1. Prior to each closure of the housing, the back door black O-ring should be visually inspected. If there is any debris present, including dirt, sand, dust, hair or any other matter, it must be cleaned to ensure a proper watertight seal. -
Page 17: Installing The Camera
6. The white O-ring featured on the back side of the front door should be visually inspected prior to each dive. If there is any debris present, gently wipe the area with a soft microfiber cloth in order to cleanse it. 7. -
Page 18: Closing The Housing
SIGNAL BOARD Image #10 4. If inserting a silica gel pack inside the housing in order to prevent moisture, it is best to insert it on the left side of the camera, in the slot midway up between the two rubber shock absorber mounts, where it doesn’t interfere with proper housing operation. - Page 19 Image #11 Image #12 5. Gently try pulling the back door away from the front door. If the housing is properly closed, it should be impossible to open the back door. 6. Visually inspect the black O-ring through the transparent back door for proper closure. Make sure it isn’t twisted or out of the groove and that no foreign matter has been caught in the seal, such as secure lines, sand, grit, hairs or any other foreign substance.
-
Page 20: Removing The Camera From The Housing
11. Using the Vacuum Safety System installed inside the housing, perform a pre-dive check to confirm the watertight seal of the housing. See “Hybrid Vacuum Safety System” section for further instructions. REMOVING THE CAMERA FROM THE HOUSING 1. After use, thoroughly rinse the housing fresh water. Prior to opening the housing, make sure both your hands and the housing are clean and dry. - Page 21 c. Attach the flash diffuser quick release secure string to the other side of the string connected to the housing in order to avoid losing the flash diffuser underwater. d. In order to remove the flash diffuser from the housing, gently push it outwards first from its top and then from the bottom.
-
Page 22: Fantasea Hybrid Vacuum Safety System
FANTASEA HYBRID VACUUM SAFETY SYSTEM The Fantasea Hybrid Vacuum Safety System is an optional pre-dive vacuum test and leak detector safety system. The system allows confirming the watertight seal of the housing prior to the dive using the vacuum system and monitoring the housing seal during the dive using the moisture detector. Follow the instructions below to safely charge and use the system. - Page 23 Identification of System Parts (Housing Back Door Exterior) Vacuum Valve Vacuum Valve Protective Cap Vacuum Release Tip Charging the Unit 1. Turn the unit on using the power switch featured on the Signal Board. 2. The LED Indicator will start flashing blue: a.
- Page 24 12. To extend the battery’s lifespan: a. Avoid draining the battery all the way to 0%. Even though the unit can handle a few more dives even when the LED Indicator starts rapidly flashing blue, it is best to connect the unit to a charger at this point.
- Page 25 4. Install the Rubber Fitting on the Vacuum Pump. Hold the Rubber Fitting against the Vacuum Pump so its wide opening faces the funnel of the pump. Insert the funnel of the pump into the Rubber Fitting and then push the fitting against the funnel until it is fully inserted (image #17).
- Page 26 9. Analysis duration is approx. 3-4 minutes. During this time, the housing must be left uninterrupted. Avoid moving the housing or pushing any of the housing controls during the analysis. 10. Once the analysis is complete, the LED Indicator will turn either red or green, depending on the results: a.
- Page 27 13. Once the pre-dive check is complete and the watertight seal of the housing has been confirmed: a. Reinstall the Protective Cap over the Vacuum Valve if it hasn’t been reinstalled yet. Note that the Vacuum Valve is watertight even without the Protective Cap, as long as the Vacuum Release Tip isn’t pulled out during the dive.
- Page 28 System Care & Maintenance 1. You can use the Multi purpose key included periodically to make Image #21 sure the Vacuum Valve is tightly screwed into its port and was not accidently loosened when unscrewing the Protective Cap (image #21). Do not over tighten the Vacuum Valve or this may damage the Port or the Valve! The O-ring positioned between the Vacuum Valve and its protective...
- Page 29 Vacuum Valve Removal 1. In case of removing the Vacuum Valve for whatever reason, follow the steps below: Remove the Vacuum Valve from its port using the Multi purpose key. b. Install the M16 Cap included in the package on the Vacuum Valve port by screwing it all the way in (image #22).
-
Page 30: Optional Accessories
OPTIONAL ACCESSORIES FOR THE FULL SELECTION OF FANTASEA ACCESSORIES COMPATIBLE WITH THE FG7X III S HOUSING, PLEASE REFER TO THE FANTASEA WEBSITE – WWW.FANTASEA.COM EXTERNAL FLASHES Underwater flashes and strobes were designed to improve the color, lighting and quality of your underwater images. - Page 31 c. Simply push the adaptor featured at the end of the cable into the dedicated slots on the front side of the plate, instead of the adaptors you’ve just pulled out, until they are fully fitted inside. Gently pull the fiber optic cable in order to make sure that it doesn’t come off easily.
-
Page 32: Flash & Video Lighting Sets
Plate by inserting it inside the dedicated slot on the housing and pushing it all the way in. 6. When installed on the housing, the Fiber Optic Cable Plate blocks the internal camera flash, so only the external slave flash illuminates the subject. This diminishes the effects of backscatter, as well as eliminates any shadowing effect caused by housing lens port, especially when lens accessories are mounted on the housing. -
Page 33: Care & Maintenance
CARE & MAINTENANCE The Fantasea FG7X III S Housing requires only a minimum amount of care for safe and reliable performance. The following tips will enable you to get the best results: 1. Always rinse your housing in streaming fresh water and if possible soak the housing in a fresh water tub or rinse tank for about 20 minutes after every dive in order to dissolve the salt water crystals from around the controls and openings of the housing. -
Page 34: Fantasea Product Consumer Limited Warranty
FANTASEA PRODUCT CONSUMER LIMITED WARRANTY “Fantasea” warrants this Fantasea Line branded product against defects in materials and workmanship under reasonable use for a period of ONE (1) YEAR, (two years, where required by law as determined by the origin of the authorized dealer).
Need help?
Do you have a question about the 13833 and is the answer not in the manual?
Questions and answers