
Related Manuals for Fantasea Line FA6500 V2


Summary of Contents for Fantasea Line FA6500 V2
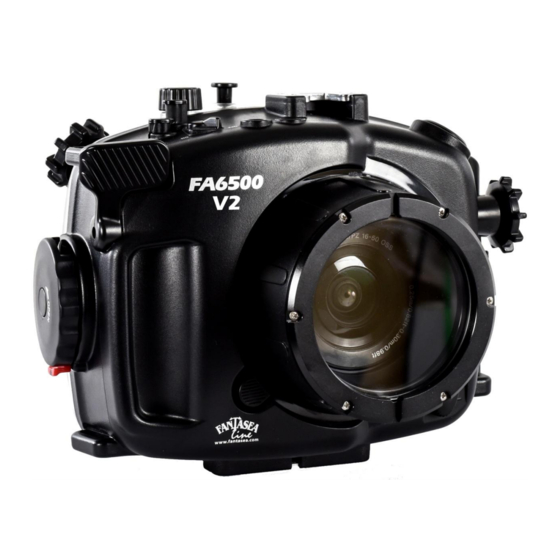
- Page 1 Fantasea Line FA6500 V2 Housing (Cat. No. 1525) For Sony a6300 a6500 Instruction Manual FA6500 V2 Housing Instruction Manual 20190402...
-
Page 2: Table Of Contents
..........................48 LASH IDEO IGHTING ..........................48 NTERCHANGEABLE ORTS ............................. 49 CCESSORIES ....................49 ONNECTOR FOR IGHTING CCESSORIES M16 P ............................ 49 CCESSORIES CARE & MAINTENANCE .......................... 50 FANTASEA PRODUCT CONSUMER LIMITED WARRANTY ................51 FA6500 V2 Housing Instruction Manual 20190402... -
Page 3: Disclaimer
While every effort has been made in order to ensure that the information included in this instruction manual is accurate and complete, no liability will be accepted for any errors or omissions. Fantasea Line reserves the right to change product specifications and features described herein at any time without prior notice. -
Page 4: Features & Specifications
Weight (with camera and FML Flat Port on land): 1,645g / 58 oz Dimensions (without accessories): 20.5 x 14.5 x 15.5 cm \ 8 x 5.7 x 6.1 inch (W x D x H) Manufacturer’s warranty FA6500 V2 Housing Instruction Manual 20190402... -
Page 5: Included In Package
INCLUDED IN PACKAGE (Corresponding numbered descriptions appear on the following page) FA6500 V2 Housing Instruction Manual 20190402... - Page 6 8. Sticker for camera flash 16. M16 port cap for Vacuum Valve (if valve is removed) Hybrid Vacuum Safety System Components (Optional) 17. Vacuum pump 18. Rubber fitting for pump 19. Wrench 20. Double-sided stickers FA6500 V2 Housing Instruction Manual 20190402...
-
Page 7: Identification Of Housing Parts
Optic Cable Port 4. Control Dial 3. C1 Button 2. On/Off 1. Shutter Release 11. Lens Dial 15. Latch Dial Latch Dial Lock 13. Lanyard Loop 12. Interchangeable Lens Port System (Lens Ports are supplied separately) FA6500 V2 Housing Instruction Manual 20190402... - Page 8 8. Cold-Shoe Mount for Lighting Accessories- Enables mounting a flash, video light, torch or focus light on top of the housing by using a dedicated connector. For further information regarding such connectors, please visit the Fantasea website – www.fantasea.com FA6500 V2 Housing Instruction Manual 20190402...
- Page 9 “Underwater Flashes & Strobes” in this manual. Note that the FA6500 V2 Housing blocks the output of the built-in flash and prevents it from being visible in images captured. This ensures that only the external strobes connected to the system illuminate the subject, thereby diminishing the effects of backscatter, as well as shadowing caused by housing lens port and lens accessories mounted on the housing.
- Page 10 “Closing the Housing”. Housing View #2 – Front - Corresponding numbered descriptions are listed on the following page 16. Lens Port Lock 18. Lens Release Control 17. Tripod Mounting Screw Holes (bottom of housing) FA6500 V2 Housing Instruction Manual 20190402...
- Page 11 In such cases, the lens should be installed and removed through the lens port. For further instructions please refer to the section “Installing the Camera”. FA6500 V2 Housing Instruction Manual 20190402...
- Page 12 Vacuum Valve in this position. For instructions of use, please refer to the section “Fantasea Hybrid Vacuum Safety System”. Prior to opening a vacuumed housing, the vacuum should be released Important Notice using the Vacuum Valve. FA6500 V2 Housing Instruction Manual 20190402...
- Page 13 29. Exposure Compensation / Image Index / Down – Pushing this control activates the camera Exposure Compensation / Image Index / Down button. FA6500 V2 Housing Instruction Manual 20190402...
- Page 14 “Preparing the Housing”. Housing View #4 – Front Door Interior - Corresponding numbered descriptions are found on the following page 37. LED Trigger Ports 36. Lens Port Lock Internal View 35. Camera Tray Port FA6500 V2 Housing Instruction Manual 20190402...
- Page 15 This spares camera battery consumption and also prevents the built-in flash recycle time from limiting continuous shooting. For LED Trigger Ports available, please visit the Fantasea website – www.fantasea.com FA6500 V2 Housing Instruction Manual 20190402...
-
Page 16: Sony A6500 And A6300 Mirrorless Digital Cameras
Slow and quick motion – Up to 5x slow motion and up to 60x quick motion in full HD Focal plane phase-detection auto focus for A-mount lenses Auto focus in Focus Magnifier for sharpest results Dust and moisture resistance build FA6500 V2 Housing Instruction Manual 20190402... -
Page 17: Setting Up The Housing
Image #1 watertight seal of the housing. A dedicated warning sticker was designed for the purpose of reminding you to push the built-in flash into the camera body prior to installing it into the FA6500 V2 Housing Instruction Manual 20190402... -
Page 18: When Using The Housing For The First Time
(image #3) and then gently and carefully stretch it downwards to install it on the bottom rail, making sure it’s sitting securely on both upper and lower rails (image #4). Image #3 Image #4 FA6500 V2 Housing Instruction Manual 20190402... - Page 19 Install the replacement extended trigger on the exposed metal shaft of the control by aligning the protrusion featured on the control with the shape of the shaft (image #8). Image #8 Image #7 FA6500 V2 Housing Instruction Manual 20190402...
-
Page 20: Converting The Housing For Use With Sony A 6300
Once conversion is complete, test the housing by installing the camera inside (see section “Installing the Camera”) and activating all housing controls to ensure they can be all easily and properly be operated. FA6500 V2 Housing Instruction Manual 20190402... - Page 21 Install the black plastic tube on the control by pushing it upwards against the exposed metal shaft of the control, so that the metal shaft is fully inserted inside the black plastic tube (image #14). Image #13 Image #14 FA6500 V2 Housing Instruction Manual 20190402...
- Page 22 Also, make sure not to cause any damage to the housing when using sharp tools. FA6500 V2 Housing Instruction Manual 20190402...
- Page 23 Open the housing and identify the interior component of the Movie Recording control – a black lever featuring a black rubber tip at its end, secured to the control shaft with an e-clip (image #22). Image #22 FA6500 V2 Housing Instruction Manual 20190402...
- Page 24 First position the e-clip around the dedicated engraving on the shaft, then push the e-clip against the shaft until it snaps into place Image #26 and clicks. You might find it easier to do so when FA6500 V2 Housing Instruction Manual 20190402...
- Page 25 Note empty (no camera installed inside) in order to verify that the housing watertight seal has not been accidently affected. FA6500 V2 Housing Instruction Manual 20190402...
-
Page 26: Installing M16 Port Accessories
Once an accessory has been installed using the M16 port, it important to Important carry out the first dive with the housing empty (no camera installed inside) in order to verify that the housing watertight seal has not been Note affected during the replacement FA6500 V2 Housing Instruction Manual 20190402... -
Page 27: Mounting And Removing Lens Ports
(image #33). Carefully push the lens port against the housing until it’s fully inserted inside the port hole. Image #33 Examine the lens port from all directions to make sure it was evenly inserted. FA6500 V2 Housing Instruction Manual 20190402... - Page 28 If mounting such lens ports on the housing and encountering resistance when attempting to push the port against the housing, simply turn the port a bit until reaching the point where the port can be inserted completely into the FA6500 V2 Housing Instruction Manual 20190402...
- Page 29 Image #37 Make sure not to scratch the lens port using the lens port opening tool. f. Separate the lens port from the housing by pulling it out and away from the housing. FA6500 V2 Housing Instruction Manual 20190402...
-
Page 30: Opening The Housing
(image #39). There is no need to apply any force. Image #38 Image #39 3. Carefully open the back side of the housing. FA6500 V2 Housing Instruction Manual 20190402... -
Page 31: Checking The O-Ring
5. When replacing the O-ring, place it back into the groove starting at one corner and gently pressing it into the groove all around the housing until it is all seated in the groove and no part of it is sticking up or out of the groove. FA6500 V2 Housing Instruction Manual 20190402... -
Page 32: Installing The Camera
INSTALLING THE CAMERA Since the FA6500 V2 Housing is specifically designed for the Sony a6500 and a6300 mirrorless digital cameras, installing the camera in the housing is quite simple. 1. If possible, it is recommended to install the camera inside the housing after the lens port has been mounted on the housing. - Page 33 (image #45). This will allow for the camera and housing mode dials to be aligned, so the housing mode dial will indicate the proper mode selected by the camera dial. AUTO AUTO Image #45 FA6500 V2 Housing Instruction Manual 20190402...
- Page 34 In such cases, the lens Image #49 FA6500 V2 Housing Instruction Manual 20190402...
-
Page 35: Closing The Housing
(image #52 on the following page). 4. Gently try pulling the back door away from the front door. If the housing is properly closed, it should be impossible to open the back door. FA6500 V2 Housing Instruction Manual 20190402... -
Page 36: Removing The Ca Mera From The Housing
It is recommended to have a clean, dry and soft towel handy in order to dry your hands and the water drops on the housing. FA6500 V2 Housing Instruction Manual 20190402... - Page 37 (image #54). Once the lens has been turned, it can be removed from the camera by pulling it away from the camera body. d. Remove the camera from the housing by following steps 2-8 above. FA6500 V2 Housing Instruction Manual 20190402...
-
Page 38: Fantasea Hybrid Vacuum Safety System
Identification of System Parts (Housing Back Door Interior) Main PC Board Signal Board LED Indicator Moisture Sensor FA6500 V2 Housing Instruction Manual 20190402... - Page 39 10. Never apply any type of pressure on the battery, expose it to direct heat or chemicals. 11. Battery must not be charged in temperatures below freezing or above 50°C (122°F). FA6500 V2 Housing Instruction Manual 20190402...
- Page 40 If the valve screws out together with its cap, use the wrench included in order to tighten the valve inside the port. This will allow for easy and safe removal of the protective cap when screwed out. Image #56 FA6500 V2 Housing Instruction Manual 20190402...
- Page 41 LED indicator turns steady yellow. 8. The analysis beings once the LED Indicator turns steady yellow. Carefully disconnect the Vacuum Pump from the Vacuum Valve and reinstall the Protective Cap over the valve. FA6500 V2 Housing Instruction Manual 20190402...
- Page 42 Yellow Yellow Red/Yellow 4-min. Vacuum Release Vacuum Continue Inspect housing Analysis in progress with Valve Lock for source of Pumping leakage Flashing Red = Flashing Green = Housing Failed Housing ready to Check dive FA6500 V2 Housing Instruction Manual 20190402...
- Page 43 Gently wipe the Moisture Sensor unit with a soft dry cloth in order to dry it off. b. Switch the Vacuum System off using the power switch on the Signal Board. Image #60 FA6500 V2 Housing Instruction Manual 20190402...
- Page 44 3. Never soak or wash the interior of the housing with water. This will cause irreparable damage to all Hybrid Vacuum Safety System electronic components! FA6500 V2 Housing Instruction Manual 20190402...
- Page 45 For installation of electronic strobe triggering bulkheads, HDMI connectors or any other accessories, use the standard M16 Port found at the top left corner of the housing. FA6500 V2 Housing Instruction Manual 20190402...
-
Page 46: Optional Accessories
Note that the FA6500 V2 Housing blocks the output of the built-in flash and prevents it from being visible in images captured. This ensures that only the external strobes connected to the system illuminate the subject, thereby diminishing the effects of backscatter, as well as shadowing caused by housing lens port and lens accessories mounted on the housing. - Page 47 Insert the adaptor with the end featuring the screw pointing out of the housing and then push it all the way into the port (image #67). Image #66 Image #67 FA6500 V2 Housing Instruction Manual 20190402...
-
Page 48: Led Flash Triggers
FLASH & VIDEO LIGHTING SETS A variety of Fantasea flash and video lighting sets are available for the FA6500 V2 Housing, enabling you to further enhance your images and videos. These sets include trays, arms, strobes, video lights, focus lights and more. -
Page 49: Lens Accessories
LENS ACCESSORIES Some lens ports compatible with the FA6500 V2 Housing can be used in combination with a variety of “wet” conversion lenses and color correction filters. These lenses and filters are mounted over the housing lens port and can be installed and removed during the dive, providing flexibility in composition preferences and a wide range of enhancement options according to changing diving conditions. -
Page 50: Care & Maintenance
CARE & MAINTENANCE The Fantasea FA6500 V2 Housing requires only a minimum amount of care for safe and reliable performance. The following tips will enable you to get the best results: 1. Always rinse your housing in streaming fresh water and if possible soak the housing in a fresh water tub or rinse tank for about 20 minutes after every dive in order to dissolve the salt water crystals from around the controls and openings of the housing. -
Page 51: Fantasea Product Consumer Limited Warranty
FANTASEA PRODUCT CONSUMER LIMITED WARRANTY “Fantasea” warrants this Fantasea Line branded product against defects in materials and workmanship under reasonable use for a period of ONE (1) YEAR, (two years, where required by law as determined by the origin of the authorized dealer).
Need help?
Do you have a question about the FA6500 V2 and is the answer not in the manual?
Questions and answers