Sign In
Upload
Download
Table of Contents
Contents
Add to my manuals
Delete from my manuals
Share
URL of this page:
HTML Link:
Bookmark this page
Add
Manual will be automatically added to "My Manuals"
Print this page
×
Bookmark added
×
Added to my manuals
Manuals
Brands
3D Systems Manuals
3d printer
ZPrinter 350
User manual
3D Systems ZPrinter 350 User Manual
Hide thumbs
1
2
3
Table Of Contents
4
5
6
7
8
9
10
11
12
13
14
15
16
17
18
19
20
21
22
23
24
25
26
27
28
29
30
31
32
33
34
35
36
37
38
39
40
41
42
43
44
45
46
47
48
49
50
51
52
53
54
55
56
57
58
59
60
61
62
63
64
65
66
67
68
69
70
71
72
73
74
75
76
77
78
79
80
81
82
83
84
page
of
84
Go
/
84
Contents
Table of Contents
Troubleshooting
Bookmarks
Table of Contents
Table of Contents
Zprinter 350 and Zprinter 450 Overview
Key Features
Specifications
Computer/System Requirements
How 3D Printing Works
Important Terms
Zprinter 350/450 Components
System Exterior
Build Chamber Interior
Fine Powder Removal Chamber Interior
Zprinter 350/450 Rear View
Zprinter 350/450 Rear View - Connections
Service Station
Carriage and Print Head
Pogo Pins and Septum
LCD Display and Control Knob (Control Panel)
Control Knob Operations
LCD Menu Overview - Zprinter 350
LCD Menu Overview - Zprinter 450
Where to Go for more Information
Setup and Print the Build
Install Zprint and Zedit
Zprint
Zedit
Choose Part Orientation
Speed, Strength, and Accuracy
Parts Containing an Opening or Hollow Area
Parts Containing Cylindrical Features
Parts Containing Overhangs
Open a Part in Zprint
Zprint Main Window
Check the Default Settings
Printer Settings
Powder Settings
Check for Errors or a Collision
Check the Build Settings
Prepare the Build Area
Print the Build
Dry the Part
Depowder the Part
Manual Gross Depowdering
Automated Gross Depowdering (AGD) (Zprinter 450 Only)
Fine Powder Removal
Next Step: Cleaning the Printer
Routine Cleaning
Vacuum Excess Powder
Empty the Debris Separator
Clean the Fast Axis Rails and Carriage
Clean the Service Station
Example - Dirty Service Station
Example - Clean Service Station
Cleaning Procedure
Clean the Parking Caps
Post-Processing
Post-Processing with Z-Bond
Preparation
Post-Processing Using the Dipping Method
Post-Processing Using the Drizzle Method
Additional Operations
The Printer Status Report
The Printer Status Dialog
Ready to Print
Not Ready to Print
Change Print Head(S)
Add Binder
Add Powder
Add Wash Fluid
Replace the Waste Tray
Position Build Piston (Build Bed)
Cover
Printer Maintenance
The Maintenance Dialog
Fast Axis Bearing Lubrication
Piston Screw Lubrication
Slow Axis Bearing Lubrication
Clean the Spreader Roller
Upgrading the Firmware
Printer Storage Preparation
Troubleshooting the Zprinter 350/450
Try this First
Problems Powering up
Print Head Errors/Weak Parts
Try this First
Troubleshoot Print Head/Weak Parts
Motion Errors/Fast Axis
Troubleshoot Fast Axis
Motion Errors/Slow Axis
Troubleshoot Slow Axis
Network Errors/Cannot Connect to Printer
Network Errors/Packet Timeout
Part Quality Issues Streaky/Striped Parts, Delamination, Weak Parts
Part Quality Issues Bad Surface Finish
Bad Horizontal Surface Finish
Bad Vertical Surface Finish
Miscellaneous Problems
Vacuum Has Low/No Suction
Binder Cartridge Is Full but Zprint Indicates Empty
Error Codes and Messages Background Details
Additional Information
Materials
Service
Calling for Service
Contact 3D Systems
Advertisement
Quick Links
1
Table of Contents
2
Zprinter 350 and Zprinter 450 Overview
3
Zprinter 350/450 Components
Download this manual
10/31/12
®
ZPrinter
®
ZPrinter
User Manual
Part Number 95035
Rev. A
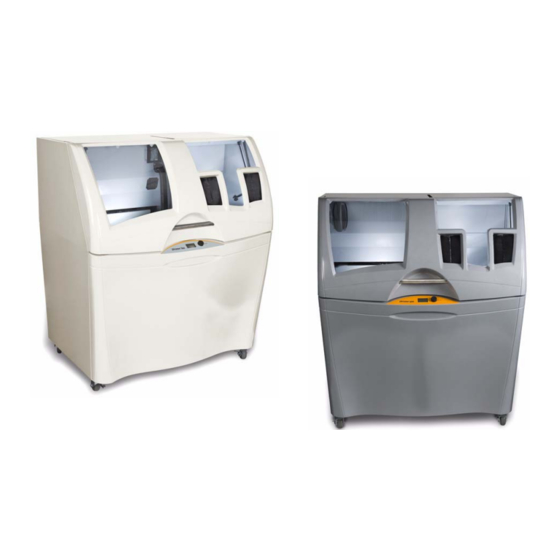
350
450
All Rights Reserved
Table of
Contents
Previous
Page
Next
Page
1
2
3
4
5
Advertisement
Table of Contents
Need help?
Do you have a question about the ZPrinter 350 and is the answer not in the manual?
Ask a question
Questions and answers
This manual is also suitable for:
Zprinter 450
Table of Contents
Print
Rename the bookmark
Delete bookmark?
Delete from my manuals?
Login
Sign In
OR
Sign in with Facebook
Sign in with Google
Upload manual
Upload from disk
Upload from URL

Need help?
Do you have a question about the ZPrinter 350 and is the answer not in the manual?
Questions and answers