
Related Manuals for Reer MZERO


Summary of Contents for Reer MZERO
- Page 1 Installation, Use and Maintenance STAND ALONE PROGRAMMABLE SAFETY CONTROLLER 8541403 • 19/07/2021 • Rev.1...
-
Page 2: Table Of Contents
Software description ..........................8 PRODUCT COMPOSITION .......................... 8 INSTALLATION .............................. 9 Mechanical fastening ..........................9 Calculation of safety distance of an ESPE connected to MZERO ............9 Electrical connections ..........................10 Instructions concerning connection cables..................10 MZERO 16.4 PINOUT ........................... 11 USB input .............................. - Page 3 STAND ALONE PROGRAMMABLE SAFETY CONTROLLER Textual tool bar............................ 26 Create a new project (configure the MZERO system) ..............26 Change user parameters ........................26 OBJECTS - OPERATOR - CONFIGURATION tool bars ..............27 Creating the diagram .......................... 28 USE OF MOUSE RIGHT BUTTON ........................28 Example of a project ...........................
- Page 4 STAND ALONE PROGRAMMABLE SAFETY CONTROLLER NAND ..................................60 NOT ................................... 61 OR ....................................61 NOR ................................... 61 XOR ................................... 62 XNOR ..................................62 LOGICAL MACRO ..............................63 MULTIPLEXER ................................. 63 DIGITAL COMPARATOR ............................64 MEMORY OPERATORS ........................66 D FLIP FLOP (max number = 16) ........................66 T FLIP FLOP (max number = 16) .........................
- Page 5 Output delay with manual ..........................108 SIMULATOR FEATURE ........................109 Schematic Simulation ........................110 How to use graphic simulation ......................112 MZERO FAIL CODES .......................... 115 ACCESSORIES AND SPARE PARTS ....................... 116 WARRANTY ..............................117 CE DECLARATION OF CONFORMITY ....................118...
-
Page 6: Introduction
This symbol indicates an important instruction. The MZERO is built to the following safety levels: SIL 3, SILCL 3, PL e, Cat. 4, Type 4 in accordance with the applicable standards. However, the definitive SIL and PL of the application will depend on the number of safety components, their parameters and the connections that are made, as per the risk analysis. -
Page 7: Abbreviations And Symbols
STAND ALONE PROGRAMMABLE SAFETY CONTROLLER Abbreviations and symbols MZD = MZERO Safety Designer: MZERO configuration SW running in Windows LL0, LL1 = Logic Level 0, Logic Level 1 OSSD = Output Signal Switching Device: solid state safety output MTTF Mean Time to Dangerous Failure... -
Page 8: Overview
The configuration performed on the PC is sent to the controller via USB connection; the file resides in the MZERO memory. ➔ MZERO is certified to the maximum safety level envisaged by the applicable industrial safety standards (SIL 3, SILCL 3, PL e, Cat. 4). PRODUCT COMPOSITION MZERO is supplied with: 1) MZERO Stand Alone Programmable Safety Controller. -
Page 9: Installation
Remember that the total response time depends on: MZERO response time + ESPE response time + response time of the machine (i.e. the time taken by the machine to stop the dangerous movement from the moment in which the stop signal is transmitted). -
Page 10: Electrical Connections
The supply voltage to the units must be 24Vdc 20% (PELV, in compliance with the standard EN 60204-1 (Chapter 6.4)). Do not use the MZERO to supply external devices. The same ground connection (0VDC) must be used for all system components. -
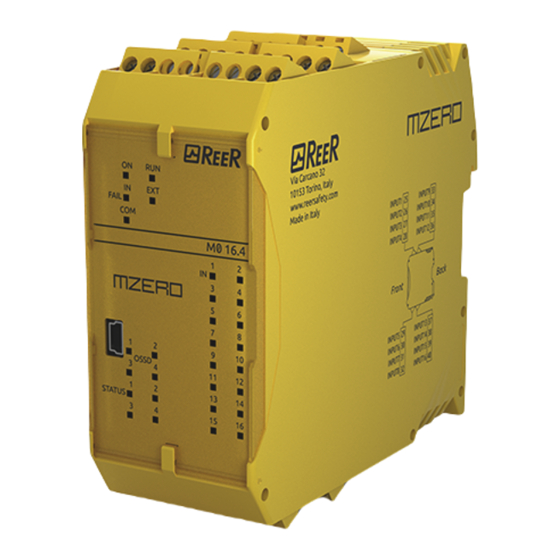
Page 11: Mzero 16.4 Pinout
STAND ALONE PROGRAMMABLE SAFETY CONTROLLER MZERO 16.4 PINOUT TERMINAL SIGNAL TYPE DESCRIPTION OPERATION 24VDC 24VDC power supply 24VDC 24VDC power supply 0VDC 0VDC power supply OSSD1_A Output PNP active high Static output 1 OSSD1_B Output PNP active high RESTART_FBK1 Input... -
Page 12: Usb Input
STAND ALONE PROGRAMMABLE SAFETY CONTROLLER USB input MZERO Stand Alone Programmable Safety Controller includes a mini USB 2.0 connector for connection to a Personal Computer with MZD (MZERO Designer) configuration SW installed. A USB cable of the correct size is available as an accessory (CSU). -
Page 13: Checklist After Installation
STAND ALONE PROGRAMMABLE SAFETY CONTROLLER CHECKLIST AFTER INSTALLATION The MZERO unit is able to detect in real time the faults. Anyway to have the system perfect operation perform the following checks at start up and at least every one year:... -
Page 14: Operating Diagram
STAND ALONE PROGRAMMABLE SAFETY CONTROLLER OPERATING DIAGRAM Mechanical fastening Electrical connections between the MZERO and external sensors Designing the project Validation SW OK ? Connection via USB with Downloading the project to MZERO Configuration check (including complete system TEST) on MZERO OK? -
Page 15: Signals
INPUTS RESTART_FBK The four RESTART_FBK (EN 61131-2, Type 2) signal inputs allow MZERO to verify an EDM (External Device Monitoring) feedback signal (series of contacts) from the external contactors and to monitor Manual/Automatic operation (RESTART function). (See the list of possible connections in Table 3). -
Page 16: Outputs
STAND ALONE PROGRAMMABLE SAFETY CONTROLLER OUTPUTS OUT STATUS (SIL 1/PL c) The OUT STATUS signal is a Programmable SIL 1/PL c output that can indicate the status of: • An input. • An output. • A node of the logic diagram designed using the MZD. OUT TEST The OUT TEST signals must be used to monitor the presence of short-circuits or overloads on the inputs (Figure 5). -
Page 17: Ossd Safety Outputs
Figure 6 – Voltage dip test OSSD MZERO is equipped with OSSD (static semiconductor safety outputs) dual channel. These outputs are short circuit protected, cross circuit monitored and supply: • In the ON condition: (Uv-1,2V)...Uv (Uv = 24VDC ± 20%) •... -
Page 18: Ossd Outputs Configuration
STAND ALONE PROGRAMMABLE SAFETY CONTROLLER Figure 8 - Configuration with dual channel OSSD outputs (safety category SIL3/Pl e) OSSD OUTPUTS CONFIGURATION Each OSSD output can be configured as shown in Table 4: The output is activated according to le configurations set by the MZD SW only if the corresponding RESTART_FBK Automatic input is conected to 24VDC. -
Page 19: Technical Features
STAND ALONE PROGRAMMABLE SAFETY CONTROLLER TECHNICAL FEATURES MZERO GENERAL SYSTEM CHARACTERISTICS Safety level parameters Parameter Value Standard PFH d 1,50E-8 99,7% EN 61508:2010 Safety standard Type B SILCL EN 62061:2005 / A2:2015 Type EN 61496-1:2013 Dc avg 98,9% EN ISO 13849-1:2015... -
Page 20: Environmental Parameters
STAND ALONE PROGRAMMABLE SAFETY CONTROLLER Environmental parameters Operating temperature -10…55°C Max surrounding air temperature 55°C (UL) Storage temperature -20…85°C Relative humidity 10%...95% Max. altitude (above sea level) 2000 m MECHANICAL DIMENSIONS Figure 10 8541403 • 19/07/2021 • Rev.1... -
Page 21: Led Indicators (Normal Operation)
GREEN ORANGE YELLOW RED/GREEN YELLOW Power on - initial TEST MZD requesting connection: MZERO Flashes slowly internal configuration not present MZD connected - MZERO stopped Table 5 - Opening Screen MEANING IN FAIL EXT FAIL IN1÷16 OSSD1÷4 STATUS1÷4 GREEN ORANGE... -
Page 22: Led Indicators (Diagnostic)
CLEAR1/2 STATUS1/2 GREEN ORANGE YELLOW BLUE RED/GREEN YELLOW YELLOW 2 or 3 Return the unit to ReeR to be Internal fault flashes repaired • Check the OSSD1/2 4 flashes connections OSSD (only the LED • If the problem persists return... -
Page 23: Mzero Safety Designer Software
STAND ALONE PROGRAMMABLE SAFETY CONTROLLER MZERO SAFETY DESIGNER SOFTWARE The "MZERO SAFETY DESIGNER" (MZD) application software can be used to configure a logic diagram of the connections between MZERO and the components of the system being developed. The MZERO will thus monitor and control the connected safety components. -
Page 24: Fundamentals
STAND ALONE PROGRAMMABLE SAFETY CONTROLLER Fundamentals • Once the MZD has been correctly installed it creates an icon on the desktop. To launch the program: double-click on this icon. => • The opening screen shown below is displayed: Figure 13 You are now ready to create your project. -
Page 25: Standard Tool Bar
REDO (RESTORE THE LAST CANCELLATION) VALIDATE THE PROJECT CONNECT TO MZERO SEND PROJECT TO MZERO DISCONNECT FROM MZERO DOWNLOAD AN EXISTING PROJECT (FROM MZERO) MONITOR (Real time I/O status - graphic) MONITOR (Real time I/O status - textual) DOWNLOAD LOG FILE SHOW SYSTEM CONFIGURATION... -
Page 26: Textual Tool Bar
The change of user parameters is obtained with the icon The dialog user identification request appears (Figure 17). To accomplish this operation is not necessary to Log out from MZERO. Generally it serves when the user must create a new project (even using a previously created). -
Page 27: Objects - Operator - Configuration Tool Bars
- Logic - Memories - Safety Guard Lock - Counters - Timers - Muting - Miscellaneous - Int Fbk 3 > CONFIGURATION TOOL WINDOW (view) This window contains the graphic representation of your MZERO composition. 8541403 • 19/07/2021 • Rev.1... -
Page 28: Creating The Diagram
STAND ALONE PROGRAMMABLE SAFETY CONTROLLER Creating the diagram Once you have selected your system composition, you are ready to configure the project. The logic diagram is created using a DRAG&DROP function: • Select the objects as required from the windows described previously (each single object is described in detail in the following sections) and drag it into the design area. - Page 29 STAND ALONE PROGRAMMABLE SAFETY CONTROLLER ON BLOCK INPUT / OUTPUT • Copy / Paste • Delete • Delete all the assigned pins • Alignment with other functional blocks (multiple selection) • On-line Help • Monitor Mode: Show / Hide Properties window •...
-
Page 30: Example Of A Project
STAND ALONE PROGRAMMABLE SAFETY CONTROLLER Example of a project Figure 20 shows an example of a project in which the MZERO controller is connected to two safety blocks (E-GATE and E-STOP). • MZERO inputs (1,2,3) for connecting the contacts of the safety components are shown on the left, in yellow. -
Page 31: Resources Allocation
STAND ALONE PROGRAMMABLE SAFETY CONTROLLER Resources Allocation To activate the RESOURCES ALLOCATION function use the icon Executing this command, all the used elements among Inputs, OSSD Outputs, Status are visible, see the example in figure. Figure 21 Project report Print of the System composition with properties of each block. (Icon on the standard toolbar). - Page 32 STAND ALONE PROGRAMMABLE SAFETY CONTROLLER Figure 22 8541403 • 19/07/2021 • Rev.1...
- Page 33 STAND ALONE PROGRAMMABLE SAFETY CONTROLLER Figure 23 8541403 • 19/07/2021 • Rev.1...
- Page 34 STAND ALONE PROGRAMMABLE SAFETY CONTROLLER Figure 24 8541403 • 19/07/2021 • Rev.1...
-
Page 35: Connect To Mzero
Sending the configuration to MZERO To send the saved configuration from a PC to MZERO use the icon on the standard toolbar and wait the execution. MZERO will save the project in its internal memory. (Password Required: level 2). ➔... -
Page 36: Configuration Log
Configuration LOG ➔ Within the configuration file (project), are included the creation date and CRC (4-digit hexadecimal identification) of a project that are stored in MZERO. ➔ This logbook can record up to 5 consecutive events, after which these are overwritten, starting from the least recent event. -
Page 37: Monitor (I/O Status In Real Time - Textual)
. (Password Required: level 1). A pop-up window will appear with (all in real time): - input’s state (when the object has two or more input connections to MZERO, the MONITOR will show as active only the first), see the example in figure;... -
Page 38: Monitor (I/O Status In Real Time - Textual - Graphic)
STAND ALONE PROGRAMMABLE SAFETY CONTROLLER MONITOR (I/O status in real time - textual - graphic) To activate/deactivate the monitor use the icon . (Password Required: level 1). The color of links (Figure 33) allows you to view the diagnostics (in real time) with: RED = OFF GREEN = ON DASHED ORANGE = Connection Error... -
Page 39: Password Protection
Designers who know the level 2 password can enter a new level 1 password (alphanumerical, max 8 characters). ➔ Operators who know this password are enabled to upload (from MZERO to PC), the project. Level 2 password Designers authorised to work on the creation of the project must know a Level 2 PASSWORD. The first time the system is initialised the operator must use the password "SAFEPASS"... -
Page 40: Testing The System
• This is done by forcing a change of status for each safety device connected to the MZERO to check that the status of the outputs actually changes. •... -
Page 41: Object Function Blocks
With high level (TRUE) OUTPUT, the FBK signal must be at low level (FALSE) within the set time. Otherwise, OUTPUT is set to low level (FALSE) and the error is indicated on the MZERO by the flashing OSSD LED corresponding to the OSSD in error. -
Page 42: Status (Sil 1/Pl C Output)
The Error Out signal is reset in case of one of the following events: 1. Switching on and switching off of system. 2. Activation of the RESET MZERO operator. Example of OSSD with incorrect Feedback signal Example of OSSD with correct Feedback signal:... -
Page 43: Input Objects
STAND ALONE PROGRAMMABLE SAFETY CONTROLLER INPUT OBJECTS E-STOP (emergency stop) E-STOP function block verifies an emergency stop device inputs status. If the emergency stop button has been pressed the output is 0 (FALSE). If not the output is 1 (TRUE). Parameters Input type: - Single NC –... -
Page 44: E-Gate (Safety Gate Device)
STAND ALONE PROGRAMMABLE SAFETY CONTROLLER Filter (ms): This is used to filter the signals coming from the emergency stop. The filter can be configured to between 3 and 250 ms and eliminates any bouncing on the contacts. The length of the filter affects the calculation of the unit's total response time. -
Page 45: Single E-Gate (Safety Gate Device)
STAND ALONE PROGRAMMABLE SAFETY CONTROLLER ➔ If the Manual Reset is active, a consecutive Input have to be used. Example: Input 1 and Input 2 are used for the fuctional block, then Input 3 have to be used for the Reset Input. Output test: This is used to select which test output signals are to be sent to the component contacts. -
Page 46: Lock Feedback
STAND ALONE PROGRAMMABLE SAFETY CONTROLLER Output test: This is used to select which test output signals are to be sent to the component contacts. This additional control permits detection and management of any short-circuits between the lines. To enable this control, the test output signals must be configured (amongst those available). -
Page 47: Enable (Enable Key)
STAND ALONE PROGRAMMABLE SAFETY CONTROLLER ENABLE (enable key) ENABLE function block verifies a manual key device Input status. If the key is not turned the output is 0 (FALSE). Otherwise the output is 1 (TRUE). Parameters Input type - Single NO – Allows connection of components with one NO contact;... -
Page 48: Espe (Optoelectronic Safety Light Curtain / Laser Scanner)
STAND ALONE PROGRAMMABLE SAFETY CONTROLLER Output test: This is used to select which test output signals are to be sent to the component contacts. This additional control permits detection and management of any short-circuits between the lines. To enable this control, the test output signals must be configured (amongst those available). -
Page 49: Footswitch (Safety Pedal)
STAND ALONE PROGRAMMABLE SAFETY CONTROLLER ➔ If the Manual Reset is active, a consecutive Input have to be used. Example: Input 1 and Input 2 are used for the functional block, then Input 3 have to be used for the Reset Input. OUT TEST signals cannot be used in case of safety static output ESPE because the control is carried out from the ESPE. - Page 50 STAND ALONE PROGRAMMABLE SAFETY CONTROLLER t = 250ms t1 > 250ms t2 = 250ms ➔ If the Manual Reset is active, a consecutive Input have to be used. Example: Input 1 and Input 2 are used for the functional block, then Input 3 have to be used for the Reset Input. Output test: This is used to select which test output signals are to be sent to the component contacts.
-
Page 51: Mod-Sel (Safety Selector)
STAND ALONE PROGRAMMABLE SAFETY CONTROLLER MOD-SEL (safety selector) The MOD-SEL function block verifies the status of the inputs from a mode selector (up to 4 inputs): If only one input is 1 (TRUE) the corresponding output is also 1 (TRUE). In all other cases, and thus when all inputs are 0 (FALSE) or more than one input is 1 (TRUE) all the outputs are 0 (FALSE). -
Page 52: Two-Hand (Bimanual Control)
STAND ALONE PROGRAMMABLE SAFETY CONTROLLER ➔ An output test signal is mandatory and can be selected from the 4 possible Test Output 1...4. ➔ If the Manual Reset is active, a consecutive Input have to be used. Example: Input 1 is used for the functional block, then Input 2 have to be used for the Reset Input. -
Page 53: Network_In
This filter can be set to between 3 and 250ms. The length of the filter affects the calculation of the unit's total response time. ➔ This input must be used when MZERO OSSD outputs are connected to the inputs of a second downstream MZERO or together with the NETWORK operator. SENSOR The SENSOR function block verifies the status of the input of a sensor (not a safety sensor). -
Page 54: S-Mat (Safety Mat)
STAND ALONE PROGRAMMABLE SAFETY CONTROLLER Output test: This is used to select which test output signals are to be sent to the sensor. This additional control permits detection and management of any short-circuits between the lines. To enable this control, the test output signals must be configured (amongst those available). Test at start-up: If selected this enables the test at start-up of the sensor. -
Page 55: Switch
STAND ALONE PROGRAMMABLE SAFETY CONTROLLER To enable this control, the test output signals must be configured (amongst those available). Test signals are mandatory. Test at start-up: If selected this enables the test at start-up of the external component. This test is performed by pressing and releasing the safety mat to run a complete function test and enable the output. -
Page 56: Enabling Grip Switch
STAND ALONE PROGRAMMABLE SAFETY CONTROLLER ENABLING GRIP SWITCH The ENABLING GRIP functional block checks the status of the In inputs of an enabling grip. If this is not gripped (position 1) or is gripped completely (position 3), the OUTPUT will be 0 (FALSE). If it is gripped to middle position (position 2), the OUTPUT will be 1 (TRUE). -
Page 57: Testable Safety Device
STAND ALONE PROGRAMMABLE SAFETY CONTROLLER TESTABLE SAFETY DEVICE The TESTABLE SAFETY DEVICE functional block checks the status of the Inx inputs of a single or double safety sensor, both NO and NC. Refer to the tables below to check type of sensor and behaviour. -
Page 58: Solid State Device
STAND ALONE PROGRAMMABLE SAFETY CONTROLLER Power-on test: If selected, enables the power-on test of the device. This test requires activation and de-activation of the device in order to run a complete functional check and enable the Output terminal. This test is required only at machine start-up (power-on of the module). Filter (ms): Permits filtering of signals from the device. -
Page 59: Restart Input
RESTART INPUT The element can be used as a digital input (in addition to the 16 available on MZERO) and connected to any external device. The usable inputs are referred to RESTART_FBK signals of MZERO (TERMINALS 7, 11, 15, 19). -
Page 60: Operator Function Blocks
STAND ALONE PROGRAMMABLE SAFETY CONTROLLER OPERATOR FUNCTION BLOCKS All the input of these operators could be inverted (logical NOT). It could be done clicking with the right mouse key on the input to be inverted. A little circle will be showed on the inverted input. To cancel the inversion, simply click another time on the same input pin. -
Page 61: Not
STAND ALONE PROGRAMMABLE SAFETY CONTROLLER Logical NOT inverts the logical status of the input. Logical OR returns an output of 1 (TRUE) if at least one of the inputs is 1 (TRUE). Parameters Number of inputs: this is used to set between 2 and 8 inputs. Logical NOR returns an output of 0 (FALSE) if at least one of the inputs is 1 (TRUE). -
Page 62: Xor
STAND ALONE PROGRAMMABLE SAFETY CONTROLLER Logical XOR returns an output 0 (FALSE) if the input's number at 1 (TRUE) is even or the inputs are all 0 (FALSE). Parameters Number of inputs: this is used to set between 2 and 8 inputs. XNOR Logical XNOR returns an output 1 (TRUE) if the input's number at 1 (TRUE) is even or the inputs are all 0... -
Page 63: Logical Macro
STAND ALONE PROGRAMMABLE SAFETY CONTROLLER LOGICAL MACRO This operator enables the grouping together of two or three logic gates. A maximum of 8 inputs is foreseen. The result of the first two operators converges into a third operator, the result of which is the OUTPUT. Parameters Logic inputs 1, 2: enables the selection of the number of logic inputs (from 1 to 7). -
Page 64: Digital Comparator
STAND ALONE PROGRAMMABLE SAFETY CONTROLLER DIGITAL COMPARATOR The digital comparator allows to compare (in binary format) a group of signals with a constant or two groups of signals to each other Comparison with constant In this case the Signal Comparator check must not be activated. - Page 65 STAND ALONE PROGRAMMABLE SAFETY CONTROLLER Signal comparison Signal comparison: Selecting this item will allow the DIGITAL COMPARATOR operator to compare the first four A inputs (In1_A...In4_A) with the second four B inputs (In1_B...In4_B). Depending on the value of the inputs and the operation selected, the following results will be obtained: •...
-
Page 66: Memory Operators
STAND ALONE PROGRAMMABLE SAFETY CONTROLLER MEMORY OPERATORS MEMORY operators can be used if you decide to save any data (TRUE or FALSE) from other project components. Status changes are performed according to the truth tables shown for each operator. D FLIP FLOP (max number = 16) The D FLIP FLOP operator saves the previously set status on output Q according to the following truth table. -
Page 67: User Restart Manual (Max Number = 16)
STAND ALONE PROGRAMMABLE SAFETY CONTROLLER Parameters Store output status If selected, it stores the output status of the Flip-flop in non-volatile memory every time it is changed. When the system is turned on, the last stored value is restored. It is possible to have up to 8 Flip-Flops with output status storage that will be distinguishable by an 'M'. -
Page 68: User Restart Monitored (Max Number = 16)
STAND ALONE PROGRAMMABLE SAFETY CONTROLLER USER RESTART MONITORED (max number = 16) The USER RESTART MONITORED operator is used to save the restart signal (coming from a RESTART command device) according to the following truth table. Clear Restart Request Type 1 Restart Request Type 2* Restart Keep Memory... -
Page 69: Macro Restart Monitored (Max Number = 16)
STAND ALONE PROGRAMMABLE SAFETY CONTROLLER Parameters Input Logic: enables the selection of the number of logic inputs (from 1 to 7). Selecting 1 the logic will not be considered. Select Logic: enables the selection of one of the following types of operator: AND, NAND, OR, NOR, XOR, XNOR. -
Page 70: Pre-Reset (Max Number = 32 With Other Restart Operators)
STAND ALONE PROGRAMMABLE SAFETY CONTROLLER PRE-RESET (max number = 32 with other RESTART operators) The PRE-RESET operator can be used when there is no possibility of having a single reset button in a position from which a complete visibility of the hazardous area is available. -
Page 71: Guard Lock Operators (Max Number = 4)
STAND ALONE PROGRAMMABLE SAFETY CONTROLLER GUARD LOCK OPERATORS (max number = 4) GUARD LOCK The “GUARD LOCK” operator is designed to control locking/unlocking of an ELECTROMECHANICAL GUARD LOCK in a variety of operating contexts. Parameters Manual Reset: There are two types of reset: Manual and Monitored. When Manual is selected the system only verifies the signal's transition from 0 to 1. - Page 72 STAND ALONE PROGRAMMABLE SAFETY CONTROLLER Description of "GUARD LOCK" operator inputs/outputs “Lock_fbk” input The “Lock_fbk” input is used to detect the status (feedback) of the electromagnet that unlocks/locks the guard lock. Electromechanical guard locks are unlocked/locked via an electric control that energises/de- energises an electromagnet.
- Page 73 STAND ALONE PROGRAMMABLE SAFETY CONTROLLER Figure 32 - Example of feedback of the status of a door/gate connected to the guard lock. The signal received by the module is processed by the "Guard Lock" operator. “Unlock_cmd” input The “Unlock_cmd” input detects the command sent by the user to lock or unlock the guard lock. In detail: ➢...
- Page 74 STAND ALONE PROGRAMMABLE SAFETY CONTROLLER “LockOut” output This signal controls the guard lock electromagnet and can assume LL0 and LL1 value. “ErrorOut” output If enabled, when this signal is set to LL1 it indicates an error in the control of the guard lock. It is set to LL0 when no errors have occurred.
- Page 75 STAND ALONE PROGRAMMABLE SAFETY CONTROLLER Example of operation in the “no Gate” mode The guard lock used in the example continues to be locked when the electromagnet is not energised. Hence the "Interlock spring" option must be selected. The user unlocks the guard lock with the “SWITCH” block. The “LockOut” signal controls a “STATUS”...
- Page 76 STAND ALONE PROGRAMMABLE SAFETY CONTROLLER Figure 34 - Traces relative to “Guard Lock” block operation in the no gate mode. Operation in the “with Gate” mode In this case, the user must NOT select the “Gate not present” parameter. The Gate input must always be connected to an “E-GATE”...
- Page 77 STAND ALONE PROGRAMMABLE SAFETY CONTROLLER The time after which the electromagnet is activated depends entirely on the technical/physical characteristics of the specific device and may therefore vary according to the type of guard lock used. Thus, since the LockOut signal controls the activation of this device, the status of the Lock_Fbk feedback signal will change at different times, depending on the type of guard lock.
- Page 78 STAND ALONE PROGRAMMABLE SAFETY CONTROLLER Figure 36 shows the traces relative to the operation. These are described in detail below: (1) At this time the user requests to unlock the guard lock. The “COMMAND” signal switches from LL0 to LL1, and the “OUTPUT1” signal switches from LL1 to LL0. (2) At this time the electromagnet is activated with a delay of "Unlock Time", after the command is sent.
- Page 79 STAND ALONE PROGRAMMABLE SAFETY CONTROLLER Operation in the “Mandatory Gate Opening” mode In this case, the user must NOT select the “Gate not present” parameter and must select the "Mandatory Gate opening" parameter. The Gate input must always be connected to an “E-GATE”...
- Page 80 STAND ALONE PROGRAMMABLE SAFETY CONTROLLER Example of operation in the “Mandatory Gate Opening” mode In this example the user unlocks the guard lock with the “SWITCH” block. The “LockOut” signal controls a “STATUS” SIL 1/PL c output that controls the guard lock electromagnet, the status of which is detected by the “LOCK FEEDBACK”...
- Page 81 STAND ALONE PROGRAMMABLE SAFETY CONTROLLER Figure 38 - Traces relative to “Guard Lock” block operation in the “Mandatory gate opening mode”. In “Mandatory gate opening” mode, the “Guard_lock” operator indicates an error condition if it does not detect that the gate has been opened following a request to unlock guard lock.
- Page 82 STAND ALONE PROGRAMMABLE SAFETY CONTROLLER Figure 39 – Example of possible error condition in "Mandatory gate opening" mode. In this case the error condition is generated because the gate has not been opened, even though a request has been sent to unlock/lock the guard lock.
-
Page 83: Counter Operators
STAND ALONE PROGRAMMABLE SAFETY CONTROLLER COUNTER OPERATORS COUNTER (max number = 16) COUNTER operator is a pulse counter that sets output Q to 1 (TRUE) as soon as the desired count is reached. There are 3 operating modes: 1) AUTOMATIC 2) MANUAL 3) AUTOMATIC + MANUAL Following are illustrated 3 examples for each... -
Page 84: Counter Comparator
STAND ALONE PROGRAMMABLE SAFETY CONTROLLER The counter generates a pulse duration equal to the system MANUAL/AUTOMATIC: response time as soon as the set count is reached. If the CLEAR signal is activated, the internal count goes back to 0. Parameters Enable Clear: If selected enables the signal CLEAR in order to restart the counter setting output Q to 0 (FALSE). -
Page 85: Timer Operators (Max Number = 32)
STAND ALONE PROGRAMMABLE SAFETY CONTROLLER TIMER OPERATORS (max number = 32) TIMER operators allow you to generate a signal (TRUE or FALSE) for a user-definable period. MONOSTABLE The MONOSTABILE operator generates a level 1 (TRUE) output activated by the rising edge of the input and remains in this condition for the set time. -
Page 86: Monostable_B
STAND ALONE PROGRAMMABLE SAFETY CONTROLLER MONOSTABLE_B This operator generates a level 1 (TRUE) output activated by the rising/falling edge of the input and remains in this condition for the set time t. Parameters Time: The delay can be set to between 10 ms and 1098,3 s. Scale: The user can choose two different scales for the time T to be set. -
Page 87: Passing Make Contact
STAND ALONE PROGRAMMABLE SAFETY CONTROLLER PASSING MAKE CONTACT In the PASSING MAKE CONTACT operator the output follows the signal on the input. However, if this is 1 (TRUE) for longer than the set time, the output changes to 0 (FALSE). When there is an input falling edge, the timer is cleared. -
Page 88: Delay
STAND ALONE PROGRAMMABLE SAFETY CONTROLLER DELAY DELAY operator applies a delay to a signal by setting the output to 1 (TRUE) after the set time, against a change in the level of the input signal. Parameters Time: The delay can be set to between 10 ms and 1098,3 s Scale: The user can choose two different scales for the time T to be set. -
Page 89: Long Delay
STAND ALONE PROGRAMMABLE SAFETY CONTROLLER LONG DELAY The LONG DELAY operator allows to apply a delay (up to more than 15 hours) to a signal bringing to 1 (TRUE) the Out output after the set time, in case of a level variation of the signal on the In input. -
Page 90: Delay Comparator
STAND ALONE PROGRAMMABLE SAFETY CONTROLLER DELAY COMPARATOR This operator compares the timer value outputted by a LONG DELAY timer and connected to the DELAY COMPARATOR “Timer” input with the set threshold value. The OUT output will be 0 (FALSE) as long as the timer value is lower than the threshold value. - Page 91 STAND ALONE PROGRAMMABLE SAFETY CONTROLLER ➔ Unlike the DELAY operator, the DELAY LINE operator does not filter any interruptions in the IN input which are shorter than the set time. ➔ This operator is recommended when using delayed OSSD (the OSSD must be programmed with RESTART MANUAL).
-
Page 92: Clocking
STAND ALONE PROGRAMMABLE SAFETY CONTROLLER CLOCKING The CLOCKING operator generates a square wave output which period is set by the user. The output is enabled if the “En” input is set to 1 (TRUE). Clocking has up to 7 inputs to control output Duty Cycle. -
Page 93: Muting Function
STAND ALONE PROGRAMMABLE SAFETY CONTROLLER MUTING FUNCTION The Muting function generates a temporary, automatic interruption of electro-sensitive protective device (ESPE) operation in order to permit normal transit of material through the guarded opening. In other words, when the system recognizes the material and distinguishes between this and any operator (in a potentially dangerous situation), it is enabled to bypass the safety device temporarily, allowing the material to pass through the guarded opening. -
Page 94: Muting "L
STAND ALONE PROGRAMMABLE SAFETY CONTROLLER Select CURTAIN Input Muting Muting active Select SENSOR Input Muting Muting active Blind Time: Only with Muting Close=Curtain, blind time is enabled when it is known that after a complete transition of the pallet (muting cycle close) some protruding objects could still occupy the light curtain and send the input to 0 (FALSE). -
Page 95: Sequential" Muting
STAND ALONE PROGRAMMABLE SAFETY CONTROLLER Enable Type: There are two Enable modes: Enable/Disable and Enable Only. • If “Enable/Disable” is selected the Muting cycle cannot start if Enable is stucked at 1 (TRUE) or 0 (FALSE). It is only activated with a rising edge of the signal. On the other hand the falling edge disables Muting regardless of the current condition. -
Page 96: Muting "T
STAND ALONE PROGRAMMABLE SAFETY CONTROLLER Muting Closing: There are two types, CURTAIN and SENSOR. If you select CURTAIN muting closes when the input signal rises, if you select SENSOR it closes when the third sensor has been cleared. Select CURTAIN Input Muting Muting... -
Page 97: Muting Override (Max Number = 4)
STAND ALONE PROGRAMMABLE SAFETY CONTROLLER There are two Enable modes: Enable/Disable and Enable Only. • If “Enable/Disable” is selected the Muting cycle cannot start if Enable is stucked at 1 (TRUE) or 0 (FALSE). It is only activated with a rising edge of the signal. On the other hand the falling edge disables Muting regardless of the current condition. - Page 98 STAND ALONE PROGRAMMABLE SAFETY CONTROLLER Light "With occupied sensors" Occupied Override Override curtain Input selected sensor request output occupied Timeout (sec): Used to set the time, between 10 sec and infinity, by which the Override function must end. Override mode: Used to configure the type of Override (pulsed or maintained action). With OverOut: Used to activate an Override active Signaling output (active when high).
-
Page 99: Miscellaneous Function Blocks
STAND ALONE PROGRAMMABLE SAFETY CONTROLLER MISCELLANEOUS FUNCTION BLOCKS SERIAL OUTPUT (max number = 8) The Serial Output operator outputs the status of up to 8 inputs, serialising the information. Operating principles. This operator outputs the status of all the connected inputs in two different ways: Asynchronous serialisation: 1) The status of the line in the idle condition is 1 (TRUE);... -
Page 100: Network (Max Number = 1)
The RESET command must be installed outside the zone of operation in a position where the zone of operation and the entire work area concerned are clearly visible. ➔ The maximum number of MZERO modules that can be connected in network configuration is equal to 10. Condition 1: With reference to the Figure 42 and Figure 43, at power-on: 1. - Page 101 The affected node will be restarted with its own reset (if 'Reset Global Reset' is not selected). The Network_in input and the Network_out output can only be mapped to the I/O pins of the MZERO. 8541403 • 19/07/2021 • Rev.1...
- Page 102 STAND ALONE PROGRAMMABLE SAFETY CONTROLLER MZERO signals with Network operative NETWORK FUNCTIONAL BLOCK SIGNALS Network out Network in Network out (OSSD) Reset in (STATUS) FAIL EXT OSSD STATUS STOP CLEAR BLINKING RED/GREEN (BLINKING) BLINKING BLINKING STATUS GREEN FAIL BLINKING Corresponding to the input where is wired Network IN...
-
Page 103: Example Of Application In Category 2 According To Iso 13849-1
STAND ALONE PROGRAMMABLE SAFETY CONTROLLER Figure 41 - NETWORK function block scheme example (Category 4) Example of application in Category 2 according to ISO 13849-1: Network data flow Figure 42 8541403 • 19/07/2021 • Rev.1... -
Page 104: Logical Block Diagram Of A Safety Function Using The Network
STAND ALONE PROGRAMMABLE SAFETY CONTROLLER Network parameters for the PL calculation Architecture: Cat.2 Diagnostic coverage: DC = 90% Reliability of Module MZERO: MTTF (years) 154,51 Logical block diagram of a safety function using the network INPUT MZERO n°1 MZERO n°2 MZERO n°3... -
Page 105: Logical Block Diagram Of A Safety Function Using The Network
OSSD EDM (max number = 32) The OSSD EDM (External Device Monitoring) operator allows to control an EDM feedback related to a safety output using a generic MZERO input. The Output can only be connected to one safety output functional block (OSSD). -
Page 106: Interpage In/Out
With this input at 1 it is possible to clear the error when the fault has been repaired. Using this input it is no longer necessary to reset MZERO or turn off the system. Figure 44 – OSSD EDM operator scheme example... -
Page 107: Intfbk_In / Intfbk_Out (Max Number = 8)
This operator can be used to create logical loops or to connect the output of a function block to the input of another function block. IntFbk consist of IntFbk_In and IntFbk_Out; after one MZERO logical cycle delay, every IntFbk_In assumes the same logical value of the corresponding IntFbk_Out. -
Page 108: Special Applications
STAND ALONE PROGRAMMABLE SAFETY CONTROLLER SPECIAL APPLICATIONS Output delay with manual If the operator needs to have two OSSD output with one of them delayed (in MANUAL mode) use the following scheme: Figure 46 - Two outputs with one delayed (in MANUAL mode) 8541403 •... -
Page 109: Simulator Feature
MZERO configuration safety parameters are provided in the MZD software report. Simulator feature is available only if MZERO controller is disconnected from the PC. The top toolbar features two new green icons: Figure 47 – Simulator icons These icons refer to the new Simulator function. -
Page 110: Schematic Simulation
STAND ALONE PROGRAMMABLE SAFETY CONTROLLER Schematic Simulation Click on the icon to start the schematic simulation. Schematic simulation can be used to check/guide the output signals of the various function blocks in real-time, even during the actual simulation. You may choose the block outputs you wish to control and check the response of the various elements of the schematic model according to the colors of the different lines. - Page 111 STAND ALONE PROGRAMMABLE SAFETY CONTROLLER ➔ The keys for enabling block outputs are shown at the top, an example of a pop-up window for entering, the connection state. 8541403 • 19/07/2021 • Rev.1...
-
Page 112: How To Use Graphic Simulation
STAND ALONE PROGRAMMABLE SAFETY CONTROLLER How to use graphic simulation Click on the icon to start the graphic simulation. Graphic simulation can be used to display the signal pattern over time in a graph. First you must define the stimuli in a specific text file: this means defining the trend over time in the waveforms used as inputs (stimuli). - Page 113 STAND ALONE PROGRAMMABLE SAFETY CONTROLLER Click on the icon to display the page shown below. Figure 50 – Menu for selecting the graphic simulation mode Figure 50 The functions of each key in the menu shown in will now be described: Template Stimuli: used to save the template file with the desired name and disk location.
- Page 114 STAND ALONE PROGRAMMABLE SAFETY CONTROLLER Traces visibility: used to select the traces (signal waveforms) to be displayed in the graph. When Figure 53 you press this key, it opens a pop-up window as shown in from which you can add or remove traces to or from the graph.
-
Page 115: Mzero Fail Codes
244D 245D 247D All other codes are related to errors or an internal malfunction. Please replace MZERO that gave the error or return to ReeR for repair and/or debugging and inform REER at the time of shipment. The following table lists all internal errors. -
Page 116: Accessories And Spare Parts
(Password Required: level 1). A table will appear with the last 5 errors occurred from the date when the schema was sent to MZERO or from the date of error log cancellation (icon Figure 54 – MZERO Errors Log Table... -
Page 117: Warranty
Characteristics are subject to change without prior notice. No part of this document may be reproduced unless authorised by ReeR. 8541403 • 19/07/2021 • Rev.1... -
Page 118: Ce Declaration Of Conformity
STAND ALONE PROGRAMMABLE SAFETY CONTROLLER CE DECLARATION OF CONFORMITY 8541403 • 19/07/2021 • Rev.1... - Page 119 STAND ALONE PROGRAMMABLE SAFETY CONTROLLER 8541403 • 19/07/2021 • Rev.1...
Need help?
Do you have a question about the MZERO and is the answer not in the manual?
Questions and answers