Table of Contents
Advertisement
Advertisement
Table of Contents

Related Manuals for Craftex CX100


Summary of Contents for Craftex CX100
- Page 1 CX100 14” ULTIMATE BAND SAW User Manual...
-
Page 2: Table Of Contents
Table of Contents General Safety Instructions------------------------------------------------------------------- 3 Specific Safety Instructions ------------------------------------------------------------------- 4 Features ------------------------------------------------------------------------------------------- 5 Physical Features ------------------------------------------------------------------------------- 6 Setup----------------------------------------------------------------------------------------------- 7 Un-Packing --------------------------------------------------------------------------------------- 7 Proper Grounding --------------------------------------------------------------------------------8 Assembly and Adjustments --------------------------------------------------------------- 9 Blade Tracking ---------------------------------------------------------------------------------- 12 Basic Controls ----------------------------------------------------------------------------------- 13 Test Run ------------------------------------------------------------------------------------------ 13 Blade Tension ----------------------------------------------------------------------------------- 14 Adjusting the Blade Tension ----------------------------------------------------------------- 14... -
Page 3: General Safety Instructions
GENERAL SAFETY INSTRUCTIONS Extreme caution should be used when operating all power tools. Know your power tool, be familiar with its operation, read through the owner’s manual and practice safe usage procedures at all times. ALWAYS read and understand the DISCONNECT the power source when user manual before operating the changing blade and / or making... -
Page 4: Specific Safety Instructions
ALWAYS ENSURE that the band saw your band saw, before operating the blade guard is no more than 1/2” above CX100. If you fail to do so, serious injury the stock. could occur. WARNING The safety instructions given above can not be complete because the environment in every shop is different. -
Page 5: Features
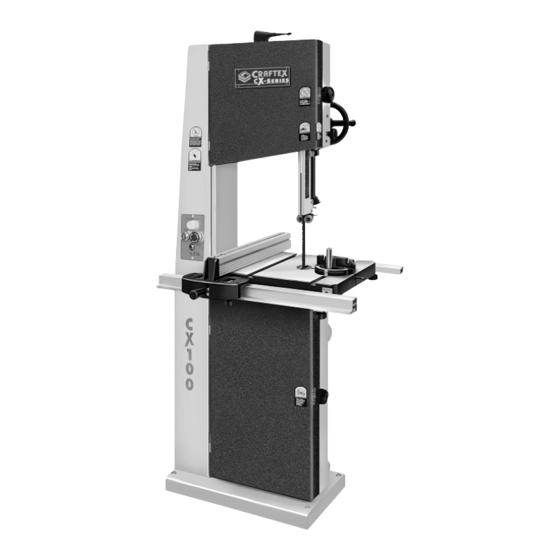
MODEL CX100 – 14” ULTIMATE BAND SAW As part of the growing line of Craftex woodworking equipment, we are proud to offer the CX100, a 14” Ultimate Band Saw. The Craftex name guarantees Craft Excellence. By following the instructions and procedures laid out in this user manual, you will receive years of excellent service and satisfaction. -
Page 6: Physical Features
CX100–14” Ultimate Band Saw Physical Features Blade Tension Upper Cabinet Adjustment Handle Lock Knob Blade Guard Adjustment Hand Wheel Blade Guard Lock Magnetic Switch Blade Guard Miter Fence Gauge Rear Fence Cam Fence Rail Lock Handle Front Table Fence Rail... -
Page 7: Setup
Use a solvent cleaner that will not damage painted surfaces. WARNING CX100 is a heavy machine. Do not over- Figure-1 Inventory exert yourself. Use a fork truck or get the help of an assistant or a friend. -
Page 8: Proper Grounding
Improper connection of the equipment- grounding conductor can result in a risk of CX100 is equipped with a 220 single phase electric shock. Check with a qualified motor which features a 3-conductor cord electrician if you are in doubt as to and a 3-prong grounding plug to fit a whether the outlet is properly grounded. -
Page 9: Assembly And Adjustments
ASSEMBLY Follow the steps below to assemble your Position the table on the base in such a band saw: way that the bolts under the table extend through the holes on the base. Thread the Take the band saw table and put it upside two knobs on the bolts (do not tighten). - Page 10 Figure-10 Rear rail bracket attached Figure-8 Attaching the table tilt bracket Now, attach the rear rail to the brackets Once the table is in the correct position, tighten the table lock knobs under the table using the knobs provided. See figure-11 and the tilt lock knob.
- Page 11 Once you have attached the adhesive backed scale to the rail, place and fence on the rail and tighten it in place by pushing down the handle. See figure-14 Figure-12 Front fence rail installed Now take the fence and pull its handle up (in the unlocked position).
-
Page 12: Blade Tracking
to tilt to the front and moves the blade Blade Tracking towards the center. The blade tracking means where the blade rides on the upper and lower wheels. It should always be centered on both wheels. Although the blade tracking of this band saw is factory set you should check it again to make sure that the blade is centered on the wheels. -
Page 13: Basic Controls
Basic Controls The basic controls of this machine are shown in the figure below. Use the figure and read the text to understand what the WARNING basic controls of this band saw are. This machine can perform many types of operations which are beyond the scope of this manual and are very dangerous if performed... -
Page 14: Blade Tension
Blade Tension Adjusting the Blade Tension properly tensioned blade very To adjust the blade tension, lift the blade important to get the best performance from tension handle shown in figure-20 and turn any band saw. If the blade is too loose it. - Page 15 Adjust the lower support bearings in the same manner. Table Stop Adjustment CX100 features a table stop which allows the table to easily come to a 90° if the table is tilted. To adjust the table stop so that the table sits at 90°, you should first make sure the...
- Page 16 Table Alignment To make accurate cuts with your band saw, the table should be aligned properly with the blade. To align the table: Make sure the blade tension and tracking is done correctly. Disconnect the machine from the power source and loosen the two knobs under the table.
-
Page 17: Guide Post
Guide Post Speed Change Settings The guide post assembly can be moved up CX100 features 3 speed settings; 1430 down above work-piece. FPM, 2300FPM and 3250FPM. movement of the guide post is controlled with the hand wheel shown in figure-27 The band saw features a motor pulley and an idler pulley. -
Page 18: Work-Piece Inspection
Work-piece Inspection Before cutting any wood, make sure to inspect the work-piece for nails, staples, small pieces of stone or metal and any other object which is dangerous to come on contact with the blade. If the wood contains any of these objects and it comes in contact with the blade, the object might fly and hit the operator or seriously damage the blade. -
Page 19: Cast Iron Wheels
Cast Iron Wheels The CX100 comes with heavy duty cast iron wheels for added stability and overall performance. A coplanar shim adjustment also added for better alignment of the wheels that allow the blade to run as straight as possible ensuring straight and accurate cuts. -
Page 20: Operations
Blade tension adjustment Blade tracking adjustment Guide bearings adjustment Make sure all the guards are in place WARNING Figure-33 Rip Cutting with CX100 CX100 produces fine dust particles during cutting operation which is very Crosscutting dangerous for health. Always connect your band saw to a dust collector. -
Page 21: Resawing
COLLECTOR Cutting a work-piece into two or more thinner pieces is called resawing. Wider CX100 features two 4” diameter dust ports blades give better result, when resawing. to connect to a dust collector. To resaw a work-piece make sure that the When connecting to a dust collector, use a table is at a 90°... -
Page 22: Maintenance
MAINTENANCE Adjust the blade tracking (See page-12) and adjust the guide bearings (See page- During the life of your machine, you will 14). Close the top and bottom cabinets and need to practice some regular maintenance insert the table pin and table insert back. to keep your saw in peak performance condition. -
Page 23: Tilting The Table Backward
Install the new bearing on the mounting Blade & Table Alignments shaft and then re-install the C-ring. The blade and table alignments should bearing mounting shaft often be checked, and make sure the blade assembly back and the guide bearings in is at a 90°... -
Page 24: Replacing The V-Belts
Figure-42 Idler pulley mounting nut Figure-40 Lower wheel and pulleys Pivot the motor and slide the idler pulley to loosen the belt. To Replace the V-Belts Remove the old belt and install the new one. Follow the instructions 1-3 to access and inspect the V-belts. -
Page 25: Optional Accessories
PTIONAL CCESSORIES These are just a few of the optional accessories available for your CX-Series band saw. Check www.busybeetools.com for more information and current pricing. Saw Blade Lubricant Stick Band Saw Finger Protector Patented new safety device protects your Smoother, quicker fingers. -
Page 26: Parts Breakdown And List
CX100 BODY PARTS BREAKDOWN... - Page 27 CX100 BODY PARTS LIST REF # DESCRIPTION REF # DESCRIPTION BODY SCREW QUICK HANDLE BAR CORD SPECIAL WASHER UPPER WHEEL BRACKET HEX NUT 3/8" SCREW SCREW UPPER WHEEL SHAFT BEARING COVER BEARING Upper Wheel - Cast Iron SCREW TIRE RUBBER(TIRE)
- Page 28 CX100 FENCE PARTS BREAKDOWN...
- Page 29 CX100 FENCE PARTS LIST REF# DESCRIPTION FENCE BODY CAP SCREW 10*16 BUTTON HEAD SCREW 5*10MM FENCE BASE SET SCREW 1/4"*1/4" EXTERNAL RETAINING RING BEARING ECCENTRIC SHAFT PRESSURE PLATE SCALE FENCE RAIL FRONT SQUARE NUT 5/16 CAP SCREW L TYPE PLATE...
- Page 30 CX100 STAND PARTS BREAKDOWN...
- Page 31 CX100 STAND PARTS LIST REF # DESCRIPTION REF # DESCRIPTION HEX BOLT 1/4"-20*3/8" TAPERED PIN HEX BOLT 1/4-20*3/8" MITER GAUGE ASSY FLAT WASHER 1/4" 140-1 MITER GAUGE HANDLE GUIDE BAR COVER 140-2 Gauge Body W/Pin ADJUSTMENT BAR BRACKET PHILLIPS HEAD SCREW 140-3 3/16"*1/4"...
-
Page 32: Warranty
This warranty shall not apply to consumable products such as blades, bits, belts, cutters, chisels, punches etceteras. Craftex shall in no event be liable for injuries, accidental or otherwise, death to persons or damage to property or for incidental contingent, special or consequential damages arising from the use of our products.
Need help?
Do you have a question about the CX100 and is the answer not in the manual?
Questions and answers