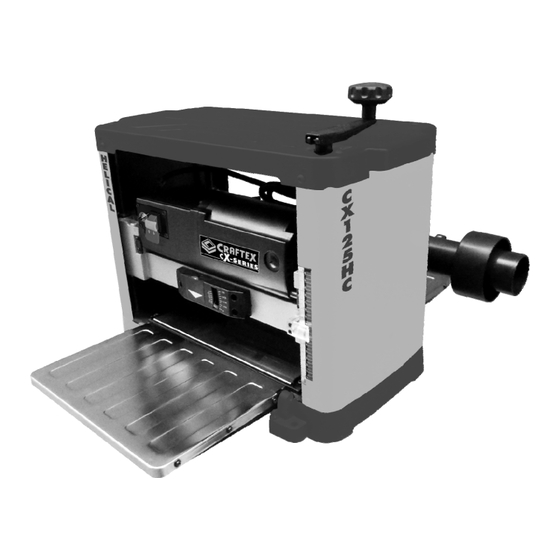
Craftex CX Series User Manual

12.5" bench top thickness planer
Hide thumbs Also See for CX Series:

Advertisement

MODEL CX125HC
12.5" Bench Top Thickness Planer
USER MANUAL
VERSION 1

Advertisement

Table of Contents
loading

Summary of Contents for Craftex CX Series

  • Page 1 MODEL CX125HC 12.5" Bench Top Thickness Planer USER MANUAL VERSION 1...
  • Page 2: Table Of Contents

    TABLE OF CONTENTS General Safety Instructions ................3 General Safety Rules ..................4 Specifications....................5 Circuit Requirements for CX125HC Benchtop Planer………….……………… 6 Unpacking ……………………………………………………….…………………. 8 Assembly………………………………………………………….………………..9 Extension Tables………………………………………………….……………..10 Head Assembly and Cutter Inserts…………………………. …………….…….11 Thickness Scale Adjustment……………………………….……………………..12 Depth-of-Cut Indicator…………………………………….……………………….14 Basic Operation………………………………………….…………………………14 Maintenance ……………………………………………………………...………..15 Gear Lubrication and Motor Brush Replacement….…………..…………16 &...
  • Page 3: General Safety Instructions

    GENERAL SAFETY INSTRUCTIONS Extreme caution should be used when operating all power tools. Know your power tool, be familiar with its operation, read through the owner’s manual and practice safe usage procedures at all times ALWAYS read and understand the router bits, shaper heads, blades, knives user manual before operating the or making other adjustments or repairs.
  • Page 4: General Safety Rules

    THICKNESS PLANER SPECIFIC SAFETY INSTRUCTIONS If you are not familiar with the Keep hands away from the surface operation of a thickness planer, you of the wood as it nears the in-feed should obtain the advice and/or rollers. instruction from qualified professional.
  • Page 5: Specifications

    SPECIFICATIONS Motor power input…………………………………..120 V, 60 Hz, AC Only, 15Amp Feed speed F/min………………..…………………………………………….. 26 FPM Cutterhead speed………………………………………………………….RPM 10,000 Motor RPM…………………………………………..….. 23000+/-10% (No Load) Cutterhead diameter…………………………………………………….……………. 2” Max planer capacity………………………………………………………..… 6" x 12.5" Max depth of cut @ 6”……………………………………………………………… 1/8" Max depth of cut @ 12.5”…………………………………………………….……1/16" Minimum Length of Stock……………………………………………………..……….7”...
  • Page 6: Circuit Requirements For Cx125Hc Benchtop Planer

    POWER SUPPLY AVAILABILITY OF POWER circuit requirements for this piece of Before Installation of this machine you machinery. will need to consider the proximity of your power supply circuit. If available WARNING!!! circuits do not meet the requirements for this machine you will have to get a new Do not connect machine to power circuit installed by a licensed electrician.
  • Page 7 please consult with a qualified If there is an improper connection of a machine grounding wire it may result in electrician to insure the circuit is a heightened risk of electric shock. If properly sized for safe operation. repair or replacement of the power cord is necessary in the future please consult a licensed electrician.
  • Page 8: Unpacking

    When receiving your planer, check the UNPACKING OF THE CX125HC carton exterior and machine for any shipping damage. Carefully remove the This machine has been carefully packed packing materials, accessories and the in order to protect it during transport. machine from the shipping carton. Lay While unpacking thoroughly go through out all parts on a clean work surface.
  • Page 9: Assembly

    ACCESSORIES A. Height Adjustment Crank Handle B. Torx Wrench C. Hex Wrench D. Dust Port Adaptor (2” to 2-1/2” and 4”) E. Dust Port Thumb Screws (2) F. Handle Screw G. Dust Port ASSSEMBLY WARNING!!! Always make certain that the machine is disconnected from the power source before assembly.
  • Page 10: Extension Tables

    secure the planer to a workbench or DUST PORT AND ADAPTOR: table. Using the four holes in the base of The planer comes with a 2” diameter the machine will allow you to bolt the dust port to be connected to a dust planer securely to your work surface.
  • Page 11: Head Assembly And Cutter Inserts

    (E) on both sides of the table until the infeed table is leve with the planer table. To adjust the outer NOTE: edge of the infeed table, loosen full revolution height the three screws on one side of adjustment crank handle will move the the infeed table (F) level in to cutterhead up or down approximately place then re-tighten.
  • Page 12: Thickness Scale Adjustment

    position, the cutter insert should be certain all wood residue is off of replaced. cutter head. Rotate cutting insert to the next sharp edge facing upwards or replace completely if necessary. 6. In order for ease of removal lubricate the Torx screws with a light machine oil, (wipe off excess Figure G oil) then tighten to 48-50 inch...
  • Page 13 prevent any unauthorized use. If the key is accidentally removed during operation it still can be moved to the off position but cannot be restarted until the key is re-inserted into the toggle switch. See Figure J and K Figure I OPERATIONS NOTE: This section is dedicated to the basic...
  • Page 14: Depth-Of-Cut Indicator

    and let it run up to full speed. Listen for DEPTH-OF-CUT INDICATOR any excessively loud noises or vibration coming from the planer. If either occurs Located on the front ride of the machine, shut the planer down immediately, this indicator is a simple way to quickly checking again for any loose hardware.
  • Page 15: Maintenance

    5. The lighter THICKNESS PLANING smoother the cut. Passing work piece through thickness planer is to size a board down 6. See the TROUBLSHOOTERS to a specified thickness and in the GUIDE if a smooth cut cannot process to create a smooth and level be obtained.
  • Page 16: Gear Lubrication And Motor Brush Replacement

     For optimal results it is essential to clean the feed rollers. The feed rollers need to be checked after each use for buildup of pitch, tar or resin. Clean off the buildup with a non-flammable tar and pitch remover that is not harmful to rubberized surfaces.
  • Page 17 2. After removing brushes, MOTOR BRUSH inspect the carbon (B), the spring REPLACEMENT (C), and the wire (D). See Figure The motor brushes should be replaced every 10-15 hours of usage. (Brush life can vary depending upon the usage and load placed upon the motor).
  • Page 18: Trouble Shooting

    TROUBLE SHOOTING...
  • Page 20: Part List

    CX125HC Parts List Item Part No. Description PCX125HC001 40700-001 Torx Wrench 145L, T25 PCX125HC001 90L, PCX125HC002 40700-002 Hex Wrench 4mm PCX125HC003 Hex Soc HD CAP SCREW PCX125HC004 Handle Assembly 4a-4f PCX125HC004 40700-04a Plate 1.8 T PCX125HC004 40700-04b Spindle lever Knuckle ADC12 PCX125HC004 GB/T 70.1- Screw M8xP1.25x35L 6mm...
  • Page 21 PCX125HC028 40700-028a Gear 70T PCX125HC029 40700-29 Undercut Spacer PCX125HC030 40700-30 Spacer PCX125HC031 40700-31 Gear Box Inner Cover T=2mm PCX125HC032 40700-32 Gear Box Cover PCX125HC033 40700-33 Pinion Gear PCX125HC034 Bearing 6203ZZ Ø40xØ17x12T PCX125HC035 40700-35 Base Bearing Retainer SPCC, T=2mm PCX125HC036 Cord Clamp GCL-3/8 S PCX125HC037 40700-37 Plate...
  • Page 22 PCX125HC073 40700-073 Infeed Rolloer PCX125HC076 40700-076 Right Coil Spring Ø2.0xØ15.5x30L SWPA PCX125HC077 40700-077 Outfeed Roller PCX125HC078 Motor Assy 150-182; 120V 60Hz PCX125HC079 40700-079 Base RAL7024 PCX125HC080 40700-080 Flat Washer Ø4.2xØ15x2T PCX125HC081 Nylock Hex Soc Hd Screw M4xP0.7x12L PCX125HC082 40700-082 Cursor PC-1225Y, H=16 PCX125HC083 Pan Head Screw M3xP0.5x25L PCX125HC084...
  • Page 23 PCX125HC235 VAC Adapter ABS PCX125HC236 Nut Hex M5xP0.8 PCX125HC237 Nylock Scr Hex Soc But Hd M5xP0.8x25L PCX125HC238 40700-238 Main Table Plate PCX125HC239 40700-239 Bearing Block PCX125HC240 40700-240 Bearing Block PCX125HC241 40700-241 Bearing Block PCX125HC242 Indicator Depth Assy, 229-237 PCX125HC243 Pan Head Screw M4xP0.7x12L PCX125HC244 13089 Special Nut, FC-0200-18...
  • Page 24: Warranty

    This warranty shall not apply to consumable products such as blades, bits, belts, cutters, chisels, punches etceteras. Craftex shall in no event be liable for injuries, accidental or otherwise, death to persons or damage to property or for incidental contingent, special or consequential damages arising from the use of our products.

This manual is also suitable for:

Cx125hc

Table of Contents