Table of Contents
Advertisement
Quick Links
Advertisement
Table of Contents

Related Manuals for Craftex CX122


Summary of Contents for Craftex CX122
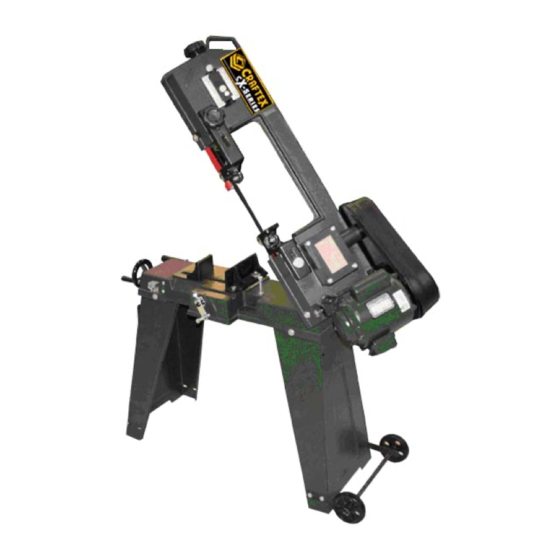
- Page 1 MODEL CX122 4-1/2" METAL CUTTING BAND SAW USER MANUAL...
-
Page 2: Table Of Contents
TABLE OF CONTENTS General Safety Instructions ................3 General Safety Rules ................... 4 Motor Specifications & Electrical Requirements........... 6 Unpacking ....................8 Operating Controls and Adjustments ............8 Adjusting Blade .................... 9 Changing Speeds and Belt Tension............. 10 Operating and Adjusting................12 Basic Operation.................... -
Page 3: General Safety Instructions
Extreme caution should be used when operating all power tools. Know your power tool, be familiar with its operation, read through the owner’s manual and practice safe usage procedures at all times. blades, knives or making other ALWAYS read and understand the adjustments or repairs. -
Page 4: General Safety Rules
GENERAL SAFETY RULES 3. Disconnect tools from the power source when changing the blade, accessories or performing any WARNING! maintenance in the machine. Serious injuries can occur if proper 4. Keep all guards in place and in safety precautions are not followed. good working order. - Page 5 the tool until it comes to a THINK SAFETY! complete stop. SAFETY IS A COMBINATION OF OPERATOR COMMON SENSE AND 5. Do not remove jammed or cutoff ALERTNESS AT ALL TIMES WHEN pieces until the tool comes to a THE BANDSAW IS BEING USED. complete stop.
-
Page 6: Motor Specifications & Electrical Requirements
plug when installing or removing WARNING! the plug. Before connecting this machine to a power source (receptacle, outlet, etc), WARNING!!! be sure the supply voltage is the same as specified on the nameplate of the Failure to properly ground this power machine. - Page 7 10. BLADE TENSION ADJUSTMENT STOP/START SWITCH KNOB - Controls blade tension LOCKOUT 11. BLADE GUIDE ADJUSTMENT This is to safeguard the band saw from KNOB - Adjusts the blade guide unauthorized operation avoid brackets to accommodate the size of accidental startup by children. The SWITCH the workpiece.
-
Page 8: Unpacking
UNPACKING: 1. To avoid injury from an unexpected startup or electrical shock, do not plug the power cord into the power source. The machine must remain unplugged whenever working on the machine. 2. When unpacking checking contents. Separate all loose parts Figure 1 from packaging materials and check each item against “The table of... -
Page 9: Adjusting Blade
ADJUSTING SCREW (E) AND CAUSE enough so that no slippage occurs BASIC SETTING MIS- between the blade and the wheels. ALIGNED. When the machine is not in use, release the blade tension. Figure 2 Figure4 ADJUSTING BLADE SUPPORT BEARING 1. -
Page 10: Changing Speeds And Belt Tension
CHANGING SPEEDS AND BELT ADJUSTING BLADE GUIDE BEARINGS TENSION 1. Disconnect the machine from the Disconnect the machine from the power power source source before changing speeds adjusting belt tension. 2. Blade guide bearings (A) and (B) (see Fig.5) should be adjusted until Proper belt tension is obtained when there they touch the sides of the blade (C) is approximately ¼”... - Page 11 ADJUSTING THE FEED RATE The feed rate of the saw arm can be adjusted by turning the control arm (see Fig.10) counterclockwise to increase and clockwise to decrease the feed rate. Do not turn the control arm more than one turn at a time.
-
Page 12: Operating And Adjusting
Figure 12 3. The vise can be adjusted to cut any angle from 0 to 45 degrees by loosening the two screws (A) (see Fig.13) and positioning the vise jaw (B) to the desired angle. A scale (C) is positioned on the rear of the table to indicate the proper cutting angle. -
Page 13: Basic Operation
1. Position the stop block (A) (see Fig.14) the desired distance away from the blade. It is good practice to have the work contact the stop rear the bottom of the work-piece, as shown. Figure 16 BASIC OPERATION CHANGING THE BAND SAW FROM HORIZONTAL TO VERTICAL OPERATION Figure 14... - Page 14 Figure 18 CHANGING BLADES 1. Disconnect the machine from the power source. 2. Raise the saw arm to the vertical position and open the blade wheel cover (A) (see Fig.19) 3. Release the blade tension by turning the blade tension hand knob (B) Figure 19 4.
-
Page 15: Maintenance
4. When thin rectangular solid bar is to sawed, work should, 3. Remove the four screws (A) (see whenever possible, be loaded with Fig.20), and the gearbox cover (B) the thinnest cross section exposed and gasket. blade teeth. pitch (number of teeth per inch of the 4. -
Page 17: Repair Parts List
REPAIR PARTS LIST AND SCHEMAT CX122001 BASE CX122002 SUPPORTING PLATE COVER SEAT CX122003 HEX SCREW ( 5/16”X3/4”) CX122004 WASHER CX122005 PIIVOTING ROD CX122006 PLASTIC SLEEVE CX122007 STOCK STOP ROD CX122008 STOCK STOP CX122009 CORD CLAMP PLATE CX122010 PAN SCREW ( 3/16”X1/4”) CX122011 SET SCREW ( 5/16”X1/4”) CX122012... - Page 18 CX122035 BLADE BACK SAFETY COVER CX122036 BLADE TENSION ADJUSTABLE KNOB CX122037 BLADE TENSION SLIDING GUIDES CX122038 HEX SCREW (5/16”X1/2”) CX122039 BLADE TENSION SLIDING PLUTE CX122040 HEX SCREW (5/16”X1-1/4”) CX122041 BLADE WHEEL ( SHAFT) CX122042 BEARING #6202ZZ CX122043 BLADE WHEEL ( REAL) CX122044 BLADE 14T CX122045...
- Page 19 CX122074 FLOOR STAND CX122075 ELECTRIC CORD CX122076 WHEEL SHAFT CX122077 WHEEL BRACKET CX122078 WHEEL CX122079 SPLIT CUTTER PIN CX122080 FLOOR STAND HANDLE CX122081 HEX NUT ( ¼”) CX122082 SWITCH SAFTEY BRACKET CX122083 SWITCH BOX CX122084 SWITCH BOX SCREW CX122085 HEX NUT (3/16”) CX122086 WASHER CX122087...
-
Page 20: Warranty
This warranty shall not apply to consumable products such as blades, bits, belts, cutters, chisels, punches etceteras. Craftex shall in no event be liable for injuries, accidental or otherwise, death to persons or damage to property or for incidental contingent, special or consequential damages arising from the use of our products.
Need help?
Do you have a question about the CX122 and is the answer not in the manual?
Questions and answers