Keysight Technologies N5166B CXG User Manual
Signal generators
Hide thumbs
Also See for N5166B CXG:
- Service manual (467 pages) ,
- Programming manual (398 pages) ,
- Getting started manual (61 pages)
Table of Contents

Related Manuals for Keysight Technologies N5166B CXG


Summary of Contents for Keysight Technologies N5166B CXG
- Page 1 Keysight N5166B CXG N5171B/72B/73B EXG N5181B/82B/83B MXG X-Series Signal Generators User’s Guide Distributed by: Sie haben Fragen oder wünschen eine Beratung? Angebotsanfrage unter 07121 / 51 50 50 oder über info@datatec.de...
- Page 2 COVERING THE MATERIAL IN THIS DOCUMENT THAT CONFLICT WITH government requirements THESE TERMS, THE WARRANTY beyond those set forth in the © Keysight Technologies, Inc. TERMS IN THE SEPARATE EULA shall apply, except to the 2012-2019 AGREEMENT WILL CONTROL. extent that those terms, rights, or...
- Page 3 Where to Find the Latest Information Documentation is updated periodically. For the latest information about these products, including instrument software upgrades, application information, and product information, browse to one of the following URLs, according to the name of your product: http://www.keysight.com/find/X-Series_SG To receive the latest updates by email, subscribe to Keysight Email Updates at the following URL: http://www.keysight.com/find/MyKeysight...
-
Page 5: Table Of Contents
Contents Table of Contents 1. Signal Generator Overview Signal Generator Features ..............20 Modes of Operation . - Page 6 Contents 5. PULSE ................31 6.
- Page 7 Contents Viewing Options and Licenses ............. . 56 Hardware Assembly Installation and Removal Softkeys .
- Page 8 Contents Configure Internal Channel Correction ............114 Perform Enhanced Factory Calibration.
- Page 9 Contents To set the ILS Localizer DDM value as a percentage (%) ......... 157 To set the ILS Localizer SDM value.
- Page 10 Contents Basic Digital Operation—No BBG Option Installed I/Q Modulation ................202 Configuring the Front Panel Inputs.
- Page 11 Contents Setting Waveform Scaling..............259 Setting the Baseband Frequency Offset.
- Page 12 Contents Accessing the N5102A Module User Interface..........321 Choosing the Logic Type and Port Configuration.
- Page 13 Contents Real–Time Fading (Option 660) Using Real-Time Fading Softkeys ............. . 378 To configure a Real-Time Fading simulation .
- Page 14 Contacting Keysight Technologies ........
- Page 15 Contents Working in a Secure Environment How to Obtain the Security Features Document ........... 459 Using Secure Display (Option 006).
- Page 16 Contents...
- Page 17 Documentation Overview — Safety Information Getting Started Guide — Receiving the Instrument — Environmental & Electrical Requirements — Basic Setup — Accessories — Operation Verification — Regulatory Information — Signal Generator Overview User’s Guide — Preferences & Enabling Options — Basic Operation —...
- Page 18 — Provides a listing of SCPI commands and programming codes for Programming signal generator models that are supported by the Keysight CXG, Compatibility Guide EXG, and MXG X- Series signal generators. — Troubleshooting Service Guide — Replaceable Parts — Assembly Replacement —...
-
Page 19: Signal Generator Overview
Keysight Technologies X-Series Signal Generators User’s Guide Signal Generator Overview To avoid damaging or degrading the performance of the instrument, do not exceed 33 dBm (2W) maximum (27 dBm (0.5W) for N5173N/83B) of reverse power levels at the RF input. See also Tips for Preventing Signal Generator Damage on www.keysight.com. -
Page 20: Signal Generator Features
Signal Generator Overview Signal Generator Features Signal Generator Features — N5171B/N5181B, RF analog models: 9 kHz to 1 (N5171B only), 3, or 6 GHz (Options 501, 503, and 506 respectively) — N5166B/N5172B/N5182B, RF vector models: 9 kHz to 3 or 6 GHz (Options 503, and 506 respectively) —... -
Page 21: Modes Of Operation
— expanded license key upgradability (Option 099) For more details on hardware, firmware, software, and documentation features and options, refer to the data sheet shipped with the signal generator and available from the Keysight Technologies website at http://www.keysight.com/find/X-Series_SG. Modes of Operation... -
Page 22: Digital Modulation (Vector Models With Option 65X Only)
Signal Generator Overview Modes of Operation Digital Modulation (Vector Models with Option 65x Only) In this mode, the signal generator modulates a CW signal with an arbitrary I/Q waveform. I/Q modulation is only available on vector models. An internal baseband generator (Option 65x) adds the following digital modulation formats: —... -
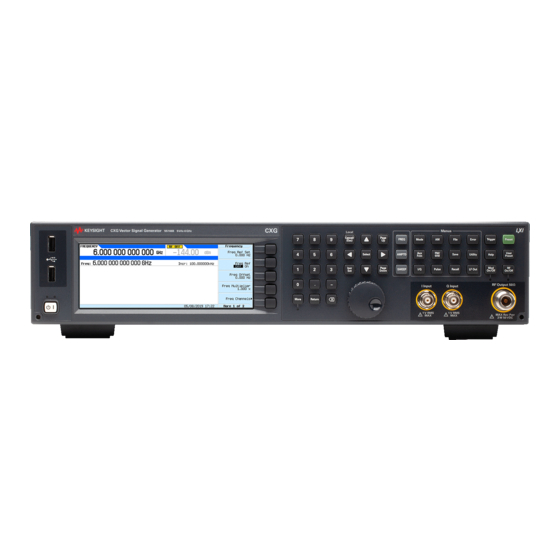
Page 23: Front Panel Overview
Signal Generator Overview Front Panel Overview Front Panel Overview 5. Arrows and Select 8. Trigger 7. MENUS 9. Local 4. Numeric Cancel/(Esc) Keypad 11. Preset and 3. Softkeys 10. Help User Preset 6. Page Up 2. Display 1. Host USB 21. -
Page 24: Arrows And Select
Signal Generator Overview Front Panel Overview 5. Arrows and Select The Select and arrow hardkeys enable you to select items on the signal generator’s display for editing. See “Entering and Editing Numbers and Text” on page 6. Page Up In a table editor, use this hardkey to display a previous page. See “Example: Using a Table Editor”... -
Page 25: 11. Preset And User Preset
Signal Generator Overview Front Panel Overview 11. Preset and User Preset These hardkeys set the signal generator to a known state (factory or user–defined). See “Presetting the Signal Generator” on page 12. RF Output (N5166B, N5171B, N5172B, N5181B, N5182B) Connector Standard: female Type–N Option 1EM:... -
Page 26: Q Input (Vector Models Only)
Signal Generator Overview Front Panel Overview 17. Q Input (vector models only) Connector Type: female BNC Impedance: 50 Ω Signal An externally supplied analog, quadrature–phase component of I/Q modulation. The signal level is = 0.5 V for a calibrated output level. Damage Levels See also, “I/Q Modulation”... -
Page 27: Front Panel Display
Signal Generator Overview Front Panel Display Front Panel Display 2. Frequency Area 1. Active Function Area 4. Amplitude Area 3. Annunciators Scroll Bar If there is more text than can be displayed on one screen, a scroll bar appears here. Use the Page Up and Page Down keys to scroll... -
Page 28: Amplitude Area
Signal Generator Overview Front Panel Display This annunciator appears when... Custom Arb waveform generator is on. DIGMOD An error message is placed in the error queue. This annunciator does not turn off until you either view all of the error messages or clear the error queue (see “Reading Error Messages”... -
Page 29: Text Area
Signal Generator Overview Front Panel Display 6. Text Area This area displays signal generator status information, such as the modulation status, and other information such as sweep lists and file catalogs. This area also enables you to perform functions such as managing information (entering information, and displaying or deleting files). 7. -
Page 30: Rear Panel Overview (N5166B, N5171B, N5172B, N5181B, & N5182B)
Signal Generator Overview Rear Panel Overview (N5166B, N5171B, N5172B, N5181B, & N5182B) Rear Panel Overview (N5166B, N5171B, N5172B, N5181B, & N5182B) Digital Modulation Connectors (Vector Models 1. AC Power Receptacle Only) on page 33 3. LF OUT 10. LAN 9. GPIB Option 1EM 6. -
Page 31: Ext 1 & Ext 2
Signal Generator Overview Rear Panel Overview (N5166B, N5171B, N5172B, N5181B, & N5182B) 2. EXT 1 & EXT 2 Connector female BNC Impedance nominally 50 Ω Signal An externally supplied ±1 V signal that produces the indicated depth. Damage Levels and 10 V 3. -
Page 32: 8. 10 Mhz Out
Signal Generator Overview Rear Panel Overview (N5166B, N5171B, N5172B, N5181B, & N5182B) 8. 10 MHz OUT Connector female BNC Impedance nominally 50 Ω Signal A nominal signal level greater than 4 dBm. 9. GPIB This connector enables communication with compatible devices such as external controllers, and is one of three connectors available to remotely control the signal generator (see also 10. -
Page 33: Digital Modulation Connectors (Vector Models Only)
Signal Generator Overview Rear Panel Overview (N5166B, N5171B, N5172B, N5181B, & N5182B) Digital Modulation Connectors (Vector Models Only) I OUT, Q OUT, OUT, OUT and OUT, require Option 1EL. Connector Type: female BNC Impedance: 50 Ω DC–coupled Signal I OUT The analog, in–phase component of I/Q modulation from the internal baseband generator. -
Page 34: Pat Trig
< −4 and > +8 V DIGITAL BUS I/O This is a proprietary bus used by Keysight Technologies signal creation software. This connector is not operational for general purpose use. Signals are present only when a signal creation software option is installed (for details, refer to http://www.keysight.com/find/signalcreation). -
Page 35: Aux I/O Connector
Signal Generator Overview Rear Panel Overview (N5166B, N5171B, N5172B, N5181B, & N5182B) AUX I/O Connector This female 36-pin connector is available only on instruments with an internal baseband generator (Option 653, 655, 656, 657). On signal generators without one of these options, this connector is not present. - Page 36 Signal Generator Overview Rear Panel Overview (N5166B, N5171B, N5172B, N5181B, & N5182B) Markers (pins 1-4) Each Arb–based waveform point has a marker on/off condition associated with it. Each real-time signal can be routed to the output marker signals using SCPI commands or the real-time personalities. Marker level = +3.3 V high (positive polarity selected);...
- Page 37 Signal Generator Overview Rear Panel Overview (N5166B, N5171B, N5172B, N5181B, & N5182B) Table 1-1 AUX I/O Connector Configuration CXG, MXG, and EXG AUX I/O Connector Configuration ARB & ARB-Based Real-Time Custom Real-Time BERT Capability Applications Modulation Applications Pin # Input Output Input Output...
- Page 38 Signal Generator Overview Rear Panel Overview (N5166B, N5171B, N5172B, N5181B, & N5182B) Table 1-1 AUX I/O Connector Configuration CXG, MXG, and EXG AUX I/O Connector Configuration ARB & ARB-Based Real-Time Custom Real-Time BERT Capability Applications Modulation Applications Pin # Input Output Input Output...
-
Page 39: Rear Panel Overview (N5173B & N5183B)
Signal Generator Overview Rear Panel Overview (N5173B & N5183B) Rear Panel Overview (N5173B & N5183B) 14. ALC INPUT 1. AC Power Receptacle 15. Z AXIS OUTPUT 10. LAN 9. GPIB Option 1EM 3. LF OUT 6. TRIG 1 & 2 13. -
Page 40: Ext 1 & Ext 2
Signal Generator Overview Rear Panel Overview (N5173B & N5183B) 2. EXT 1 & EXT 2 Connector female BNC Impedance nominally 50 Ω Signal An externally supplied ±1 V signal that produces the indicated depth. Damage Levels and 10 V 3. LF OUT Connector female BNC Impedance 50 Ω... -
Page 41: 8. 10 Mhz Out
Signal Generator Overview Rear Panel Overview (N5173B & N5183B) 8. 10 MHz OUT Connector female BNC Impedance nominally 50 Ω Signal A nominal signal level greater than 4 dBm. 9. GPIB This connector enables communication with compatible devices such as external controllers, and is one of three connectors available to remotely control the signal generator (see also 10. -
Page 42: 15. Z Axis Output
Signal Generator Overview Rear Panel Overview (N5173B & N5183B) 15. Z AXIS OUTPUT This female BNC connector supplies a +5 V (nominal) level during retrace and band-switch intervals of a step or list sweep. During step or list sweep, this female BNC connector supplies a -5 V (nominal) level when the RF frequency is at a marker frequency and intensity marker mode is on. -
Page 43: Preferences & Enabling Options
Keysight Technologies X-Series Signal Generators User’s Guide Preferences & Enabling Options The Utility menu provides access to both user and remote operation preferences, and to the menus in which you can enable instrument options. Remote Operation Preferences on page 49 GPIB Address and Remote Language ... -
Page 44: User Preferences
Preferences & Enabling Options User Preferences User Preferences From the Utility menu, you can set the following user preferences: — Display Settings, below — Power On and Preset on page 46 — Front Panel Knob Resolution on page 46 Keysight CXG, EXG, and MXG X-Series Signal Generators User’s Guide... -
Page 45: Display Settings
Preferences & Enabling Options User Preferences Display Settings Using Secure Display (Option 006) on page 460. See also, Utility > Display Range: 0 to 100 Light Only: turns the display light off, leaving the text visible at a low intensity. Light & Text: turns the display light and the text off. If the display remains unchanged for long periods of time, use this mode to prevent the text from burning the display. -
Page 46: Power On And Preset
Preferences & Enabling Options User Preferences Power On and Preset Utility > Power On/Preset Select the GPIB language desired after a preset. See also, the Programming Guide and the SCPI Command Restores persistent settings Reference. (those unaffected by a power Available only when 8648 is either the selected preset language or cycle*, preset, or recall) the selected remote language (see page 49). -
Page 47: Setting Time And Date
Preferences & Enabling Options User Preferences Setting Time and Date The signal generator’s firmware tracks the time and date, and uses the latest time and date as its time/date reference point. Changing the time or date can adversely affect the signal generator’s ability to use time. —... -
Page 48: Reference Oscillator Tune
Preferences & Enabling Options User Preferences Reference Oscillator Tune Utility > Instrument Adjustments Tunes the internal VCTXCO oscillator frequency. The user value offsets the factory tuned value (the value is added to the factory calibrated DAC value). The tune value of 0 sets the factory calibrated value. -
Page 49: Upgrading Firmware
Preferences & Enabling Options Upgrading Firmware Upgrading Firmware For information on new firmware releases, go to http://www.keysight.com/find/upgradeassistant. Remote Operation Preferences For details on operating the signal generator remotely, refer to the Programming Guide. GPIB Address and Remote Language NOTES USB is also available. It is not shown in the menu because it requires no configuration. For details on using the instrument remotely, see the Programming Guide. -
Page 50: Configuring The Lan Interface
Preferences & Enabling Options Remote Operation Preferences Configuring the LAN Interface Utility > I/O Config page 50 NOTES Use a 100Base–T LAN cable to connect the signal generator to the LAN. Use a crossover cable to connect the signal generator directly to a PC. For details on using the instrument remotely, Values are listed in the refer to the Programming Guide and to... -
Page 51: Configuring The Remote Languages
Preferences & Enabling Options Remote Operation Preferences Configuring the Remote Languages Figure 2-2 N5166B/71B/72B/81B/82B Utility > I/O Config Select the desired Remote language. For details on each key, use key help Refer to the SCPI Command Reference. page 60 as described on Keysight CXG, EXG, and MXG X-Series Signal Generators User’s Guide... - Page 52 Preferences & Enabling Options Remote Operation Preferences Figure 2-3 N5173B/83B Utility > I/O Config Select the desired Remote language. page 60 For details on each key, use key help as described on Refer to the SCPI Command Reference. Keysight CXG, EXG, and MXG X-Series Signal Generators User’s Guide...
-
Page 53: Configuring The Preset Languages
Preferences & Enabling Options Remote Operation Preferences Configuring the Preset Languages Figure 2-4 N5166B/71B/72B/81B/82B Utility > Power On/Preset Select the desired Remote language. page 46 Refer to the SCPI Command Reference. For details on each key, use key help page 60 as described on Keysight CXG, EXG, and MXG X-Series Signal Generators User’s Guide... - Page 54 Preferences & Enabling Options Remote Operation Preferences Figure 2-5 N5173B/83B Select the desired Remote language. Utility > Power On/Preset page 46 page 60 For details on each key, use key help as described on Refer to the SCPI Command Reference. Keysight CXG, EXG, and MXG X-Series Signal Generators User’s Guide...
-
Page 55: Enabling An Option
Preferences & Enabling Options Enabling an Option Enabling an Option With firmware version B.0.175 or later, the following options have changed to a new eight-digit format: — Option 302 to Option N5180302B — Option 320 to Option N5180320B — Option 403 to Option N5180403B —... -
Page 56: Viewing Options And Licenses
Preferences & Enabling Options Enabling an Option Viewing Options and Licenses Instrument options appear Utility > here. A check mark means that Instrument Info an option is enabled. Displays software options and information such as those that are internal to the instrument. With firmware B.01.75 or later, these options are an eight-digit format as shown in this figure. -
Page 57: Hardware Assembly Installation And Removal Softkeys
Preferences & Enabling Options Hardware Assembly Installation and Removal Softkeys Hardware Assembly Installation and Removal Softkeys For details on each key, use key help Utility > More 2 of 2 > page 60 as described on Verify output attenuator operation using a power meter at the RF Output. - Page 58 Preferences & Enabling Options Hardware Assembly Installation and Removal Softkeys Keysight CXG, EXG, and MXG X-Series Signal Generators User’s Guide...
-
Page 59: Basic Operation
Keysight Technologies X-Series Signal Generators User’s Guide Basic Operation This chapter introduces fundamental front panel operation. For information on remote operation, refer to the Programming Guide. — Presetting the Signal Generator on page 60 — Viewing Key Descriptions on page 60 —... -
Page 60: Presetting The Signal Generator
Basic Operation Presetting the Signal Generator Presetting the Signal Generator To return the signal generator to a known state, press either Preset or User Preset. Preset is the factory preset; User Preset is a custom preset** (see also, page 46). To reset persistent settings (those unaffected by preset, user preset, or power cycle*), press: Utility >... -
Page 61: Entering And Editing Numbers And Text
Basic Operation Entering and Editing Numbers and Text Entering and Editing Numbers and Text Entering Numbers and Moving the Cursor Use the number keys and decimal point to enter numeric data. Up/down arrow keys increase/decrease a selected (highlighted) numeric value, and move the cursor vertically. Page up/down keys move tables of data up and down within the display area. -
Page 62: Example: Using A Table Editor
Basic Operation Entering and Editing Numbers and Text Example: Using a Table Editor Table editors simplify configuration tasks. The following procedure describes basic table editor functionality using the List Mode Values table editor. 1. Preset the signal generator: Press Preset. 2. -
Page 63: Setting Frequency And Power (Amplitude)
Basic Operation Setting Frequency and Power (Amplitude) Setting Frequency and Power (Amplitude) Figure 3-1 Frequency and Amplitude Softkeys In Frequency mode, this menu is In Amplitude mode, this menu is automatically displayed when entering automatically displayed when entering a numeric value with the front panel a numeric value with the front panel keypad. -
Page 64: Example: Configuring A 700 Mhz, −20 Dbm Continuous Wave Output
Basic Operation Setting Frequency and Power (Amplitude) Example: Configuring a 700 MHz, −20 dBm Continuous Wave Output 1. Preset the signal generator. The signal generator displays its maximum specified frequency and minimum power level (the front panel display areas are shown on page 27). -
Page 65: Setting Alc Bandwidth Control
Basic Operation Setting ALC Bandwidth Control Figure 3-2 Using an External Reference Oscillator Setting ALC Bandwidth Control Figure 3-3 Amplitude Softkeys Enables the automatic bandwidth mode (Auto). For details on each key, use key help Refer to the SCPI Command Reference. To display the next menu, press page 60 as described on... -
Page 66: Configuring A Swept Output
Basic Operation Configuring a Swept Output Configuring a Swept Output The signal generator has two methods of sweeping through a set of frequency and amplitude points: Step sweep (page 67) provides a linear or logarithmic progression from one selected frequency, amplitude, or both, to another, pausing at linearly or logarithmically spaced points (steps) along the sweep. -
Page 67: Routing Signals
Basic Operation Configuring a Swept Output Routing Signals Sweep > More > More > Route Connectors Step Sweep Step sweep provides a linear or logarithmic progression from one selected frequency, or amplitude, or both, to another, pausing at linearly or logarithmically spaced points (steps) along the sweep. The sweep can progress forward, backward, or be changed manually. - Page 68 Basic Operation Configuring a Swept Output Figure 3-6 Sweep Softkeys For details on each key, use key help page 60 as described on Dwell Time = the time that the signal is settled and you can make a measurement before the sweep moves to the next point. (Point to point time is the sum of the value set for the dwell plus processing time, switching time, and settling time.) Step Sweep and List Sweep dwell times are set...
-
Page 69: List Sweep
Basic Operation Configuring a Swept Output A continuous sweep begins, from the start frequency/amplitude to the stop frequency/amplitude. The SWEEP annunciator displays, and sweep progress is shown in the frequency display, the amplitude display, and the progress bar. 5. Turn the RF output on: Press RF On/Off. The RF LED lights, and the continuous sweep is available at the RF Output connector. - Page 70 Basic Operation Configuring a Swept Output Example: Configuring a List Sweep Using Step Sweep Data 1. Set up the desired step sweep, but do not turn the sweep on. This example uses the step sweep configured on page 2. In the SWEEP menu, change the sweep type to list: Press SWEEP >...
- Page 71 Basic Operation Configuring a Swept Output 2. If sweep is on, turn it off. Editing list sweep parameters with sweep on can generate an error. 3. Ensure that the sweep type is set to list: Press SWEEP > Sweep Type List Step to highlight List.
-
Page 72: Example: Using A Single Sweep
Basic Operation Configuring a Swept Output 13.As desired, repeat step for the remaining points for which you want to select a waveform. The following figure shows an example of how this might look. The empty entry is equivalent to choosing CW (no modulation). 14.Turn sweep on: Press Return >... -
Page 73: Example: Manual Control Of Sweep
Basic Operation Configuring a Swept Output Example: Manual Control of Sweep 1. Set up either a step sweep (page 68) or a list sweep (page 70). 2. In the Sweep/List menu, select a parameter to sweep: Press Sweep > parameter > Return. 3. -
Page 74: Modulating The Carrier Signal
Basic Operation Modulating the Carrier Signal Modulating the Carrier Signal To modulate the carrier signal, you must have both — an active modulation format — modulation of the RF output enabled Example 1. Preset the signal generator. 2. Turn on AM: Press AM > AM Off On (requires Option UNT). You can turn on the modulation format before or after setting signal parameters. -
Page 75: Simultaneous Modulation
Basic Operation Modulating the Carrier Signal Simultaneous Modulation The Keysight X-Series signal generators are capable of simultaneous modulation. All modulation types (AM, FM, fM, Pulse, and I/Q) may be simultaneously enabled, but there are some exceptions. Refer to Table 3-1. Table 3-1 Simultaneous Modulation Type Combinations Pulse... -
Page 76: Working With Files
Basic Operation Working with Files Working with Files — File Softkeys on page 77 — Viewing a List of Stored Files on page 78 — Storing a File on page 80 — Loading (Recalling) a Stored File on page 81 —... -
Page 77: File Softkeys
Basic Operation Working with Files File Softkeys page 60 For details on each key, use key help as described on Note: Available file types depend on the installed options. page 82 Display internal or USB Instrument operating parameters (see files, depending on the Sweep data from the List Mode Values table editor. -
Page 78: Viewing A List Of Stored Files
Basic Operation Working with Files ARB File Softkeys Waveform files and their associated marker and header information. Note: Available file types depend on the installed options. page 60 For details on each key, use key help as described on Viewing a List of Stored Files The information in this section is provided with the assumption that default storage media is set to Auto, as described on page... - Page 79 Basic Operation Working with Files Viewing a list of Files Stored on USB Media With USB media connected, you can view files on USB media using either the file catalogs, which can display only a selected type of file, or the USB File Manager, which displays all files. Using the File Catalogs: —...
-
Page 80: Storing A File
Basic Operation Working with Files Storing a File Several menus enable you to store instrument parameters. For example, you can store instrument states, lists, and waveforms. — An instrument state file contains instrument settings. For this type of file, use the Save hardkey shown in Figure 3-8 on page —... -
Page 81: Loading (Recalling) A Stored File
Basic Operation Working with Files Loading (Recalling) a Stored File There are several ways to load (recall) a stored file. — For an instrument state file, use the Recall hardkey shown in Figure 3-8 on page — For other types of data, use the Load/Store softkey (shown below) that is available through the menu used to create the file. -
Page 82: Moving A File From One Media To Another
Basic Operation Working with Files Moving a File from One Media to Another Use the USB Media Manager to move files between USB and internal media. File > Catalog Type > <type> > More > USB File Manager File > More > USB File Manager Insert the USB Flash Drive (UFD) Selecting a waveform or an unknown file type... - Page 83 Basic Operation Working with Files Figure 3-8 Save and Recall Softkeys When saved to the signal generator, instrument settings (states) save to instrument state memory*. Instrument state memory is divided into 10 sequences (0 through 9); each sequence comprises 100 registers (00 through 99). Delete softkeys in the Save and Recall menus enable you to delete the contents of a specific register, or the contents of all sequences in the state file catalog.
- Page 84 Basic Operation Working with Files Saving an Instrument State 1. Preset the signal generator and set the following: • Frequency: 800 MHz • Amplitude: 0 dBm • RF: on 2. (Optional, vector models only) Associate a waveform file with these settings: a.
- Page 85 Basic Operation Working with Files If the desired state is listed in the currently selected sequence, press desired number > Enter. If not, press Press Select Seq > desired number > Enter > RECALL Reg > desired number > Enter. Recalling an Instrument State and Associated Waveform File 1.
- Page 86 Basic Operation Working with Files Moving or Copying a Stored Instrument State Figure 3-9 Instrument State File Catalog Sequence Register page 84 The signal generator recognizes only the file named USER_PRESET as user preset information ( A user–created state file’s default name is its memory location (sequence and register). To move the file, rename it to the desired sequence and register;...
-
Page 87: Selecting The Default Storage Media
Basic Operation Working with Files Selecting the Default Storage Media You can configure the signal generator to store user files to either the internal storage or to external USB media. To automatically switch between USB media and internal storage, depending on whether USB media is attached, select Automatically Use USB Media If Present. -
Page 88: Reading Error Messages
Basic Operation Reading Error Messages Reading Error Messages If an error condition occurs, the signal generator reports it to both the front panel display error queue and the SCPI (remote interface) error queue. These two queues are viewed and managed separately;... -
Page 89: Optimize Performance
Keysight Technologies X-Series Signal Generators User’s Guide Optimize Performance Before using this information, you should be familiar with the basic operation of the signal generator. If you are not comfortable with functions such as setting the power level and frequency, refer to Chapter 3, “Basic Operation”, on page 59... -
Page 90: Using The Dual Power Meter Display
Optimize Performance Using the Dual Power Meter Display Using the Dual Power Meter Display The dual power meter display can be used to display the current frequency and power of either one or two power sensors. The display outputs the current frequency and power measured by the power sensors in the larger center display and in the upper right corner of the display. -
Page 91: Example: Dual Power Meter Calibration
Optimize Performance Using the Dual Power Meter Display Figure 4-3 Configuring the Power Sensor Channels AUX Fctn > Power Meter Note: This figure illustrates channel A. Channel B is similar. Measurements Enables the power meter connection type: Sockets LAN, VXI–11 LAN, or USB. Note: The VXI–11 softkey is used to communicate remotely with a power meter... - Page 92 Optimize Performance Using the Dual Power Meter Display 1. Setup for Step Sweep. “Configuring a Swept Output” on page Verify RF Output power is off before continuing. 2. Connecting the Channel A power sensor: Connect USB sensor to the signal generator. The CXG/MXG/EXG should display a message across the bottom that reads similar to: USB TMC488 device (USB POWER SENSOR,MY47400143) connected Figure 4-4...
- Page 93 Optimize Performance Using the Dual Power Meter Display Figure 4-6 Running Calibration(s) Bar (Zeroing Sensor) For details on each key, use key help as described page 60 The U2000 Series USB Power Sensor, does require a 50 MHz calibration. If a calibration is attempted with the U2000 Series Power Sensors, the signal generator displays a message reading: The U2000 series power sensor does not require a 50 MHz calibration.
- Page 94 Optimize Performance Using the Dual Power Meter Display 6. On the N1912A P–Series Power Meter (Channel B power sensor): Connect the N1912A P– Series Power Meter to the LAN. 7. Connect the power meter sensor to channel B of the power meter. It is recommended, but not required to use the channel B on the N1912A.
- Page 95 Optimize Performance Using the Dual Power Meter Display 13.On the signal generator: Press Channel B to On and then back to Off again. This initializes the signal generator to the external power meter. 14.Press Return > Zero Sensor A diagnostic dialog box is displayed each time an external power meter is being used and the Zero Sensor or Calibrate Sensor softkey is pressed (refer to Figure 4-10 on page 95).
- Page 96 Optimize Performance Using the Dual Power Meter Display 17.Press Done Calibration progress bar is displayed. Refer to Figure 4-12 on page Figure 4-12 Running Calibration(s) Bar (Calibrating Sensor) For details on each key, use key help as described page 60 18.Press Return > Channel B to On 19.The current power meter sensor reading should be displayed on the signal generator in the ChB portion of the display and in the upper right corner of the display under Power Meter and to the left of the Power Meter power sensor reading.
-
Page 97: Using The Usb Pass Through Commands
Optimize Performance Using the USB Pass Through Commands Using the USB Pass Through Commands The USB pass through SCPI commands are used remotely and or to program your system setup and power meter sensor setup. This section applies to the following USB power sensors: —... -
Page 98: Procedure
Optimize Performance Using the USB Pass Through Commands Procedure Step Substeps Results/Notes 1. Setup equipment. 2. Enable the pass a. Enter: through capability in :SYSTem:PMETer:PAS the MXG. Sthrough:ENABle 1 3. Query the instrument a. Enter: The instrument should return a 1, indicating that the and verify pass pass through feature has been enabled. -
Page 99: Using The Power Meter Servo
Optimize Performance Using the Power Meter Servo Using the Power Meter Servo The Power Meter Servo mode uses power meter readings to adjust the output power of the source, maintaining a constant DUT output power. The servo loop measures the output power of the DUT, compares it to the user-provided reference power, and adjusts the output of the source to achieve the user-provided power level within the settling error. -
Page 100: Power Meter Servo Configuration
Optimize Performance Using the Power Meter Servo Power Meter Servo Configuration The following procedure is a basic configuration for using the signal generator’s Power Meter Servo mode. The configuration described below is one possible setup example. Consider the limits of your DUT and use caution to protect the DUT from being exposed to too much power. -
Page 101: Example
Optimize Performance Using the Power Meter Servo Power Meter Continuous performs the adjustment as in Once mode, and continues to adjust the power periodically if the value differs by more than the specified Settling Error. Once these parameters are set, the servo loop engages and levels the DUT’s output power. Example The following example emphasizes the importance of setting the amplitude offset, as it protects the DUT from being exposed to too much power. -
Page 102: Using Flatness Correction
Optimize Performance Using Flatness Correction Using Flatness Correction User flatness correction allows the digital adjustment of RF output amplitude for up to 1601 sequential linearly or arbitrarily spaced frequency points to compensate for external losses in cables, switches, or other devices. Using an Keysight N1911A/12A, E4419A/B, or U2000 Series power meter/sensor to calibrate the measurement system, a table of power level corrections can automatically be created for frequencies where power level variations or losses occur. - Page 103 Optimize Performance Using Flatness Correction Figure 4-16 User Flatness Correction Softkeys For details on each key, use key help page 60 as described on Starts the user flatness calibration. page 105 Confirm Keysight CXG, EXG, and MXG X-Series Signal Generators User’s Guide...
-
Page 104: Creating A User Flatness Correction Array
Optimize Performance Using Flatness Correction Creating a User Flatness Correction Array In this example, you will create a user flatness correction array. The flatness correction array contains ten frequency correction pairs (amplitude correction values for each specified frequency), from 500 MHz to 1 GHz. An Keysight N1911A/12A or E4419A/B power meter and E4413A power sensor are used to measure the RF output amplitude at the specified correction frequencies and transfer the results to the signal generator. - Page 105 Optimize Performance Using Flatness Correction Connect the Equipment — Keysight N1911A/12A or E4419A/B — LAN, GPIB, or USB interface cables, as required power meter — adapters and cables, as — Keysight U2000A/01A/02A/04A power required Sensor The LAN, GPIB*, and USB connections are for convenience.
- Page 106 Optimize Performance Using Flatness Correction Basic Procedure 1. Create a user flatness array. a. Configure the power meter/sensor b. Connect the equipment c. Configure the signal generator d. Enter the user flatness correction values 2. Optionally, save the user flatness correction data. 3.
- Page 107 Optimize Performance Using Flatness Correction 4. Enable the power meter’s cal factor array. The signal generator’s RF Output LED remains unchanged during zeroing of the power sensor (e.g. if the RF Output LED was on prior to starting the Zeroing of the power sensor, the LED remains on throughout the zero/calibration).
- Page 108 Optimize Performance Using Flatness Correction c. Open the User Flatness table editor and preset the cal array: Press Return > Configure Cal Array > More > Preset List > Confirm Preset with Defaults. d. In the Step Array menu, enter the desired flatness–corrected start and stop frequencies, and the number of points: Press More >...
- Page 109 Optimize Performance Using Flatness Correction 2. Connect the power meter to the RF output and enter the correction values: With a Power Meter Over LAN, GPIB, or USB Manually i. Create the correction values: i. Open the User Flatness table editor and highlight Press More >...
-
Page 110: Recalling And Applying A User Flatness Correction Array
Optimize Performance Using Flatness Correction The UF annunciator appears in the AMPLITUDE area of the display, and the correction data in the array is applied to the RF output. Recalling and Applying a User Flatness Correction Array The following example assumes that a user flatness correction array has been created and stored. If not, perform the Example: A 500 MHz to 1 GHz Flatness Correction Array with 10 Correction Values... -
Page 111: Using Internal Channel Correction (N5166B/72B/82B Only)
Optimize Performance Using Internal Channel Correction (N5166B/72B/82B Only) Using Internal Channel Correction (N5166B/72B/82B Only) There is an internal calibration routine (Factory Calibration) that collects correction data for both the baseband and RF magnitude and phase errors over the entire RF frequency and power level range on any unit with options 653, 655, 656, and 657. - Page 112 Optimize Performance Using Internal Channel Correction (N5166B/72B/82B Only) — If a frequency sweep is activated, then the calculation and caching will occur up front for the first 256 unique frequencies, and all additional unique frequencies will have the characteristics of arbitrary frequency switching. —...
- Page 113 Optimize Performance Using Internal Channel Correction (N5166B/72B/82B Only) Figure 4-18 Internal Channel Correction Softkeys I/Q > More Displays a menu that controls the calibration and application of the internal baseband generator RF and baseband magnitude and phase corrections across the entire baseband bandwidth.
-
Page 114: Configure Internal Channel Correction
Optimize Performance Using Internal Channel Correction (N5166B/72B/82B Only) Configure Internal Channel Correction There is an internal calibration routine (Enhanced Factory Calibration) that collects correction data for both the baseband and RF magnitude and phase errors over the entire RF frequency and power level range on any unit with options 653, 655, 656, and 657. -
Page 115: Using External Leveling (N5173B/83B Only)
Optimize Performance Using External Leveling (N5173B/83B Only) Using External Leveling (N5173B/83B Only) Atten Hold sets to On and grays out (inactive) with Ext Detector selection. When re– selecting Internal, the softkey becomes active, but attenuator hold remains on. If desired, manually set it to off. With the Ext Detector selection, Set Atten has no effect on the output power level. - Page 116 Figure 4-21 on page 117 shows the input power versus output voltage characteristics for typical Keysight Technologies diode detectors. Using this chart, you can determine the leveled power at the diode detector input by measuring the external detector output voltage. For a coupler, you must then add the coupling factor to determine the leveled output power.
- Page 117 Optimize Performance Using External Leveling (N5173B/83B Only) Figure 4-20 Power Value Differences with External Leveling Signal generator set power level Measured output power of a coupler Figure 4-21 Typical Diode Detector Response at 25° C Keysight CXG, EXG, and MXG X-Series Signal Generators User’s Guide...
-
Page 118: Option 1E1 Output Attenuator Behavior And Use
Optimize Performance Using External Leveling (N5173B/83B Only) Option 1E1 Output Attenuator Behavior and Use When using the internal detector, the Option 1E1 output attenuator enables signal generator power levels down to -130 dBm at the RF Output connector. It accomplishes this by adding attenuation to the output signal after the ALC detection circuit. - Page 119 Optimize Performance Using External Leveling (N5173B/83B Only) 4. Determine the output amplitude range, see “Determining the Signal Generator’s Amplitude Range” on page 120 5. Set the displayed power value, see “Adjusting the Signal Generator Display’s Amplitude Value” on page 121 Equipment Setup Set up the equipment as shown in Figure 4-22 on page...
- Page 120 Optimize Performance Using External Leveling (N5173B/83B Only) Determining the Signal Generator’s Amplitude Range The maximum output amplitude is frequency dependent. So if you are using multiple frequency points and there is a need to know the maximum output amplitude for each frequency point, refer to the “Amplitude”...
- Page 121 Optimize Performance Using External Leveling (N5173B/83B Only) To remove the error message, press the down arrow key until the message is gone. The error appears when an attempt is made to increase the amplitude beyond the maximum value as it relates to the current attenuator setting. Adjusting the Signal Generator Display’s Amplitude Value When using external leveling, the signal generator’s displayed amplitude value will not match the leveled power of the signal at the output of the coupler/splitter.
-
Page 122: Using Unleveled Operating Modes
Optimize Performance Using Unleveled Operating Modes Using Unleveled Operating Modes Figure 4-23 Power Search and ALC Off Softkeys Auto: The calibration routine executes whenever output frequency or amplitude changes. Only available when I/Q is on. Span: Pressing Do Power Search executes the power search calibration routine once over a These selected frequency range. -
Page 123: Power Search Mode
Optimize Performance Using Unleveled Operating Modes slow amplitude variations or bursts that the automatic leveling would remove or distort. When using the internal IQ baseband generator, the best technique is to use the ALC hold marker function vs. ALC off for the types of signals just described. After the ALC has been turned off, power search must be executed to set the proper output power level requested on the front panel. - Page 124 Optimize Performance Using Unleveled Operating Modes — Fixed – Reference level is 0.5 Vrms. This reference functions with internal, external IQ and bursted signals. This is the instrument’s default setting. — RMS – User provided reference level 0–1.414 Vrms placed in the Waveform Header. Refer to “Saving a Waveform’s Settings &...
- Page 125 Optimize Performance Using Unleveled Operating Modes The FIXED, RMS, and MANUAL references use a DAC to apply the reference voltage and do not require the IQ signal to be present. The CXG/MXG/EXG reference voltage is designed to operate between 0.1 Vrms to 1 Vrms nominally, but it can overrange to 1.414 Vrms.
-
Page 126: Using An Output Offset, Reference, Or Multiplier
Optimize Performance Using an Output Offset, Reference, or Multiplier When set to Auto, power search automatically executes when a significant instrument setting changes. The Do Power Search feature enables you to decide when to execute a power search to compensate for changes, such as temperature drift or a change in the external input. Using an Output Offset, Reference, or Multiplier Setting an Output Offset Using an output offset, the signal generator can output a frequency or amplitude that is offset... -
Page 127: Setting An Output Reference
Optimize Performance Using an Output Offset, Reference, or Multiplier Antenna tuned to 1321 MHz IF Amplifier RF Amplifier Mixer Filter IF Output IF = 321 MHz 321 MHz Output Frequency = 1000 MHz Selected Offset SIgnal Generator Display 321 MHz 1321 MHz (Antenna Frequency) −679 MHz... -
Page 128: Setting A Frequency Multiplier
Optimize Performance Using an Output Offset, Reference, or Multiplier To set a new frequency or amplitude reference, turn the frequency reference off, and then follow the steps above. Setting a Frequency Multiplier Using a frequency multiplier, the signal generator can display a frequency that is the multiple (positive or negative) of the output value. -
Page 129: Using The Frequency And Phase Reference Softkeys
Optimize Performance Using the Frequency and Phase Reference Softkeys When using the signal generator as the input to a system, you can set the frequency multiplier so that the signal generator displays the output of the system, as illustrated below using a doubler: Signal Generator Doubler Entered/Displayed... -
Page 130: Using Free Run, Step Dwell, And Timer Trigger
Optimize Performance Using Free Run, Step Dwell, and Timer Trigger Using Free Run, Step Dwell, and Timer Trigger Free Run, Step Dwell (time), and Timer Trigger can be used to adjust the time spent at any point in a Step Sweep or a List Sweep. There are two possible measurement combinations: Free Run with Step Dwell time (Figure 4-27 on page 131) the signal generator waits for the signal... - Page 131 Optimize Performance Using Free Run, Step Dwell, and Timer Trigger Figure 4-27 Free Run, Set Dwell, and Timer Trigger Softkeys Sweep > Configure Step Sweep > More Use Step Dwell with Free Run when additional measurement wait time is desired after settling. If the signal is to be settled for a minimum specific time at each point and it is not important if the point to point time is consistent, use Step Dwell and Free Run time.
-
Page 132: Using A Usb Keyboard
Optimize Performance Using a USB Keyboard Using a USB Keyboard You can use a USB keyboard to remotely control the RF output state, the modulation state, and to select a memory sequence and register. The register selection, RF output state, and modulation state are affected by power cycle or preset, but the USB keyboard control state and the sequence selection are not. -
Page 133: Avionics Vor/Ils (Option N5180302B)
Keysight Technologies X-Series Signal Generators User’s Guide Avionics VOR/ILS (Option N5180302B) With firmware version B.01.75 or later, option numbers for software internal to the instrument “Enabling an Option” on page 55 have changed. For more information, see This chapter describes the avionics softkeys used by Keysight N5171B/72B EXG and N5181B/82B MXG X-Series signal generators with Option N5180302B Avionics License during either VOR [VHF Omnidirectional Ranging] or ILS [Instrument Landing System] aircraft navigation receiver test. -
Page 134: Using Vor [Vhf Omnidirectional Range] Softkeys
Avionics VOR/ILS (Option N5180302B) Using VOR [VHF Omnidirectional Range] Softkeys Using VOR [VHF Omnidirectional Range] Softkeys The purpose of the VOR system is to provide directional information for aircraft in flight. VOR ground based transmitter stations are strategically located to provide complete coverage for air traffic. - Page 135 Avionics VOR/ILS (Option N5180302B) Using VOR [VHF Omnidirectional Range] Softkeys Figure 5-3 VOR Softkeys - Turns off all VOR modulation; - Sets a Carrier Frequency by selecting an Index from 1 to 160. VOR carrier remains on. (Default: Index is 1 and corresponds to 108.00 MHz) - Turns on all VOR modulation and VOR carrier...
-
Page 136: To Set The Vor Mode That Produces A Full Or Partial Vor Signal
Avionics VOR/ILS (Option N5180302B) Using VOR [VHF Omnidirectional Range] Softkeys To set the VOR mode that produces a full or partial VOR signal 1. Press Aux Fctn > Avionics > VOR 2. Press VOR Mode (Default selection is OFF.) 3. Select either: OFF | NORM | VAR | Sub-carrier | Sub-carrier+FM —... - Page 137 Avionics VOR/ILS (Option N5180302B) Using VOR [VHF Omnidirectional Range] Softkeys The default VOR carrier frequency Index is 1 and corresponds to 108.00 MHz. VOR Carrier Frequencies (MHz) Carrier Freq Index = 1 to 160 1 to 32 33 to 64 65 to 96 97 to 128 129 to 160...
-
Page 138: To Set The Vor Bearing Angle Between The Var Signal And The Ref Signal
Avionics VOR/ILS (Option N5180302B) Using VOR [VHF Omnidirectional Range] Softkeys 110.80 113.00 114.60 116.20 117.80 110.85 113.05 114.65 116.25 117.85 111.00 113.10 114.70 116.30 117.90 111.05 113.15 114.75 116.35 117.95 To set the VOR bearing angle between the VAR signal and the REF signal 1. -
Page 139: To Set The Vor Bearing Direction As From Or To
Avionics VOR/ILS (Option N5180302B) Using VOR [VHF Omnidirectional Range] Softkeys To set the VOR bearing direction as From or To 1. Press Aux Fctn > Avionics > VOR 2. Press Bearing 3. Press Direction (Default selection is From.) 4. Select either From | To From - In the From convention, the VOR transmitter beacon is made the reference point and the Bearing Angle is between local magnetic-North and the beacon-to-aircraft radial line (RL). -
Page 140: To Set The Am Depth Of The Variable Phase Signal (Var Freq)
Avionics VOR/ILS (Option N5180302B) Using VOR [VHF Omnidirectional Range] Softkeys To set the AM depth of the variable phase signal (VAR Freq) 1. Press Aux Fctn > Avionics > VOR 2. Press REF/VAR 3. Press VAR Depth (Default value is 30%.) 4. -
Page 141: Example Of Setting All Vor Parameters
Avionics VOR/ILS (Option N5180302B) Using VOR [VHF Omnidirectional Range] Softkeys 3. Press Recall Default Settings VOR Menu Parameters Default State VOR Mode Carrier Freq Index 108.00 MHz Bearing menu Angle 0.00 Deg Direction From REF/VAR menu REF/VAR Freq 30.00 Hz REF Deviation 480.0 Hz VAR Depth... - Page 142 Avionics VOR/ILS (Option N5180302B) Using VOR [VHF Omnidirectional Range] Softkeys a.Press Return b.Press REF/VAR c.Press REF/VAR Freq (Default value is 30 Hz.) d.(Optional) Select a <value> from 10 to 60 Hz. 6. Set the amount of FM deviation that the 30 Hz reference signal (REF Freq) applies on the sub-carrier.
- Page 143 Avionics VOR/ILS (Option N5180302B) Using VOR [VHF Omnidirectional Range] Softkeys b.Select a value from -20 dBm to -40 dBm. 13.Set RF output to on. a.Press RF On and verify that the front panel LED is illuminated, indicating that it is on. (Default is off).
-
Page 144: Using Com/Id Softkeys
Avionics VOR/ILS (Option N5180302B) Using COM/ID Softkeys Using COM/ID Softkeys The purpose of COM/ID commands are to set parameters related to airport communication identification codes. (This code may also be referred to as an, “airport call-sign”.) During VOR and ILS testing, a COM/ID code can be transmitted as a three letter Morse-code signal of 1.02000 kHz and is placed on the carrier;... -
Page 145: To Set The Com/Id Type Between Code Or Tone
Avionics VOR/ILS (Option N5180302B) Using COM/ID Softkeys 2. Press COM/ID (Default is COM/ID Off.) 3. Select either COM/ID Off | COM/ID On When COM/ID is set to Off, all COM/ID functions are turned off and must be set to On before any of the other COM/ID parameters have an effect. -
Page 146: To Set The Com/Id Tone/Code Modulating Frequency
Avionics VOR/ILS (Option N5180302B) Using COM/ID Softkeys To find a valid COM/ID code (airport communication identification code) for a particular area, refer to the following websites: Airline Coding Directory (http://www.iata.org) AirNav (http://www.airnav.com) To set the COM/ID tone/code modulating frequency 1. Press Aux Fctn > Avionics > VOR 2. -
Page 147: Example Of Setting All Com/Id Parameters
Avionics VOR/ILS (Option N5180302B) Using COM/ID Softkeys Selecting these softkeys returns the COM/ID parameters to a set of default state conditions. COM/ID Menu Parameters Default State COM/ID Off/On COM/ID Code/Type Code COM/ID Code Frequency 1.02000 kHz Depth 10.0% Example of Setting All COM/ID Parameters 1. - Page 148 Avionics VOR/ILS (Option N5180302B) Using COM/ID Softkeys a.Press COM/ID (Default is COM/ID Off.) b.Select COM/ID On 7. Set modulation to on. a.Press MOD On and verify that the front panel LED is illuminated, indicating that it is on. (Default is on). 8.
-
Page 149: Using Ils Localizer Softkeys
Avionics VOR/ILS (Option N5180302B) Using ILS Localizer Softkeys Using ILS Localizer Softkeys An ILS [Instrument Landing System] is a navigation system, used by aircraft to obtain guidance to a runway (performing a “runway approach” while attempting to land the aircraft) and includes the following three functions operating in tandem (working together): —... - Page 150 Avionics VOR/ILS (Option N5180302B) Using ILS Localizer Softkeys Figure 5-6 ILS Localizer: 108.10 MHz w/ 90 Hz AM (Left), 150 Hz AM (Right) @ 20% Figure 5-7 ILS Glide Slope: 334.70 MHz w/ 90 Hz AM (Up), 150 Hz AM (Down) @ 40% Figure 5-8 ILS Marker Beacons: 75 MHz, Inner 3000 Hz, Middle 1300 Hz, Outer 400 Hz Keysight CXG, EXG, and MXG X-Series Signal Generators User’s Guide...
-
Page 151: To Set The Ils Localizer Mode To Produce A Full Or Partial Signal
Avionics VOR/ILS (Option N5180302B) Using ILS Localizer Softkeys Figure 5-9 ILS Localizer Softkeys - Turns off the Left (90 Hz) and Right (150 Hz) - Sets a Carrier Frequency by selecting an Index from 1 to 40. ILS Localizer signals (Default: Index is 1 and corresponds to 108.10 MHz) - Turns on the Left (90 Hz) and Right (150 Hz) -
Page 152: To Set The Ils Localizer Carrier Frequency
Avionics VOR/ILS (Option N5180302B) Using ILS Localizer Softkeys 3. Select either: OFF | NORM | Suppress Left | Suppress Right These softkeys allow selection of a complete or partial ILS Localizer signal and can set the ILS Localizer Mode to one of the following: —... -
Page 153: To Set The Ils Localizer Left Frequency
Avionics VOR/ILS (Option N5180302B) Using ILS Localizer Softkeys 9=108.90 9=329.30 29=110.90 29=330.80 10=108.95 10=329.15 30=110.95 30=330.65 11=109.10 11=331.40 31=111.10 31=331.70 12=109.15 12=331.25 32=111.15 32=331.55 13=109.30 13=332.00 33=111.30 33=332.30 14=109.35 14=331.85 34=111.35 34=332.15 15=109.50 15=332.60 35=111.50 35=332.90 16=109.55 16=332.45 36=111.55 36=332.75 17=109.70 17=333.20 37=111.70... -
Page 154: To Set The Ils Localizer Ddm Polarity To Fly Left Or Fly Right
Avionics VOR/ILS (Option N5180302B) Using ILS Localizer Softkeys These softkeys set the phase of the right (150 Hz) ILS Localizer signal relative to the left (90 Hz) ILS Localizer signal. To set the ILS Localizer DDM polarity to fly left or fly right 1. - Page 155 Avionics VOR/ILS (Option N5180302B) Using ILS Localizer Softkeys Figure 5-10 ILS Localizer @ 108.10 MHz w/ Aircraft In-Line, Fly Left, Fly Right Keysight CXG, EXG, and MXG X-Series Signal Generators User’s Guide...
-
Page 156: To Set The Ils Localizer Ddm Value
Avionics VOR/ILS (Option N5180302B) Using ILS Localizer Softkeys Example: To correct if the left signal at 90 Hz is stronger at 0.2 DDM, the aircraft would have to be pointed Right with a DDM of 0.2. The following steps of key presses demonstrate the correction for Right: 1.Aux Fctn >... -
Page 157: To Set The Ils Localizer Ddm Value In Micro-Amps (Μa)
Avionics VOR/ILS (Option N5180302B) Using ILS Localizer Softkeys To set the ILS Localizer DDM value in micro-amps (μA) This process sets a value for the difference in depth of modulation (DDM) in μA. 1. Press Aux Fctn > Avionics > ILS Localizer. 2. -
Page 158: To Set Or Return The Ils Localizer Parameters To A Default State
Avionics VOR/ILS (Option N5180302B) Using ILS Localizer Softkeys (Default value is 40.00%.) 4. Select a value from 0 to 99% and press Enter. The SDM range is defined by the following equation: SDM = [AM(90 Hz) + AM(150 Hz)] / 100: To set or return the ILS Localizer parameters to a default state This process returns the ILS Localizer parameters to a set of default state conditions. -
Page 159: Example Of Setting All Ils Localizer Parameters
Avionics VOR/ILS (Option N5180302B) Using ILS Localizer Softkeys Example of Setting All ILS Localizer Parameters 1. Press Preset to place the signal generator in a known preset state. 2. Set the ILS Localizer carrier frequency. a.Press Aux Fctn > Avionics > ILS Localizer b.Press Carrier Freq Index (Default value is 1 and corresponds to 108.10 MHz carrier frequency.) c.(Optional) Select a value from 1 to 40 and press Enter... - Page 160 Avionics VOR/ILS (Option N5180302B) Using ILS Localizer Softkeys (–SDM/100) to (SDM/100) As SDM’s value increases or decrease, so does DDM’s range. 8. Set the ILS Localizer SDM value. a.Press SDM (Default value is 40.00%.) b.(Optional) Select a <value> from 0 to 99% and press Enter. 9.
-
Page 161: Using Ils Glide Slope Softkeys
Avionics VOR/ILS (Option N5180302B) Using ILS Glide Slope Softkeys Using ILS Glide Slope Softkeys An ILS [Instrument Landing System] is a navigation system, used by aircraft to obtain guidance to a runway (performing a “runway approach” while attempting to land the aircraft) and includes the following three functions operating in tandem (working together): —... - Page 162 Avionics VOR/ILS (Option N5180302B) Using ILS Glide Slope Softkeys Figure 5-11 ILS Localizer: 108.10 MHz w/ 90 Hz AM (Left), 150 Hz AM (Right) @ 20% Figure 5-12 ILS Glide Slope: 334.70 MHz w/ 90 Hz AM (Up), 150 Hz AM (Down) @ 40% Figure 5-13 ILS Marker Beacons: 75 MHz, Inner 3000 Hz, Middle 1300 Hz, Outer 400 Hz Keysight CXG, EXG, and MXG X-Series Signal Generators User’s Guide...
- Page 163 Avionics VOR/ILS (Option N5180302B) Using ILS Glide Slope Softkeys Figure 5-14 ILS Glide Slope Softkeys - Turns off the Up (90 Hz) and Down (150 Hz) - Sets a Carrier Frequency by selecting an Index from 1 to 40. ILS Glide Slope signals (Default: Index is 1 and corresponds to 334.70 MHz) - Turns on the Up (90 Hz) and Down (150 Hz)
-
Page 164: To Set The Ils Glide Slope Mode To Produce A Full Or Partial Signal
Avionics VOR/ILS (Option N5180302B) Using ILS Glide Slope Softkeys To set the ILS Glide Slope mode to produce a full or partial signal 1. Press Aux Fctn > Avionics > ILS Glide Slope 2. Press ILS GS Mode (Default selection is OFF.) 3. -
Page 165: To Set The Ils Glide Slope Up Frequency
Avionics VOR/ILS (Option N5180302B) Using ILS Glide Slope Softkeys 8=108.75 8=330.35 28=110.75 28=330.05 9=108.90 9=329.30 29=110.90 29=330.80 10=108.95 10=329.15 30=110.95 30=330.65 11=109.10 11=331.40 31=111.10 31=331.70 12=109.15 12=331.25 32=111.15 32=331.55 13=109.30 13=332.00 33=111.30 33=332.30 14=109.35 14=331.85 34=111.35 34=332.15 15=109.50 15=332.60 35=111.50 35=332.90 16=109.55 16=332.45... -
Page 166: To Set The Ils Glide Slope Phase Of The Down Signal Relative To The Up
Avionics VOR/ILS (Option N5180302B) Using ILS Glide Slope Softkeys To set the ILS Glide Slope phase of the down signal relative to the up This process sets the phase of the Down (150 Hz) ILS Glide Slope signal relative to the Up (90 Hz) ILS Glide Slope signal. - Page 167 Avionics VOR/ILS (Option N5180302B) Using ILS Glide Slope Softkeys Figure 5-15 ILS Glide Slope @ 334.70 MHz w/ Aircraft In-Line, Fly Down, Fly Up Example: To correct if the upper tone at 90 Hz is stronger at 0.4 DDM, the aircraft would have to fly Down with a DDM of 0.4.
-
Page 168: To Set The Ils Glide Slope Ddm Value
Avionics VOR/ILS (Option N5180302B) Using ILS Glide Slope Softkeys 3. DDM > –0.4 > Enter. To set the ILS Glide Slope DDM value This process sets a value for the “Difference in Depth of Modulation” (DDM). 1. Press Aux Fctn > Avionics > ILS Glide Slope 2. -
Page 169: To Set The Ils Glide Slope Ddm Value In Percentage (%)
Avionics VOR/ILS (Option N5180302B) Using ILS Glide Slope Softkeys To set the ILS Glide Slope DDM value in percentage (%) This process sets a value for the difference in depth of modulation (DDM) in %. DDM can be expressed either in terms of percentage (%) or as a modulation index. A DDM of 1% is equivalent to 0.01 DDM. -
Page 170: Example Of Setting All Ils Glide Slope Parameters
Avionics VOR/ILS (Option N5180302B) Using ILS Glide Slope Softkeys ILS Glide Slope Menu Parameters Default State ILS GS Mode Carrier Freq Index 334.70 MHz Up/Down menu Up Frequency 90 Hz Down Frequency 150 Hz Up/Down Phase 0.00 deg DDM/SDM menu Fly Up/Down 0.0000 DDM uA... - Page 171 Avionics VOR/ILS (Option N5180302B) Using ILS Glide Slope Softkeys 5. Set the ILS Glide Slope phase of the down signal relative to the up. a.Press Up/Down Phase (Default value is 0.00 deg.) b.(Optional) Select a <value> from 0.00 deg to 360 deg and press Enter. 6.
- Page 172 Avionics VOR/ILS (Option N5180302B) Using ILS Glide Slope Softkeys b.Select a value from -20 dBm to -40 dBm. 12.Set the RF output to on. a.Press RF On and verify that the front panel LED is illuminated, indicating that it is on. (Default is off).
-
Page 173: Using Ils Marker Beacon Softkeys
Avionics VOR/ILS (Option N5180302B) Using ILS Marker Beacon Softkeys Using ILS Marker Beacon Softkeys An ILS [Instrument Landing System] is a navigation system, used by aircraft to obtain guidance to a runway (performing a “runway approach”) and includes the following three functions operating in tandem (working together): —... -
Page 174: To Set The Ils Marker Beacon Mode To Off, Inner, Middle, Or Outer
Avionics VOR/ILS (Option N5180302B) Using ILS Marker Beacon Softkeys ILS Marker Beacon Menu Parameters Default State Marker Beacon mode Carrier Freq Index 75.0 MHz Marker Freq 400 Hz Outer Marker Depth 95.0% COM/ID menu a. For information on the COM/ID menu, refer to “Using COM/ID Softkeys”... -
Page 175: To Set The Ils Marker Beacon Am Depth
Avionics VOR/ILS (Option N5180302B) Using ILS Marker Beacon Softkeys The default ILS Marker Beacon carrier frequency Index is 17 and corresponds to 75.000 MHz. ILS Marker Beacon Carrier Frequencies (Index = 1 to 33) 1=74.600 12=74.875 23=75.150 2=74.625 13=74.900 24=75.175 3=74.650 14=74.925 25=75.200... -
Page 176: To Set The Ils Marker Beacon Outer Marker Frequency
Avionics VOR/ILS (Option N5180302B) Using ILS Marker Beacon Softkeys 2. Press Marker Beacon 3. Press Middle 4. Press Marker Freq (Default value is 1300 Hz.) 5. Select a value in Hz | kHz | MHz | GHz from 0 Hz to 10 MHz. To set the ILS Marker Beacon outer marker frequency This process sets the frequency for the Outer Marker Beacon. -
Page 177: Example Of Setting All Ils Marker Beacon Parameters
Avionics VOR/ILS (Option N5180302B) Using ILS Marker Beacon Softkeys Example of Setting All ILS Marker Beacon Parameters 1. Press Preset to place the signal generator in a known preset state. 2. Set the ILS Marker Beacon mode to inner, middle, or outer mode. a.Press Aux Fctn >... - Page 178 Avionics VOR/ILS (Option N5180302B) Using ILS Marker Beacon Softkeys c.Press Marker Freq d.(Optional) Select a <value> from 0 Hz to 10 MHz. 8. Set the modulation to on. a.Press MOD On and verify that the front panel LED is illuminated, indicating that it is on. (Default is on).
-
Page 179: Analog Modulation (Option Unt)
Keysight Technologies X-Series Signal Generators User’s Guide Analog Modulation (Option UNT) Before using this information, you should be familiar with the basic operation of the signal generator. If you are not comfortable with functions such as setting the power level and frequency, refer to Chapter 3, “Basic Operation”, on page 59... -
Page 180: Analog Modulation Waveforms
Analog Modulation (Option UNT) Analog Modulation Waveforms Analog Modulation Waveforms The signal generator can modulate the RF carrier with four types of analog modulation: amplitude, frequency, phase, and pulse. For pulse modulation information, refer to Chapter 7, “ Pulse Modulation (Options UNW and N5180320B)”, on page 189. - Page 181 Analog Modulation (Option UNT) Analog Modulation Sources Figure 6-1 Analog Modulation Softkeys page 182 page 182 page 182 For details on each key, use key help page 60 as described on Keysight CXG, EXG, and MXG X-Series Signal Generators User’s Guide...
-
Page 182: Using An Internal Modulation Source
Analog Modulation (Option UNT) Using an Internal Modulation Source Using an Internal Modulation Source 1. Preset the signal generator. 2. Set the carrier (RF) frequency. 3. Set the RF amplitude. 4. Configure the modulation: ΦM FM/ Φ M FM/ Φ M FM/ Φ... -
Page 183: Using An External Modulation Source
Analog Modulation (Option UNT) Using an External Modulation Source Using an External Modulation Source page 30 Rear panel inputs are described on AM, FM or ΦM inputs Removing an External Source DC Offset To eliminate an offset in an externally applied FM or ΦM signal, perform an external DC calibration (Ext DC Cal). -
Page 184: Using Wideband Am
Analog Modulation (Option UNT) Using an External Modulation Source Using Wideband AM Wideband AM uses the I input of the I/Q modulation system. When the wideband AM is turned on, the I/Q is turned on and the I/Q source is set to external. If the I/Q is turned off or the I/Q source is set to internal, then the wideband AM turns off. -
Page 185: Configuring The Lf Output (Option 303)
Analog Modulation (Option UNT) Configuring the LF Output (Option 303) Configuring the LF Output (Option 303) The signal generator has a low frequency (LF) output. The LF output’s source can be switched between an internal modulation source or an internal function generator. Using internal modulation (Int Monitor) as the LF output source, the LF output provides a replica of the signal from the internal source that is being used to modulate the RF output. -
Page 186: Configuring The Lf Output With An Internal Modulation Source
Analog Modulation (Option UNT) Configuring the LF Output (Option 303) selects a DC voltage level as the LF output BNC source. LF Out Off On softkey controls the operating state of the LF output. However when the LF Int Monitor output source selection is , you have three ways of controlling the output. -
Page 187: Configuring The Lf Output With A Function Generator Source
Analog Modulation (Option UNT) Configuring the LF Output (Option 303) Figure 6-3 Configure the LF Out Source with FM FM and LF annunciators indicate Frequency Modulation is the LF Out source FM as the LF Out Source LF Out using the Int Monitor source (default selection). For details on each key, use key help Configuring the LF Output with a Function Generator Source In this example, the function generator is the LF output source. - Page 188 Analog Modulation (Option UNT) Configuring the LF Output (Option 303) Figure 6-4 LF Out Status Display LF Out annunciator For details on each key, use key help page 60 as described on LF Out configuration Keysight CXG, EXG, and MXG X-Series Signal Generators User’s Guide...
-
Page 189: Pulse Modulation (Options Unw And N5180320B)
Keysight Technologies X-Series Signal Generators User’s Guide Pulse Modulation (Options UNW and N5180320B) With firmware version B.01.75 or later, option numbers for software internal to the instrument “Enabling an Option” on page 55 have changed. For more information, see Before using this information, you should be familiar with the basic operation of the signal generator. - Page 190 Pulse Modulation (Options UNW and N5180320B) Figure 7-1 Pulse Softkeys Note: Pulse Period page 193 and Pulse Width are page 193 not available when Pulse Train is selected as the Pulse Source. page 195 These softkeys are Low = settled only available when the Pulse–Source is Latency from the external pulse input to the pulse...
-
Page 191: Pulse Characteristics
Pulse Modulation (Options UNW and N5180320B) Pulse Characteristics Pulse Characteristics When using very narrow pulses that are below the signal generator’s ALC pulse width specification, or leveled pulses with an unusually long duty cycle, it is often useful to turn ALC off (see page 122 Width &... - Page 192 Pulse Modulation (Options UNW and N5180320B) Pulse Characteristics page 30 Rear panel inputs are described on External pulse input Figure 7-2 Adjustable Doublet External Trigger RF Output Puls Puls Delay Width The delay of the first pulse is measured from the leading edge of the external trigger signal. Puls Puls Delay...
-
Page 193: The Basic Procedure
Pulse Modulation (Options UNW and N5180320B) The Basic Procedure The Basic Procedure 1. Preset the signal generator. 2. Set the carrier (RF) frequency. 3. Set the RF amplitude. 4. Configure the modulation: a.Set the pulse source: Press Pulse > Pulse Source > selection b.Set the parameters for the selected pulse source: Square Free Run... -
Page 194: Example
Pulse Modulation (Options UNW and N5180320B) Example Example The following example uses the factory preset pulse source and delay. Output: A 2 GHz, 0 dBm carrier modulated by a 24 μs pulse that has a period of 100 μs. 1. Preset the signal generator. 2. -
Page 195: Pulse Train (Options Unw And N5180320B)
Pulse Modulation (Options UNW and N5180320B) Pulse Train (Options UNW and N5180320B) Pulse Train (Options UNW and N5180320B) The Option N5180320B Pulse Train feature enables the specification of up to 2047 independent pulse cycles, each of which has an “On Time”, during which the RF output is measurable at the RF output connector, and an "Off Time", during which the RF output is attenuated. - Page 196 Pulse Modulation (Options UNW and N5180320B) Pulse Train (Options UNW and N5180320B) Figure 7-5 Edit Pulse Train Menu Softkeys page 60 For details on each key, use key help as described on These softkeys provide Pulse > Pulse Source > More > Pulse Train > Edit Pulse Train ease of use in changing the pulse cycle settings in the pulse train.
- Page 197 Pulse Modulation (Options UNW and N5180320B) Pulse Train (Options UNW and N5180320B) Figure 7-6 Display Pulse Train Menu Softkeys Pulse > Pulse Source > More > Pulse Train > Edit Pulse Train > Display Pulse Train This softkey shifts the time offset from the left hand side of the display to the one specified.
- Page 198 Pulse Modulation (Options UNW and N5180320B) Pulse Train (Options UNW and N5180320B) Figure 7-7 Pulse Train: Import From Selected File Softkeys page 60 For details on each key, use key help as described on Pulse > Pulse Source > More > Pulse Train > Edit Pulse Train > More page 80 These softkeys delete individual On Time or Off...
- Page 199 Pulse Modulation (Options UNW and N5180320B) Pulse Train (Options UNW and N5180320B) Figure 7-8 Pulse Train: Export to File Softkeys Note: Files can be FTP’d to the BIN (Binary) folder in the instrument, or a USB page 81 Pulse > Pulse Source > More > Pulse Train > Edit Pulse Train > More stick can be used to download the files to the instrument.
- Page 200 Pulse Modulation (Options UNW and N5180320B) Pulse Train (Options UNW and N5180320B) Keysight CXG, EXG, and MXG X-Series Signal Generators User’s Guide...
-
Page 201: Basic Digital Operation-No Bbg Option Installed
Keysight Technologies X-Series Signal Generators User’s Guide Basic Digital Operation—No BBG Option Installed Before using this information, you should be familiar with the basic operation of the signal generator. If you are not comfortable with functions such as setting power level and frequency, refer Chapter 3, “Basic Operation”, on page 59... -
Page 202: I/Q Modulation
Basic Digital Operation—No BBG Option Installed I/Q Modulation I/Q Modulation The following factors contribute to the error vector magnitude: — Differences in amplitude, phase, and delay between the I and Q channels — DC offsets The I/Q menu provides adjustments and calibration to compensate for some of the differences in the I and Q signals or to add impairments. -
Page 203: Configuring The Front Panel Inputs
Basic Digital Operation—No BBG Option Installed I/Q Modulation The following table shows common uses for the adjustments. Table 8-1 I/Q Adjustments Uses I/Q Adjustment Effect Impairment Offset Carrier Feedthrough dc offset EVM error phase skew Quadrature Angle I/Q Images I/Q path delay Configuring the Front Panel Inputs The CXG/MXG/EXG accepts externally supplied analog I and Q signals through the front panel I Input and Q Input for modulating onto the carrier. - Page 204 Basic Digital Operation—No BBG Option Installed I/Q Modulation Keysight CXG, EXG, and MXG X-Series Signal Generators User’s Guide...
-
Page 205: Basic Digital Operation (Option 653/655/656/657)
Keysight Technologies X-Series Signal Generators User’s Guide Basic Digital Operation (Option 653/655/656/657) Before using this information, you should be familiar with the basic operation of the signal generator. If you are not comfortable with functions such as setting power level and frequency, refer Chapter 3, “Basic Operation”, on page 59... - Page 206 Basic Digital Operation (Option 653/655/656/657) See Also: — Adding Real–Time Noise to a Dual ARB Waveform on page 364 — Real–Time Phase Noise Impairment on page 372 — Multitone and Two-Tone Waveforms (Option N5180430B) on page 433 Keysight CXG, EXG, and MXG X-Series Signal Generators User’s Guide...
-
Page 207: Waveform File Basics
Basic Digital Operation (Option 653/655/656/657) Waveform File Basics Waveform File Basics There are two types of waveform files: — A segment is a waveform file that you download to the signal generator. For information on creating and downloading waveform files, refer to the Programming Guide. —... - Page 208 Basic Digital Operation (Option 653/655/656/657) Waveform File Basics Figure 9-1 Dual ARB Softkeys If you set the ARB sample clock when the dual ARB is off, the new setting is applied when the dual ARB player is turned on; this setting survives toggling the Dual ARB player off and on.
-
Page 209: Storing, Loading, And Playing A Waveform Segment
Basic Digital Operation (Option 653/655/656/657) Storing, Loading, and Playing a Waveform Segment Storing, Loading, and Playing a Waveform Segment The CXG/MXG/EXG’s ARB Waveform File Cache is limited to 128 files. Consequently, once the 128 file cache limit has been reached, the waveform switching speed will be much slower for additional files loaded into the volatile waveform memory (BBG). -
Page 210: Storing/Renaming A Waveform Segment To Internal Or Usb Media
Basic Digital Operation (Option 653/655/656/657) Storing, Loading, and Playing a Waveform Segment 3. If there is already a copy of this segment in the currently selected media and you do not want to overwrite it, rename the waveform segment before you load it (refer to the previous procedure). - Page 211 Basic Digital Operation (Option 653/655/656/657) Storing, Loading, and Playing a Waveform Segment Annunciators display with active waveform (ARB On) Current waveform selection 5. Configure the RF Output: Set the RF carrier frequency and amplitude, and turn on the RF output. The waveform segment is now available at the signal generator’s RF Output connector.
-
Page 212: Waveform Sequences
Basic Digital Operation (Option 653/655/656/657) Waveform Sequences Waveform Sequences Figure 9-3 Waveform Sequence Softkeys Sequence name To display this softkey, select a waveform sequence. Mode > Dual ARB Sequence contents page 235 For details on each key, use key help page 60 as described on A waveform sequence is a file that contains pointers to one or more waveform segments or other waveform sequences, or both. - Page 213 Basic Digital Operation (Option 653/655/656/657) Waveform Sequences segment versus repeating a nested sequence. Each segment can repeat up to 65,535 times, but no matter how many times a segment repeats, it counts as a single segment. However each repetition of a nested sequence counts as additional segments. Segment 1 Sequence A 2 segments...
-
Page 214: Viewing The Contents Of A Sequence
Basic Digital Operation (Option 653/655/656/657) Waveform Sequences 3. Name and store the waveform sequence to the Seq file catalog: a.Press More > Name and Store. b.Enter a file name and press Enter. See also, “Viewing the Contents of a Sequence” on page 214 “Setting Marker Points in a Waveform Segment”... -
Page 215: Playing A Sequence
Basic Digital Operation (Option 653/655/656/657) Waveform Sequences Assumption: A waveform sequence that has two different segments has been created and stored (see previous example on page 213). 1. Select the sequence: Press Mode > Dual ARB > More > Waveform Sequences > highlight the desired sequence > Edit Selected Waveform Sequence. - Page 216 Basic Digital Operation (Option 653/655/656/657) Waveform Sequences Annunciators display with active waveform (ARB On) Current waveform selection 2. Generate the waveform: Press ARB Off On to On. This plays the selected waveform sequence. During the waveform sequence generation, both the I/Q and ARB annunciators turn on, and the waveform modulates the RF carrier. 3.
-
Page 217: Saving A Waveform's Settings & Parameters
Basic Digital Operation (Option 653/655/656/657) Saving a Waveform’s Settings & Parameters Saving a Waveform’s Settings & Parameters This section describes how to edit and save a file header. When you download only a waveform file (I/Q data, which the signal generator treats as a waveform segment), the signal generator automatically generates a file header and a marker file with the same name as the waveform file. - Page 218 Basic Digital Operation (Option 653/655/656/657) Saving a Waveform’s Settings & Parameters All settings in this menu can be stored to thefile header Table 9-1 on page 218 lists all settings stored in a file header) Softkey label, file header setting The Runtime Scaling softkey is only available under the Dual ARB menu.
-
Page 219: Viewing And Modifying Header Information
Basic Digital Operation (Option 653/655/656/657) Saving a Waveform’s Settings & Parameters Table 9-1 File Header Entries AWGN: State Indicated whether real–time noise is on (1) or off (0) (see page 363 AWGN: C/N Ratio Carrier to noise ration, in dB (see page 368 AWGN: Carrier BW Bandwidth over which the noise power is integrated, in Hz (see... - Page 220 Basic Digital Operation (Option 653/655/656/657) Saving a Waveform’s Settings & Parameters If a setting is unspecified in the file header, the signal generator uses its current value for that setting when you select and play the waveform. Figure 9-5 Example File Header The name of the waveform file.
-
Page 221: Viewing & Editing A Header Without Selecting The Waveform
Basic Digital Operation (Option 653/655/656/657) Saving a Waveform’s Settings & Parameters As shown in the following figure, the Current Inst. Settings column now reflects the changes to the current signal generator setup, but the saved header values have not changed. Values differ between the two columns e.Save the current settings to the file header:... - Page 222 Basic Digital Operation (Option 653/655/656/657) Saving a Waveform’s Settings & Parameters Active catalog Active media Active waveform catalog Type: Catalogs that enable you to WFM1 = Volatile Segment view files in the active media. NVWFM = Non–Volatile Segment For details on selecting the SEQ = Sequence page 78 active media, see...
-
Page 223: Using Waveform Markers
Basic Digital Operation (Option 653/655/656/657) Using Waveform Markers Using Waveform Markers The signal generator provides four waveform markers to mark specific points on a waveform segment. When the signal generator encounters an enabled marker, an auxiliary signal is routed to a rear panel event output that corresponds to the marker number. -
Page 224: Waveform Marker Concepts
Basic Digital Operation (Option 653/655/656/657) Using Waveform Markers Waveform Marker Concepts The signal generator’s Dual ARB provides four waveform markers for use on a waveform segment. You can set each marker’s polarity and marker points (on a single sample point or over a range of sample points). - Page 225 Basic Digital Operation (Option 653/655/656/657) Using Waveform Markers ALC Hold Marker Function While you can set a marker function (described as Marker Routing on the softkey label) either before or after you set marker points (page 230), setting a marker function before setting marker points may cause power spikes or loss of power at the RF output.
- Page 226 Basic Digital Operation (Option 653/655/656/657) Using Waveform Markers Example of Correct Use Waveform: 1022 points Marker range: 95–97 Marker polarity: Positive This example shows a marker set to sample the waveform’s area of highest amplitude. Note that the marker is set well before the waveform’s area of lowest amplitude.
- Page 227 Basic Digital Operation (Option 653/655/656/657) Using Waveform Markers Example of Incorrect Use Waveform: 1022 points Marker range: 110–1022 Marker polarity: Negative This figure shows that a negative polarity marker goes Marker low during the marker on points; the marker signal goes Marker On Marker On high during the off points.
-
Page 228: Accessing Marker Utilities
Basic Digital Operation (Option 653/655/656/657) Using Waveform Markers Accessing Marker Utilities For details on each key, use key help Mode > Dual ARB > More > Marker Utilities page 60 as described on The settings in these menus can be stored to the file page 217 header, see Note: This is the... -
Page 229: Viewing Waveform Segment Markers
Basic Digital Operation (Option 653/655/656/657) Using Waveform Markers Viewing Waveform Segment Markers Markers are applied to waveform segments. Use the following steps to view the markers set for a segment (this example uses the factory–supplied segment, SINE_TEST_WFM). 1. In the second Arb menu (page 228), press Marker Utilities >... -
Page 230: Setting Marker Points In A Waveform Segment
Basic Digital Operation (Option 653/655/656/657) Using Waveform Markers 3. Set the last marker point in the range that you want off to a value less than or equal to the number of points in the waveform, and greater than or equal to the value set in Step 2 (for this example, 17):... - Page 231 Basic Digital Operation (Option 653/655/656/657) Using Waveform Markers page 229 How to view markers is described on Placing a Marker on a Single Point On the First Point 1. In the second Arb menu (page 228), press Marker Utilities > Set Markers. 2.
-
Page 232: Viewing A Marker Pulse
Basic Digital Operation (Option 653/655/656/657) Using Waveform Markers 7. Enter the number of sample points that you want skipped (in this example, 1): Press # Skipped Points > 1 > Enter. 8. Press Apply To Waveform > Return. This causes the marker to occur on every other point (one sample point is skipped) within the marker point range, as shown at right. - Page 233 Basic Digital Operation (Option 653/655/656/657) Using Waveform Markers When marker 1 is present, the Keysight CXG/MXG/EXG outputs a signal through EVENT 1 as shown in the following example. Q OUT Marker pulse on the Event 1 signal. Keysight CXG, EXG, and MXG X-Series Signal Generators User’s Guide...
-
Page 234: Using The Rf Blanking Marker Function
Basic Digital Operation (Option 653/655/656/657) Using Waveform Markers Using the RF Blanking Marker Function While you can set a marker function (described as Marker Routing on the softkey label in the Marker Utilities menu) either before or after setting the marker points (page 230), setting a marker function before you set marker points may change the RF output. -
Page 235: Setting Marker Polarity
Basic Digital Operation (Option 653/655/656/657) Using Waveform Markers Setting Marker Polarity Setting a negative marker polarity inverts the marker signal. 1. In second Arb menu (page 228), press Marker Utilities > Marker Polarity. 2. For each marker, set the marker polarity as desired. —The default marker polarity is positive. - Page 236 Basic Digital Operation (Option 653/655/656/657) Using Waveform Markers Figure 9-6 Waveform Sequence Menus for Enabling/Disabling Segment Markers Mode > Dual ARB > More Note: This is the second Arb menu. Enable/Disable markers while creating a waveform sequence Edit a sequence to enable/disable markers For details on each key, use key help page 60...
- Page 237 Basic Digital Operation (Option 653/655/656/657) Using Waveform Markers Enabling and Disabling Markers in a Waveform Sequence Select the waveform segments within a waveform sequence to enable or disable each segment’s markers independently. You can enable or disable the markers either at the time of creating the sequence or after the sequence has been created and stored.
-
Page 238: Using The Event Output Signal As An Instrument Trigger
Basic Digital Operation (Option 653/655/656/657) Using Waveform Markers Using the EVENT Output Signal as an Instrument Trigger page 60 For details on each key, use key help as described on One of the uses for the EVENT output signal (marker signal) is to trigger a The settings in this menu can be stored to the file measurement instrument. -
Page 239: Triggering A Waveform
Basic Digital Operation (Option 653/655/656/657) Triggering a Waveform Triggering a Waveform Figure 9-7 Triggering Softkeys Mode > Dual ARB page 240 page 241 For details on each key, use key help page 60 as described on Triggers control data transmission by controlling when the signal generator transmits the modulating signal. -
Page 240: Trigger Type
Basic Digital Operation (Option 653/655/656/657) Triggering a Waveform Trigger Type Type defines the trigger mode: how the waveform plays when triggered. Mode > Immediately triggers and plays the waveform; triggers Dual ARB > received while the waveform is playing are ignored. Trigger Type Plays the waveform when a trigger is received;... -
Page 241: Trigger Source
Basic Digital Operation (Option 653/655/656/657) Triggering a Waveform — Segment Advance mode plays a segment in a sequence only if triggered. The trigger source controls segment–to–segment playing (see Example: Segment Advance Triggering on page 242). A trigger received during the last segment loops play to the first segment in the sequence. —... -
Page 242: Example: Segment Advance Triggering
Basic Digital Operation (Option 653/655/656/657) Triggering a Waveform Example: Segment Advance Triggering Segment advance triggering enables you to control the segment playback within a waveform sequence. This type of triggering ignores the repetition value (page 214). For example if a segment has repetition value of 50 and you select Single as the segment advance triggering mode, the segment still plays only once. -
Page 243: Example: Gated Triggering
Basic Digital Operation (Option 653/655/656/657) Triggering a Waveform Example: Gated Triggering Gated triggering enables you to define the on and off states of a modulating waveform. 1. Connect the output of a function generator to the signal generator’s rear panel PAT TRIG IN connector, as shown in the following figure. - Page 244 Basic Digital Operation (Option 653/655/656/657) Triggering a Waveform 8. (Optional) Monitor the waveform: Configure the oscilloscope to display both the output of the signal generator, and the external triggering signal. You will see the waveform modulating the output during the gate active periods (low in this example).
-
Page 245: Example: External Triggering
Basic Digital Operation (Option 653/655/656/657) Triggering a Waveform Example: External Triggering Use the following example to set the signal generator to output a modulated RF signal 100 milliseconds after a change in TTL state from low to high occurs at the PATT TRIG IN rear panel BNC connector 1. -
Page 246: Clipping A Waveform
Basic Digital Operation (Option 653/655/656/657) Clipping a Waveform Clipping a Waveform Digitally modulated signals with high power peaks can cause intermodulation distortion, resulting in spectral regrowth that can interfere with signals in adjacent frequency bands. The clipping function enables you to reduce high power peaks by clipping the I and Q data to a selected percentage of its highest peak, thereby reducing spectral regrowth. -
Page 247: How Power Peaks Develop
Basic Digital Operation (Option 653/655/656/657) Clipping a Waveform How Power Peaks Develop To see how clipping reduces high power peaks, it is important to understand how the peaks develop as you construct a signal. Multiple Channel Summing I/Q waveforms can be the summation of multiple channels, as shown in the following figure. If a bit in the same state (high or low) occurs simultaneously in several individual channel waveforms, an unusually high power peak (positive or negative) occurs in the summed waveform. - Page 248 Basic Digital Operation (Option 653/655/656/657) Clipping a Waveform Combining the I and Q Waveforms When the I and Q waveforms combine in the I/Q modulator to create an RF waveform, the magnitude of the RF envelope is , where the squaring of I and Q always results in a positive value.
-
Page 249: How Peaks Cause Spectral Regrowth
Basic Digital Operation (Option 653/655/656/657) Clipping a Waveform How Peaks Cause Spectral Regrowth In a waveform, high power peaks that occur infrequently cause the waveform to have a high peak– to–average power ratio, as illustrated in the following figure. Because the gain of a transmitter’s power amplifier is set to provide a specific average power, high peaks can cause the power amplifier to move toward saturation. -
Page 250: How Clipping Reduces Peak-To-Average Power
Basic Digital Operation (Option 653/655/656/657) Clipping a Waveform How Clipping Reduces Peak–to–Average Power You can reduce peak–to–average power, and consequently spectral regrowth, by clipping the waveform. Clipping limits waveform power peaks by clipping the I and Q data to a selected percentage of its highest peak. - Page 251 Basic Digital Operation (Option 653/655/656/657) Clipping a Waveform Figure 9-10 Rectangular Clipping Keysight CXG, EXG, and MXG X-Series Signal Generators User’s Guide...
- Page 252 Basic Digital Operation (Option 653/655/656/657) Clipping a Waveform Figure 9-11 Reduction of Peak–to–Average Power Keysight CXG, EXG, and MXG X-Series Signal Generators User’s Guide...
-
Page 253: Configuring Circular Clipping
Basic Digital Operation (Option 653/655/656/657) Clipping a Waveform Configuring Circular Clipping Use this example to configure circular clipping and observe its affect on the peak–to–average power ratio of a waveform. Circular clipping clips the composite I/Q data (I and Q data are clipped equally). -
Page 254: Configuring Rectangular Clipping
Basic Digital Operation (Option 653/655/656/657) Clipping a Waveform Configuring Rectangular Clipping Use this example to configure rectangular clipping. Rectangular clipping clips the I and Q data independently. For more information about rectangular clipping, refer to “How Clipping Reduces Peak–to–Average Power” on page 250. -
Page 255: Scaling A Waveform
Basic Digital Operation (Option 653/655/656/657) Scaling a Waveform Scaling a Waveform The signal generator uses an interpolation algorithm (sampling between the I/Q data points) when reconstructing a waveform. For common waveforms, this interpolation can cause overshoots, which may create a DAC over–range error condition. This chapter describes how DAC over–range errors occur and how you can use waveform scaling to eliminate these errors. -
Page 256: How Dac Over-Range Errors Occur
Basic Digital Operation (Option 653/655/656/657) Scaling a Waveform How DAC Over–Range Errors Occur The signal generator uses an interpolator filter when it converts digital I and Q baseband waveforms to analog waveforms. Because the clock rate of the interpolator is four times that of the baseband clock, the interpolator calculates sample points between the incoming baseband samples and smooths... -
Page 257: How Scaling Eliminates Dac Over-Range Errors
Basic Digital Operation (Option 653/655/656/657) Scaling a Waveform How Scaling Eliminates DAC Over–Range Errors Scaling reduces the amplitude of the baseband waveform while maintaining its basic shape and characteristics, such as peak–to–average power ratio. If the fast–rising baseband waveform is scaled enough to allow an adequate margin for the interpolator filter overshoot, the interpolator filter can calculate sample points that include the... -
Page 258: Setting Waveform Runtime Scaling
Basic Digital Operation (Option 653/655/656/657) Scaling a Waveform Setting Waveform Runtime Scaling Runtime scaling scales the waveform data during playback; it does not affect the stored data. You can apply runtime scaling to either a segment or sequence, and set the scaling value either while the ARB is on or off. -
Page 259: Setting Waveform Scaling
Basic Digital Operation (Option 653/655/656/657) Scaling a Waveform Setting Waveform Scaling Waveform scaling differs from waveform runtime scaling in that it permanently affects waveform data and only applies to waveform segments stored in BBG media. You scale the waveform either up or down as a percentage of the DAC full scale (100%). - Page 260 Basic Digital Operation (Option 653/655/656/657) Scaling a Waveform 4. Name the copy (this example uses the name MY_TEST_SCAL) and press Enter. Apply Scaling to the Copied Waveform File This type of scaling is non–reversible. Any data lost in the scaling operation cannot be restored.
-
Page 261: Setting The Baseband Frequency Offset
Basic Digital Operation (Option 653/655/656/657) Setting the Baseband Frequency Offset Setting the Baseband Frequency Offset The baseband frequency offset specifies a value to shift the baseband frequency up to ±50 MHz within the BBG 100 MHz signal bandwidth, depending on the signal generator’s baseband generator option. - Page 262 Basic Digital Operation (Option 653/655/656/657) Setting the Baseband Frequency Offset Changing the baseband frequency offset may cause a DAC over range condition that generates error 628, Baseband Generator DAC over . The signal generator incorporates an automatic scaling feature to range minimize this occurrence.
-
Page 263: Dac Over-Range Conditions And Scaling
Basic Digital Operation (Option 653/655/656/657) Setting the Baseband Frequency Offset Modulated carrier with 0 Hz Modulated carrier with 20 MHz Modulated RF signal baseband frequency offset baseband frequency offset LO/carrier feedthrough Spectrum analyzer set to a span of 100 MHz DAC Over–Range Conditions and Scaling When using the baseband frequency offset (at a setting other than 0 Hz), it is possible to create a DAC over–range condition, which causes the Keysight CXG/MXG/EXG to generate an error. - Page 264 Basic Digital Operation (Option 653/655/656/657) Setting the Baseband Frequency Offset Figure 9-14 Dual ARB DAC Over–Range Protection Softkey Location When the DAC over–range protection is off, eliminate over–range conditions by “Setting decreasing the scaling value (see Waveform Runtime Scaling” on page 258 Default setting is On.
-
Page 265: I/Q Modulation
Basic Digital Operation (Option 653/655/656/657) I/Q Modulation I/Q Modulation The following factors contribute to the error vector magnitude: — Differences in amplitude, phase, and delay between the I and Q channels — DC offsets The I/Q menu not only enables you to select the I/Q signal source and output, it also provides adjustments and calibrations to compensate for differences in the I and Q signals. - Page 266 Basic Digital Operation (Option 653/655/656/657) I/Q Modulation Figure 9-15 I/Q Display and Softkeys This panel displays the current status and settings of the I/Q adjustments. Use the Page Up and This panel displays the current Page Down keys to scroll through these settings for the I/Q signal routing parameters.
-
Page 267: Using The Rear Panel I And Q Outputs
Basic Digital Operation (Option 653/655/656/657) I/Q Modulation Using the Rear Panel I and Q Outputs The rear panel I and Q connectors only output a signal while using the internal BBG. In addition to modulating the carrier, the signal generator also routes the internally generated I and Q signals to the rear panel I and Q connectors. -
Page 268: Configuring The Front Panel Inputs
Basic Digital Operation (Option 653/655/656/657) I/Q Modulation Configuring the Front Panel Inputs The signal generator accepts externally supplied analog I and Q signals through the front panel I Input and Q Input. You can use the external signals as the modulating source, or sum the external signals with the internal baseband generator signals. -
Page 269: I/Q Adjustments
Basic Digital Operation (Option 653/655/656/657) I/Q Adjustments I/Q Adjustments Use the I/Q Adjustments to compensate for or add impairments to the I/Q signal. Adjusts the I signal amplitude relative to the Q signal amplitude. Use this as an internal The DC offset values are calibrated relative to impairment, or to compensate for differences in the RMS waveform voltage being played out of signal path loss that occur due to path irregularities... -
Page 270: I/Q Calibration
Basic Digital Operation (Option 653/655/656/657) I/Q Calibration Table 9-2 I/Q Adjustments Uses I/Q Adjustment Effect Impairment Offset Carrier feedthrough dc offset EVM error phase skew Quadrature Angle I/Q images I/Q path delay high sample rate phase I/Q Skew EVM error skew or I/Q path delay I/Q Gain Balance I/Q amplitude difference... - Page 271 Basic Digital Operation (Option 653/655/656/657) I/Q Calibration DC optimizes the I/Q performance for the current instrument settings, and typically completes in several seconds. Changing any instrument setting after performing I/Q > I/Q Calibration a DC calibration voids the DC calibration and causes the signal generator to revert to the user calibration data (or factory-supplied calibration data, if no user calibration data exists)
-
Page 272: Using The Equalization Filter
Basic Digital Operation (Option 653/655/656/657) Using the Equalization Filter Using the Equalization Filter An equalization FIR file can be created externally, uploaded via SCPI, and subsequently selected from the file system (refer to “Working with Files” on page 76). For information related to downloading FIR file coefficients, refer to the Programming Guide. - Page 273 Basic Digital Operation (Option 653/655/656/657) Using the Equalization Filter Figure 9-16 Int Equalization Filter Softkeys For details on each key, use key help I/Q > More page 60 as described on Enables the internal equalization filter. Opens a file catalog of FIR filters to select as the equalization filter. Equalization filters are typically complex and must have an oversample ratio of 1.
-
Page 274: Using Finite Impulse Response (Fir) Filters In The Dual Arb Real-Time Modulation Filter
Basic Digital Operation (Option 653/655/656/657) Using Finite Impulse Response (FIR) Filters in the Dual ARB Real-Time Modulation Filter Using Finite Impulse Response (FIR) Filters in the Dual ARB Real-Time Modulation Filter Finite Impulse Response filters can be used to compress single carrier I/Q waveforms down to just the I/Q constellation points and then define the transitions similar to the modulation filter in Arb Custom (refer to “Using Finite Impulse Response (FIR) Filters with Custom Modulation”... -
Page 275: Creating A User-Defined Fir Filter Using The Fir Table Editor
Basic Digital Operation (Option 653/655/656/657) Using Finite Impulse Response (FIR) Filters in the Dual ARB Real-Time Modulation Filter Creating a User–Defined FIR Filter Using the FIR Table Editor In this procedure, you use the FIR Values table editor to create and store an 8–symbol, windowed sync function filter with an oversample ratio of 4. - Page 276 Basic Digital Operation (Option 653/655/656/657) Using Finite Impulse Response (FIR) Filters in the Dual ARB Real-Time Modulation Filter 4. Continue entering the coefficient values from the table in step 1 until all 16 values have been entered. Table 9-3 Coefficient Value Coefficient Value...
- Page 277 Basic Digital Operation (Option 653/655/656/657) Using Finite Impulse Response (FIR) Filters in the Dual ARB Real-Time Modulation Filter Setting the Oversample Ratio Modulation filters are real and have an oversample ratio (OSR) of two or greater. Equalization filters are typically complex and must have an OSR of one (refer to “Using the Equalization Filter”...
- Page 278 Basic Digital Operation (Option 653/655/656/657) Using Finite Impulse Response (FIR) Filters in the Dual ARB Real-Time Modulation Filter Figure 9-20 For details on each key, use key page 60 help as described on 2. Press Return. 3. Press Display Impulse Response. Refer to Figure 9-21.
- Page 279 Basic Digital Operation (Option 653/655/656/657) Using Finite Impulse Response (FIR) Filters in the Dual ARB Real-Time Modulation Filter Figure 9-22 These keys manage the table of DMOD files in internal storage. Catalog displays FIR files that have page 60 For details on each key, use key help as described on been previously saved by the user.
-
Page 280: Modifying A Fir Filter Using The Fir Table Editor
Basic Digital Operation (Option 653/655/656/657) Modifying a FIR Filter Using the FIR Table Editor Modifying a FIR Filter Using the FIR Table Editor FIR filters stored in signal generator memory can easily be modified using the FIR table editor. You can load the FIR table editor with coefficient values from user–defined FIR files stored in non–... -
Page 281: Modifying The Coefficients
Basic Digital Operation (Option 653/655/656/657) Modifying a FIR Filter Using the FIR Table Editor Figure 9-24 For details on each key, use key page 60 help as described on 7. Press Return. Modifying the Coefficients 1. Using the front panel arrow keys, highlight coefficient 15. 2. -
Page 282: Storing The Filter To Memory
Basic Digital Operation (Option 653/655/656/657) Modifying a FIR Filter Using the FIR Table Editor Storing the Filter to Memory The maximum file name length is 23 characters (alphanumeric and special characters). 1. Press Return > Return > Load/Store > Store To File. 2. -
Page 283: Setting The Real-Time Modulation Filter
Basic Digital Operation (Option 653/655/656/657) Setting the Real-Time Modulation Filter Setting the Real-Time Modulation Filter The real-time modulation filter effectively compresses a single carrier I/Q waveform down to just the I/Q constellation points and then controls the transitions similar to the modulation filter in Arb Custom modulation. - Page 284 Basic Digital Operation (Option 653/655/656/657) Setting the Real-Time Modulation Filter — When you have a low rate waveform that could benefit from a higher OSR that does not make the waveform longer. The real-time modulation filter setup is one of the file header parameters (page 217), which means you can store this setup with the waveform.
-
Page 285: Multiple Baseband Generator Synchronization
Basic Digital Operation (Option 653/655/656/657) Multiple Baseband Generator Synchronization Multiple Baseband Generator Synchronization Available in the Dual ARB menu, this feature lets you set up a master/slave system of up to sixteen Keysight CXG/MXG/EXGs so that the baseband generators (BBG) synchronize the playing of waveforms. -
Page 286: Understanding The Master/Slave System
Basic Digital Operation (Option 653/655/656/657) Multiple Baseband Generator Synchronization Figure 9-28 Multiple BBG Synchronization Front Panel Displays Mode > Dual ARB > Arb Setup > More > Multi-BBG Sync Setup Master Display and Available Softkeys Select Off, Master, or Slave This is a persistent setting that survives both preset and cycling the power. - Page 287 Basic Digital Operation (Option 653/655/656/657) Multiple Baseband Generator Synchronization The delay value includes compensation for cables that have less than 1 ns of propagation delay between the EVENT 1 and PAT TRIG connectors (see Equipment Setup). The recommended cable is an Keysight BNC cable, part number 10502A.
-
Page 288: Equipment Setup
Basic Digital Operation (Option 653/655/656/657) Multiple Baseband Generator Synchronization Equipment Setup Figure 9-29 Multiple Baseband Synchronization Setup Note: To minimize synchronization delay, the Keysight BNC cable 10502A is the page 286 recommended cable for the rear panel daisy chain connections (see If not using the Trigger key, provide an external trigger source. - Page 289 Basic Digital Operation (Option 653/655/656/657) Multiple Baseband Generator Synchronization The master signal generator allows the modifications of both the trigger type and the trigger source. a.Return to the Dual ARB menu (see page 285). b.Set the desired trigger type and source. c.Return to the Multi–BBG Sync Setup menu.
-
Page 290: Making Changes To The Multiple Synchronization Setup And Resynchronizing The Master/Slave System
Basic Digital Operation (Option 653/655/656/657) Multiple Baseband Generator Synchronization Making Changes to the Multiple Synchronization Setup and Resynchronizing the Master/Slave System If any changes are made to the master/slave parameters or a signal generator (slave unit) is added to the system, the system must be resynchronized even if In Sync appears in the Status portion of the display. -
Page 291: Understanding Option 012 (Lo In/Out For Phase Coherency)
Basic Digital Operation (Option 653/655/656/657) Understanding Option 012 (LO In/Out for Phase Coherency) with Multiple Baseband Generator Synchronization Understanding Option 012 (LO In/Out for Phase Coherency) with Multiple Baseband Generator Synchronization This section assumes that the previous section on Multiple Baseband Generator Synchronization has been read and understood. - Page 292 Basic Digital Operation (Option 653/655/656/657) Understanding Option 012 (LO In/Out for Phase Coherency) with Multiple Baseband Generator Synchronization — The phase coherency feature only applies to the Dual ARB modulation mode. — All cables from the splitter output to the instrument inputs should be of equal lengths. Table 9-5 Option 012 (LO In/Out for Phase Coherency) Equipment MIMO Configuration...
- Page 293 Basic Digital Operation (Option 653/655/656/657) Understanding Option 012 (LO In/Out for Phase Coherency) with Multiple Baseband Generator Synchronization 2x2 MIMO (LO In/Out for Phase Coherency) Configuration For the 2x2 MIMO (LO In/Out for phase coherency) setup, the LO from the master MXG/EXG can be run through a power splitter and used as the LO input to both the master and the slave signal generators.
- Page 294 Basic Digital Operation (Option 653/655/656/657) Understanding Option 012 (LO In/Out for Phase Coherency) with Multiple Baseband Generator Synchronization Figure 9-31 3x3 and 4x4 MIMO (LO In/Out for Phase Coherency) Equipment Setup Note: A SMA flexible cable is recommended for the input to the 4–way splitter connections to the LO IN and LO OUT of the instruments with Option 012 (see page 291).
-
Page 295: Real-Time Applications
Basic Digital Operation (Option 653/655/656/657) Real-Time Applications Real-Time Applications The Keysight X-Series signal generators provide access to several real-time applications for signal creation. Figure 9-32 Real-Time Applications Softkeys page 207 page 382 page 382 page 370 page 433 page 372 page 239 Licensed Signal Studio applications are displayed here. Refer to www.keysight.com/find/signalstudio. -
Page 296: Waveform Licensing
Basic Digital Operation (Option 653/655/656/657) Waveform Licensing Waveform Licensing Waveform licensing enables you to license waveforms that you generate and download from any Signal Studio application for unlimited playback in a signal generator. Each licensing option (221-229) allows you to permanently license up to five waveforms or (250-259) allows you to permanently license up to 50 waveforms of your choice (i.e. - Page 297 Basic Digital Operation (Option 653/655/656/657) Waveform Licensing Waveform Licensing Softkeys Overview Figure 9-33 Waveform Licensing Softkeys Mode > Dual ARB > More Note: Waveforms licensed with Option 2xx cannot be exchanged for other waveforms. Once a waveform is locked into a license slot, that license is permanent and cannot be revoked or replaced. This softkey is only available if there is an Option 2xx license installed on the instrument.
- Page 298 Basic Digital Operation (Option 653/655/656/657) Waveform Licensing Figure 9-34 Waveform Licensing Softkeys Note: Waveforms licensed with Option 2xx cannot be “exchanged”. Once a slot is locked, Mode > Dual ARB > More > that license for the waveform in the locked slot is permanent and cannot be revoked or Waveform Licensing >...
- Page 299 Basic Digital Operation (Option 653/655/656/657) Waveform Licensing Figure 9-35 Waveform Licensing Softkeys Mode > Dual ARB > More > Waveform Licensing > Lock Waveform in Slot Press this softkey to confirm that you want to lock the waveform into the slot for permanent licensing.
- Page 300 Basic Digital Operation (Option 653/655/656/657) Waveform Licensing Table 9-6 Waveform Licensing Slot Status Messages Status Column Meaning Notes Locked MM/DD/YY The slot is locked and can no longer The waveform in this slot is licensed be modified. to this signal generator for unlimited playback.
- Page 301 Basic Digital Operation (Option 653/655/656/657) Waveform Licensing Example: Licensing a Signal Studio Waveform The following steps add a waveform file to a license slot and lock the slot for permanent playback. 1. Press Mode > Dual ARB > More > Waveform Utilities > Waveform Licensing The signal generator displays a catalog of files labeled: Catalog of BBG Segment Files in BBG Memory.
- Page 302 Basic Digital Operation (Option 653/655/656/657) Waveform Licensing 4. License the waveform: a.Press Lock Waveform in Slot. A warning is displayed: *** Waveform Lock Warning!!! ***. If necessary, verify you have selected the correct waveform you want for licensing by pressing Return. Figure 9-37 Waveform Lock Warning b.Press Confirm Locking Waveform.
- Page 303 Basic Digital Operation (Option 653/655/656/657) Waveform Licensing Waveform Licensing Warning Messages Figure 9-39 This standard warning is displayed every time a waveform is selected to be locked. This notification indicates that one of the available “license slots” is about to be used from Option 2xx.
- Page 304 Basic Digital Operation (Option 653/655/656/657) Waveform Licensing Keysight CXG, EXG, and MXG X-Series Signal Generators User’s Guide...
-
Page 305: Digital Signal Interface Module (Option 003/004)
Keysight Technologies X-Series Signal Generators User’s Guide Digital Signal Interface Module (Option 003/004) This chapter provides information on the N5102A Baseband Studio Digital Signal Interface Module. These features are available only in N5172B/82B Vector Signal Generators with Options 003/004 and 653/655/656/657. The following list shows the topics covered in this chapter: —... -
Page 306: Clock Timing
Digital Signal Interface Module (Option 003/004) Clock Timing Clock Timing This section describes how clocking for the digital data is provided. Clock timing information and diagrams are supplied for the different port configurations (serial, parallel, or parallel interleaved data transmission) and phase and skew settings. All settings for the interface module are available on the signal generator user interface (UI). - Page 307 Digital Signal Interface Module (Option 003/004) Clock Timing 1. The IF signal type is not available for a serial port configuration. Table 10-2 Warranted Parallel Input Level Clock Rates and Maximum Clock Rates Logic Type Warranted Level Clock Rates Maximum Clock Rates (typical) LVTTL and CMOS 100 MHz 150 MHz...
- Page 308 Digital Signal Interface Module (Option 003/004) Clock Timing Parallel and Parallel Interleaved Port Configuration Clock Rates Parallel and parallel interleaved port configurations have other limiting factors for the clock and sample rates: — logic type — Clocks per sample selection —...
-
Page 309: Clock Source
Digital Signal Interface Module (Option 003/004) Clock Timing Clock Source The clock signal for the N5102A module is provided in one of three ways through the following selections: — Internal: generated internally in the interface module (requires an external reference) —... - Page 310 Digital Signal Interface Module (Option 003/004) Clock Timing Signal Generator Frequency Reference Connections When a frequency reference is connected to the signal generator, it is applied the REF In rear panel connector. Figure 10-3 Frequency Reference Setup Diagrams for the N5102A Module Clock Signal Internally Generated Clock Device (DUT) Supplied Clock NOTE: Use only one of the two signal generator frequency reference inputs.
-
Page 311: Clock Timing For Parallel Data
Digital Signal Interface Module (Option 003/004) Clock Timing Externally Supplied Clock NOTE: Use only one of the two signal generator frequency reference inputs. Clock Timing for Parallel Data Some components require multiple clocks during a single sample period. (A sample period consists of an I and Q sample). - Page 312 Digital Signal Interface Module (Option 003/004) Clock Timing Figure 10-4 Clock Sample Timing for Parallel Port Configuration 1 Clock Per Sample Clock and sample rates are the same 1 Sample Period 1 Clock Clock I sample 4 bits per word Q sample 4 bits per word Keysight CXG, EXG, and MXG X-Series Signal Generators User’s Guide...
- Page 313 Digital Signal Interface Module (Option 003/004) Clock Timing 2 Clocks Per Sample Sample rate decreases by a factor of two 1 Sample Period 2 Clocks Clock I sample 4 bits per word Q sample 4 bits per word 4 Clocks Per Sample Sample rate decreases by a factor of four 1 Sample Period 4 Clocks...
-
Page 314: Clock Timing For Parallel Interleaved Data
Digital Signal Interface Module (Option 003/004) Clock Timing Clock Timing for Parallel Interleaved Data The N5102A module provides the capability to interleave the digital I and Q samples. There are two choices for interleaving: — IQ, where the I sample is transmitted first —... -
Page 315: Clock Timing For Serial Data
Digital Signal Interface Module (Option 003/004) Clock Timing 2 Clocks Per Sample The I sample is transmitted for one clock period and the Q sample is transmitted during the second clock period; the sample rate decreases by a factor of two. 1 Sample Period 2 Clocks Clock... -
Page 316: Clock Timing For Phase And Skew Adjustments
Digital Signal Interface Module (Option 003/004) Clock Timing Figure 10-6 Clock Timing for a Serial Port Configuration 1 Sample Frame Marker Clock Data Bits 4 bits per word Clock Timing for Phase and Skew Adjustments The N5102A module provides phase and skew adjustments for the clock relative to the data and can be used to align the clock with the valid portion of the data. - Page 317 Digital Signal Interface Module (Option 003/004) Clock Timing Figure 10-7 Clock Phase and Skew Adjustments 90 degree phase adjustment Clock skew adjustment Phase and skew adjusted clock Phase adjusted clock Clock Data Keysight CXG, EXG, and MXG X-Series Signal Generators User’s Guide...
-
Page 318: Connecting The Clock Source And The Device Under Test
Digital Signal Interface Module (Option 003/004) Connecting the Clock Source and the Device Under Test Connecting the Clock Source and the Device Under Test As shown in Figure 10-3 on page 310, there are numerous ways to provide a common frequency reference to the system components (signal generator, N5102A module, and the device under test). - Page 319 Digital Signal Interface Module (Option 003/004) Connecting the Clock Source and the Device Under Test 3. Select the break-out board that has the output connector suited for the application. If the Device Interface mating connector is used with the device under test, refer to Figure 10-8 for the device interface connection and connect the...
-
Page 320: Data Types
Digital Signal Interface Module (Option 003/004) Data Types Data Types The following block diagram indicates where in the signal generation process the data is injected for input mode or tapped for output mode. Output Mode Output Mode Pre-FIR Samples Samples Signal Generator Data Generator... -
Page 321: Operating The N5102A Module In Output Mode
Digital Signal Interface Module (Option 003/004) Operating the N5102A Module in Output Mode Operating the N5102A Module in Output Mode This section shows how to set the parameters for the N5102A module using the signal generator UI in the output direction. Each procedure contains a figure that shows the softkey menu structure for the interface module function being performed. -
Page 322: Choosing The Logic Type And Port Configuration
Digital Signal Interface Module (Option 003/004) Operating the N5102A Module in Output Mode Press N5102A Interface to access the UI (first-level softkey menu shown in Figure 10-10) that is used to configure the digital signal interface module. Notice the graphic in the signal generator display, showing a setup where the N5102A module is generating its own internal clock signal. -
Page 323: Selecting The Output Direction
Digital Signal Interface Module (Option 003/004) Operating the N5102A Module in Output Mode From this menu, choose a logic type. Changing the logic type can increase or decrease the signal voltage level going to the device under test. To avoid damaging the device and/or the , ensure that both are capable of handling the voltage N5102A module change. - Page 324 Digital Signal Interface Module (Option 003/004) Operating the N5102A Module in Output Mode Figure 10-12 Data Setup Menu Location Accesses the Data Setup menu This softkey menu accesses the various parameters that govern the data received by the device under test. The status area of the display shows the number of data lines used for both I and Q along with the clock position relative to the data.
- Page 325 Digital Signal Interface Module (Option 003/004) Operating the N5102A Module in Output Mode Figure 10-13 Data Setup Softkey Menu with Parallel Port Configuration Inactive for ARB formats Inactive for word size = 16 bits Inactive for a serial port configuration Available only while in output mode Frame polarity is active...
-
Page 326: Configuring The Clock Signal
Digital Signal Interface Module (Option 003/004) Operating the N5102A Module in Output Mode 5. Select the numeric format required for the test. 6. Press the More (1 of 2) softkey. From this softkey menu, select the bit order, swap I and Q, select the polarity of the transmitted data, and access menus that provide data negation, scaling, gain, offset, and IQ rotation adjustments. - Page 327 Digital Signal Interface Module (Option 003/004) Operating the N5102A Module in Output Mode From this softkey menu, set all of the clock parameters that synchronize the clocks between the N5102A module and the signal generator. You can also change the clock signal phase so the clock occurs during the valid portion of the data.
- Page 328 Digital Signal Interface Module (Option 003/004) Operating the N5102A Module in Output Mode This error is reported when the output FIFO is overflowing in the digital module. This error can be generated if an external clock or its reference is not set up properly, or if the internal VCO is unlocked.
- Page 329 Digital Signal Interface Module (Option 003/004) Operating the N5102A Module in Output Mode b.Press the Clock Rate softkey and enter the appropriate clock rate. Table 10-7 provides a quick view of the settings and connections associated with each clock source selection. Table 10-7 Clock Source Settings and Connectors Clock...
-
Page 330: Generating Digital Data
Digital Signal Interface Module (Option 003/004) Operating the N5102A Module in Output Mode 11.Press the Clock Polarity Neg Pos softkey to Neg. This shifts the clock signal 180 degrees, so that the data starts during the negative clock transition. This has the same affect as selecting the 180 degree phase adjustment. 12.Make the clock polarity selection that is required for the device being tested. -
Page 331: Operating The N5102A Module In Input Mode
Digital Signal Interface Module (Option 003/004) Operating the N5102A Module in Input Mode Operating the N5102A Module in Input Mode This section shows how to set the parameters for the N5102A module using the signal generator UI in the input direction. Each procedure contains a figure that shows the softkey menu structure for the interface module function being performed. -
Page 332: Selecting The Input Direction
Digital Signal Interface Module (Option 003/004) Operating the N5102A Module in Input Mode Selecting the Input Direction If both Option 003 (output mode) and Option 004 (input mode) are installed, you must select the input direction. Press Data Setup > Direction Input Output to Input and press Return. If only Option 004 is installed, the direction softkey will be unavailable and the mode will always be input. -
Page 333: Configuring The Clock Signal
Digital Signal Interface Module (Option 003/004) Operating the N5102A Module in Input Mode 2. Select the logic type required for the device being tested. A caution message is displayed whenever a change is made to the logic types, and a softkey selection appears asking for confirmation. - Page 334 Digital Signal Interface Module (Option 003/004) Operating the N5102A Module in Input Mode clock rate under the clock setup menu. Digital module input FIFO underflow error; There are not enough samples being produced for the current clock rate. Verify that the digital module clock is set up properly. This error is reported when the digital module clock setup is not synchronized with the rate the samples are entering the digital module.
- Page 335 Digital Signal Interface Module (Option 003/004) Operating the N5102A Module in Input Mode From this menu, select the clock signal source. With each selection, the clock routing display in the signal generator clock setup menu will change to reflect the current clock source. This will be indicated by a change in the graphic.
- Page 336 Digital Signal Interface Module (Option 003/004) Operating the N5102A Module in Input Mode From the menu that appears, the phase of the clock relative to the data can be changed in 90 degree increments. The selections provide a coarse adjustment for positioning the clock on the valid portion of the data.
-
Page 337: Selecting The Data Parameters
Digital Signal Interface Module (Option 003/004) Operating the N5102A Module in Input Mode Selecting the Data Parameters This procedure guides you through the data setup menu. Softkeys that have self-explanatory names are generally not mentioned. For example, the Word Size softkey. 1. - Page 338 Digital Signal Interface Module (Option 003/004) Operating the N5102A Module in Input Mode Figure 10-22 Data Setup Softkey Menu with Parallel Port Configuration Inactive for a serial port configuration Only available when Data Type is Pre-FIR Samples Only available when the N5102A digital module is turned on and using input mode Frame polarity is active...
-
Page 339: Digital Data
Digital Signal Interface Module (Option 003/004) Operating the N5102A Module in Input Mode From this menu, select how the binary values are represented. Selecting 2’s complement allows both positive and negative data values. Use the Offset Binary selection when components cannot process negative values. 5. - Page 340 Digital Signal Interface Module (Option 003/004) Operating the N5102A Module in Input Mode Keysight CXG, EXG, and MXG X-Series Signal Generators User’s Guide...
-
Page 341: 11 Baseband Operating Mode-Primary, Bert, Or N5102A
Keysight Technologies X-Series Signal Generators User’s Guide 11 Baseband Operating Mode—Primary, BERT, or N5102A With firmware version B.01.75 or later, option numbers for software internal to the instrument “Enabling an Option” on page 55 have changed. For more information, see Baseband Operating Mode is available on all Keysight N5172B EXG, and N5182B MXG X-Series signal generators that have installed firmware version B.01.70 or later. -
Page 342: To Set The Baseband Operating Mode To Bert
Baseband Operating Mode—Primary, BERT, or N5102A To set the Baseband Operating Mode to BERT To set the Baseband Operating Mode to BERT In this mode, all installed and licensed signal generator features as well as all BERT features are fully supported, but N5102A features are not available. Figure 11-2 Changing to the BERT Baseband Operating Mode The BERT annunciator is displayed indicating that the BERT Baseband Operating Mode is currently selected. -
Page 343: To Set The Baseband Operating Mode To N5102A
Baseband Operating Mode—Primary, BERT, or N5102A To set the Baseband Operating Mode to N5102A To set the Baseband Operating Mode to N5102A In this mode, all installed and licensed signal generator features as well as all N5102A features are fully supported, but BERT features are not available. Figure 11-3 Changing to the N5102A Baseband Operating Mode The N5102A annunciator is displayed indicating that the N5102A Baseband Operating Mode is currently selected. -
Page 344: To Set The Baseband Operating Mode To Primary
Baseband Operating Mode—Primary, BERT, or N5102A To set the Baseband Operating Mode to Primary To set the Baseband Operating Mode to Primary In this mode, all installed and licensed signal generator features are fully supported, but BERT and N5102A features are not available. Figure 11-4 Changing to the Primary Baseband Operating Mode The Primary annunciator is NOT displayed and it overwrites both the BERT and N5102A annunciators, indicating that the... -
Page 345: Bert (Option N5180Un7B)
Keysight Technologies X-Series Signal Generators User’s Guide BERT (Option N5180UN7B) With firmware version B.01.75 or later, option numbers for software internal to the instrument “Enabling an Option” on page 55 have changed. For more information, see The bit error rate test (BERT) capability allows you to perform bit error rate (BER) analysis on digital communications equipment. -
Page 346: Bit Error Rate Tester-Option N5180Un7B
BERT (Option N5180UN7B) Bit Error Rate Tester–Option N5180UN7B Bit Error Rate Tester–Option N5180UN7B The bit error rate test (BERT) capability allows you to perform bit error rate (BER) analysis on digital communications equipment. This enables functional and parametric testing of receivers and components including sensitivity and selectivity. -
Page 347: Clock/Gate Delay Function
BERT (Option N5180UN7B) Bit Error Rate Tester–Option N5180UN7B Figure 12-2 — When the Clock Gate Off On softkey is set to Off: The clock signal in both “A” and “B” parts is effective and no gate function is required. Therefore, the bit error rate is measured using the clock and data signal in both “A”... - Page 348 BERT (Option N5180UN7B) Bit Error Rate Tester–Option N5180UN7B Figure 12-3 Keysight CXG, EXG, and MXG X-Series Signal Generators User’s Guide...
-
Page 349: Clock Delay Function
BERT (Option N5180UN7B) Bit Error Rate Tester–Option N5180UN7B Clock Delay Function In this example, the clock delay function is off. Figure 12-4 shows the input of the internal error detector of N5180UN7B through AUX I/O and indicates that the data is delayed from the clock. Figure 12-4 CH1: BER TEST OUT (pin 17 of AUX I/O connector) CH2: BER MEAS END (pin 15 of AUX I/O connector) -
Page 350: Gate Delay Function In The Clock Mode
BERT (Option N5180UN7B) Bit Error Rate Tester–Option N5180UN7B Gate Delay Function in the Clock Mode To use this function, the clock must be set to continuous mode. In this example, the clock is used to delay the gate function. The clock of the internal error detector was gated by the gate signal which is delayed by two clocks. -
Page 351: Triggering
BERT (Option N5180UN7B) Bit Error Rate Tester–Option N5180UN7B Triggering This section describes the operating principles of the triggering function for Option N5180UN7B. To see the signal flow of the triggering function refer to Figure 12-7. Figure 12-7 In this example, the triggering sequence is where you have an incoming data clock and data bit sequences, the trigger is active, and the BERT measurement begins. - Page 352 BERT (Option N5180UN7B) Bit Error Rate Tester–Option N5180UN7B In this example, synchronization occurs after receiving a trigger. The reference data is generated by stored data bits. If the BERT measurement accepts data bits immediately after receiving a trigger, set the trigger delay to On and the trigger delay count to a value corresponding to the data format.
-
Page 353: Data Processing
BERT (Option N5180UN7B) Bit Error Rate Tester–Option N5180UN7B In this example, the triggering sequence is where the trigger delay is active with a cycle count. The reference data is generated by stored data bits. If the BERT measurement accepts data bits immediately after receiving a trigger, set the trigger delay to On and the trigger delay count to a value corresponding to the data format. -
Page 354: Repeat Measurements
BERT (Option N5180UN7B) Bit Error Rate Tester–Option N5180UN7B and the Spcl Pattern Ignore Off On softkey is set to On, then all of the consecutive 0’s or 1’s are ignored. Select either 0’s or 1’s as the data to ignore by using the Spcl Pattern 0’s 1’s softkey. The following figure shows an example of the special pattern ignore function. -
Page 355: Testing Signal Definitions
BERT (Option N5180UN7B) Bit Error Rate Tester–Option N5180UN7B Testing Signal Definitions The timing diagram <Keysight Red >Figure 12-13, “Testing Signal Definitions,” shows the relationships between a trigger event and the output signals at the BER MEAS END and BER TEST OUT connectors. -
Page 356: Verifying Bert Operation
BERT (Option N5180UN7B) Verifying BERT Operation Verifying BERT Operation The following procedures verify the operation of the signal generator’s bit error rate test (BERT) function. The tests can be performed as part of a daily validation routine or can be used whenever you want to check the validity of your BERT measurements. - Page 357 BERT (Option N5180UN7B) Verifying BERT Operation Figure 12-15 BERT I/O Setup Softkeys page 356 Select PXB/BERT to enable BERT functionality. The highlighted BNC connectors in Figure 12-16 are used for different signals in the BERT capability mode. The BERT-specific configuration is shown here. The AUX I/O connector configuration is customizable for the applications/options being used.
-
Page 358: Measurement Setup Using Self-Test Mode
BERT (Option N5180UN7B) Verifying BERT Operation Measurement Setup Using Self-Test Mode The following steps set up the signal generator for the BERT measurement selt-test. 1. Refer to Figure 12-16 and make the following connections on the signal generator’s rear panel. —DATA OUT (Aux I/O connector pin 15) to BER DATA IN (BNC connector labeled EVENT 1). - Page 359 BERT (Option N5180UN7B) Verifying BERT Operation The Total Bits will count to 10000 Bits (default setting) and the Error Bits should read 0 Bits. Figure 12-17. Figure 12-17 Self-Test Mode Results Keysight CXG, EXG, and MXG X-Series Signal Generators User’s Guide...
-
Page 360: Measurement Example Using Custom Digital Modulation (Requires Option N5180431B)
BERT (Option N5180UN7B) Verifying BERT Operation Measurement Example Using Custom Digital Modulation (Requires Option N5180431B) The following steps set up the signal generator for a BERT measurement using Custom Digital Modulation. 1. Refer to Figure 12-16 and make the following connections on the signal generator’s rear panel. —DATA OUT (Aux I/O connector pin 33) to BER DATA IN (BNC connector labeled EVENT 1). - Page 361 BERT (Option N5180UN7B) Verifying BERT Operation Figure 12-18 Configuration Using Custom Digital Modulation BERT Verification 1. Press BERT Trigger to Immediate. Notice the cycle counter updating in the lower left-hand corner of the signal generator display. 2. Disconnect the cable connecting the DATA OUT to BER DATA IN connectors. Notice the No Data annunciator in the lower left corner of the display and the BER result is approximately 50%.
- Page 362 BERT (Option N5180UN7B) Verifying BERT Operation Keysight CXG, EXG, and MXG X-Series Signal Generators User’s Guide...
-
Page 363: Real-Time Noise-Awgn (Option N5180403B)
Keysight Technologies X-Series Signal Generators User’s Guide Real–Time Noise—AWGN (Option N5180403B) With firmware version B.01.75 or later, option numbers for software internal to the instrument “Enabling an Option” on page 55 have changed. For more information, see Before using this information, you should be familiar with the basic operation of the signal generator. -
Page 364: Adding Real-Time Noise To A Dual Arb Waveform
Real–Time Noise—AWGN (Option N5180403B) Adding Real–Time Noise to a Dual ARB Waveform Adding Real–Time Noise to a Dual ARB Waveform The procedures in this section that pertain specifically to adding Real– Time Noise (AWGN) to a waveform, are applicable to the Custom ARB, Multitone, and Two–Tone modulation standards too. - Page 365 Real–Time Noise—AWGN (Option N5180403B) Adding Real–Time Noise to a Dual ARB Waveform Figure 13-1 Real Time I/Q Baseband AWGN Softkeys For details on each key, use key help page 60 as described on This is the stand–alone Real– Time AWGN and the 2nd page of the Modulation Mode menu (see The state of the noise (on or off) is shown on the display.
- Page 366 Real–Time Noise—AWGN (Option N5180403B) Adding Real–Time Noise to a Dual ARB Waveform Figure 13-2 Real Time I/Q Baseband AWGN - Power Control Mode Softkeys For details on each key, use key help Mode > Dual ARB > Arb Setup > page 60 Real-Time AWGN Setup as described on...
-
Page 367: Eb/No Adjustment Softkeys For Real Time I/Q Baseband Awgn
Real–Time Noise—AWGN (Option N5180403B) Adding Real–Time Noise to a Dual ARB Waveform Figure 13-3 Real Time I/Q Baseband AWGN - Noise Mux Menu Softkeys Mode > Dual ARB > Arb Setup > Real-Time AWGN Setup > More Figure 13-6 on page 368 provides additional details on Enables diagnostic control of these settings. - Page 368 Real–Time Noise—AWGN (Option N5180403B) Adding Real–Time Noise to a Dual ARB Waveform Figure 13-5 Real Time I/Q Baseband AWGN - E Adjustment Softkeys Mode > Dual ARB > Arb Setup > Real-Time AWGN Setup Figure 13-6 on page 368 provides additional details on these settings.
- Page 369 Real–Time Noise—AWGN (Option N5180403B) Adding Real–Time Noise to a Dual ARB Waveform Carrier Bandwidth (CBW) is typically the occupied bandwidth of the carrier and the Noise Bandwidth is the flat noise bandwidth (NBW). The carrier now appears larger because of the added noise power.
-
Page 370: Using Real Time I/Q Baseband Awgn
Real–Time Noise—AWGN (Option N5180403B) Using Real Time I/Q Baseband AWGN Using Real Time I/Q Baseband AWGN Figure 13-7 Real Time I/Q Baseband AWGN Softkeys For details on each key, use key help page 60 as described on Use the following steps to apply 10 MHz bandwidth noise to a 500 MHz, –10 dBm carrier. 1. -
Page 371: 14 Real-Time Phase Noise Impairments
Keysight Technologies X-Series Signal Generators User’s Guide 14 Real–Time Phase Noise Impairments (Option N5180432B) With firmware version B.01.75 or later, option numbers for software internal to the instrument “Enabling an Option” on page 55 have changed. For more information, see Before using this information, you should be familiar with the basic operation of the signal generator. -
Page 372: Real-Time Phase Noise Impairment
Real–Time Phase Noise Impairments (Option N5180432B) Real–Time Phase Noise Impairment Real–Time Phase Noise Impairment This feature lets you degrade the phase noise performance of the signal generator by controlling two frequency points and an amplitude value. The signal generator adds this phase noise to the phase noise normally produced by the signal generator. -
Page 373: Phase Noise Shape And Additive Phase Noise Impairments
Real–Time Phase Noise Impairments (Option N5180432B) Phase Noise Shape and Additive Phase Noise Impairments Phase Noise Shape and Additive Phase Noise Impairments Keysight X-Series Phase Noise Plots Without Phase Noise Impairment −50 dBc/Hz −50 dBc/Hz The Keysight X-Series vector signal generator demonstrates a definitive shape to its phase noise plot. - Page 374 Real–Time Phase Noise Impairments (Option N5180432B) Phase Noise Shape and Additive Phase Noise Impairments Phase Noise Plots With Phase Noise Impairments Fl at mi d–freq uen cy o ffset −50 dBc/Hz −50 dBc/Hz cha racteristics (L mid) When turned on, this phase noise is added Resultant phase to the base phase noise of the signal noise plot...
-
Page 375: Understanding The Phase Noise Adjustments
Real–Time Phase Noise Impairments (Option N5180432B) Understanding the Phase Noise Adjustments Understanding the Phase Noise Adjustments The signal generator bases the resultant phase noise shape on three settings, Lmid (amplitude), f1 (start frequency), and f2 (stop frequency). The range for Lmid is coupled to f2, so as f2 increases in value, Lmid’s upper boundary decreases. If the current Lmid setting is too high for the new f2 setting, the signal generator changes the Lmid value and generates an error to alert you to the change. -
Page 376: Dac Over-Range Conditions And Scaling
Real–Time Phase Noise Impairments (Option N5180432B) DAC Over–Range Conditions and Scaling DAC Over–Range Conditions and Scaling When using phase noise impairment, it is possible to create a DAC over–range condition, which causes the signal generator to generate an error. To minimize this condition with the phase noise impairment feature, the Keysight X-Series signal generator incorporates an automatic DAC over–... -
Page 377: Real-Time Fading (Option 660)
Keysight Technologies X-Series Signal Generators User’s Guide Real–Time Fading (Option 660) The feature described in this chapter is available only in Keysight N5172B EXG and N5182B MXG X-Series signal generators with Option 660 Upgrade Baseband Generator with Real-Time Capability. Option 660 requires Option 653, 655, 656 or 657. -
Page 378: Using Real-Time Fading Softkeys
Real–Time Fading (Option 660) Using Real-Time Fading Softkeys Using Real-Time Fading Softkeys This feature lets you open a menu to configure Real-Time Fading simulations. Figure 15-1 Real-Time Fading Softkeys - Turns off Fading Mode; do not route through the Fading path. - Turns on Fading Mode;... -
Page 379: To Configure A Real-Time Fading Simulation
Real–Time Fading (Option 660) Using Real-Time Fading Softkeys To configure a Real-Time Fading simulation When configuring a Real-Time Fading simulation, perform the following steps: 1. Press Mode 2. Press Fading Mode (Default selection is Off.) 3. Select either: Off | On | Pass-Through —... - Page 380 Real–Time Fading (Option 660) Using Real-Time Fading Softkeys Keysight CXG, EXG, and MXG X-Series Signal Generators User’s Guide...
- Page 381 Keysight Technologies X-Series Signal Generators User’s Guide Custom Digital Modulation (Option N5180431B) With firmware version B.01.75 or later, option numbers for software internal to the instrument “Enabling an Option” on page 55 have changed. For more information, see Before using this information, you should be familiar with the basic operation of the signal generator.
-
Page 382: Custom Modulation
Custom Digital Modulation (Option N5180431B) Custom Modulation Custom Modulation For creating custom modulation, the signal generator offers two modes of operation: the ARB custom modulation mode and the real-time custom modulation mode. The ARB custom modulation mode has built-in modulation formats such as NADC or GSM and pre-defined modulation types such as BPSK and 16QAM that can be used to create a signal. - Page 383 Custom Digital Modulation (Option N5180431B) Custom Modulation Figure 16-1 ARB Custom Modulation Softkeys Enables the current ARB custom modulation settings. page 207 page 413 This softkey changes, depending on the selected Available only when mode of modulation. page 387 Multicarrier is Off. page 261 page 295 page 384 page 433...
- Page 384 Custom Digital Modulation (Option N5180431B) Custom Modulation Figure 16-2 Quick Setup Softkeys Mode > ARB Custom Modulation > Single Carrier Setup This softkey label shows the currently selected modulation standard. page 406 page 385 page 416 page 386 Press Symbol Rate softkey and use numeric keypad to change value as required.
- Page 385 Custom Digital Modulation (Option N5180431B) Custom Modulation Figure 16-3 Mod Type Softkeys Mode > ARB Custom Modulation > Single page 384 page 402 page 416 page 386 Sets the modulation depth for the Amplitude Shift Keying (ASK). These symbol maps utilize Gray coded bit mapping. These symbol maps are consistent with the symbol maps in...
- Page 386 Custom Digital Modulation (Option N5180431B) Custom Modulation Figure 16-4 Custom Modulation Formats and Applications Figure 16-5 Store Custom Dig Mod State Softkeys Mode > ARB Custom Modulation > Single Carrier Setup > Store Custom Dig Mod State page 405 Catalog displays digital modulation (DMOD) files that have been previously saved.
- Page 387 Custom Digital Modulation (Option N5180431B) Custom Modulation Figure 16-6 Real-Time Custom Modulation Softkeys page 207 page 382 Enables the current custom real-time page 295 modulation settings. page 388 page 433 Opens a menu from which you can set burst shape parameters. page 364 page 426 page 372 page 261 page 239 page 60 For details on each key, use key help as described on...
- Page 388 Custom Digital Modulation (Option N5180431B) Custom Modulation Figure 16-7 Modulation Setup Softkeys Mode > Real-Time Custom Modulation > Modulation Setup This softkey label shows the currently selected page 389 page 416 page 391 Press Symbol Rate softkey and use numeric keypad to change value as required.
- Page 389 Custom Digital Modulation (Option N5180431B) Custom Modulation Figure 16-8 Modulation Type Softkeys Mode > Real-Time Custom Modulation > Modulation Setup page 388 page 407 page 408 page 416 page 390 These symbol maps utilize Gray coded bit mapping. These symbol maps are consistent with the symbol maps in the VSA software.
-
Page 390: Creating And Using Bit Files
Custom Digital Modulation (Option N5180431B) Creating and Using Bit Files Creating and Using Bit Files This procedure teaches you how to use the Bit File Editor to create, edit, and store user-defined files for data transmission within real time I/Q baseband generated modulation. For this example, a user file is defined within a custom digital communications format. -
Page 391: Creating A User File
Custom Digital Modulation (Option N5180431B) Creating and Using Bit Files Creating a User File Accessing the Table Editor 1. Press Preset. 2. Press Mode > Real-Time Custom Modulation > Modulation Setup > Data > User File > Create File. This opens the Bit File Editor. The Bit File Editor contains three columns: Offset, Binary Data, and Hex Data, as well as cursor position (Position) and file name (Name) indicators, as shown in the following figure. -
Page 392: Renaming And Saving A User File
Custom Digital Modulation (Option N5180431B) Creating and Using Bit Files Figure 16-11 Entering Bit Values Enter these bit Cursor Position Hexadecimal values Indicator Data Renaming and Saving a User File In this example, you learn how to store a user file. If you have not created a user file, complete the steps in the previous section, “Creating a User File”... -
Page 393: Recalling A User File
Custom Digital Modulation (Option N5180431B) Creating and Using Bit Files Recalling a User File In this example, you learn how to recall a user-defined data file from the memory catalog. If you have not created and stored a user-defined data file, complete the steps in the previous sections, “Creating a User File”... -
Page 394: Applying Bit Errors To A User File
Custom Digital Modulation (Option N5180431B) Creating and Using Bit Files Inverting Bit Values 1. Press 1011. This inverts the bit values that are positioned 4C through 4F. Notice that hex data in this row has now changed to 76DB6DB6, as shown in the following figure. Figure 16-13 Inverting Bit Values Bits 4C through 4F are Hex Data changed... -
Page 395: Using Customized Burst Shape Curves
Custom Digital Modulation (Option N5180431B) Using Customized Burst Shape Curves Using Customized Burst Shape Curves You can adjust the shape of the rise time curve and the fall time curve using the Rise Shape and Fall Shape editors. Each editor allows you to enter up to 256 values, equidistant in time, to define the shape of the curve. - Page 396 Custom Digital Modulation (Option N5180431B) Using Customized Burst Shape Curves — the modulation type When the rise and fall delays equal 0, the burst shape is attempting to synchronize the maximum burst shape power to the beginning of the first valid symbol and the ending of the last valid symbol of the timeslot.
-
Page 397: Creating A User-Defined Burst Shape Curve
Custom Digital Modulation (Option N5180431B) Using Customized Burst Shape Curves Figure 16-14 Burst Shape Softkeys Mode > Real-Time Custom Modulation page 60 For details on each key, use key help as described on Creating a User-Defined Burst Shape Curve Using this procedure, you learn how to enter rise shape sample values and mirror them as fall shape values to create a symmetrical burst curve. - Page 398 Custom Digital Modulation (Option N5180431B) Using Customized Burst Shape Curves Entering Sample Values Use the sample values in the following table. Rise Shape Editor Sample Value Sample Value 0.000000 0.830000 0.400000 0.900000 0.600000 1.000000 0.750000 1. Highlight the value (1.000000) for sample 1. 2.
-
Page 399: Storing A User-Defined Burst Shape Curve
Custom Digital Modulation (Option N5180431B) Using Customized Burst Shape Curves Display the Burst Shape Press Display Burst Shape. This displays a graphical representation of the waveform’s rise and fall characteristics, as shown in Figure 16-16. Figure 16-16 Burst Shape To return the burst to the default conditions, press the following keys: Return >... - Page 400 Custom Digital Modulation (Option N5180431B) Using Customized Burst Shape Curves 1. Press Preset. 2. Press Mode > Real-Time Custom Modulation > Burst Shape > Burst Shape Type > User File. 3. Highlight the desired burst shape file (for example, NEWBURST). 4.
-
Page 401: Using The Arbitrary Waveform Generator
Custom Digital Modulation (Option N5180431B) Using the Arbitrary Waveform Generator Using the Arbitrary Waveform Generator This section teaches you how to build dual arbitrary (ARB) waveform files containing custom digital modulation for testing component designs. Figure 16-17 Adding Custom Modulation to a Waveform Mode >... -
Page 402: Creating A Custom Digital Modulation State
Custom Digital Modulation (Option N5180431B) Using the Arbitrary Waveform Generator 2. Set the output amplitude to −5 dBm. 3. Press RF On/Off. The predefined EDGE signal is now available at the signal generator’s RF OUTPUT connector. Creating a Custom Digital Modulation State In this procedure, you learn how to set up a single–carrier NADC digital modulation with customized modulation type, symbol rate, and filtering. - Page 403 Custom Digital Modulation (Option N5180431B) Using the Arbitrary Waveform Generator Figure 16-19 Modifying a Digital Modulation Type Mode > ARB Custom Modulation > Single Carrier Setup > page 60 For details on each key, use key help as described on Modulation Type > Select These softkeys, open a menu to Note: This is the...
-
Page 404: Storing A Custom Digital Modulation State
Custom Digital Modulation (Option N5180431B) Using the Arbitrary Waveform Generator Selecting the Filter 1. In the Setup Mod menu (page 402), press Filter > Select > Nyquist. 2. Press Return > Return. Generating the Waveform Press Digital Modulation Off On. This generates a waveform with the custom, single–carrier NADC, digital modulation state created in the previous sections. -
Page 405: Recalling A Custom Digital Modulation State
Custom Digital Modulation (Option N5180431B) Using the Arbitrary Waveform Generator Figure 16-20 Storing a Custom Digital Modulation State Mode > ARB Custom Modulation > Single Carrier Setup page 61 These keys manage the table of DMOD files in internal storage. Catalog displays DMOD files that have been previously saved by the user. -
Page 406: Defining A Modulation
Custom Digital Modulation (Option N5180431B) Using the Arbitrary Waveform Generator If you have not created and stored a user-defined, single–carrier, digital modulation state, complete the steps in the previous sections, Creating a Custom Digital Modulation State page 402 and Storing a Custom Digital Modulation State on page 404, then preset the signal generator to clear the stored user–defined, digital modulation waveform from volatile ARB memory. - Page 407 Custom Digital Modulation (Option N5180431B) Using the Arbitrary Waveform Generator Building an Asymmetric FSK Modulation with the FSK Table Editor You can use the FSK table editor to create customized asymmetric FSK modulation of up to 16 levels, then apply the custom FSK modulation to one of the modulation standards. An example of this capability is to create an interfering signal for adjacent channel selectivity testing of FLEXTM pagers.
- Page 408 Custom Digital Modulation (Option N5180431B) Using the Arbitrary Waveform Generator Figure 16-22 FSK Table Editor Mode > Real-Time Custom Modulation > Modulation Setup > Modulation Type > Define User FSK For details on each key, use key page 60 help as described on Mapping I/Q Values with the I/Q Table Editor In most digital radio systems, the frequency of the carrier is fixed so only phase and magnitude need to be considered.
- Page 409 Custom Digital Modulation (Option N5180431B) Using the Arbitrary Waveform Generator By modulating the carrier to one of several predetermined positions in the I/Q plane, you can then transmit encoded information. Each position or state represents a certain bit pattern that can be decoded at the receiver.
- Page 410 Custom Digital Modulation (Option N5180431B) Using the Arbitrary Waveform Generator Figure 16-25 STAR QAM Diagram and Table Keysight CXG, EXG, and MXG X-Series Signal Generators User’s Guide...
- Page 411 Custom Digital Modulation (Option N5180431B) Using the Arbitrary Waveform Generator Figure 16-26 shows the X-Series setup and the I/Q display. Figure 16-26 Custom Modulation and I/Q Display Hints for Constructing Modulations — The map is limited to 16 total signal levels for I and Q combined. The readout on the right-hand side of the table tracks the number of I and Q levels utilized.
- Page 412 Custom Digital Modulation (Option N5180431B) Using the Arbitrary Waveform Generator Figure 16-28 16QAM I/Q Map with Even and Uneven Levels Keysight CXG, EXG, and MXG X-Series Signal Generators User’s Guide...
-
Page 413: Creating A Custom Multicarrier Digital Modulation State
Custom Digital Modulation (Option N5180431B) Using the Arbitrary Waveform Generator Creating a Custom Multicarrier Digital Modulation State In this procedure, you learn how to customize a predefined, multicarrier, digital modulation setup by creating a custom, 3–carrier EDGE, digital modulation state. This section teaches you how to perform the following tasks: —... - Page 414 Custom Digital Modulation (Option N5180431B) Using the Arbitrary Waveform Generator Creating a Multicarrier Digital Modulation Setup 1. Press Preset. 2. Press Mode > ARB Custom Modulation > Multicarrier Off On to On. 3. Press Multicarrier Setup > Select Carrier and Initialize Table > Carrier Setup > EDGE > Done. Modifying Carrier Frequency Offset 1.
-
Page 415: Storing A Custom Multicarrier Digital Modulation State
Custom Digital Modulation (Option N5180431B) Using the Arbitrary Waveform Generator Storing a Custom Multicarrier Digital Modulation State Using this procedure, you learn how to store a custom, multicarrier, digital modulation state to non–volatile memory. If you have not created a custom, multicarrier, digital modulation state, complete the steps in the previous section, “Creating a Custom Multicarrier Digital Modulation State”... -
Page 416: Using Finite Impulse Response (Fir) Filters With Custom Modulation
Custom Digital Modulation (Option N5180431B) Using Finite Impulse Response (FIR) Filters with Custom Modulation Using Finite Impulse Response (FIR) Filters with Custom Modulation Finite Impulse Response filters can be used to refine the transitions between symbol decision points of the generated waveforms. Figure 16-31 Filter Menu Mode >... - Page 417 Custom Digital Modulation (Option N5180431B) Using Finite Impulse Response (FIR) Filters with Custom Modulation The NADC and TETRA standards specify an alpha of 0.35. PDC and PHS standards specify an alpha of 0.50. For each of these standards, the Keysight X-Series signal generator provides a root Nyquist filter with the designated alphas as the default premodulation filter.
-
Page 418: Creating A User-Defined Fir Filter Using The Fir Table Editor
Custom Digital Modulation (Option N5180431B) Using Finite Impulse Response (FIR) Filters with Custom Modulation To change the filter Bbt, press Mode > Real-Time Custom Modulation > Modulation Setup > Filter > Select Gaussian > Filter Bbt. Enter a new value between 0.1 and 1. Creating a User–Defined FIR Filter Using the FIR Table Editor In this procedure, you use the FIR Values table editor to create and store an 8–symbol, windowed sync function filter with an oversample ratio of 4. - Page 419 Custom Digital Modulation (Option N5180431B) Using Finite Impulse Response (FIR) Filters with Custom Modulation 3. Use the numeric keypad to type the first value (−0.000076) from Table 16-1. As you press the numeric keys, the numbers are displayed in the active entry area. (If you make a mistake, you can correct it using the backspace key.) 4.
- Page 420 Custom Digital Modulation (Option N5180431B) Using Finite Impulse Response (FIR) Filters with Custom Modulation Duplicating the First 16 Coefficients Using Mirror Table In a windowed sinc function filter, the second half of the coefficients are identical to the first half in reverse order.
- Page 421 Custom Digital Modulation (Option N5180431B) Using Finite Impulse Response (FIR) Filters with Custom Modulation Figure 16-35 For details on each key, use key page 60 help as described on 2. Press Return. 3. Press Display Impulse Response. Refer to Figure 16-36. Figure 16-36 For details on each key, use key page 60...
- Page 422 Custom Digital Modulation (Option N5180431B) Using Finite Impulse Response (FIR) Filters with Custom Modulation Figure 16-37 These keys manage the table of DMOD files in internal storage. Catalog displays FIR files that have page 60 For details on each key, use key help as described on been previously saved by the user.
-
Page 423: Modifying A Fir Filter Using The Fir Table Editor
Custom Digital Modulation (Option N5180431B) Modifying a FIR Filter Using the FIR Table Editor Modifying a FIR Filter Using the FIR Table Editor FIR filters stored in signal generator memory can easily be modified using the FIR table editor. You can load the FIR table editor with coefficient values from user–defined FIR files stored in non–... -
Page 424: Modifying The Coefficients
Custom Digital Modulation (Option N5180431B) Modifying a FIR Filter Using the FIR Table Editor 5. Press Filter Symbols > 8 > Enter. 6. Press Generate. The actual oversample ratio during modulation is automatically selected by the instrument. A value between 4 and 16 is chosen dependent on the symbol rate, the number of bits per symbol of the modulation type, and the number of symbols. -
Page 425: Storing The Filter To Memory
Custom Digital Modulation (Option N5180431B) Modifying a FIR Filter Using the FIR Table Editor 5. Highlight coefficient 15. 6. Press 1 > Enter. Storing the Filter to Memory The maximum file name length is 23 characters (alphanumeric and special characters). 1. -
Page 426: Differential Encoding
Custom Digital Modulation (Option N5180431B) Differential Encoding Differential Encoding Differential encoding is a digital–encoding technique whereby a binary value is denoted by a signal change rather than a particular signal state. Using differential encoding, binary data in any user– defined I/Q or FSK modulation can be encoded during the modulation process via symbol table offsets defined in the Differential State Map. - Page 427 Custom Digital Modulation (Option N5180431B) Differential Encoding Entering a value of +1 will cause a 1–state forward transition through the I/Q State Map, as shown in the following illustration. The following I/Q State Map illustrations show all of the possible state transitions using a particular symbol table offset value.
- Page 428 Custom Digital Modulation (Option N5180431B) Differential Encoding These symbol table offsets will result in one of the transitions, as shown. Data Value 00000001 Data Value 00000000 with Symbol Table Offset –1 with Symbol Table Offset +1 transition 1 state backward transition 1 state forward Data Value 00000010 Data Value 00000011...
-
Page 429: Using Differential Encoding
Custom Digital Modulation (Option N5180431B) Differential Encoding When applied to the user–defined default 4QAM I/Q map, starting from the 1st symbol (data 00), the differential encoding transitions for the data stream (in 2–bit symbols) 0011100001 appear in the following illustration. 1st Symbol 5th Symbol 3rd Symbol... - Page 430 Custom Digital Modulation (Option N5180431B) Differential Encoding Press Mode > ARB Custom Modulation > Single Carrier Setup > Quick Setup (desired format) > Modulation Type > Select > More > Define User I/Q > More 1 of 2 > Load Default I/Q Map > QAM >...
- Page 431 Custom Digital Modulation (Option N5180431B) Differential Encoding This encodes the first symbol by adding a symbol table offset of 1. The symbol rotates forward through the state map by 1 value when a data value of 0 is modulated. 2. Press +/– > 1 > Enter. This encodes the second symbol by adding a symbol table offset of 1.
- Page 432 Custom Digital Modulation (Option N5180431B) Differential Encoding Keysight CXG, EXG, and MXG X-Series Signal Generators User’s Guide...
-
Page 433: Multitone And Two-Tone Waveforms (Option N5180430B)
Keysight Technologies X-Series Signal Generators User’s Guide 17 Multitone and Two-Tone Waveforms (Option N5180430B) With firmware version B.01.75 or later, option numbers for software internal to the instrument “Enabling an Option” on page 55 have changed. For more information, see Before using this information, you should be familiar with the basic operation of the signal generator. -
Page 434: Creating A Custom Two-Tone Waveform
Multitone and Two-Tone Waveforms (Option N5180430B) Creating a Custom Two–Tone Waveform Creating a Custom Two–Tone Waveform Using the Two-Tone menu, you can define, and modify user–defined Two–Tone waveforms. Two– Tone waveforms are generated by the dual arbitrary waveform generator. The section Using Two–Tone Modulation on page 435 teaches you how to perform the following tasks:... -
Page 435: Using Two-Tone Modulation
Multitone and Two-Tone Waveforms (Option N5180430B) Using Two–Tone Modulation Using Two–Tone Modulation In the following sections, this chapter describes the two–tone mode, which is available only in Keysight X-Series vector signal generators with Option N5180430B: — Creating a Two–Tone Waveform on page 436 —... -
Page 436: Creating A Two-Tone Waveform
Multitone and Two-Tone Waveforms (Option N5180430B) Using Two–Tone Modulation Creating a Two–Tone Waveform This procedure describes how to create a basic, centered, two–tone waveform. 1. Preset the signal generator. 2. Set the signal generator RF output frequency to 6 GHz. 3. -
Page 437: Minimizing Carrier Feedthrough
Multitone and Two-Tone Waveforms (Option N5180430B) Using Two–Tone Modulation 7. Set the attenuation to 4 dB, so you’re not overdriving the input mixer on the spectrum analyzer. You should now see a two–tone waveform with a 6 GHz center carrier frequency that is similar to the one shown in Figure 17-2 on page 437. -
Page 438: Changing The Alignment Of A Two-Tone Waveform
Multitone and Two-Tone Waveforms (Option N5180430B) Using Two–Tone Modulation 5. Repeat steps 3 and 4 until you have reached the lowest possible carrier feedthrough level. 6. On the spectrum analyzer, return the resolution bandwidth to its previous setting. 7. Turn on waveform averaging. 8. - Page 439 Multitone and Two-Tone Waveforms (Option N5180430B) Using Two–Tone Modulation Whenever a change is made to a setting while the two–tone generator is operating (Two Tone Off On set to On), you must apply the change by pressing the Apply Settings softkey before the updated waveform will be generated.
-
Page 440: Using Multitone Modulation
Multitone and Two-Tone Waveforms (Option N5180430B) Using Multitone Modulation Using Multitone Modulation Multitone Modulation Softkeys This softkey is active if changes have been made to the current Multitone waveform in the table editor. The softkey must be pressed to apply those changes. page 440 page 441 page 442... -
Page 441: Configuring Tone Powers And Tone Phases
Multitone and Two-Tone Waveforms (Option N5180430B) Using Multitone Modulation Figure 17-5 The Random Seed softkey that affects the Multitone’s phase values is not used in the following examples and is shown for reference, only. page 60 For details on each key, use key help as described on 5. -
Page 442: Configuring The Rf Output
Multitone and Two-Tone Waveforms (Option N5180430B) Using Multitone Modulation Configuring the RF Output 1. Set the RF output frequency to 100 MHz. 2. Set the output amplitude to 0 dBm. 3. Press RF On/Off. The multitone waveform is now available at the signal generator’s RF OUTPUT connector. Applying Changes to an Active Multitone Signal If the multitone generator is currently in use (Multitone Off On set to On) while changes are made in the Multitone Setup table editor, you must apply the changes before the updated waveform... - Page 443 Multitone and Two-Tone Waveforms (Option N5180430B) Using Multitone Modulation Recalling a Multitone Waveform Using this procedure, you learn how to recall a multitone waveform from the signal generator’s memory catalog. If you have not created and stored a multitone waveform, complete the steps in the previous sections, Creating a Custom Multitone Waveform on page 434 and...
- Page 444 Multitone and Two-Tone Waveforms (Option N5180430B) Using Multitone Modulation Keysight CXG, EXG, and MXG X-Series Signal Generators User’s Guide...
-
Page 445: Troubleshooting
—Pressing Preset Performs a User Preset — Error Messages on page 453 — Front Panel Tests on page 454 — Self Test Overview on page 454 — Licenses on page 456 — Contacting Keysight Technologies on page 457 —Returning a Signal Generator to Keysight... -
Page 446: Display
Troubleshooting Display Display The Display is Too Dark to Read Brightness may be set to minimum. Use the figure in “Display Settings” on page 45 to locate the brightness softkey and adjust the value so that you can see the display. The Display Turns Black when Using USB Media Removing the USB media when the instrument begins to use it can cause the screen to go black. -
Page 447: Rf Output
If the power supply does not work, it requires repair or replacement. If you are unable to service the instrument, send the signal generator to an Keysight service center for repair (see “Contacting Keysight Technologies” on page 457). No Modulation at the RF Output Check both the Mod On/Off LED and the <modulation>... -
Page 448: Signal Loss While Working With A Spectrum Analyzer
Troubleshooting RF Output Signal Loss While Working with a Spectrum Analyzer To avoid damaging or degrading the performance of the signal generator, do not exceed 33 dBm (2W) of reverse power levels at the RF maximum input. See also Tips for Preventing Signal Generator Damage www.keysight.com The effects of reverse power can cause problems with the RF output when you use the signal generator with a spectrum analyzer that does not have preselection. -
Page 449: Signal Loss While Working With A Mixer
Troubleshooting RF Output Signal Loss While Working with a Mixer To avoid damaging or degrading the performance of the signal generator, do not exceed 33 dBm (2W) of reverse power levels at the RF maximum input. See also Tips for Preventing Signal Generator Damage www.keysight.com To fix signal loss at the signal generator’s RF output during low–amplitude coupled operation with a mixer, add attenuation and increase the RF output amplitude. - Page 450 Troubleshooting RF Output The solution at right shows a similar configuration with the Reverse Power Solution addition of a 10 dB attenuator connected between the RF output Signal Generator Output Control of the signal generator and the input of the mixer. The signal ALC Level/ Output Mixer...
-
Page 451: Sweep
Troubleshooting Sweep Sweep Cannot Turn Off Sweep Press Sweep > Sweep > Off. Sweep Appears Stalled The current status of the sweep is indicated as a shaded rectangle in the progress bar (see “Configuring a Swept Output” on page 66). If the sweep appears to stall, check the following: 1. -
Page 452: Amplitude Does Not Change In List Or Step Sweep
Troubleshooting Internal Media Data Storage Amplitude Does Not Change in List or Step Sweep Verify that sweep type is set to amplitude (Amptd); the amplitude does not change when the sweep type is set to frequency (Freq) or waveform. Internal Media Data Storage Instrument State Saved but the Register is Empty or Contains the Wrong State If the register number you intended to use is empty or contains the wrong instrument state, recall... -
Page 453: Error Messages
Troubleshooting Error Messages Error Messages Error Message Types Events do not generate more than one type of error. For example, an event that generates a query error does not generate a device–specific, execution, or command error. Query Errors (–499 to –400) indicate that the instrument’s output queue control has detected a problem with the message exchange protocol described in IEEE 488.2, Chapter 6. -
Page 454: Front Panel Tests
Troubleshooting Front Panel Tests Front Panel Tests Set all display pixels to the selected color. To return to normal operation, press any key. Blink RF On/Off, Mod on/Off, and More LEDs Displays a keyboard map. As you press a key, the map indicates the key location. - Page 455 Troubleshooting Self Test Overview Utility > Instrument Info Automatically runs diagnostic self test. Self Test Summary displays current status. Opens a table in which user selects specific tests and view details in Test Editor display. Displays detailed information of highlighted page 60 test.
-
Page 456: Licenses
Troubleshooting Licenses Licenses A Time–Based License Quits Working — The instrument’s time or date may have been reset forward causing the time–based license to expire. — The instrument’s time or date may have been reset backward more than approximately 25 hours, causing the instrument to ignore time–based licenses. -
Page 457: Contacting Keysight Technologies
Returning a Signal Generator to Keysight Use the following steps to return a signal generator to Keysight Technologies for servicing: 1. Gather as much information as possible regarding the signal generator’s problem. 2. Call the phone number listed on the Internet (http://www.keysight.com/find/assist) that is specific to your geographic location. - Page 458 Troubleshooting Contacting Keysight Technologies Keysight CXG, EXG, and MXG X-Series Signal Generators User’s Guide...
- Page 459 Keysight Technologies X-Series Signal Generators User’s Guide Working in a Secure Environment If you are using the instrument in a secure environment, you may need details of how to clear or sanitize its memory, in compliance with published security standards of the United States Department of Defense, or other similar authorities.
- Page 460 Working in a Secure Environment Using Secure Display (Option 006) Using Secure Display (Option 006) This function prevents unauthorized personnel from reading the instrument display or tampering with the current configuration via the front panel. When Secure Display is active, the display is blank, except for an advisory message, as shown in Figure 19-1 below.
- Page 461 Working in a Secure Environment Using Restricted Display Using Restricted Display While in restricted display mode, all frequency information is hidden and the front panel frequency control is disabled. To set Restricted Display, perform the following key presses: Utility > Display > More > Activate Restricted Display > Confirm Restricted Display. Once Restricted Display has been activated, an instrument preset or power cycle is required to re-enable the front panel frequency control.
- Page 462 Working in a Secure Environment Using Restricted Display Keysight CXG, EXG, and MXG X-Series Signal Generators User’s Guide...
- Page 463 Glossary Active Entry The currently selected, and therefore editable, entry or parameter ARB Arbitrary waveform generator Avionics Avionics is a term used to describe the electronic instrumentation on aircraft. AWG Arbitrary waveform generator. Additive white Gaussian noise BBG Media Baseband generator media. Volatile memory, where waveform files are played or edited.
- Page 464 Gaussian filter The Gaussian filter does not have a zero Inter-Symbol Interference (ISI). Wireless system architects must decide just how much of the ISI can be tolerated in a system and combine that with noise and interference. The Gaussian filter is Gaussian shaped in both the time and frequency domains, and it does not ring like the root Nyquist filters do.
- Page 465 Nyquist filter Also referred to as a cosine filter. These filters have the property that their impulse response rings at the symbol rate. Adjacent symbols do not interfere with each other at the symbol times because the response equals zero at all symbol times except the center (desired) one. Persistent That which is unaffected by preset, user preset, or power cycle.
- Page 466 User FIR Selects a user-defined set of coefficient values. Each line in the FIR values table contains one coefficient value. The number of coefficient values listed must be a multiple of the selected oversampling ratio. Each coefficient applies to both I and Q components. Volatile That which does not survive a power cycle (such as files stored in BBG media).
- Page 467 Index Symbols analog modulation configuring AC power receptacle angle, quadrature ΦM annunciators annunciator Activate Secure Display APCO 25 w/C4FM softkey dc offset, removing softkey hardkey active APCO 25 w/CQPSK softkeys entry softkey # points softkey entry area apodization settings, FIR # Skipped Points softkey Active High softkey filter...
- Page 468 Index Avionics Softkey Menus resynchronization Catalog Type softkey system Avionics VOR/ILS system delay catalog, state files AWGN trigger setup adding CDPD softkey annunciator BERT definition Option N5180UN7B dual ARB player Binary softkey ceiling function, bits per softkeys bit file editor, using symbol AWGN softkeys bits per symbol, equation...
- Page 469 Index Step Sweep Custom ARB softkeys multiple BBG sync Confirm Load From File Delete softkeys softkey custom arb waveform All Regs in Seq Connection Monitoring generator All Segments On Int softkey custom mode Media Connection Type softkeys custom modulation All Segments On USB Sockets adding to a waveform Media...
- Page 470 Index digital signal interface module Dynamic Hostname Services locking a slot N5102A softkey examples digital signal to analog FIR filters waveform creating discrete steps, skew range modifying display E4428C, E4438C softkey LF output, configuring blanking E442xB, E443xB softkey Execute Cal softkey error message area E8241A, E8244A, E8251A, EXT CLOCK connector...
- Page 471 Index catalog. See data storage flat bandwidth gated triggering extensions flatness correction. See user Gaussian working with flatness correction definition filter Flatness softkey gaussian filter, loading equalization default real-time modulation annunciator Gaussian. See AWGN softkey location dc offset, removing glossary external source Go To Default Path softkey user, equalization...
- Page 472 Index GPIB blink test ILS Glide Slope 334.70 MHz w/ front panel 90 Hz AM (Up), 150 Hz AM internal modulation (Down) @ 40% reference oscillator, using leveling ILS Glide Slope Softkey Internal Baseband Adjustments external Menus softkey turn off ALC ILS Localizer 108.10 MHz w/ internal clock source LF Out...
- Page 473 Index Segment From USB Mode key multicarrier, Default softkey. Media mode, modulation See quick setup, Default Store modes of operation softkey, settings Sweep List Modulated softkey multiplier, using Load/Store softkey modulation multitone Local hardkey multitone mode lock up, troubleshooting analog Multitone softkeys logarithmic sweep configuring...
- Page 474 Index No Retrigger softkey enabling Calibrate Sensor noise resource Zero Sensor noise bandwidth factor PM Config softkeys Noise Bandwidth softkey Connection Type Noise Mux softkeys PM VXI-11 Device Name Noise softkey Options 250-259 Power Meter IP Address non-harmonics Options Info softkey Power Meter IP Port non-volatile memory oscillator, external...
- Page 475 Index troubleshooting real-time Ref Oscillator Tune key using AWGN reference oscillator tune, Preset softkeys softkeys internal Language reference oscillator, List external I/Q Baseband AWGN Preset reference, using softkeys Prev REG softkey references, content of modulation filter Prev SEQ softkey regrowth, spectral modulation filter, setting Proceed With Reconfiguration remote interface, emulate HP...
- Page 476 Index Rohde & Schwarz softkey security clock timing Security softkey range roort Segment Advance softkey skew, I/Q root cosine filter. See root segment advance Sockets SCPI softkey nyquist filter triggering sockets, enabling root mean square segments Softkeys Root Nyquist Filter advance triggering softkeys definition...
- Page 477 Index mode multiple BBG sync Only Internal Storage out connector Trigger setup softkeys Only USB Media out signal Trigger softkeys user softkeys & Run documentation content step Doublet files, backup and restore troubleshooting flatness correction waveform, including Out Polarity preset SWEEP hardkey Source preset, troubleshooting...
- Page 478 Index Waveform license, Opt 25x adding a waveform backup warning file missing warning license status messages licensing, installing licensing, understanding licensing, warning messages lock warning replacing a waveform status messages using waveform licensing softkeys Waveform softkeys Licenses Runtime Scaling Segments Sequences Utilities Waveform...
- Page 479 This information is subject to change without notice. © Keysight Technologies 2012-2019 Edition 1, November 2019 N5180-90056 www.keysight.com Distributed by: Sie haben Fragen oder wünschen eine Beratung? Angebotsanfrage unter 07121 / 51 50 50 oder über info@datatec.de...
Need help?
Do you have a question about the N5166B CXG and is the answer not in the manual?
Questions and answers