Keysight Technologies X Series Security Features And Document Of Volatility
Hide thumbs
Also See for X Series:
- Service manual (671 pages) ,
- User manual (502 pages) ,
- Measurement manual (83 pages)
Table of Contents
Advertisement
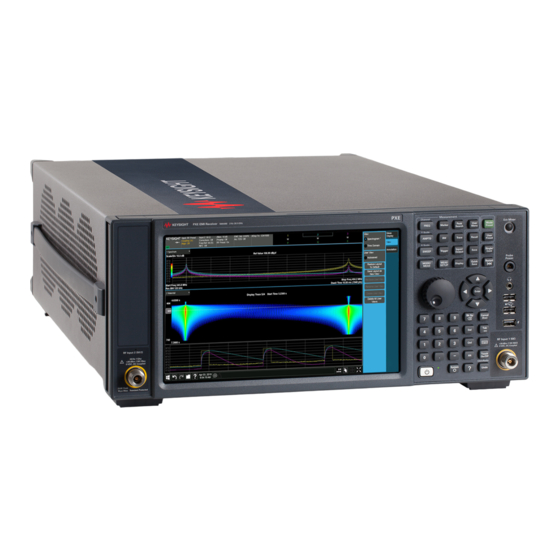
Keysight X-Series
Signal Analyzers
This manual provides documentation for the
following analyzers:
PXE EMI Receiver N9048B
UXA Signal Analyzer N9040B/N9041B
PXA Signal Analyzer N9030B
MXA Signal Analyzer N9020B
EXA Signal Analyzer N9010B
CXA Signal Analyzer N9000B
NFA Noise Figure Analyzer N8973B-N8976B
Security
Features and
Document of
Volatility
Advertisement
Table of Contents

Related Manuals for Keysight Technologies X Series


Summary of Contents for Keysight Technologies X Series
- Page 1 Keysight X-Series Signal Analyzers This manual provides documentation for the following analyzers: PXE EMI Receiver N9048B UXA Signal Analyzer N9040B/N9041B PXA Signal Analyzer N9030B MXA Signal Analyzer N9020B EXA Signal Analyzer N9010B CXA Signal Analyzer N9000B NFA Noise Figure Analyzer N8973B-N8976B Security Features and Document of...
- Page 2 AND IS modify, distribute, or disclose the SUBJECT TO BEING CHANGED WITHOUT Software. The EULA and the license © Keysight Technologies, 2014-2020 NOTICE IN FUTURE EDITIONS URTHER set forth therein, does not require or No part of this manual may be...
- Page 3 Where to Find the Latest Information Documentation is updated periodically. For the latest information about these products, including instrument software upgrades, application information, and product information, see the following URLs: http://www.keysight.com/find/pxe http://www.keysight.com/find/uxa http://www.keysight.com/find/pxa http://www.keysight.com/find/mxa http://www.keysight.com/find/exa http://www.keysight.com/find/cxa http://www.keysight.com/find/nfa To receive the latest updates by email, subscribe to Keysight Email Updates: http://www.keysight.com/find/emailupdates Information on preventing instrument damage can be found at: http://www.keysight.com/find/PreventingInstrumentDamage...
-
Page 4: Table Of Contents
Security Features and Document of Volatility Contents Table of Contents 1 Contacting Keysight Sales and Service Offices 2 Products Covered by this Document Determining Installed Options & Processor Assembly Type Determining Instrument Software Revision 3 Security Terms and Definitions 4 Instrument Memory & Volatility Non-Volatile Memory Disk Drive Partitioning Volatile Memory... - Page 5 Contents 9 Procedure for Declassifying a Faulty Instrument 10 Special Options Option SF1 Menu & Command Changes File Menu System Menu SCPI Commands Option SF2 Operating System Changes Menu & Command Changes Front-panel Keys File Menu Preset Menu System Menu Disabled SCPI Commands Appendix A References...
-
Page 6: Contacting Keysight Sales And Service Offices
Security Features and Document of Volatility Contacting Keysight Sales and Service Offices Contacting Keysight Sales and Service Offices Assistance with test and measurement needs, and information to help you find a local Keysight office, is available via the internet at, http://www.keysight.com/find/assist. -
Page 7: Products Covered By This Document
Be sure that all information stored by the user in the instrument that needs to be saved is properly backed up before attempting to clear any of the instrument memory. Keysight Technologies cannot be held responsible for any lost files or data resulting from the clearing of memory. -
Page 8: Determining Installed Options & Processor Assembly Type
Products Covered by this Document Determining Installed Options & Processor Assembly Type Determining Installed Options & Processor Assembly Type To determine your instrument’s installed options and processor assembly type: 1. Press the System hardkey on the front panel, or tap the gear icon in the user interface. -
Page 9: Determining Instrument Software Revision
Products Covered by this Document Determining Instrument Software Revision Determining Instrument Software Revision 1. On the instrument front panel, press System > Show > System. 2. The display appears, as shown in Figure 2-1 below. Look for the Show System Software Revision number specified in the entry. -
Page 10: Security Terms And Definitions
Security Features and Document of Volatility Security Terms and Definitions Security Terms and Definitions Term Definition Clearing As defined in Section 5 of NIST SP 800-88, Revision 1, Guidelines for Media Sanitization, Clearing is a sanitization method by which classified information in user-addressable storage space on the media is overwritten with non-sensitive data, using the standard read and write commands for the device. -
Page 11: Instrument Memory & Volatility
Security Features and Document of Volatility Instrument Memory & Volatility Instrument Memory & Volatility This chapter summarizes all memory types in the instrument. The descriptions are divided between: Non-Volatile Memory, Volatile Memory. -
Page 12: Non-Volatile Memory
Instrument Memory & Volatility Non-Volatile Memory Non-Volatile Memory This section contains information on the memory components available in your instrument. The table provides details of the size of each memory component, its type, how it is used, its location, volatility, and the sanitization procedure. N O T E The instrument contains no user-accessible non-volatile memory, except for the Disk Drive described in Item 17 of... - Page 13 Instrument Memory & Volatility Non-Volatile Memory Table 4-1 Summary of Non-Volatile instrument memory Memory Purpose/Contents Data Input Method Location in Sanitization Component, Instrument and Procedure Type and Size Remarks 5. Config Memory Contains measurement Programmed A3 Digital IF None and control software, before installation.
- Page 14 Instrument Memory & Volatility Non-Volatile Memory Table 4-1 Summary of Non-Volatile instrument memory Memory Purpose/Contents Data Input Method Location in Sanitization Component, Instrument and Procedure Type and Size Remarks 12. COMe Defines PCIe, SATA, USB, Programmed A4 Processor None EEPROM DisplayPort, VGA, LAN, before installation Assy...
- Page 15 Instrument Memory & Volatility Non-Volatile Memory Table 4-1 Summary of Non-Volatile instrument memory Memory Purpose/Contents Data Input Method Location in Sanitization Component, Instrument and Procedure Type and Size Remarks 18. Disk Drive Contains Operating Programmed A5 Disk Drive Table 5-1 System, Instrument before installation Assy...
- Page 16 Instrument Memory & Volatility Non-Volatile Memory Table 4-1 Summary of Non-Volatile instrument memory Memory Purpose/Contents Data Input Method Location in Sanitization Component, Instrument and Procedure Type and Size Remarks 24. Config Contains measurement Programmed A14 Synthesizer None Memory and control software, before installation.
- Page 17 Instrument Memory & Volatility Non-Volatile Memory Table 4-1 Summary of Non-Volatile instrument memory Memory Purpose/Contents Data Input Method Location in Sanitization Component, Instrument and Procedure Type and Size Remarks 31. Digital Contains default data to Programmed A16 Reference None Potentiometer preset digital before installation.
- Page 18 Instrument Memory & Volatility Non-Volatile Memory Table 4-1 Summary of Non-Volatile instrument memory Memory Purpose/Contents Data Input Method Location in Sanitization Component, Instrument and Procedure Type and Size Remarks 39. PSoCMD Contains configuration Programmed A21 WBIF Assy None configuration for PSoCMD processor before installation Contains no memory...
-
Page 19: Disk Drive Partitioning
Instrument Memory & Volatility Non-Volatile Memory Disk Drive Partitioning The instrument’s disk drive is divided at the factory into three visible partitions, labeled C:, D: and E:, plus a fourth hidden partition. Details of the functions of all partitions are provided in Table 4-2 below. -
Page 20: Volatile Memory
Instrument Memory & Volatility Volatile Memory Volatile Memory The volatile memory in the instrument does not have battery backup. It does not retain any information when AC power is removed. Removing power from this memory meets the memory sanitization requirements specified in the “Media Sanitization Matrix” in Appendix T of the Defense Security Service (DSS) Assessment and Authorization Process Manual (DAAPM). - Page 21 Instrument Memory & Volatility Volatile Memory Table 4-3 Summary of Volatile Instrument Memory Memory Type Purpose/Contents Data Input Method Location in Sanitization and Size Instrument and Procedure Remarks 5. SDRAM Contains measurement Programmed by A23 Digital IF Turn off data from data firmware.
-
Page 22: Memory Sanitization And Removal Procedures
Security Features and Document of Volatility Memory Sanitization and Removal Procedures Memory Sanitization and Removal Procedures This section explains how to clear, sanitize, and remove memory from your instrument, for all types of non-volatile memory that can be written to during normal instrument operation. - Page 23 Memory Sanitization and Removal Procedures Table 5-2 EEPROM Memories Memory Not applicable. This memory does not contain user information and is not accessible by the user. sanitization Memory removal Not applicable. Write protecting Not applicable. Memory Not applicable. validation Remarks With one exception, as described below, these memories are only writable by factory/service center software, or upgrade installation software.
-
Page 24: Instrument Sanitization Procedures
Memory Sanitization and Removal Procedures Instrument Sanitization Procedures Instrument Sanitization Procedures This section includes flowcharts that describe how to sanitize an instrument by physical removal and replacement of the Disk Drive. Application License Key Storage Note that License keys for all Applications are stored in EEPROM on the A7 Midplane Assembly (as described in Item 18 of Table 4-1 on page 12). - Page 25 Memory Sanitization and Removal Procedures Instrument Sanitization Procedures Step Task Power up the instrument and verify the Instrument Software Revision. For instructions on how to verify the currently installed Instrument Software Revision, “Is your product software up-to-date?” on page Write down the software revision. If the instrument’s software is not the latest version, update the instrument software to the latest version available.
- Page 26 Memory Sanitization and Removal Procedures Instrument Sanitization Procedures Step Task Make a note of the current software version, because the instrument’s software may have been updated inside the secure area. To determine this, press System, Show System, and write down the Instrument Software Revision. Attach this note to the instrument.
-
Page 27: Replacement Of Disk Drive (Instruments With Pc6S Or Pc7S)
Memory Sanitization and Removal Procedures Instrument Sanitization Procedures Step Task Restore calibration file (Step 27) from read-only media to instrument. Done. Go to Step 15. Replacement of Disk Drive (Instruments with PC6S or PC7S) IMPORTANT Ensure that the instrument software revision on the secondary non-classified disk drive matches that of the classified drive in the controlled area. - Page 28 Memory Sanitization and Removal Procedures Instrument Sanitization Procedures Step Task If software update was performed in step 3, back up (archive) the instrument factory calibration data to internal Flash memory. For details of the procedure, see “Archiving and Restoring Factory Calibration Data Files”...
- Page 29 Memory Sanitization and Removal Procedures Instrument Sanitization Procedures Step Task Install secondary non-classified Disk Drive #2, which was previously prepared in Step 23. When the instrument has booted up, press System, Show System, and confirm that the Instrument Software Revision is the same as noted in Step 16. If not, upgrade the instrument software to the same version as recorded in Step 16.
- Page 30 Memory Sanitization and Removal Procedures Instrument Sanitization Procedures Step Task A further dialog appears, as shown in Figure 5-2 below, asking you to confirm that you want to overwrite the current calibration data (presently on the Disk Drive) with the backup data stored in the internal Flash memory.
-
Page 31: Archiving And Restoring Factory Calibration Data Files
Memory Sanitization and Removal Procedures Archiving and Restoring Factory Calibration Data Files Archiving and Restoring Factory Calibration Data Files This section describes how to archive ("back up") the instrument’s factory calibration data to an external USB memory device, or restore the calibration data from an external memory device. -
Page 32: Backup Operation
Memory Sanitization and Removal Procedures Archiving and Restoring Factory Calibration Data Files Figure 5-3 Alignment Data Wizard Dialog Click Next to proceed. 8. The next screen allows you to select either Backup or Restore. — To complete a Backup operation, follow the instructions in “Backup Operation”... - Page 33 Memory Sanitization and Removal Procedures Archiving and Restoring Factory Calibration Data Files Figure 5-4 Selecting Backup Operation 2. The content of the next screen displayed depends on the Processor Assembly type. To determine your instrument’s Processor Assembly type, see “Determining Installed Options &...
- Page 34 Memory Sanitization and Removal Procedures Archiving and Restoring Factory Calibration Data Files Figure 5-5 Alignment Data Wizard Storage Options for PC6S/PC7S The available storage location options are as follows: — Internal Flash is the Calibration Backup memory in the A4 Processor assembly.
-
Page 35: Restore Operation
Memory Sanitization and Removal Procedures Archiving and Restoring Factory Calibration Data Files Figure 5-6 Alignment Data Wizard Storage Options for PC6/PC7 3. Select the desired storage location, then click Next and follow the wizard’s on-screen instructions to back up the calibration data to the external USB Memory Device or Flash Memory. - Page 36 Memory Sanitization and Removal Procedures Archiving and Restoring Factory Calibration Data Files Figure 5-7 Selecting Restore Operation 2. If the instrument has a PC6S or PC7S Processor Assembly, then you can choose to perform a Restore operation from Internal Flash Memory. Select that option as shown Figure 5-8.
- Page 37 Memory Sanitization and Removal Procedures Archiving and Restoring Factory Calibration Data Files Figure 5-8 Restore Operation from Internal Flash (PC6S/PC7S only) Alternatively, you can perform a Restore from an External Removable Drive. If the instrument has a PC6 or PC7 Processor Assembly, then this is the only available option.
- Page 38 Memory Sanitization and Removal Procedures Archiving and Restoring Factory Calibration Data Files Figure 5-9 Restore Operation from External Removable Drive (PC6/PC7 or PC6S/PC7S) 3. Select the desired storage location, then click Next and follow the wizard’s on-screen instructions to restore the calibration data from the external USB Memory Device or Flash Memory.
-
Page 39: Disk Drive Removal Procedure
Security Features and Document of Volatility Disk Drive Removal Procedure Disk Drive Removal Procedure This chapter describes the procedures for physical removal of the instrument’s disk drive. T I P Application License keys are stored in EEPROM on the A7 Midplane Assembly (as described in Item 18 of Table 4-1 on page 12). - Page 40 Disk Drive Removal Procedure 1. Locate the Processor and Disk Drive Assembly on the instrument’s rear panel, as shown in Figure 6-1. 2. Locate the removable drive, and its retaining thumbscrew, as shown in Figure 6-1. Figure 6-1 Instrument Rear Panel & Processor Assembly 3.
- Page 41 Disk Drive Removal Procedure Figure 6-2 Removable Disk Drive Unit fully extracted 4. Pull the U-shaped handle attached to the drive unit, to remove the drive from the Processor Assembly, as shown in Figure 6-2. Security Features & Document of Volatility...
-
Page 42: Sd Memory Card Removal Procedure
Security Features and Document of Volatility SD Memory Card Removal Procedure SD Memory Card Removal Procedure When present, the SD Memory Card is located on the A4 Processor assembly. However, it can only be accessed after the instrument’s disk drive is removed. To remove the SD Memory Card: 1. - Page 43 SD Memory Card Removal Procedure Figure 7-1 Instrument Rear Panel, showing Removable Disk Drive Assembly and SD Memory Card 3. Reinstall the disk drive assembly. Removing the SD Memory Card does not interfere with normal operation of the instrument operating system or the instrument application software. Security Features &...
-
Page 44: User And Remote Interface Security Measures
Security Features and Document of Volatility User and Remote Interface Security Measures User and Remote Interface Security Measures This chapter discusses options that are available to you to control and configure user and remote access to the instrument, including: — SCPI/GPIB Control of Interfaces —... -
Page 45: Usb Interfaces
User and Remote Interface Security Measures USB Interfaces — To provide additional protection for instruments that have a network (or internet) connection, the standard Windows Firewall is enabled by default. — You can install standard third-party antivirus and spyware detection software designed for use with Windows. -
Page 46: Sd Memory Card
User and Remote Interface Security Measures SD Memory Card 2. To log off, click the Windows Start button, then select Shut down > Log off from the Windows Start menu, as shown in Figure 8-1 below. Figure 8-1 Windows Log off Control 3. -
Page 47: Procedure For Declassifying A Faulty Instrument
Security Features and Document of Volatility Procedure for Declassifying a Faulty Instrument Procedure for Declassifying a Faulty Instrument Even if the instrument is not able to power on, it may be declassified by: 1. Removing the disk drive from the instrument, using the appropriate procedure as described in “Disk Drive Removal Procedure”... -
Page 48: Special Options
Security Features and Document of Volatility Special Options Special Options You can install certain special options that provide security-related functionality. The following available options are described in this chapter. — “Option SF1” on page 49 — “Option SF2” on page 50 To determine which of these options, if any, are installed in your instrument, use the procedure described in “Determining Installed Options &... -
Page 49: Option Sf1
Special Options Option SF1 Option SF1 Option SF1 is a license key-enabled special option that addresses the requirements of security-conscious users. Installing Option SF1 in the instrument causes changes to available functionality in certain menus, and suppression of certain SCPI commands, to prevent the launching of Windows programs from the instrument application. -
Page 50: Option Sf2
Special Options Option SF2 Option SF2 Option SF2 is a license key-enabled special option that addresses the requirements of security-conscious users who need to be able to prevent the saving of measurement results or user configurations to the instrument’s disk drive while in the instrument application. -
Page 51: File Menu
Special Options Option SF2 — Save N O T E Save and Recall are often used with the N9069C Noise Figure Measurement Application to allow multiple noise sources to be used without the need to re-enter ENR values or to perform the noise source calibration each time a different noise source is connected. - Page 52 Special Options Option SF2 — :MMEMory:LOAD:AXConfig — :MMEMory:LOAD:CAPTured — :MMEMory:LOAD:CCORrection — :MMEMory:LOAD:CHTable — :MMEMory:LOAD:CORRection — :MMEMory:LOAD:CORRection:DDIRectory — :MMEMory:LOAD:CORRection:GROup — :MMEMory:LOAD:DLISt — :MMEMory:LOAD:DPD:REFerence:DATa — :MMEMory:LOAD:DPD:REFerence:SRATe? — :MMEMory:LOAD:DTRaces — :MMEMory:LOAD:ENR — :MMEMory:LOAD:EVMSetup — :MMEMory:LOAD:FMT — :MMEMory:LOAD:FREQuency — :MMEMory:LOAD:IQRef — :MMEMory:LOAD:LIMit — :MMEMory:LOAD:LIMit:DDIRectory —...
- Page 53 Special Options Option SF2 — :MMEMory:LOAD:STATe:VSA — :MMEMory:LOAD:T2Config — :MMEMory:LOAD:TMMConfig — :MMEMory:LOAD:TRACe — :MMEMory:LOAD:TRACe:DATA — :MMEMory:LOAD:TRACe:REGister — :MMEMory:LOAD:VSASetup — :MMEMory:LOAD:ZMAP — :MMEMory:MSIS — :MMEMory:NAME — :MMEMory:NFIGure:LOAD:ENR — :MMEMory:NFIGure:LOAD:FREQuency — :MMEMory:NFIGure:LOAD:LOSS — :MMEMory:NFIGure:STORe:ENR — :MMEMory:NFIGure:STORe:FREQuency — :MMEMory:NFIGure:STORe:LOSS — :MMEMory:REGister:STATe:LABel — :MMEMory:REGister:STATe:LABel:MAXimum? —...
- Page 54 Special Options Option SF2 — :MMEMory:RMEDia:LIST? — :MMEMory:RMEDia:SIZE? — :MMEMory:RMEDia:WPRotect? — :MMEMory:SELect[:ITEM]:ALL — :MMEMory:SELect[:ITEM]:DEFault — :MMEMory:SELect[:ITEM]:HWSettings — :MMEMory:SELect[:ITEM]:LINes:ALL — :MMEMory:SELect[:ITEM]:NONE — :MMEMory:SELect[:ITEM]:SCData — :MMEMory:SELect[:ITEM]:TRACe[:ACTive] — :MMEMory:SELect[:ITEM]:TRANsducer:ALL — :MMEMory:STORe:ALIMit — :MMEMory:STORe:ALISt — :MMEMory:STORe:ATRace — :MMEMory:STORe:AXConfig — :MMEMory:STORe:CAPTured — :MMEMory:STORe:CHTable — :MMEMory:STORe:CORRection —...
- Page 55 Special Options Option SF2 — :MMEMory:STORe:RECording — :MMEMory:STORe:RESults — :MMEMory:STORe:RESults:DATA — :MMEMory:STORe:RESults:MTABle — :MMEMory:STORe:RESults:PTABle — :MMEMory:STORe:RESults:SNGLS — :MMEMory:STORe:RESults:SPECtrogram — :MMEMory:STORe:RESults:TABLe:CUMulative — :MMEMory:STORe:RESults:TABLe:CURRent — :MMEMory:STORe:RESults:TABLe:PDW — :MMEMory:STORe:RESults:TABLe:PDW:FULL — :MMEMory:STORe:RESults:TABLe:PULSe — :MMEMory:STORe:RESults:TABLe:PULSe:FULL — :MMEMory:STORe:RESults:TABLe:VPDW — :MMEMory:STORe:RESults:TABLe:VPDW:FULL — :MMEMory:STORe:SCAN — :MMEMory:STORe:SCONfig — :MMEMory:STORe:SCReen —...
- Page 56 Special Options Option SF2 — :MMEMory:TRACe:OPERator:STATe — :MMEMory:TRACe:PDEScription — :MMEMory:TRACe:PDEScription:STATe — :MMEMory:TRACe:TITLe — :MMEMory:TRACe:TITLe:STATe SYSTem Subsystem — :SYSTem:PON:TYPE — :SYSTem:PRESet:SAVE — :SYSTem:PRESet:TYPE — :SYSTem:PRESet:USER — :SYSTem:PRESet:USER:ALL — :SYSTem:PRESet:USER:SAVE — :SYSTem:PRINt:THEMe Security Features & Document of Volatility...
-
Page 57: Appendix A References
NIST SP 800-88, Revision 1, Guidelines for Media Sanitization National Institute of Standards and Technology. December 17, 2014 May be downloaded in PDF format from: http://nvlpubs.nist.gov/nistpubs/SpecialPublications/NIST.SP.800-88r1.pdf Installation Note: Keysight X-Series Signal Analyzers Option SF2 Keysight Technologies 2018. Part Number: N9020-90234. May be downloaded from: http://literature.cdn.keysight.com/litweb/pdf/N9020-90234.pdf... - Page 58 This information is subject to change without notice. © Keysight Technologies 2014-2020 Edition 8, February 2020 N9040-90005 www.keysight.com...
Need help?
Do you have a question about the X Series and is the answer not in the manual?
Questions and answers