Table of Contents
Advertisement
Bioness Inc.
25103 Rye Canyon Loop
Valencia, CA 91355 USA
Telephone: 800.211.9136
Email: info@bioness.com
Website: www.bioness.com
Bioness Europe B.V.
Stationsweg 41
3331 LR Zwijndrecht, The Netherlands
Telephone: +31.78.625.6088
Email: international@nl.bioness.com
Website: www.bioness.com
Rx Only
2797
©2020 Bioness Inc.
602-00686-001 Rev. G
12/2020
Advertisement
Table of Contents

Related Manuals for Bioness BITS


Summary of Contents for Bioness BITS
- Page 1 Bioness Inc. 25103 Rye Canyon Loop Valencia, CA 91355 USA Telephone: 800.211.9136 Email: info@bioness.com Website: www.bioness.com Bioness Europe B.V. Stationsweg 41 3331 LR Zwijndrecht, The Netherlands Telephone: +31.78.625.6088 Email: international@nl.bioness.com Website: www.bioness.com Rx Only 2797 ©2020 Bioness Inc. 602-00686-001 Rev. G...
- Page 2 CLINICIAN'S GUIDE...
- Page 4 No part of this publication may be reproduced, transmitted, transcribed, stored in a retrieval system, or translated into any language or any computer language, in any form or by any third party, without the prior written permission of Bioness Inc.
- Page 5 List of Symbols Caution Warning Class II Equipment (Double Insulated) Type BF Applied Part(s) Non-Ionizing Radiation Date of Manufacture Manufacturer This Product Must Not Be Disposed of with Other Household Waste Refer to Instruction Manual/Booklet FCC ID: RYYEYSHSN Re-Order Number Lot Number Serial Number Warning Electricity...
-
Page 6: Table Of Contents
Turning the System On ........................9 Launching the Software .......................10 Log Out ............................11 Exit Program ..........................12 Windows Operating System ......................12 Chapter 4: Introduction to BITS Software Navigation ............15 Start Therapy .........................15 Client Directory ........................15 Reports ..........................15 System Settings ........................15 Help ............................15 Discipline Menu ...........................16... - Page 7 Sensor Settings ...........................22 Sensor Battery Level ........................22 Identify Active Sensor ........................22 Recent Sessions List ........................23 Chapter 5: Client Directory .......................25 Creating a New Client Record .....................25 Accessing an Existing Client Record ...................28 Updating an Existing Client Record .....................29 Custom Image Library and Custom Word List ................30 Adding Custom Images ......................30 Removing Custom Images ....................30 Adding Custom Words ......................31...
- Page 8 Bluetooth Icon ........................46 Chapter 7: BITS Parameters .....................47 Stimuli Parameters ........................47 Display Parameters ........................56 Balance Parameters ........................60 Chapter 8: Therapy Categories ....................63 Visual Scanning ...........................63 Visual Pursuit ..........................63 Cognitive ............................63 Visual Motor ..........................63 Charts ............................64 Static Balance ..........................64 Dynamic Balance .........................64 Optokinetic Static and Optokinetic Dynamic ................64...
- Page 9 Adjustable Pattern ........................73 Chapter 13: Cognitive Programs ....................75 Memory ............................75 Rhythm ............................75 Chapter 14: Geoboards and Drawing Programs ..............77 Geoboard .............................77 Symmetry Program ........................77 Trace Program ..........................77 Replicate Program ........................77 Between the Lines Program ......................77 Chapter 15: Charts Programs ....................79 Letter Charts Program Group ......................79 Static Program ........................79 Motion Program ........................79...
- Page 10 Chapter 18: Results ........................87 Chapter 19: Reports ........................91 Selecting a Client .........................91 Navigating in the Reports Module ....................92 Printing a Report ..........................94 Graphing ............................95 Change Variables ........................97 Add Session Labels .......................97 Graph Quadrant Results ......................97 Graph Area/Ring Results .......................98 Adjust the Date Range ......................98 Printing a Graph ..........................98 Graphable Result Variables .......................100 Single Target/Balance Reaction Program Group ..............100...
- Page 11 Chapter 22: Maintenance and Cleaning ................121 Maintenance ..........................121 Cleaning ............................121 Touchscreen Display Monitor ....................121 BITS Bedside & Mobile ......................122 Cleaning the BITS Bedside & Mobile Hardware ..............122 Sensor ..........................122 Straps ..........................122 Chapter 23: Technical Specifications ..................123 55" Display Technical Specifications ..................123 Motion Sensor Technical Specifications ..................124...
-
Page 12: Chapter 1: Introduction
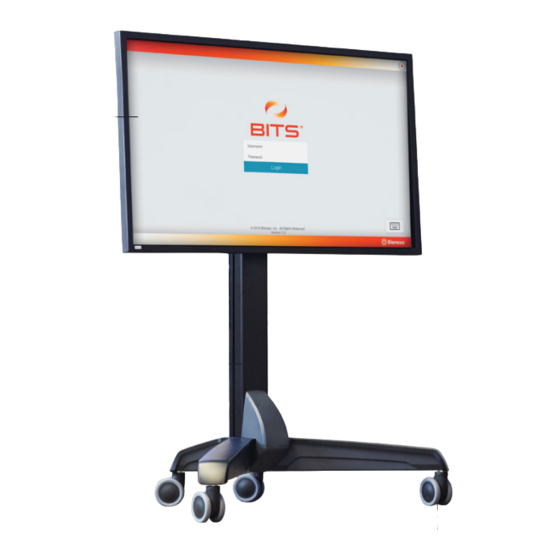
Chapter Introduction The Bioness Integrated Therapy System (BITS) is a hardware and software platform using touchscreen technology that allows for patient interaction with different software therapy and assessment programs. BITS is intended to challenge and assess vision, motor, cognitive and balance abilities of individuals, including those with deficits resulting from traumatic injuries and movement disorders as well as competitive athletes. - Page 13 For Balance Training, BITS includes Motion Sensor which can be used with the Chest Strap or a Balance Platform. Adhesive Patches are also available for single-use applications. Power Charging Port Adhesive Patch Pairing Sensor Controls Wearable Motion Sensor Motion Sensor...
-
Page 14: Chapter 2: Safety Information
• Unauthorized modifications to the Bioness Integrated Therapy System, such as installing or uninstalling software, will void the warranty. • Accessing the internet or local intranet with the Bioness Integrated Therapy System will void the warranty. • Do not alter the Windows 10 Operating System settings by adding Windows user accounts or adjusting the screen saver and sleep timer as this may interfere with the functioning of the software. -
Page 15: Warnings
• Always exercise universal precautions and wear gloves when cleaning any component of the system. Warnings • Do not move the Bioness Integrated Therapy System over obstacles on the floor or over uneven or soft surfaces. Doing so could cause the equipment to fall causing damage and/or injury. -
Page 16: Incident Reporting
BITS should discontinue use immediately. • The BITS Balance Adhesive Patch can be attached to patient's clothing or directly applied to the skin. It is normal for the skin under the Adhesive Patch to become red. The redness should disappear in approximately one hour once the patch is removed. - Page 17 Clinician's Guide...
-
Page 18: Chapter 3: The Bits System
During the installation process, the Bioness Integrated Therapy System should be set-up and positioned in the location designated for therapy sessions. If needed, the BITS portable stand can be moved. Warning: Make sure the computer is shut down and turned off before moving the stand. -
Page 19: Moving The Balance Platform
4. Push the portable stand from the side with both hands on the tower. See Figure 3-1. 5. Move the stand to the new location and lock the wheel casters. 6. Reposition the display screen to the desired height. 7. Reconnect the power cord to the wall socket. Moving the Balance Platform Warning: Make sure the Balance Platform is placed in a secured location when not in use to avoid tripping hazards. -
Page 20: Charging The Sensors
Charging the Sensors Warning: Sensor should not be in use while charging. To charge the Sensor: 1. Plug charging block and cable provided by Bioness into a wall outlet. 2. Connect charging cable with Sensor. See Figure 3-4. Charging Port... -
Page 21: Launching The Software
BITS Icon Figure 3-7: BITS Icon on Desktop 2. The BITS Login Screen will open. To open the on-screen keyboard, press the Keyboard Icon located at the bottom right of the screen. See Figure 3-8. 3. Type your username and password into the text fields. Login username /password will be set up when the administrator creates new user accounts. -
Page 22: Log Out
It is recommended to press the "X" Button to logout of the BITS software after a clinician has completed a therapy session with a client. When the BITS is not in use, it is recommended to exit from the BITS software application and shut down the Windows operating system. -
Page 23: Exit Program
Exit Program To exit the BITS software application, press the "X" Button located in the upper right corner of the display screen. See Figure 3-10. In the Login Screen the "X" Button functions as an exit button. The display screen will return to the Windows desktop. - Page 24 Power Icon Shut Down Figure 3-12: Windows Shut Down Chapter 3 - The System...
- Page 25 Clinician's Guide...
-
Page 26: Chapter 4: Introduction To Bits Software Navigation
Figure 4-1. For more information see the "System Settings" section of this guide. Help Pressing the Help Button opens a link to the BITS Clinician’s Guide. See Figure 4-1. For more information, see the "Help" section of this guide. Chapter 4 - Introduction to BITS Software Navigation... -
Page 27: Discipline Menu
Discipline Menu Within the Start Therapy Module, the Discipline Menu divides the BITS Therapy Programs into groups for a particular application (Discipline). See Figure 4-2. Selecting a Discipline Menu Button opens a screen displaying the available therapy categories found in the selected discipline. -
Page 28: Occupational Therapy
The therapy programs also generate records on patient performance for each session. Refer to BITS Therapies Table on the next page to view a matrix of all BITS Therapy Categories and Programs. Chapter 4 - Introduction to BITS Software Navigation... - Page 29 Clinician's Guide...
- Page 30 Program Group Therapy Programs Figure 4-4: Visual Scanning Therapy Category with Program Groups and Therapy Programs 4. To select a therapy program, press one of the blue program buttons. See Figure 4-4. Chapter 4 - Introduction to BITS Software Navigation...
-
Page 31: Pairing The Sensor
Pairing a Sensor 1. Turn the Sensor on by holding the Power Button for two seconds until an audible sound is heard and power button is flashing green. 2. Select the Bluetooth Icon on screen 3. Select the Pair Icon in Device Settings menu 4. -
Page 32: Switching Between Sensors
2. In the Device Settings menu, select Disconnect for the active Sensor. See Figure 4-6. 3. Turn the Sensor off by holding the Power Button for two seconds until an audible sounds is heard and power button is no longer flashing green. Chapter 4 - Introduction to BITS Software Navigation... -
Page 33: Sensor Settings
Sensor Settings To quickly view all Sensors paired with BITS, press the Bluetooth icon. See Figure 4-7. Bluetooth Icon Figure 4-7: Sensor Device Settings The Sensor Device Setting Menu displays the paired Sensors, the active Sensor and the signal strength. -
Page 34: Recent Sessions List
The Recent Sessions list allows the user to review therapy results obtained during the client's previous therapy sessions. The user can also launch a new therapy session with the program parameters of a recent therapy session preselected. Figure 4-9: Recent Sessions List Chapter 4 - Introduction to BITS Software Navigation... - Page 35 Clinician's Guide...
-
Page 36: Chapter 5: Client Directory
Chapter Client Directory The Client Directory button allows the user to access the Client Directory, view client details, add a new client, select an existing client, and archive a client. The client detail screen also allows the user to access a client's therapy session history. - Page 37 3. The New Client Screen will open. Enter the required information into the data fields using the touchscreen and keyboard. Verify that all information has been correctly entered and press the Save Button. See Figure 5-3. 4. Gender is required for Functional Reach Assessment normative results. Note: Pressing the Save &...
- Page 38 7. Wearable Balance Therapy Difficulty allows user to update the difficulty level of the wearable Sensor and the Platform Balance Therapy Difficulty allows user to update the difficulty level of the Platform Sensor. 7a: Wearable Balance Therapy Difficulty Definitions: Wearable Difficulty Difficulty Level Static Balance Dynamic Balance...
-
Page 39: Accessing An Existing Client Record
Figure 5-3: New Client Screen Accessing an Existing Client Record 1. From the Home Screen or Navigation Bar, press the Client Directory Button. 2. The Client List Screen will open. Press the Visibility Icon, see Figure 5-4, to make the Client List visible on the display screen. -
Page 40: Updating An Existing Client Record
Visibility Icon Search Figure 5-5: Visibility Feature Turned On Updating an Existing Client Record 1. From the Client List Screen, select the desired client by pressing on the row with the client's name. 2. The Client Detail Screen will open, see Figure 5-6. Make desired changes to the data fields. Custom images and words can also be added to a client record. -
Page 41: Custom Image Library And Custom Word List
Custom Image Library and Custom Word List Custom images and text can be added to create a library for individual clients. The custom images and text can be used in a number of programs to create custom, tailored stimuli. Adding Custom Images 1. -
Page 42: Adding Custom Words
5. The Custom Image Library Window will open, reflecting the change to the library. Press the Done Button to close the window. See Figure 5-8. Figure 5-8: Removing Custom Images, Windows 6. The Client Detail Screen will open. Press the Save or Save & Start Button to save changes to the client record. -
Page 43: Removing Custom Words
Removing Custom Words 1. From the Client Detail Screen, press the Custom Word Icon Box next to the Custom Word Icon to remove words. See Figure 5-6. 2. The Custom Word List Window will open. Press the red Trash Icon next to the word you want to remove from the word list. -
Page 44: Archiving A Client
Archiving a Client 1. From the Client List Screen, select the desired client by pressing the row with the client's name. See Figure 5-11. Figure 5-11: Client List Screen 2. The Client Detail Screen will open. Press the Archive client Button. See Figure 5-12. Archive Client Button... -
Page 45: Activating An Archived Client
Activating an Archived Client 1. From the Client List Screen, press the Archived Tab. See Figure 5-13. Archived Client Tab Figure 5-13: Archived Client List 2. The archived Client List will appear. Select the desired client by pressing the row with the client's name. 3. -
Page 46: Chapter 6: Start Therapy
7. From the Discipline Menu, select one of the Discipline Menu Buttons. See Figure 6-3. The next several chapters in this guide discuss in detail each of the Parameters and Therapy Programs found in the BITS software. Chapter 6 - Start Therapy... -
Page 47: Preparing The Client
Figure 6-2: Client List Screen Client ID Icon Figure 6-3: Discipline Menu Screen Once a client has been selected, their Client ID will appear in the top portion of the display screen next to the Client ID Icon . See Figure 6-3. If needed, the user can change client by selecting the Change Icon . -
Page 48: Setting Up The Wearable Sensor
Front Orientation Back Orientation Adhesive Patch Figure 6-4: Sensor Placement – Chest Strap and Adhesive Patch Setting up the Wearable Sensor To calibrate the wearable Sensor, instruct the client to stand or sit in the position in which the client will rehabilitate in front of the screen and follow the steps below: 1. - Page 49 7. User will then be prompted to perform an assessment for the client. This is optional, user can select Yes, which will then open the Assessment Therapy Category. If user does not want to perform an assessment, then click Cancel. Type Button Placement Button...
-
Page 50: Setting Up The Platform Sensor
Setting up the Platform Sensor To calibrate the Sensor on the Platform, position the Platform in front of the display screen in the desired location. 1. Attach the Sensor to the Platform with the Sensor buttons facing the screen. See Figure 6-7. Figure 6-7: Sensor Placement - Platform 2. -
Page 51: Adjusting Platform Tilt
7a: If Tilt Level Low, Medium or High is selected, ensure the tilt level corresponds to the position of the feet on the Platform 7b: Depending on the tilt selected, user can select Platform Balance Therapy Difficulty Level. Platform Difficulty Tilt Levels Difficulty Level Low:... -
Page 52: Parameter Screen
Parameter Screen The Parameter Screen is the first screen that appears after a Therapy Program has been selected. The therapy program parameters control how each program will display content and how the client will interact with the active program. The Parameter Screen contains the available parameter settings for each therapy program. -
Page 53: Custom Parameter Profiles
To adjust the Parameter Profile: 1. Press the Profile Icon Box 2. The Parameter Profile pop-up window will appear, see Figure 6-11. 3. Select the desired Parameter Profile and then press the Done Button to close the window. See Figure 6-11. Figure 6-11: Parameter Profile Pop-up Window Custom Parameter Profiles A Custom Parameter Profile can be created to facilitate the use of the Graphing and Baseline features. -
Page 54: In-Therapy Side Menu And In-Therapy Parameters
In-Therapy Side Menu and In-Therapy Parameters Some of the therapy programs found in the BITS software have additional parameter settings that are accessed directly in the therapy program after the program has been launched. These parameters are found in the In-Therapy Side Menu and are referred to as In-Therapy Parameters. Refer to Chapter 7 for detailed information on all Parameters. -
Page 55: In-Therapy Screen Scale Feature
In-Therapy Screen Scale Feature The Screen Scale Feature adjusts the size of the visual field of the therapy program. This feature is available in most BITS Therapy Programs to accommodate each client's physical abilities. Press the gray arrows or drag the blue indicator to change the value. -
Page 56: Results Screen
Results Screen The Results Screen will appear at the end of each therapy program session. The Results Screen captures performance results from the therapy program session and displays this information as both a summary and detailed report. This information is stored to the client's file in the Reports Module and can be accessed at a later time. -
Page 57: Navigation Bar
Navigation Bar The five menu options that appear on the BITS software application Home Screen are also found as icon buttons on the Navigation Bar. The Navigation Bar appears on the left side of the screen throughout the BITS software application. -
Page 58: Chapter 7: Bits Parameters
Chapter BITS Parameters Parameters can be adjusted, or in some cases, enabled or disabled depending on the program and profile settings chosen. This Chapter defines all parameters available in BITS. Stimuli Parameters #Flashes The Flashes Parameter controls the quantity of ‘E’ optotypes that are flashed and presented on screen in the Ocular Motor Program. - Page 59 Duration The Duration Parameter controls the length of time the therapy program will run. Press the gray arrows or drag the blue indicator to change the value. Note: if Duration is enabled , the Quantity Parameter is deactivated Center Active The Center Active Parameter controls the presentation of the letter "E"...
- Page 60 1/10 of a second, from the stimulus presentation, in order for the response to be recorded as accurate. Distractors The Distractors Parameter adds up to three extra stimulus appear to create a distraction from target stimulus. It is only available in the Ocular Motor Program. Chapter 7 - BITS Parameters...
- Page 61 Draw Requirement The Draw Requirement Parameter controls how the client will need to draw the stimulus pattern. The Draw Requirements Parameter options are: Duplicate, Horizontal Flip, Vertical Flip, Rotated 90° Left, and Rotated 90° Right. To change this parameter, press the Draw Requirements Parameter Icon. A pop up window will open displaying the options.
- Page 62 Rotations. To change the setting, press the Movement Parameter Icon. A pop up window will open displaying the options. Press the radio button next to the desired option to enable it. Press the Done Button to close the window. Chapter 7 - BITS Parameters...
- Page 63 Pattern The Pattern Parameter controls the appearance of the stimulus pattern displayed on the Geoboard. For the Pursuit Pattern Programs, it controls the path of movement of the target stimuli. To change the stimulus pattern, press the Pattern Parameter Icon. A pop up window will open displaying the options.
- Page 64 To change the setting, press the Response Mode Parameter Icon. A pop up window will open displaying the options. Press the radio button next Reticle Visible The Reticle Visible Parameter controls whether the reticle will be visible on screen during the therapy session. Chapter 7 - BITS Parameters...
- Page 65 Reverse When selected, the Reverse Parameter changes the direction of the sequence order. For example, letters must be selected in the sequence Z, Y, X, etc. Rhythm The Rhythm Parameter controls the speed of the Rhythm during the therapy session. Press the gray arrows or drag the blue indicator to change the value. Rings Visible The Rings Visible Parameter controls whether the rings will be displayed on screen during therapy session.
- Page 66 Press the gray arrows or drag the blue indicator to change the value. Note: Only the Time Paced Program has this Parameter. Chapter 7 - BITS Parameters...
-
Page 67: Display Parameters
Therapist Guided The Therapist Guided Parameter allows the user to choose the target stimuli on screen that the client must move towards using body movement in the anterior, posterior or lateral directions in Dynamic Postural Sway Program. Trials The Trial Parameter controls the number of words sequences that will be presented in the Chart Puzzle Program. - Page 68 Ring, excluding the Center and Outer Rings. When the Ring is blue, it means stimuli will appear within the selected area. Conversely, when the Ring is white, the stimuli will not appear in that Ring. Chapter 7 - BITS Parameters...
- Page 69 Draw Position The Draw Position Parameter controls which side of the display screen the user will draw the pattern on. The default setting is left. To change this setting, press the Draw Position Parameter Icon. A pop up window will open displaying Left or Right options. Press the radio button next to the desired option to enable it.
- Page 70 The Rotator Size Parameter controls the size of the rotator that will appear on the display screen. The parameter options are: Small or Large. Press the radio button next to the desired option to enable it. Chapter 7 - BITS Parameters...
-
Page 71: Balance Parameters
Speed The Speed Parameter controls how fast the optokinetic screen will move. Press the gray arrows or drag the blue indicator to change the value. The Speed Parameter ranges from None (0) to Slow, Medium and Fast. Balance Parameters Adjustable Balance Point The Adjustable Balance Point Parameter allows the location of the Balance Point to be moved on the display screen. - Page 72 The Rings Visible Parameter controls whether the Rings will be displayed on screen during therapy session. Show Path The Show Path Parameter is only available for Pattern and Adjustable Pattern Therapy Programs. When enabled, it displays the movement path of the target stimulus. Chapter 7 - BITS Parameters...
- Page 73 Clinician's Guide...
-
Page 74: Chapter 8: Therapy Categories
Rotator. The Rotator Program Group is divided into four therapy programs. Warning: The programs found in the Visual Pursuit Therapy Category utilize moving and rotating graphics that may cause dizziness, vertigo, or nausea in sensitive patients. Individuals experiencing dizziness, vertigo, or nausea while using BITS should discontinue use immediately. Cognitive The programs in the Cognitive Therapy Category are designed to challenge and assess visual memory, auditory memory, visual/auditory motor planning, and cognitive training. -
Page 75: Charts
Warning: The programs found in the Optokinetic Static and Optokinetic Dynamic Therapy Categories utilize moving and rotating graphics that may cause dizziness, vertigo, or nausea in sensitive patients. Individuals experiencing dizziness, vertigo, or nausea while using BITS should discontinue use immediately. Clinician's Guide... -
Page 76: Vestibular
Vestibular Program Category include Ocular Motor and Visual Acuity. Warning: The programs found in the Vestibular Therapy Category utilize moving and rotating graphics that may cause dizziness, vertigo, or nausea in sensitive patients. Individuals experiencing dizziness, vertigo, or nausea while using BITS should discontinue use immediately. Assessments The programs in the Assessments Therapy Category are digitized standard tests. - Page 77 Clinician's Guide...
-
Page 78: Chapter 9: Single Target/Balance Reaction Program
Chapter Single Target/Balance Reaction Programs The Single Target Program Group is a category within the Visual Scanning, Static Balance and Optokinetic Static Therapy Categories. Balance Reaction Program Group is a category within the Dynamic Balance and Optokinetic Dynamic Therapy Categories. The programs found in the Single Target/Balance Reaction Program Groups are Reaction Time, User Paced, Time Paced, Static Postural Sway, Dynamic Postural Sway and Weight Shift. - Page 79 Clinician's Guide...
-
Page 80: Chapter 10: Array/Complex Array Programs
Chapter Array/Complex Array Programs The Array/Complex Array Program Group consists of three therapy programs: Sequence, Verbal, and Competition. These programs are designed to challenge a client's ability to visually scan and process a complex environment with multiple stimuli. The Complex Array Program Group is a category within the Visual Scanning, Static Balance and Optokinetic Static Therapy Categories. - Page 81 Clinician's Guide...
-
Page 82: Chapter 11: Rotator Programs
Chapter Rotator Programs The Rotator Program Group consists of four therapy programs: Single Color, Multi Color, Sequence, and Gap Sequence. These programs are designed to challenge the client's ability to visually follow moving objects and plan and coordinate motor movements. The Rotator Program Category is a category within Visual Scanning, Static Balance and Optokinetic Static Therapy Categories. - Page 83 Clinician's Guide...
-
Page 84: Chapter 12: Pursuit/Smooth Pursuit Programs
Chapter Pursuit/Smooth Pursuit Programs The Pursuit Program Group consists of four therapy programs: Smooth Pursuit, Pattern and Adjustable Pattern. These programs are designed to challenge the client's ability to visually follow moving objects and plan and coordinate motor movements. The Smooth Pursuit Program is a category within Visual Pursuit Therapy Category. Pattern, Adjustable Pattern and Rotator Programs are available in Dynamic Balance and Optokinetic Dynamic Therapy Categories. - Page 85 Clinician's Guide...
-
Page 86: Chapter 13: Cognitive Programs
Chapter Cognitive Programs The Cognitive Program Group consists of two therapy programs: Memory and Rhythm. These programs are designed to challenge and assess visual memory, auditory memory, visual/auditory motor planning, and cognitive training. The Memory Program is available in Cognitive, Static Balance, Optokinetic Static, Dynamic Balance and Optokinetic Dynamic Therapy Category. - Page 87 Clinician's Guide...
-
Page 88: Chapter 14: Geoboards And Drawing Programs
Chapter Geoboards and Drawing Programs The Geoboards Program Group consists of one therapy program: Geoboards. This program is designed to challenge a client's visual spatial processing skills, memory and motor coordination. The Drawing Program Group consists of four therapy programs: Symmetry, Trace, Replicate, and Between the Lines. - Page 89 Clinician's Guide...
-
Page 90: Chapter 15: Charts Programs
Chapter Charts Programs The programs in the Charts Therapy Category are designed to challenge and assess visual search skills, accuracy, speed of response, and visual and auditory processing. The Charts Therapy Category is divided into two Program Groups: Letter Charts and Peripheral Letter Charts. The Letter Charts Program Group is divided into four therapy programs. -
Page 91: Peripheral Letter Charts Program Group
Peripheral Letter Charts Program The Peripheral Letter Charts Program Group consists of two therapy programs: Sequence and Match. Sequence Program A chart displaying different size letters will appear on the display screen. The peripheral letter chart will have the letter "E" as the central focus point. The client will need to locate and touch the letters in the chart in alphabetical order. -
Page 92: Chapter 16: Vestibular Programs
Chapter Vestibular Programs The Vestibular Therapy Category consists of two therapy programs: Ocular Motor and Visual Acuity. These programs are designed to challenge and assess visual scanning, peripheral awareness, visual memory, visual/auditory motor planning, and cognitive training. Ocular Motor Program Client is instructed to follow the correct moving stimuli with the eyes while keeping the head stationary. - Page 93 Clinician's Guide...
-
Page 94: Chapter 17: Assessments
Chapter Assessments The programs in the Assessments Therapy Category are standardized tests. The Assessments Therapy Category is divided into four Program Groups: Trail Making, Bell Cancellation Task, Maze Test, and Visual Scanning and Motor Reaction. The Trail Making Program Group is divided into two therapy programs. The Balance Assessment Therapy Category is divided into five Program Groups: Berg Balance Scale, Postural Sway, Sensory and Functional Reach. -
Page 95: Maze Test
Maze Test This program assesses attention, visuoconstructional ability and executive functions of planning and foresight. Performance is scored according to time to complete the test and total number of errors. Errors are determined by counting the number of times the user entered a dead-end alley or failed to stay within the lines. -
Page 96: Berg Balance Scale
Berg Balance Scale The Berg Balance Scale is used to objectively determine a client's ability (or inability) to safely balance during a series of predetermined tasks. It is a 14-item question assessment with an ascending score range from 0 to 4 for each question and takes approximately 20 minutes to complete. Postural Sway The Postural Sway Program Group consists of Static and Dynamic Postural Sway Programs. - Page 97 Clinician's Guide...
-
Page 98: Chapter 18: Results
Chapter Results Results Screen has five tabs: Summary, Details, Balance, Parameters and Baseline. See Figure 6-16. The Summary Tab displays a snapshot of the session results. The Details Tab provides more information on the breakdown of these results including a quadrant, area or axis breakdown where applicable. The Parameters Tab provides a list of parameter settings that were used for the therapy program session. - Page 99 • Percent Late: Percentage of late hits • Percent Missed: Percentage of missed beats • Percent On Time: Percentage of on time hits • Points: Left Points + Right Points (only for Competition Program) • Reaction Time: The time period between the initial appearance of the stimulus and the moment the stimulus is hit •...
- Page 100 • Percent in Center: total percent of time client remained within the center of the Rings • Percent off Center: percent of time client spent outside of the center Ring • Percentage in Balance Point (only appears if Balance Point is adjusted): percent of time client spent within the Balance Point if Balance Point was adjusted to another area within the Rings •...
- Page 101 Clinician's Guide...
-
Page 102: Chapter 19: Reports
Chapter Reports The Reports feature allows the user to view a client's therapy session results, create and print PDF reports, and graph session results over a period of time. Selecting a Client 1. From the Home Screen or Navigation Bar, press the Reports button. See Figure 19-1. Reports Button Figure 19-1: Reports Button Home Screen (Left), Navigation Bar (Right) 2. -
Page 103: Navigating In The Reports Module
3. Select the desired client from the Client List by pressing the row with the client's name. Figure 19-3. Note: To search the Client List, type the client's first name, last name, date of birth, or client ID into the text field next to the Search Icon. - Page 104 Session Results Exist (dark button example) Session Results Do Not Exist (light button example) Report Categories Figure 19-5: Reports Category Screen, Example 3. Press a Therapy Category Button to display the therapy groups and therapy programs found in the selected category. See Figure 19-5. The buttons for each Therapy Program containing Session Results will also be darker in color than Therapy Programs without Session Results 4.
-
Page 105: Printing A Report
The Session Results Screen contains five tabs labeled: Summary, Details, Balance Parameters, and sometimes Baseline. See Figure 19-7. This screen is similar to the Results Screen that appears at the end of a therapy session. The content of each of these tabs differs depending on the Therapy Program for which the session was performed. -
Page 106: Graphing
3. The Adobe Reader Program will launch and a pop up window will open displaying the PDF Report. See Figure 19-9. The report is automatically saved to the folder C:\Users\BITS\Documents\BITS PDF Reports\Results. The file name will include the name of the Therapy Program, the Client Name, and the date and time at which the therapy session was performed. - Page 107 Parameter Profile Icon Graph All Figure 19-10: Reports, Session Results List Screen Note: The Sessions Results List can also be filtered by Default or Custom Parameter Profiles by pressing the Parameter Profile Icon. See Figure 19-11. Default Tab Custom Tab Figure 19-11: Parameter Profile Pop Up Window Check Boxes...
-
Page 108: Change Variables
3. Press the Graph Selected Button. See Figure 19-12. 4. The Graph Screen will open and display a default result Variable displayed on the y-axis. See Figure 19-13. Date Range Variable Icon Print Button Session Labels Quadrant Results Radio Button Figure 19-13: Reports, Graph Screen Change Variables 1. -
Page 109: Graph Area/Ring Results
Graph Area/Ring Results 1. Some Therapy Programs in Balance Therapy Category provide results regarding the client's performance in each area/ring displayed in the touchscreen. 2. Area results correspond to client's movement in posterior, anterior, left and right movements. Rings results correspond to center, first, second and fourth rings presented on screen. 3. - Page 110 3. The Adobe Reader Program will launch and a pop up window will open displaying the PDF Report. See Figure 19-17. The report is automatically saved to the folder “C:\users\BITS\Documents\BITS PDF Reports\Graphs”. The file name will include the name of the Therapy Program, the Client Name, and the date and time at which the Therapy Session was performed.
-
Page 111: Graphable Result Variables
Graphable Result Variables Most of the Therapy Programs in BITS are capable of producing Graphs for Therapy Session Results, and some Therapy Programs are capable of producing Graphs for Therapy Session Results for multiple Variable options. The Therapy Programs that are capable of producing Graphs for Therapy Session Results are listed below with their graphable Variables options. -
Page 112: Array/Complex Array Program Group
Reaction Time Program • Accuracy • Reaction Time • Hand Speed • Time to Complete • Reaction Latency Array/Complex Array Program Group Sequence Program • Accuracy • Reaction Time by Area • Accuracy by Area • Reaction Time by Rings •... -
Page 113: Rotator Program Group
Rotator Program Group Gap Sequence Program • Accuracy • Time in Center • Percent in Balance Point* • Time in each Area • Percent in Center • Time in each Ring • Time in Balance Point* *(only if Balance Point was adjusted) Multi-Color Program •... -
Page 114: Pursuit Program Group
Pursuit Program Group Adjustable Pattern Program • Accuracy • Time to Complete • Longest Consecutive Time on Stimulus • Total Time On Pattern Program • Accuracy • Time to Complete • Longest Consecutive Time on Stimulus • Total Time On Pursuit Rotator Program •... -
Page 115: Drawing Program Group
*(only if Balance Point was adjusted) Drawing Program Group Between the Lines Program Replicate Program • Time to Complete • Time to Complete • Collisions Symmetry Program Trace Program • Time to Complete • Time to Complete • Coverage Letter Charts Program Group Puzzle Program •... -
Page 116: Maze Program
Maze Program • Time to Complete • Errors Dynamic Postural Sway Program • Reaction Time • Reaction Time per Area Static Postural Sway Program • Percent in Center • Time in Center Functional Reach Program • Average Distance Romberg Program •... -
Page 117: Baseline Comparison Results
Baseline Comparison Results The Baseline Comparison feature allows the user to designate a Therapy Session as a Baseline to which all future Therapy Sessions can be compared. The Baseline Therapy Session consists of two parts: the Results generated during the Baseline Therapy Session, and the Parameter Options used to generate the Results. -
Page 118: Creating A Baseline Profile
Therapy Categories Program Groups Therapy Programs • Static Charts Letter Charts • Motion • Multiple Assessments Visual Scanning & Motor Reaction Table 19-1: Programs without the Baseline Comparison Feature Creating a Baseline Profile Baselines Sessions are saved following the completion of a Therapy Session. Only Completed Therapy Sessions may be saved as a Baseline. -
Page 119: Overwriting A Baseline Session
2. The Save As Baseline dialog window will open displaying the text, “Save this parameter set and these results as the new baseline". Press the Proceed Button. See Figure 19-21. Proceed Button Figure 19-21: Save As Baseline Pop Up Window Overwriting a Baseline Session After a Baseline Profile has been created, the user may want to Save a new Therapy Session as the Baseline Profile for that Parameter and overwrite the current one. - Page 120 3. The Save As Baseline dialog window will open. Select the check box next to the statement, “Save these results as the new baseline.” Press the Proceed Button. See Figure 19-23. Proceed Button Figure 19-23: Baseline Overwrite Dialog Window 4. The dialog window will display the following statement, “Are you sure? Overwriting the Baseline results will establish these session results as your new Baseline Profile.
- Page 121 Clinician's Guide...
-
Page 122: Chapter 20: System Settings
The System Settings Module allows the administrator to customize the default software settings. These settings include language, format preference, header logo, clinic contact information, and screen size. There are two main user roles within the BITS Software, each have different access to the System Settings Module: Administrator User Account Privileges: •... -
Page 123: Adding A New User
Add New Archived User Icon Figure 20-2: System Settings Screen Adding a New User 1. From the System Settings Screen, press the Add User Icon , see Figure 20-2. 2. From the New User Screen, fill in all text fields (User Name, First Name, Last Name, Credential, and Password). -
Page 124: Editing A User Account
Admin Done Button Figure 20-4: Change User Role Pop Up Window Editing a User Account A user may make changes to their User Name, First Name, Last Name, and Credential. Users may also change their own password. 1. From the System Settings Screen, select the desired user account from the User List by pressing the row with their name. -
Page 125: Administrator Resetting A User Password
Changed" will appear. See Figure 20-7. The password now is the same as the Admin password. 3. The Administrator now can exit BITS. 4. The Administrator will log back into the BITS software using the therapist's username and the Admin Password. -
Page 126: Disable A User Account
9. Give the revised password to the therapist. Disable a User Account The disable a user account feature will prevent that user from accessing the BITS Software, while maintaining the user’s history. This can only be performed by an Admin user. -
Page 127: Format Settings
The Screen Size setting is used to match software with touch screen LCD monitor display. The Installation Guide for the BITS system will cover this. If adjustment is needed, follow this procedure: 1. From the System Settings Screen, press the Screen Size Icon 2. -
Page 128: Report Header Setting
Done Button Figure 20-11: Contact Info Pop Up Window Report Header Setting The Report Header - Logo Setting adds the Clinic's logo to printed reports. 1. From the System Settings Screen, press the Report Header - Logo Icon 2. The Report Header - Logo Window will open. Press the Add Button. See Figure 20-12. 3. - Page 129 Clinician's Guide...
-
Page 130: Chapter 21: Help
1. From the Home Screen or Navigation Bar, press the Help Button. See Figure 21-1. Help Button Figure 21-1: Location of Help Button Home Screen (left), Navigation Bar (Right) 2. The Adobe Reader Program will launch and a pop up window will open displaying the BITS Clinician's Guide. Chapter 21 - Help... - Page 131 Clinician's Guide...
-
Page 132: Chapter 22: Maintenance And Cleaning
To clean the touchscreen display monitor: 1. Turn the Bioness Integrated Therapy System off and unplug the device from the socket-outlet. 2. Use the provided Touchscreen Cleaning Kit or a non-abrasive (alcohol and ammonia free) glass cleaner solution to clean the touchscreen. -
Page 133: Bits Bedside & Mobile
Keyboard and other accessories can be wiped with facility approved disinfectant wipes. Cleaning the BITS Bedside & Mobile Hardware 1. Turn the BITS Touchscreen PC off by closing all software programs and shutting down the Windows 10 Operating System. 2. Unplug the device from the wall socket. -
Page 134: Chapter 23: Technical Specifications
Chapter Technical Specifications 55" Display Technical Specifications Stand Specifications Lift Range 20" (50.8cm) Tilt Range 20 degrees Display Rotation 90 degrees Mobility Four (4) low friction casters, Two (2) lockable Keyboard Shelf Supplied Cord Management Supplied Shipping Dimension 66" (167.6cm) (l) x 20" (50.8cm) (h) x 14" (35.6 cm) (d) Shipping Weight 122 lbs. -
Page 135: Motion Sensor Technical Specifications
Radio Communication Information Several components of the Bioness Integrated Therapy System use radio communication. They have been tested and found to comply with the limits for a Class B digital device, pursuant to Part 15 (Radio Frequency Devices) of the FCC rules. These limits are designed to provide reasonable protection against harmful interference in an environment. -
Page 136: Radio Equipment Directive (Red) Declaration Of Conformity Statement
Radio Equipment Directive (RED) Declaration of Conformity Statement Hereby, Bioness, Inc. declares that the radio equipment is in compliance with Directive 2014/53/EU. This product operates at 2402-2480 MHz with the maximum RF output power not to exceed 4dBm. Electromagnetic Emissions... -
Page 137: Balance Platform Technical Specifications
Balance Platform Technical Specifications Balance Platform Specifications Dimensions 24” (61cm) x 24” (61cm) x 6.125” (15.6cm) 5°-20° range (Range limiting feet can extend and have three settings: Tilt Range 2.5” (6.3cm) (not extended), 3.25” (8.3cm) (medium extension) and 4” (10.2cm) (fully extended) Weight 30 lbs. -
Page 138: Software
Expected or observed adverse events and/or complications: None Known • Performance measurements do not apply to BITS Balance • Repeatability of measurements are not applicable to BITS Balance • Construct validity does not apply to BITS Balance Chapter 23 - Technical Specifications... - Page 139 Clinician's Guide...
-
Page 140: Chapter 24: Network Safety, Security, And Privacy
• Operational Security (e.g. do not leave sensitive information, such as exported report files open on BITS, and do not leave a logged-in BITS unattended, do not connect the system to the Internet and be careful inserting flash drives to BITS, do not alter the BITS software and install unauthorized software on it including Virus scan software.)
Need help?
Do you have a question about the BITS and is the answer not in the manual?
Questions and answers