Table of Contents
Advertisement
Quick Links
Advertisement
Table of Contents

Related Manuals for Bioness BITS


Summary of Contents for Bioness BITS
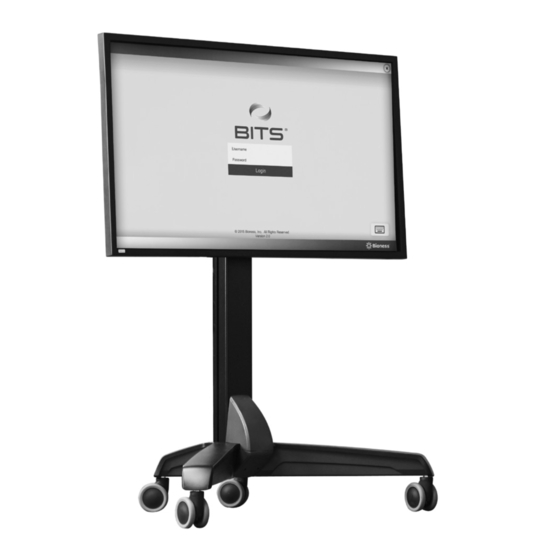
- Page 1 Installation Guide...
- Page 3 • Always lock the wheel casters on the display stand when the system is in a stationary position. Warnings • Do not move the Bioness Integrated Therapy System over obstacles on the floor or over uneven or soft surfaces. Doing so could cause the equipment to fall causing damage and/or injury.
- Page 4 BITS Installation Component List The components for the BITS product consists of three different kits: Hardware Kit, Software Kit, and Computer Kit. Do not start the installation process until all three kits have been received. BITS Hardware Kit: 117-00154-000 (55" Display) and 117-00154-001 (48" Display)
- Page 5 BITS Software Kit: 117-00152-000 Description Illustration (Reference Only) Quantity Wire Loom Zip Ties Mounting Bases Fasteners 2 packages Round Cord Clips 1 package BITS Installation Guide 602-00690-001 BITS Computer Kit: 117-00160-001 Description Illustration (Reference Only) Quantity Computer with Mounting Bracket,...
-
Page 6: Tools Needed For Installation
Unpacking and Setting Up the Hardware Kit 1. The BITS Hardware Kit is a large package that is delivered on top of a wooden palette. The package consists of a palette with ramp, layered cardboard, foam inserts, shipping straps, and plastic shipping wrap. See Figure 1. - Page 7 10. Cut the green shipping straps that are attached to the anchors on the bottom of the box. 11. Remove the foam wrap and the foam blocks that are located under the BITS display stand. 12. Carefully roll the BITS System down the wooden ramp.
-
Page 8: Computer Installation
Figure 3: Knob, Back of Mounting Bracket Adjusting Display Stand Lift Tension The display monitor should be able to move smoothly and easily on the tower of the portable display stand and stay in place. If movement is difficult or the display monitor does not stay in the desired position, then adjustment to the tension in the tower is needed. - Page 9 Figure 5: Attaching Computer Mounting Bracket 3. Remove the computer from the plastic bag and attach 2 screws (provided with the computer) to the back of the computer. See Figure 6. Do not over tighten the screws. The screws will be used to slide the computer into the computer mounting bracket.
-
Page 10: Wireless Keyboard
Figure 7: Securing the USB Hub BITS License Key 1. Remove the BITS License Key from the box located in the Software Kit package. 2. Remove the protective cover from the BITS License Key. 3. Plug the BITS License Key into the USB Hub. See Figure 8. -
Page 11: Usb Extension Cable
Securing the Power Strip Note: For Installations in the UK use the Power Strip supplied in the BITS Power Supply Kit, UK (BIT-A001). Discard the Power Strip from the BITS Computer Kit (117-00160-001) and replace it with the Power Strip supplied in the BITS Power Supply Kit, UK (BIT-A001). -
Page 12: Cable Management
PC Power Adapter Mounting Platform Power Strip Figure 10: Mounted PC Power Adapter and Power Strip Cable Management The wire loom, zip ties, mounting bases, and fasteners are used for cable management. 1. Measure the length needed for the specific monitor size. 2. - Page 13 Figure 12: Mounting Bases Attachment Locations for 55" Monitor (example only) Figure 13: Feeding Zip Tie into Mounting Base (Left), Securing Zip Tie (Right) Figure 14: Inserting PC Power Cord and Display Monitor Cord (example only) 9. Carefully push the Touchscreen Display Monitor down to the lowest position on the tower of the display stand. 10.
- Page 14 Figure 16: Example of BITS with Completed Cable Management Moving the BITS Display Stand After the BITS hardware has been installed, the system will need to be moved to the location designated for therapy sessions. To move the portable display stand: 1.
- Page 15 2. Unlock the wheel casters and point the wheels in the direction of travel. 3. Push the portable display stand from the side with both hands on the tower. See Figure 17. 4. Move the display stand to the new location and lock the wheel casters. 5.
-
Page 16: Input Source
3. Once the Display Monitor has turned on, touch the middle of the touchscreen and slide up to reveal the Windows Login Screen. See Figure 18. 4. Use the wireless keyboard or the on-screen keyboard to enter in "BITS" as the username and "bits" as the password. Enter Arrow Button Press the Enter Arrow Button. - Page 17 3. A File Explorer window will open. Open the file called, “Pulse IRController.exe” 4. The User Account Control pop up window will display. Press the "Yes" Button to proceed. 5. The PulseIRController window will appear. Touch the Reset Button. 6. Confirm that the Parameter Settings shown on the PulselRController window are the following: •...
-
Page 18: Date And Time Settings
Figure 22: Date and Time Settings Menu Printer Setup Only USB connected printers should be connected to the BITS PC. 1. Follow the setup instructions specific to the printer being attached to the BITS PC. 2. Upload the necessary printer drivers onto a USB memory device... - Page 19 3. Connect the USB printer cable to the empty USB port on the USB hub. 4. Insert the USB memory device into the USB Extension Cable, and install the necessary printer drivers onto the BITS Computer. Note: Connecting the BITS PC to the Internet will void the warranty.
- Page 20 Changing the Administrator Profile Password For security purposes, it is recommended that the default Administrator Profile Password be changed before adding Client Profiles or entering patient data into the BITS System. 1. From the Home Screen, press the System Settings Button. See Figure 25.
- Page 21 Changing the Language Preference Settings The default language setting for BITS is English (US). 1. Navigate to the System Settings Screen. Global Language Preference Field Date, Time & Number Format Preference Field 2. Click on the Global Language Preference field. See Figure 27.
- Page 22 Log Out and Exit To log out of the BITS software application, press the "X" Button. The "X" Button is located in the upper right corner of the display screen in the BITS software, see Figure 26. Pressing the Logout Button will bring the user back to the Login Screen.
-
Page 23: Technical Specifications
Technical Specifications BITS Hardware Kit Specifications Shipping Dimensions (approximately) 54" length, 73.5" height, 39.75" depth Shipping Weight (approximately) 257 lbs Touchscreen Display Monitor Specifications • 48" Screen Monitor Options • 55" Screen • 65" Screen (Note: no longer commercially available.) •... -
Page 25: List Of Symbols
List of Symbols Caution Warning Manufacturer This Product Must Not Be Disposed of with Other Household Waste Refer to instruction manual/ booklet Re-Order Number Serial Number Complies with the European Union Medical Device Directive European Authorized Representative... - Page 26 Disclaimer Bioness Inc. and its affliates shall not be liable for any injury or damage suffered by any person, either directly or indirectly, as a result of the unauthorized use or repair of Bioness Inc. products. Bioness Inc. and its affiliates do not accept any responsibility for any damage caused to its products, either directly or indirectly, as a result of use and/or repair by unauthorized personnel.
Need help?
Do you have a question about the BITS and is the answer not in the manual?
Questions and answers