Table of Contents
Advertisement
Advertisement
Table of Contents

Related Manuals for KBL megaSun 6900 alpha deluxe


Summary of Contents for KBL megaSun 6900 alpha deluxe
- Page 1 MANUALE OPERATIVO...
- Page 2 L’esportazione o il funzionamento delle apparecchiature, indicate nelle presenti istruzioni, sono vietate negli Stati Uniti e in Canada. In questo caso KBL AG non fornisce la garanzia del produt- tore. Si avverte espressamente che in caso di infrazioni si possono verificare elevati rischi di responsabilità per l’esportatore e/o il gestore.
-
Page 3: Table Of Contents
Indice Informazioni generali ..........4 Service codes ............26 Informazioni sul manuale operativo ......4 Service menu - options ......... 26 Trasporto con muletto ..........4 Impostare l’illuminazione decorativa ..... 39 Altre modi di trasporto ..........4 Smaltimento delle vecchie apparecchiature ... 4 Manutenzione e pulizia ........ -
Page 4: Informazioni Generali
Informazioni generali Informazioni sul manuale Smaltimento delle vecchie operativo apparecchiature Il presente Manuale operativo si rivolge Il presente dispositivo è composto da • al personale di gestione del centro di abbronzatura, componenti che non possono essere gettati nei rifiuti • agli utenti, domestici! •... -
Page 5: Istruzioni Di Sicurezza
Obblighi dell‘operatore controindicazioni al trattamento stesso. Non possono utilizzare l‘apparecchio le seguenti categorie di La ditta KBL declina ogni responsabilità per danni persone: derivanti da uso improprio o mancata osservanza delle •... -
Page 6: Istruzioni Generali Di Sicurezza
Non è consentito rimuovere le istruzioni di sicurezza Per eseguire l’aggiornamento utilizzare il software né mettere fuori servizio i dispositivi di sicurezza. “USB Connect” offerto in download da KBL. Per • Azionare l‘apparecchio solo se è in perfette informazioni dettagliate sulla procedura premere il condizioni. -
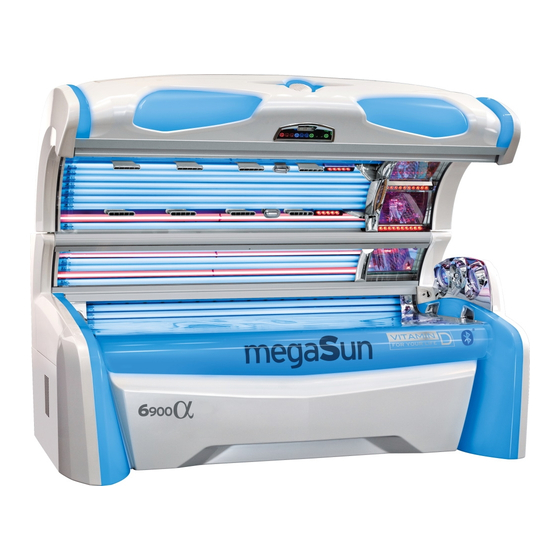
Page 7: Description Of The Unit
• The base part including 20 tubes and the elec- Canopy tronic unit. Depending on the model also with shoulder tanner and further, optionally available ② ③ ① components. ④ megaSun 6900 alpha deluxe ⑭ ⑤ ⑬ ⑥ ⑫ ⑦ ⑪ ⑩... -
Page 8: Connections
The connection to the 400 V mains must be protected by fuses. Their specifications are listed in the chapter “Technical data”. A residual current-operated circuit breaker (RCD) with short time delay is absolutely required. KBL AG Level adjustment studio music recommends the following type: KBL 3200 0770 00 signal (type (Typ ABB F 204 A - 40//0,03 AP-R). -
Page 9: Operation Using Different Audio Sources
(OPTIONAL FEATURE) If you decide for a connection to a 100 V audio system, you will need a transformer (KBL no.: 9100 ATTENTION 0170 00) for the transmission of the audio signal. • Danger of damage to the player due to This connection must be made by trained service overheating. -
Page 10: Bluetooth Connection
The MP3 tracks to be played must not exceed A Bluetooth connection can be established in a sampling rate of 320 Kbit/s. standby and during tanning mode. KBL AG attaches great importance to hardware Make sure that you are within the recep- compatibility. large number tion area (about 2 meters). -
Page 11: Connecting The Channel Selection
COMPATIBILITY OF BLUETOOTH DEVICES KBL AG attaches great importance to hardware com- patibility. Due to the large number of manufacturers, KBL can not guarantee a 100 % compatibility. In rare cases, it may happen that a bluetooth connection can not be established. -
Page 12: Connecting The External Timer
AROMA Connecting the external timer The Aroma box is attached within the aquaCool box Connect the external timer (coin box, studio control) and equipped with three hose connections, one for according to the instructions supplied with the timer. ⑤ the compressed-air supply and two leading to the The following diagram shows the wiring requirements ⑥... -
Page 13: Messa In Funzione
Messa in funzione MODALITÀ TRATTAMENTO ABBRONZANTE Prima di accendere il sistema per la prima volta: Applicare in modo permanente sulla parete in prossi- I tubi abbronzanti sono accesi e ha luogo un mità del dispositivo il cartello in dotazione con la for- trattamento abbronzante. -
Page 14: Istruzioni Per Il Trattamento Abbronzante
Istruzioni per il trattamento abbronzante • In generale una pelle che si abbronza normalmente Le radiazioni UV del sole o dei dispositivi UV pos- necessita di tre, massimo cinque trattamenti sono causare danni irreversibili alla pelle o agli abbronzanti raggiungere colorazione occhi. -
Page 15: Tempi Di Esposizione
Tempi di esposizione Dalla successiva tabella è possibile rilevare i tempi di esposizione al sole a seconda della propria tipologia di pelle. La definizione precisa di tipologia di pelle è indicata nella tabella delle tipologie di pelle fornita. Se l’esposizione solare raggiunge le quattro settimane, si deve ricominciare dalla prima esposizione. -
Page 16: Modalità Abbronzatura
Modalità abbronzatura Il pannello di controllo per la preselezione è situato al PERICOLO centro della parte frontale del soffitto. Dose eccessiva di radiazioni UV. A seconda della configurazione del basamento, Sedute abbronzanti eccessivamente sono disponibili fino a sette pulsanti di controllo da prolungate possono provocare gravi danni selezionare. - Page 17 M e n u p r e s e l e z i o n e MEDIT. CARIBIC MP3 int. MP3 ext. VOICE AIRCON AQUA BASIC STUDIO AROMA Preselezione del livello di abbronzatura Preselezione della sorgente audio Preselezione di altre caratteristiche condizioni ottimali È...
-
Page 18: Inizio Della Seduta Abbronzante
NOTE: Inizio della seduta abbronzante Trascorsi 20 secondi dall’ultima immissione, il display La seduta abbronzante inizierà automaticamente al passa ad indicare il tempo di abbronzatura. termine del periodo di riscaldamento, controllato dal timer. Durante il periodo di riscaldamento è possibile Una riga informativa sul bordo inferiore del display iniziare manualmente la seduta abbronzante in ogni segnala le caratteristiche correntemente selezionate. -
Page 19: Funzioni Di Base
Durante la seduta abbronzante, è necessario accedere rapidamente alle funzioni di base, come il controllo del volume, la ventola ed i tubi abbronzanti per il viso. La posizione dell’utente dovrà anche rendere possibile la modifica delle impostazioni preselezionate. Il pannello di Sezione delle funzioni di controllo soddisfa entrambe le esigenze. -
Page 20: Sezione Variabile Del Pannello Di Controllo
Sezione variabile del pannello di controllo Durante la seduta abbronzante si continua ad avere accesso alle impostazioni effettuate tramite la funzione di “preselezione”. Se si desidera modificare le scelte effettuate, è possibile fare ciò nella sezione variabile del pannello di controllo. Premendo uno dei pulsanti freccia, sopra o sotto il simbolo di passaggio , tutte le funzioni disponibili saranno visualizzate in sequenza secondo il principio di rotazione. - Page 21 FUNZIONI AUDIO ESEMPIO: ATTIVAZIONE DELLE FUNZIONI AUDIO A disposizione dell’utente sono disponibili fino a quattro sorgenti audio. Se si passa ad un’altra sorgente sarà prima necessario ATTIVA attivarla. Ciò avviene premendo il pulsan (ad eccezione dell’audio USB). Tutte le funzioni audio non attive sono contrassegnate da “OFF”...
-
Page 22: Standby Mode / Service Mode
Standby mode / service mode While the tanning device is in standby mode, you can Switching the decorative light- switch the decorative lighting of the tanning device ing on and off on and off and trigger an aquaCool spraying test (1 spraying cycle). -
Page 23: Led Boosters In Standby Mode
SERVICE MENU - BASIC OPERATION LED boosters in standby mode The service menu is divided into the main menu and In standby mode, the LED boosters work as deco- subordinate groups of functions. rative lighting with minimum power. For testing and If you choose a menu item, e.g. - Page 24 CHANGE SETTINGS STORE & EXIT • Depending on the respective function, you can • Save your settings by pressing the button 3 change values, select options and switch functions (STORE). If you fail to do so, the system will not on or off.
-
Page 25: Service Menu - Overview
Service menu - Overview VERSION: 04.42 KBL-7 ENVIRONMENT AROMA ① Language ㊹ Aroma ② Contrast ㊺ Aroma status reset ③ TIME AND DATE ㊻ Cycle time ④ TIMER DECORATIVE LIGHTING ㊼ Aroma cabin automatic ⑤ Maximum tanning time ㊽ Aroma cycles per hour ㊾... -
Page 26: Service Codes
Service menu - options Service codes SERVICE-CODE LEVEL 1 In order to avoid operating errors, read Access to the service menu start window is pro- through the basics at the beginning of tected by CODE 1. When delivered, this CODE is the “Service Menu”... - Page 27 ③ The menu item „Timer decorative lighting“ offers you ENVIRONMENT 03/05 two switching cycles (A and B) for each day of the TIME AND DATE week. > press ENTER Entry of date and time. Invoke the submenu by NOTE - SWITCHING CYCLES pressing START (ENTER).
- Page 28 ④ ⑤ ENVIRONMENT 05/05 ENVIRONMENT 04/05 Maximum tanning time TIMER DEKOLIGHT > > press ENTER > 5min .. . 45min Sets the maximum tanning time for all timers. In Entering switching times for the decorative lighting. the easyCare operating mode, the setting has been The submenu is invoked by pressing START (ENTER).
- Page 29 ⑬ ⑨ PRESELECTION 04/06 HOUR METERS 04/04 Aircon (Aircondition) Number of sunbaths > > 0000 Reset: press `-` for 2s > on > off 2 sec. = reset Fixes the “preSelection” setting of the air- conditioning system. Indicates the number of tanning sessions (sunbaths) and includes a reset function.
- Page 30 ㉒ ⑱ AUDIO 07/22 AUDIO 03/22 Studio channel selection megaVoice language > bcd > > English > > puls code > German > off > ... Allows for the change-over between pulse-code Fixes the language setting of the megaVoice system. and BCD-code mode with the Studio music signal The following languages are fully supported: pending and deactivates the external-channel...
- Page 31 ㉖ ㉛ AUDIO 11/22 AUDIO 16/22 Default volume tanning Treble MP3 - USB > > > 0 .. . 9 > -14 .. . +14 dB Sets the volume for the tanning mode. Sets the treble for MP3 - USB operation. Factory setting: 6 Factory setting: +14 dB ㉗...
- Page 32 ㊱ ㊶ AUDIO 21/22 AQUA 04/06 High-bass Studio Line-in aquaCool start testcycle > > Start: press `+` for 2s > -14 .. . +14 dB Sets the high-bass for studio music operation. Starts the aquaCool test (1 cycle). Factory setting: +08 dB ㊲...
- Page 33 The menu item „TIMER AROMA“ offers you ㊺ a switching cycle for each day of the week. AROMA 02/07 Aromastatus reset > Reset: press `-` for 2s NOTE - SWITCHING CYCLES Using the setting „monday-sunday“, the switching 2 sec. = reset cycle will be the same for each day of the week.
- Page 34 ㊿ ㊾ AROMA 07/07 AROMA 06/07 Aroma start testcycle TIMER AROMA > Start: press `+` for 2s > press ENTER Entering switching times for the Aroma Timer. Starts the Aroma test (1 cycle). The submenu is invoked by pressing START (ENTER). SUBMENU AIR CONDITIONING 01/02...
- Page 35 The easyCare menu item is only available with CPI EASYCARE\SETTINGS 03/07 Energy and smart technology tanning devices that easyCare tanning time are connected to an easyCare system. > > 8min .. . 20min EASYCARE 01/03 SETTINGS Allows for preselecting the tanning time. The >...
- Page 36 SERVICE 02/11 EASYCARE\SETTINGS 07/07 SERVICE-CODE Melanin min runtime > press ENTER > > 1.. .20 Submenu call with START/ENTER. These settings must only be made by trained service personnel! Factory setting: EU=10 / USA=6 SUBMENU SERVICE CODE Service Code Level 1 EASYCARE 02/03 Service Code Level 2...
- Page 37 SERVICE 03/11 SERVICE 05/11 BLUETOOTH FIRMWARE-VERSIONS > press ENTER > press enter Submenu call with START/ENTER. Displays the cur- Submenu BLUETOOTH. rent firmware version of the system components. Invoked by pressing START (ENTER). Do not operate the system with different firmware versions! •...
- Page 38 SERVICE 01/02 Service mode without tanning > Start: press `ENTER` for 2s Troubleshooting mode. The service mode is switched on for 30 minutes. The mains voltage is connected. Error notifications are ignored, but tanning cannot be started. SERVICE 02/02 EVENTLOG 01/01 Service mode with tanning >...
-
Page 39: Impostare L'illuminazione Decorativa
colorMotion controller Impostare l’illuminazione decorativa Interruttore ON/OFF Illuminazione decorativa Per gli apparecchi con tecnologia LED è disponibile il nostro controller colorMotion che consente di controllare in remoto le modalità di colori fourSeason. Selettore programma colorWheel Aumentare / ridurre luminosità o frequenza colorMotion controller - Elementi di comando Con il raffinato controller colorMotion è... -
Page 40: Manutenzione E Pulizia
• Se possibile, utilizzare lo speciale prodotto deter- • Rimuovere la spina di corrente dalla gente e disinfettante “megaClean”, fornito da KBL rete di alimentazione. per pulire le parti in acrilico e le impugnature, di- • Assicurare il dispositivo da accensioni luendolo in acqua in rapporto di 1:13. -
Page 41: Intervalli Di Manutenzione
Intervalli di manutenzione Utensili e ausili Componente / Cacciavite esagonale (SW 4 / 60mm) Pulizia / cura Sostituzione parte di usura Art. No.: 3410055263 Se viene Serbatoio visualizzato Cacciavite intaglio a croce (PH2) Quando necessario condensa il messaggio corrispondente Cacciavite intaglio a croce (PH2) a 90° A seconda delle condizioni lo- Filtro aria... -
Page 42: Sbloccaggio Del Basamento
ABBASSAMENTO DELLA LASTRA DEL SOFFITTO / Sbloccaggio del basamento DELLA LASTRA LATERALE ↵ ↵ Attention Attenzione! The bench must only be opened with bench Evitare di far cadere la lastra quando la pane folded down. si apre! • Infine aprire la chiusura della lastra ①... - Page 43 Aprire i 3 dispositivi di bloccaggio utilizzando ⑤ cacciavite esagonale dotazione (3410055263). ⇒ Abbassare la lastra. ⑧ ⑧ ⑨ RIMOZIONE DELLA LASTRA DEL SOFFITTO ↵ ⓐ ⓑ Di solito non è necessario rimuovere la lastra del soffitto per le operazioni di manutenzione e pulizia. ⑧...
-
Page 44: Lastre Filtro
SOSTITUZIONE DELLE LASTRE FILTRO Lastre filtro ↵ ⑬ FUNZIONE DI SICUREZZA I tubi abbronzanti per il viso sono dotati di un’ulteriore funzione di sicurezza. Dietro ciascuna lastra filtro si trova infatti un interruttore di sicurezza, il quale spegne il basamento abbronzante se la lastra filtro è mancante o danneggiata. -
Page 45: Tubi
SOSTITUZIONE DEL TUBO SOFFITTO / PARTE Tubi LATERALE ↵ Abbassare la lastra del soffitto e/o quella Pagina laterale. ⇒ Rimuovere i tubi. • Installando i tubi, assicurarsi che la dicitura sul tubo sia visibile. Se detta dicitura viene installata in una diversa posizione, l’effetto Tubi P2 abbronzante sarà... -
Page 46: Pannelli Abbrozzanti Sulle Spalle
SOSTITUZIONE DELLA LAMPADA AD ALTA Pannelli abbrozzanti sulle PRESSIONE spalle Attenzione! Far installare e rimuovere le lampade ad alta pressione esclusivamente da personale tecnico qualificato. pannelli abbrozzanti sulle spalle L’accumulo di sporco o il montaggio non Tan” ⑱ possono essere installati “x-tra corretto possono provocare danni alla facoltativamente al posto della parte... -
Page 47: Interior Unit Lighting
㉑ ⑲ ㉒ Rondella ㉓ Aletta di centraggio Svitare la vite di ritenuta (M6 x12) del coper- ⑲ chio rivestito in cromo. Estrarre con attenzione dal supporto la ⇒ ㉑ lampada ad alta pressione. Usare un panno Rimuovere il coperchio rivestito in cromo. pulito e privo di grasso. -
Page 48: Filter Cartridges
Open the lock of the filter insert. ⇒ with copper crease or adhesive lubricant ⇒ Remove the filter insert. HHS-2000 (KBL 1200024000). M a n u a l e o p e r a t i v o | megaSun 6700 - 6800 - 6900... - Page 49 REPLACING THE SPRING-LOADED WIRE ROPES (PREPARATION) ㉖ ㉚ Page Remove the screw (M6x12) of the shoulder Open the bench part. ㉚ tanner or the shoulder part. Disconnect the cable connections of the ㉖ audio system (only on right-hand side). Pay attention to the correct connections according to the colours ㉖...
- Page 50 REPLACING THE SPRING-LOADED WIRE ROPES Page Tilt down the side pane. Loosen the hexagon socket head screw ㉜ ㊴ (SW10) by approx. two turns. ㉝ Remove the hinge cap. ㊲ ㉞ ㊵ Page Tilt the canopy pane down. Remove the front fastening of the end cap of ㉞...
-
Page 51: Ventilation And Air-Conditioning
SERVICING THE VENTILATION SYSTEM Ventilation and air-conditioning ⇒ ↵ Check all hose connections. Remove any kinks in the air hoses. Replace ⇒ defective hoses immediately. In order to preserve the performance of the air-con- ditioning unit, clean the heat exchangers after The exhaust air hose must not exceed a 500 - 600 hours of operation. -
Page 52: Recording To An Sd Card
EMPTYING THE CONDENSATE TANK The condensate pump transports the condensation water into a canister via a hose. Once this condensate canister is full, a corresponding message is displayed. The air-conditioning symbol flashes (check), and the air-conditioning unit switches off shortly afterwards. ㊺... -
Page 53: Replacing Aroma And Aquacool Media
↵ ㊽ Attention! Do not use any agents other than aquaCool and Aroma gel supplied by KBL! • Risk of infections • Function of nozzles impaired REPLACING THE AQUACOOL CANISTER Due to the system a residual amount remains in the canister. -
Page 54: System Messages
System messages ERROR MESSAGES After the error has been eliminated, all error messages must be acknowledged by pressing START on the interior display Status message Description Remedy Check the air-intake/air-discharge system. Let the Excess temperature bimetal Bimetal switch triggers. sunbed cool down. Enabling signal from coin-box system comes in longer than the time value ap- Maximum tanning time! - Page 55 INFORMATION MESSAGES Info. message Description Remedy The content of the aquaCool canister is Fill level aquaCool Replace the empty aquaCool canister with a full one. sufficient for another 2.5 hours of operation canister low Do not replace aquaCool with any other liquid. with a spraying time of 6 seconds each.
-
Page 56: Dati Tecnici
Dati tecnici Condizioni ambientali In ambienti asciutti (cabine) con sufficiente circolazione d‘aria • Umidità dell‘aria relativa: ≤ 70% Luogo d‘installazione • Temperatura ambiente: ≤ 30°C • Altezza minima d‘ingombro: 2400 mm Pesi e misure Dimensioni (mm) 1534 x 2380 x 1430 (chiuso) (altezza x larghezza x 1942 x 2380 x 1430 (aperto) profondità) - Page 57 CARATTERISTICHE APPARECCHIO - secondo il tipo UV III e 0,3 W/m come da EN 60335-2-27 megaSun 6700 alpha - business Super Codice articolo Campo chiave di equivalenza 18x ultimate 1806 R 100W 3230076000 100-R-(20-27) / (2,6-3,6) Soffitto: Tubi 6x ultimate 1806 R 100W 3230076000 100-R-(20-27) / (2,6-3,6) abbronzanti...
- Page 58 CARATTERISTICHE APPARECCHIO - secondo il tipo UV III e 0,3 W/m come da EN 60335-2-27 megaSun 6800 alpha - hurricane Ultra Power Codice articolo Campo chiave di equivalenza 20x hurricane 1809 R 160W 3230076128 160-N-(23-30) / (2,7-3,7) Soffitto: Tubi abbronzanti 6x hurricane 1809 R 160W 3230076128 160-N-(23-30) / (2,7-3,7)
- Page 59 CHIAVE DI EQUIVALENZA PER LAMPADE FLUORESCENTI UV Marcatura delle lampade fluorescenti UV secondo IEC 61228 Esempio di codice di una lampada Utilizzo di tubi di ricambio. 160-R-32 / 3,2 Le tabelle d‘insolazione su cui questo appa- recchio si basa si riferiscono esclusivamente all‘uso con il corredo di tubi originale! Rapporto delle irradianze UV efficaci NMSC ≤...
- Page 60 Ringstraße 24-26 56307 Dernbach / Germania fon: +49 (0) 26 89.94 26-0 fax: +49 (0) 26 89.94 26-66 mail: megaSun@kbl.de www.megaSun.de...
Need help?
Do you have a question about the megaSun 6900 alpha deluxe and is the answer not in the manual?
Questions and answers