Table of Contents
Advertisement
Available languages
Available languages
Quick Links
Advertisement
Table of Contents

Related Manuals for KBL megaSun 6900 Alpha


Summary of Contents for KBL megaSun 6900 Alpha
- Page 1 UTILISATION ET MAINTENANCE...
- Page 2 L’exportation ou l’exploitation des appareils mentionnés dans ce mode d’emploi sont interdites respectivement aux États-Unis et au Canada. Dans un tel cas, la société KBL AG n’assume aucune responsabilité du fabricant. Nous attirons expressément l’attention sur le fait qu’en cas d’infractions, des risques élevés de responsabilité...
-
Page 3: Table Of Contents
Table des matières Informations générales ......... 4 Service menu - Basics .......... 23 Informations sur ces instructions ......4 Service menu - Overview ........25 Transport avec le chariotélévateur ......4 Service codes ............26 Autres modes de transport ........4 Service menu - options ......... -
Page 4: Informations Générales
Informations générales Informations sur ces Mise au rebut de l’ancien instructions équipement Ces instructions sont destinées Cet appareil contient des composants qui ne • au personnel d‘exploitation, peuvent pas être jetés avec les ordures ménagères. • aux utilisateurs, • au personnel de maintenance. Mettez au rebut votre ancien équipement de manière Toute personne utilisant cet appareil doit s’être écologique à... -
Page 5: Consignes De Sécurité
La société KBL décline toute responsabilité en cas de dommages résultant d’une utilisation non conforme ou premier degré sont atteints ou ont été atteints de d’un non respect de ce manuel d’utilisation. -
Page 6: Consignes De Sécurité
On doit respecter toutes les consignes de sécurité “USB-Connect” qui est proposé en téléchargement qui sont indiquées sur l’appareil. par KBL. Vous obtiendrez des informations détail- • Aucun dispositif de sécurité ne doit être enlevé et/ lées sur la procédure en utilisant le bouton d’aide du ou débranché. -
Page 7: Description Of The Unit
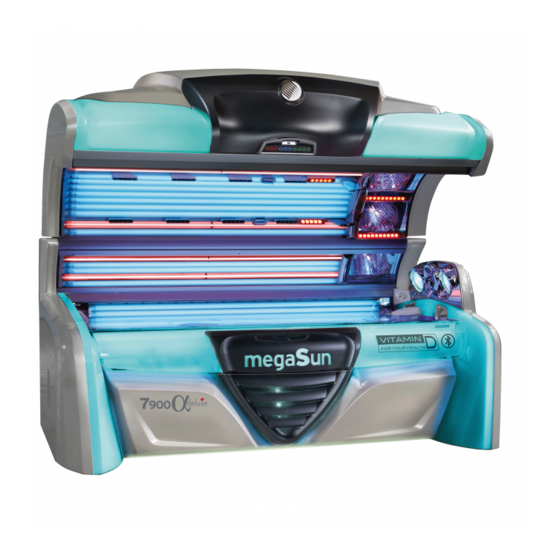
Description of the unit Standards aquaCool - nozzles (optional equipment) This tanning system complies with the following preSelection display with USB connector standards in their respectively applicable version: Collagen booster • EN 60335-2-27 Interior display • EMC 2004/108/EC Facial tanner •... -
Page 8: Connections
The connection to the 400 V mains must be protected by fuses. Their specifications are listed in the chapter “Technical data”. A residual current-operated circuit breaker (RCD) with short time delay is absolutely required. KBL AG Level adjustment studio music recommends the following type: KBL 3200 0770 00 signal (type (Typ ABB F 204 A - 40//0,03 AP-R). -
Page 9: Operation Using Different Audio Sources
(OPTIONAL FEATURE) If you decide for a connection to a 100 V audio system, you will need a transformer (KBL no.: 9100 0170 00) for the transmission of the audio signal. ATTENTION This connection must be made by trained service •... -
Page 10: Bluetooth Connection
The MP3 tracks to be played must not exceed A Bluetooth connection can be established in a sampling rate of 320 Kbit/s. standby and during tanning mode. KBL AG attaches great importance to hardware Make sure that you are within the recep- compatibility. large number tion area (about 2 meters). -
Page 11: Connecting The Channel Selection
COMPATIBILITY OF BLUETOOTH DEVICES KBL AG attaches great importance to hardware com- patibility. Due to the large number of manufacturers, KBL can not guarantee a 100 % compatibility. In rare cases, it may happen that a bluetooth connection can not be established. -
Page 12: Connecting The External Timer
Connecting the external timer AROMA The Aroma box is attached within the aquaCool box Connect the external timer (coin box, studio control) and equipped with three hose connections, one for according to the instructions supplied with the timer. ⑤ the compressed-air supply and two leading to the The following diagram shows the wiring requirements ⑥... -
Page 13: Mise En Service
Mise en service Avant le premier démarrage: MODE BRONZAGE • Fixez durablement sur le mur près de l‘appareil Les tubes sont allumés et une séance de bronzage a le panonceau fourni ou un panonceau avec lieu. Lorsque le mode bronzage est activé, vous pou- l‘inscription suivante: vez utiliser le panneau de commande pour modifier les paramètres de la séance en cours. -
Page 14: Guide De Bronzage
Guide de bronzage En règle générale, une peau bronzée normale a après bronzage peuvent endommager irréversiblement la trois à cinq jours d’exposition aux ultraviolets un peau et les yeux. Ces effets biologiques dépendent bronzage régulier. Ces expositions aux ultraviolets de la qualité et de la quantité des rayons reçus ainsi doivent avoir lieu une fois tous les deux jours. -
Page 15: Temps D'exposition
Temps d’exposition Vous trouverez dans les tableaux suivants les temps d’exposition qui vous conviennent en fonction de votre type de peau. Vous trouverez la définition exacte des types de peau dans les tableaux relatifs aux types de peau inclus dans la livraison. Si aucune exposition n’a lieu pendant 4 semaines, il convient de reprendre à la première séance de bronzage. -
Page 16: Mode Bronzage
Mode bronzage L‘écran de commande correspondant se trouve au DANGER centre du couvercle. Dose excessive de rayonnement UV Selon l’équipement choisi, vous y trouverez jusqu’à Une longue phase de bronzage non contrôlé sept touches de commande qui vous permettront de peut gravement endommager votre peau et procéder à... - Page 17 M e n u d e p r é s é l e c t i o n MP3 ext. MEDIT. CARIBIC MP3 int. STUDIO VOICE AIRCON AROMA AQUA BASIC Présélection du niveau de Présélection de la source Présélection des autres fonctions bronzage de musique Vous trouverez ici d’autres fonctions que...
-
Page 18: Début De La Séance De Bronzage
Début de la séance de bronzage REMARQUE: Une fois la dernière commande effectuée, l’écran La séance de bronzage démarre automatiquement repasse au mode d’affichage « Durée du bronzage » une fois la durée de mise en route paramétrée dans après 20 secondes. la minuterie écoulée. -
Page 19: Fonctions De Base
Pendant la séance de bronzage, vous devez pouvoir accéder rapidement aux fonctions de base : réglage du volume, du ventilateur corporel et de l’unité de bronzage visage. Il faut également que vous puissiez modifier votre sélection initiale. Fonctions de base Le panneau de commande assure cette fonctionnalité. -
Page 20: Élément De Commande Modulaire
Élément de commande modulaire Pendant la séance de bronzage, vous pouvez toujours accéder aux choix effectués en présélection. Si vous voulez effectuer des modifications, vous pouvez utiliser l’élément de commande modulaire. Si vous appuyez sur l’une des touches fléchées , au-dessus ou au-dessous de l’affichage alterné , toutes les fonctions disponibles s’affichent selon le principe de rotation. - Page 21 FONCTIONS « MUSIQUE » SCHÉMA : ACTIVATION DES FONCTIONS « MUSIQUE » Vous disposez au maximum de quatre sources de musique qui doivent être É activées lors du changement! L‘activation ACTIVER se fait par la touche (Exception: USB-Audio). Afin de pouvoir toujours identifier la source de musique active, toutes les fonctions de musique inactives sont indiquées «...
-
Page 22: Standby Mode / Service Mode
Standby mode / service mode While the tanning device is in standby mode, you can Switching the decorative switch the decorative lighting of the tanning device lighting on and off on and off and trigger an aquaCool spraying test (1 spraying cycle). -
Page 23: Led Boosters In Standby Mode
LED boosters in standby mode SERVICE MENU - BASIC OPERATION The service menu is divided into the main menu and In standby mode, the LED boosters work as deco- subordinate groups of functions. rative lighting with minimum power. For testing and If you choose a menu item, e.g. - Page 24 STORE & EXIT CHANGE SETTINGS • Save your settings by pressing the button 3 • Depending on the respective function, you can (STORE). If you fail to do so, the system will not change values, select options and switch functions take over the changes you made.
-
Page 25: Service Menu - Overview
Service menu - Overview VERSION: 04.42 KBL-7 ENVIRONMENT AROMA ① Language ㊹ Aroma ② Contrast ㊺ Aroma status reset ③ TIME AND DATE ㊻ Cycle time ④ TIMER DECORATIVE LIGHTING ㊼ Aroma cabin automatic ⑤ Maximum tanning time ㊽ Aroma cycles per hour ㊾... -
Page 26: Service Codes
Service codes Service menu - options SERVICE-CODE LEVEL 1 In order to avoid operating errors, read Access to the service menu start window is pro- through the basics at the beginning of tected by CODE 1. When delivered, this CODE is the “Service Menu”... - Page 27 ③ The menu item „Timer decorative lighting“ offers you ENVIRONMENT 03/05 two switching cycles (A and B) for each day of the TIME AND DATE week. > press ENTER Entry of date and time. Invoke the submenu by NOTE - SWITCHING CYCLES pressing START (ENTER).
- Page 28 ⑤ ④ ENVIRONMENT 05/05 ENVIRONMENT 04/05 Maximum tanning time TIMER DEKOLIGHT > > press ENTER > 5min .. . 45min Entering switching times for the decorative lighting. Sets the maximum tanning time for all timers. In the easyCare operating mode, the setting has been The submenu is invoked by fixed to 30 minutes.
- Page 29 ⑬ ⑨ PRESELECTION 04/06 HOUR METERS 04/04 Aircon (Aircondition) Number of sunbaths > > 0000 Reset: press `-` for 2s > on > off 2 sec. = reset Fixes the “preSelection” setting of the air- conditioning system. Indicates the number of tanning sessions (sunbaths) and includes a reset function.
- Page 30 ㉒ ⑱ AUDIO 07/22 AUDIO 03/22 Studio channel selection megaVoice language > bcd > > English > > puls code > German > off > ... Allows for the change-over between pulse-code Fixes the language setting of the megaVoice system. and BCD-code mode with the Studio music signal The following languages are fully supported: pending and deactivates the external-channel...
- Page 31 ㉖ ㉛ AUDIO 11/22 AUDIO 16/22 Default volume tanning Treble MP3 - USB > > > 0 .. . 9 > -14 .. . +14 dB Sets the volume for the tanning mode. Sets the treble for MP3 - USB operation. Factory setting: 6 Factory setting: +14 dB ㉗...
- Page 32 ㊱ ㊶ AUDIO 21/22 AQUA 04/06 High-bass Studio Line-in aquaCool start testcycle > > Start: press `+` for 2s > -14 .. . +14 dB Sets the high-bass for studio music operation. Starts the aquaCool test (1 cycle). Factory setting: +08 dB ㊲...
- Page 33 ㊺ The menu item „TIMER AROMA“ offers you AROMA 02/07 a switching cycle for each day of the week. Aromastatus reset > Reset: press `-` for 2s NOTE - SWITCHING CYCLES Using the setting „monday-sunday“, the switching 2 sec. = reset cycle will be the same for each day of the week.
- Page 34 ㊿ ㊾ AROMA 07/07 AROMA 06/07 Aroma start testcycle TIMER AROMA > Start: press `+` for 2s > press ENTER Entering switching times for the Aroma Timer. Starts the Aroma test (1 cycle). The submenu is invoked by pressing START (ENTER). SUBMENU AIR CONDITIONING 01/02...
- Page 35 The easyCare menu item is only available with CPI EASYCARE\SETTINGS 03/07 Energy and smart technology tanning devices that easyCare tanning time are connected to an easyCare system. > > 8min .. . 20min EASYCARE 01/03 SETTINGS Allows for preselecting the tanning time. The >...
- Page 36 SERVICE 02/11 EASYCARE\SETTINGS 07/07 SERVICE-CODE Melanin min runtime > press ENTER > > 1.. .20 Submenu call with START/ENTER. These settings must only be made by trained service personnel! Factory setting: EU=10 / USA=6 SUBMENU SERVICE CODE Service Code Level 1 EASYCARE 02/03 Service Code Level 2...
- Page 37 SERVICE 03/11 SERVICE 05/11 BLUETOOTH FIRMWARE-VERSIONS > press ENTER > press enter Submenu call with START/ENTER. Displays the cur- Submenu BLUETOOTH. rent firmware version of the system components. Invoked by pressing START (ENTER). Do not operate the system with different firmware versions! •...
- Page 38 SERVICE 11/11 SERVICE 01/02 Reboot Service mode without tanning > Reboot: press `-` for 2s > Start: press `ENTER` for 2s Troubleshooting mode. Performs a restart of the electronics. The service mode is switched on for 30 minutes. The mains voltage is connected. Error notifications Attention are ignored, but tanning cannot be started.
-
Page 39: Réglage De L'éclairage Décoratif
Réglage de l’éclairage décoratif colorMotion controller Les appareils dotés de lampes LED vous permettent Touche Marche/Arrêt d’utiliser le contrôleur colorMotion Controller pour Éclairage décoratif gérer à distance les modes de couleurs fourSeason. Touche de sélection de programmes colorWheel Modification de la luminosité ou de la fréquence L’élégante roue des couleurs et le panneau de com- Commandes du colorMotion Controller... -
Page 40: Entretien Et Nettoyage
Utiliser si possible, pour les parois en acrylique, assurer le fonctionnement sécurisé des solariums. le nettoyant désinfectant spécial « megaClean » Les opérations de nettoyage se feront en fonction fourni par KBL en le diluant dans de l’eau (1 vol. des besoins. pour 13 vol. d’eau). DANGER PIÈCES LAQUÉES ET EN PLASTIQUE... -
Page 41: Fréquence D'entretien
Fréquence d’entretien Outillage et accessoires Élément/ Nettoyage/ Tournevis pour vis à six pans creux (span. Remplacement Pièce d‘usure Entretien 4 / 60 mm) Art. N° 3410055263 Bidon d’eau Le vider quand Tournevis cruciforme standard (PH2) de condensa- l’information res- En cas de besoin tion pective s’affiche Tournevis cruciforme coudé... -
Page 42: Déverrouillage Du Banc
Déverrouillage du banc DÉGAGEMENT PLAQUE COUVERCLE / PLAQUE LATÉRALE ↵ ↵ Attention Attention! The bench must only be opened with bench Empêchez le panneau de tomber lorsque pane folded down. vous l’ouvrez. • Ouvrez enfin le verrou du panneau ① intermédiaire Ⓑ. - Page 43 Ouvrir les 3 chevilles de fermeture à l’aide ⑤ du tournevis pour vis à six pans creux fourni (3410055263). ⇒ Rabattre la plaque. ⑧ ⑧ ⑨ ENLEVER LA PLAQUE DU COUVERCLE ↵ ⓐ ⓑ En général, il n’est pas nécessaire d’enlever la plaque du couvercle pour la maintenance et l’entretien.
-
Page 44: Panneaux Filtrants
Panneaux filtrants REMPLACEMENT DES PANNEAUX FILTRANTS ↵ ⑬ FONCTION DE SÉCURITÉ Les unités de bronzage visage sont dotées d’une fonction de protection supplémentaire. Un interrupteur de sécurité est placé derrière chaque Panneaux filtrant. Il éteint la lampe si le Panneaux filtrant fait défaut ou est cassé. -
Page 45: Tubes
Tubes REMPLACEMENT TUBES COUVERCLE / CÔTÉ Rabattre la plaque de couvercle et / ou la ↵ Page plaque latérale. ⇒ Retirer les tubes. • Lors de l’installation des tubes, vérifier que le marquage est parfaitement lisible! Dans le Tubes P2 cas contraire, la fonction bronzage n‘est pas Si votre lit de bronzage est équipé... -
Page 46: Bronzeur Pour Les Épaules
Bronzeur pour les épaules Pendant le fonctionnement, les salissures et un mauvais positionnement peuvent endommager la lampe haute pression et son support! Le bronzeur pour les épaules « x-tra Tan » • Insérer les lampes en les plaçant bien droit dans ⑱... -
Page 47: Interior Unit Lighting
㉑ ⑲ ㉒ Rondelle ressort ㉓ Ergot centrage Desserrer la vis de fixation (M6x12) du revê- ⑲ tement chromé. Sortir avec précaution l’ampoule haute pres- ⇒ ㉑ sion de son support. Utiliser un chiffon propre Enlever le revêtement chromé. et non gras. ㉒... -
Page 48: Filter Cartridges
⇒ Remove the filter insert. HHS-2000 (KBL 1200024000). α U t i l i s a t i o n e t M a i n t e n a n c e | megaSun 7900... - Page 49 REPLACING THE SPRING-LOADED WIRE ROPES (PREPARATION) ㉖ ㉚ Page Remove the screw (M6x12) of the shoulder Open the bench part. ㉚ tanner or the shoulder part. Disconnect the cable connections of the ㉖ audio system (only on right-hand side). Pay attention to the correct connections according to the colours ㉖...
- Page 50 REPLACING THE SPRING-LOADED WIRE ROPES Page Tilt down the side pane. Loosen the hexagon socket head screw ㉜ ㊴ (SW10) by approx. two turns. ㉝ Remove the hinge cap. ㊲ ㉞ ㊵ Page Tilt the canopy pane down. Remove the front fastening of the end cap of ㉞...
-
Page 51: Ventilation And Air-Conditioning
Ventilation and air-conditioning SERVICING THE VENTILATION SYSTEM ⇒ ↵ Check all hose connections. Remove any kinks in the air hoses. Replace ⇒ defective hoses immediately. In order to preserve the performance of the air-con- ditioning unit, clean the heat exchangers after The exhaust air hose must not exceed a 500 - 600 hours of operation. -
Page 52: Recording To An Sd Card
EMPTYING THE CONDENSATE TANK The condensate pump transports the condensation water into a canister via a hose. Once this condensate canister is full, a corresponding message is displayed. The air-conditioning symbol flashes (check), and the air-conditioning unit switches off shortly afterwards. ㊺... -
Page 53: Replacing Aroma And Aquacool Media
↵ ㊽ Attention! Do not use any agents other than aquaCool and Aroma gel supplied by KBL! • Risk of infections • Function of nozzles impaired REPLACING THE AQUACOOL CANISTER Due to the system a residual amount remains in the canister. -
Page 54: System Messages
System messages ERROR MESSAGES After the error has been eliminated, all error messages must be acknowledged by pressing START on the interior display Status message Description Remedy Check the air-intake/air-discharge system. Let the Excess temperature bimetal Bimetal switch triggers. sunbed cool down. Enabling signal from coin-box system comes in longer than the time value ap- Maximum tanning time! - Page 55 ERROR MESSAGES After the error has been eliminated, all error messages must be acknowledged by pressing START on the interior display Status message Description Remedy Frequency detection: power Frequency detection failed. No mains volt- supply connection faulty Check mainboard connector X6/E6. age.
-
Page 56: Données Techniques
Données techniques Conditions d’exploitation Dans des pièces sèches (cabines) avec une aération suffisante • Taux d’humidité: ≤ 70% Lieu d’installation • Température ambiante: ≤ 30°C • Hauteur minimale: 2400 mm Dimensions et poids Dimensions en mm 1713 x 2380 x 1430 (fermé) (h x l x L) 2087 x 2380 x 1430 (overt) Charge porteuse max. - Page 57 CARACTÉRISTIQUES TECHNIQUES DE L’APPAREIL - correspondant au Type III d’UV et à 0,3W/m conformément à EN 60335-2-27 megaSun 7900 alpha - Electronic Power Super Référence Code d’équivalence rangée Partie supérieure: 18x ultimate 1806 R 100W 3230076000 100-R-(20-27) / (2,6-3,6) 2x ultimate 1863 O 80W 3230074882 80-O-(15-20) / (7,4-10) Tubes...
- Page 58 CARACTÉRISTIQUES TECHNIQUES DE L’APPAREIL - correspondant au Type III d’UV et à 0,3W/m conformément à EN 60335-2-27 megaSun 7900 alpha - CPI Energy Super Référence Code d’équivalence rangée Partie supérieure: 20x ultimate 1806 R 100W 3230076000 100-R-(20-27) / (2,6-3,6) Tubes Paroi latérale: 6x ultimate 1806 R 100W 3230076000...
- Page 59 CARACTÉRISTIQUES TECHNIQUES DE L’APPAREIL - correspondant au Type III d’UV et à 0,3W/m conformément à EN 60335-2-27 megaSun 7900 alpha - IntelliSun - Ultra Power Référence Code d’équivalence rangée Partie supérieure: 16x ultimate 1859 R 160W 3230076114 160-R-(21-28) / (2,2-3) 4x ultimate 1863 O 80W 3230074882 80-O-(15-20) / (7,4-10)
- Page 60 Ringstraße 24-26 56307 Dernbach / Allemagne Téléphone +49(0)26 89.94 26-0 Télécopie +49(0)26 89.94 26-66 mail: megaSun@kbl.de www.megaSun.de...
Need help?
Do you have a question about the megaSun 6900 Alpha and is the answer not in the manual?
Questions and answers