Table of Contents
Advertisement
Advertisement
Table of Contents

Subscribe to Our Youtube Channel
Related Manuals for WEEDO F150S


Summary of Contents for WEEDO F150S
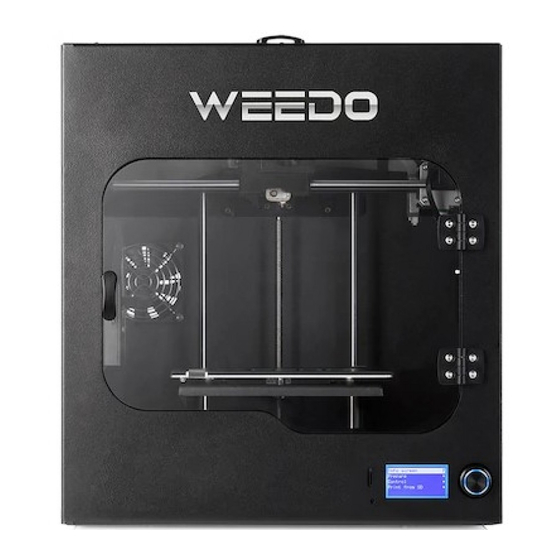
- Page 1 WEEDO F150S 3D Printer User Manual...
-
Page 2: Table Of Contents
Contents 1. Application Notices ............................3 1.1. About the User Manual..........................3 1.2. Safety Precautions............................. 3 1.3. Printing Consumables ..........................3 1.4. Environment requirements........................4 2. Introduction to the Printer..........................4 2.1 Appearance Introduction ..........................4 2.2 Technical Parameters..........................5 3. Install the software of the printer........................6 3.1 Install Wiibuilder software .......................... -
Page 3: Application Notices
9. Frequently Asked Questions and Troubleshooting (FAQ)..................355 1. Application Notices 1.1. About the User Guide This User Guide contains important information on the installation, use, maintenance and other questions frequently raised up about the 3D printer. Please read this user guide carefully before using this 3D printer. For damages to the 3D printer and other losses caused by the violation of safety precautions and operational processes given in this User Guide, the user should take all the responsibilities. -
Page 4: Introduction To The Printer
2. Introduction of the Printer The printer applies the FDM (Fused Deposition Modeling) principle, slice and convert the STL three-dimensional model, then print out the physical object layer by layer. This printer has a series of innovative design such as a metal frame, a fully enclosed structure, an electric heating platform with the characteristic of high printing speed, good printing quality, easy to use, easy maintenance and supporting USB cable print. -
Page 5: Technical Parameters
○ ○ ○ ○ ○ ○ 1 Filament holder 2 SD card socket 3 USB socket for printer 2.2 Technical Parameters Printing parameters Machine parameters Printing Size 200*150*150mm Display Type English Thickness of one 0.1-0.4mm Machine Size 380*340*420mm layer Nozzle Diameter 0.4mm Machine 15kg... -
Page 6: Install Wiibuilder Software
Printing USB/SD Card mode 3. Install the Slicing Software of the Printer Software Wiibuilder is a host computer software for 3D printers, which can be sliced to Wiibuilder generate files for offline printing, online printing, 3D model editing, and management of 3D printers. Wiibuilder uses a multithreading slicing engine, including user interface and professional interface. -
Page 7: Wiibuilder Instructions For Advanced Settings
When you first time use Wiibuilder, you can set it up according to the software interface reminder. When the software is started, parameters can be set up through the "configuration" menu in the upper left corner of the software, choose “GUI choices" , “Easy GUI” is user interface, “Expert GUI" is professional interface. - Page 8 Click the "advanced configure" , you will see the following interface: There are nine settings in the settings box above the advanced settings menu, which are "speed", "infill", "support", "build plate adhesion", "retraction", "material", "empty walk", "machine" and “line width”.
- Page 9 In the settings box below the advanced settings menu, there are four settings, namely "dual extrusion", "warping prevention", "seam" and "others". 3.2.1、"Speed" interface: Top/bottom speed (mm/s): the printing speed of the upper and bottom surfaces of the model. Outer shell speed (mm/s): the printing speed of the model shell. Inner shell speed (mm/s): the printing speed of the shell in the model.
- Page 10 zag, concentric, cross and octet as follows: The shape of each filling method is as follows: Lines— ;Grid— ;Triangles— ; Zig Zag— ; Concentric— ;Cross— ;Octet— 。 Infill before walls: that is to choose whether to print the model after filling and print the outline. Outer before inner: that is to choose whether to print the outline of the model before printing the internal walls.
- Page 11 Support pattern: the supporting shape of the model, including lines, grid, triangles, zig zag and concentric. The drop down menu for the support mode is shown as follows: , Users can set different forms of support according to different models, so that support can be conveniently removed and better support and model contact surfaces can be obtained.
- Page 12 Support interface (%): that is, the filling rate of the supporting surface is generally set by default. Support surface infill pattern: the filling mode of the supporting surface, including lines, mesh, triangles, zig zag and concentric. 3.2.4、"Build plate adhesion" interface: Raft air gap (mm): the space between the the adhesion and the model, the gap of the space determines the difficulty of removing it from the model.
- Page 13 Skirt line count : that is to add the anti overflow line at the edge of the model contact with the platform, it is usually set by default. 3.2.5、"Retraction" interface: In order to prevent stringing during printing process, retraction setup is added in the software. Horizontal travel retraction: that is, when the nozzle is not printing, the nozzle will turn on the retraction setting when horizontal movement.
- Page 14 WEEDO series printer is 1.75mm at present. Automatic change temperature: when printing, the nozzle will automatically change the printing temperature according to the temperature characteristics of the consumables, the general consumables are set by default, no need to select.
- Page 15 Layer start position Y ( mm) : that is, you want to change the Y axis coordinates of the position of the model layer. 3.2.8、"Machine" interface: WEEDO series 3D printers include single nozzle and double nozzle machines. At present, the WEEDO series 3D printers use the 0.4mm diameter nozzle. 3.2.9、“Line Width” interface...
- Page 16 Raft Base Line Width(mm):Width of the lines in the base raft layer. These should be thick lines to assist in build plate adhesion. 3.2.10、"Double nozzle" interface: The interface is the parameter setting of WEEDO double nozzle series.
- Page 17 Standby temperature: that is when a double nozzle machine is printing, one of the nozzles stays at the temperature waiting to be printed. Prime tower: when the double nozzle model is printed, one of the nozzles is waiting to be printed. The residual temperature of the nozzle leads to the overflow of the consumable material from the nozzle.
- Page 18 Z axis offset: when the Z axis bias is changed to negative, the gap between the model and the print base plate is reduced, so that the model and the printing plate are pasted more tightly to prevent the warping. The extra contour of the surface layer is to increase the number of contour in the outer contour of the surface of the model and the printed plate, so that the contact surface of the model bottom and the print floor is greater, so as to prevent the warping edge.
- Page 19 If the general model is not set, there will be concave lines or dots after printing. The right picture is the state of the model in the software, that is, the concave line or point on the solid model is a blank joint. Therefore, when the model is sliced, the "seam"...
- Page 20 The joint position of the printing model is set at random, and the printing model effect is as follows: The setting of the printing model is the sharp corner position. The printing model effect is as follows: Joint position X coordinates: determine the X axis coordinates of the specified joint position. Joint position Y coordinates: determine the Y axis coordinates of the specified joint position.
- Page 21 Skin layers thickness (mm): the thickness of the model surface layer is generally set by default. Horizontal expansion(mm): when there is a deviation in the horizontal printing of the model, a certain parameter can be compensated. Skin alternate rotation: General default settings; Enable print cooling: the nozzle is printed with wire drawing phenomenon.
-
Page 22: Print The First Model
As shown above, all the parameters in the "advanced function" are changed, and then click the "apply" and "OK" to complete all the settings. 4. Print the first model 4.1. Connect the power supply Take out the power cord from the accessory box, insert it the power socket on the left side of the printer and start the printer. -
Page 23: Printing Preparation
4.3 Printing preparation 4.3.1 Take out the TF card from the accessory box and plug it to the card slot. 4.4 Printing Mode On the operation panel, right turn the button to select "print the SD" – Ducky.gcode, press the button to start printing. -
Page 24: Details Of The Printing Operation
5. Details of the Printing Operation 5.1 Operation Panel Setting There are TF card slots beside the 3D printer's display screen, which can be directly printed on the TF card. The LCD and the control keys can be used to replace and debug the machine's filament. 5.1.1 Introduction of the Operation Panel The control panel of the 3D printer consists of a LCD display and a knob. -
Page 25: Operation Panel Menu
5.1.2 Operation Panel Menu The menu tree of the control panel is shown below. The menu is divided into three levels: the left side is the start menu, and the right side is its submenu. Click the button to enter the submenu of the menu item. -
Page 26: Printer Preheat
Select the first item of "Print from SD" from the Start menu to enter the file list of the SD card. This list gives all the gcode format files in the SD card root directory in reverse chronological order. Select the file you want to print, and then click the OK button to start printing. -
Page 27: Filament Replacement
5.1.6.Filament Replacement In the start menu,choose the second item ” Prepare ” ,enter to the secondary menu,choose the second item”Retract” to enter the filament replacement interface. Select "retreat", press the button to enter the filament unload program, heat the nozzle to the preset temperature, then start the nozzle motor to unload the filament. - Page 28 5.1.8 Level the build platform Regular inspection and leveling the printing platform is very important for high quality molding. In the start menu, select the third item "Control", rotate the button and click to select "Manual Level bed" to enter the printer platform debugging interface. Wait for the platform to rise to the highest point, the print head will move to the first measurement point, and insert an A4 paper under the nozzle.
- Page 29 At this point, the printer will enter the following interface. When the printer nozzle moves to a fixed point, start adjusting the spin button on the bottom of the platform and adjust the gap between the platform and the nozzle until the A4 paper has a slight frictional resistance when sliding. After adjustment, click the spin button to enter the next adjustment point until the four-point leveling is completed (the same level is used for each level).
-
Page 30: Auto Home
After adjust, if the gap between the nozzle and platform is not suitable, please repeat to adjust each point. 5.1.9 Auto Home. In the start menu, select item 2 "Prepare", rotate the button and click to select "Auto home", the printer nozzle and platform will automatically return to the home position. -
Page 31: Adjust The Temperature
5.1.11 Adjust the temperature In the start menu, select item 3 "Control", rotate the knob and click the button to select "Temperature", click the button to select the setting "Nozzle " and "bed" to enter the print head temperature reset interface, rotating button can increase or decrease temperature. -
Page 32: Daily Repair And Maintenance
6.Daily Repair and Maintenance 3D Printer needs to perform the regular maintenance,as well as some daily maintenance,in order to ensure the printer can maintain the high performance to run stably. 6.1. Printer Daily Maintenance Guide The daily maintenance mainly contains:clean printer nozzle,replace the printer platform sticker and tape ,printer platform regular check and leveling,replace air filtration core,optical shaft and screw rod maintenance and others. -
Page 33: Replacing The Tape Of The Glass Plate
After that, heat the nozzle to 200 degrees, fix the nozzle with a tool such as a pliers, and use a 1.5mm wrench to clear it until the blocked wire is completely cleaned. Then install the nozzle and fix it with the screw. Note:after clean the nozzle, need to re-calibrate the platform level before printing. -
Page 34: Optical Shaft And Screw Rod Maintenance
Tear the tape sticker from the bottom left of the glass plate, strip it slowly, do not leave any residue, and then paste the new stickers. Be careful not to leave a gap between the stickers. 7. Optical Shaft and Screw Rod Maintenance In the process of using printer, the two directions of X and Y depends on the precise guide rail and shaft X screw rod to ensure stable and precise rectilinear motion.After add silicon grease lubrication, it can reduce the friction and lower the wear of mechanical moving parts,thus it must be performed... - Page 35 Loose the screw and unplug the nozzle. Completely unscrew the two hexagon socket head cap screw at right side,and take out fan and cooling fan. Use a tweezers to clean the filament debris on the motor gear, and installation process is performed according reverse procedures after cleaning.
- Page 36 4. What if the computer software cannot be connected to the printer? Please check whether the USB interface is connected properly; turn off the ReplicatorG software on your computer and try printing again; If it does not work, please restart the computer and the printer. 5.
Need help?
Do you have a question about the F150S and is the answer not in the manual?
Questions and answers