Table of Contents
Advertisement
Advertisement
Table of Contents

Related Manuals for WEEDO F192


Summary of Contents for WEEDO F192
- Page 1 3D PRINTER USER MANUAL...
-
Page 2: Table Of Contents
CONTENTS CONTENTS 1.ATTENTIONS 1.1 ABOUT THE INSTRUCTION BOOK 1.2 SAFETY ATTENTIONS 1.3 PRINTING CONSUMABLE ITEMS 1.4 ENVIRONMENTAL REQUIREMENTS 2.PRINTER BRIEF INTRODUCTION 2.1 APPEARANCE INTRODUCTION 2.2 TECHNICAL PARAMETERS 3. INSTALLATION OF SOFTWARE 3.1. INSTALL PYTHON 3.2. THE INSTALLATION OF REPLICATORG AYCE SPECIAL USE VERSION 3.3. -
Page 3: Attentions
1. ATTENTIONS 1.1 About the instruction book This instruction book contains 3D printer’s installation, use, maintenance, common problems and other important information. Please read this instruction book carefully before use 3D printer. For 3D printer damage and other damages caused by violation of safety matters and operation procedures given in the instruction book, it will be borne by the user. -
Page 4: Printing Consumable Items
8. The socket-outlet shall be installed near the equipment and shall be easily 8. The socket-outlet shall be inst accessible 1.3 Printing Consumable Items Use the printer, please use the printing consumable items provided by the company. The printing consumable sold in the retail market is of different specifications and quality levels, it is very easy to block the printer nozzle and damage the nozzle and electrical machine. -
Page 5: Printer Brief Introduction
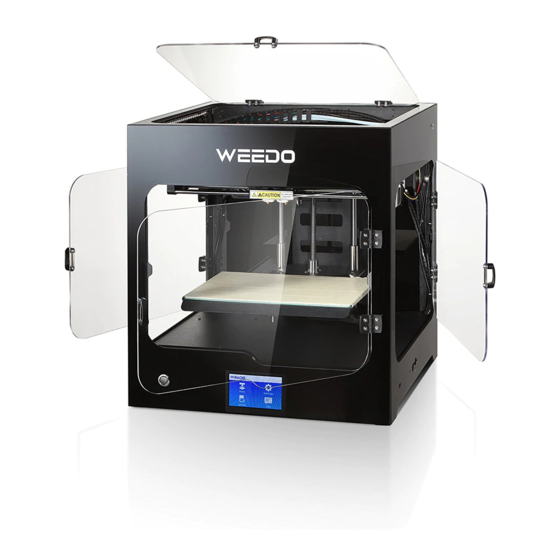
2. PRINTER BRIEF INTRODUCTION The printer is applied with FDM (Fused Deposition Modelin) theory, which performs the slicing conversion for the STL 3D model, and then prints out the real finished product one by one. The printer is of metal frame, fully closed structure, removable printing platform, active air filtration system and one series of innovative design, and is characterized of high printing speed, high quality finished products, easy maintenance, and high-intensity continuous printing. - Page 6 Touch Screen Up Cover Up Cover Front door Front Decorative Panel Left Side Door Filament Hold Power Switch Acrylic Platform The Right View and Back View of Printer SD Card (7) Socket Right Side Door Chassis Fan USB Line Socket Air Filtration Fan Power Socket Filament External Entreance...
-
Page 7: Technical Parameters
20 ~ 150 mm/s Mesh Filter Z axis 0.00125mm Positional Nozzle Number Accuracy XY axis 0.011mm Consumable Parameters Software Parameters Consumable Printing Cura WEEDO Version/ PLA/PLA Pro/ Type Software ReplicatorG WEEDO PVA /ABS Consumable 1,75 mm STL/GCODE/OBJ File Format Diameter... -
Page 8: Installation Of Software
3.INSTALLATION OF PRINTING SOFTWARE 3 INSTALLATION OF PRINT Software Type Software usage This program is used to transfer "gcode" and "x3g" file Weedo _V44EN.exe to "stl" file. When the 3D printer connected to computer (ReplicatorG) by a digital wire, you can use ReplicaterG to control the printing from computer. Python is a must program for ReplicatorG, and it makes Python _ 2.7.6.msi ReplicatorG can achieve model data format conversion. -
Page 9: The Installation Of Replicatorg Ayce Special Use Version
Choose the default option to install all the features. After the installation is complete, click Finish to exit。 3.2. The Installation of ReplicatorG WEEDO Special Use Version Run the software installation package from CD (14), WEEDO_V42.4_EN, in the installation wizard window, click “next”→“I Agree” to continue. In the window of... -
Page 10: The Installation Of Cura Ayce Special Useversion
After the software installation is complete, click "Finish" to exit. 3.3. The Installation of Cura Special Use Version Run the software installation package from CD (14), Cura-14.07-WEEDO, in the installation wizard window, click “install”→“Next”→“Finish”. In the window of selection installation path window, please use the program default route. - Page 11 Note: Cura installation path is the root directory of Disc C When it is first time to use Cura software, go to the guide interface, click “Next”, go into the computer model selection interface, select WEEDO F152, click “Next”, go to the ready interface, click “Finish”, the installation is completed.
-
Page 13: Print The First Model
4.PRINT THE FIRST MODEL 4.1. Attaching the Power Cable (4) External 24V power supply Pick up the power cord from the accessory box, put the male head into the power outlet and female head into the 24V external power wide-mouth adapter; connect the 24V external power round port to the power input jack at the back of the printer. -
Page 14: Assembly Of Filament
4.2. Assembly of Filament 4.2. Assembly of Filament Assemble the filament support (2) according to the “Instruction of Filament Support Setting”, and after it’s done, find out one end of filament from the material tray (2) and sent it to the feed pipe at the back board of printer, until the filament thread out from another end of material pipe. -
Page 15: Printing Preparation
Stuff the excess material filament back to the feeding pipe, and then place the feeding pipe on the feeding hole. 4.3. Printing Preparation Take out the SD card (5) presented in accompany with printer, and plug it to the card slot. -
Page 16: Printing Model
4.4. Printing Model 4.4. Printing Model On the operation panel, choose “Print” the files in the SD card”→”02▁ ThinwallCub.x3g”, press it to start printing. 4.5. Removing Model After model is completed with printing, it uses the presented plastic scraper (13) in accompany with printer, to take the model out along with model edge, or firstly disassemble the printing platform and take out model. -
Page 17: Software Detailed Introduction
5. SOFTWARE DETAILED INTRODUCTION 5.1. Cura Software Introduction 5.1.1. Basic Interface The figure below displays a typical interface of Cura Red Box is Menu Bar Blue Box is Printing Parameters Setting Bar Yellow Box is used to Adjust model, and to check model Black Box is the operation related to Printing,grey buttons displays it can’t be used temporarily under the current condition. - Page 18 Please note: After language is switched, it can be effective only after restart. 5.1.3. Machine Setting Dual-extruder machine use single nozzle printing Click “Machine” on the menu bar→ “Machine Setting”, enter to machine setting interface, as shown in figure below. Blue Box refers to the size of machine printing platform, we have already performed the preset according to your choice of model, please do not change these data.
- Page 19 17 18 5.1.4. Printing Parameters Settings Click “Expert” on the menu bar→ “Switch to full settings… ”, go into the complete setting interface, as shown in figure below. Red Box is Printing Quality Parameter. Layer height: is the printing precision we usually refer to, and is generally chosen between 0.1 and 0.25, the smaller the data is, the higher the model precision is.
- Page 20 Printing platform adhesive base type: as shown in figure below, “None” refers to not used pad, “Brim” refers to edge pad, “Raft” refers to bottom gridding pad. ◆Orange Box is the filament flow rate parameters The filament rate parameter is generally 90%. Please note: when it is wrong or ineffective for filling the parameters, software would use yellow and pink to provide indication, yellow refers to warning, red refers to error, it can be seen when the mouse hovers, as shown in figure below.
- Page 21 19 20 5.1.5. Model Conversion 5.1.5. 1.Model Loading Open Cura software, as shown in figure below, click the loading button of “Load” of red arrow pointing on the interface, the model needed to print is choose in the pop-up window. Please note: Yellow arrow pointing is the progress bar, Cura section engine is always started, when model or parameter is changed, engine would re-start slicing.
- Page 22 Red Box is Model Rotation Setting. Click the rotation button, and then hold the left Red Box is Model Rotation Setting. C key of mouse, and drag the ring shape edge frame around the model to adjust the model, it can perform rotation adjustment to the model from three directions of “X, Y, Z”.
- Page 23 Green Box is Check Mode Option Click the button , five modes buttons, respectively: “Normal” is normal mode, show the model appearance only, which is default mode “Overhang” refers to overhang mode, and would indicate the overhang part of model, these part may hang down in the absence of support. The red area pointed by blue arrow is as shown in figure below.
- Page 24 “Transparent” refers to transparent mode, and can watch the internal structure of “Transparent” refers to transparent m model. “X-Ray” refers to X ray mode, and is similar to the transparent mode, but ignore the surface. “Layers” refers to layered mode, and can watch the movement path of spray-head and support structure, as shown in figure below:...
- Page 25 23 24 5.1.5.3. Generation of Gcode Code and X3G File Yellow arrow refers to the data which is When the model generates code of result of model conversion, including Gcode, the icon blue arrow points “ ” printing time-consuming is changed from grey to white, and it filament use volume.
-
Page 26: Replicatorg Software Introduction
5.2. ReplicatorG Software Introduction 5.2. ReplicatorG Software 5.2.1. Basic Interface The software interface of ReplicatorG is as follows. Tool bar Meaubar Status Bar Model/Code Model Control Preview Panel Message Output Window 1.Menu bar. The main menu has five options: File, Edit, GCode, Machine and Help. You can find the detailed information in 5.2.1. - Page 27 5.2.2. Menu bar 1.File New: Create a new GCode file Open Print STL model or GCode file Save Allows you to save the current STL model or GCode file Save as Allows youto save the modified STL model or GCode files as specified file name Recent Open the recent file list.
- Page 28 5.2.3. Tool Bar 5.2.3. Tool Bar Start a print via USB, if the STL model has not converted to Gcode, the software will firstly use The previous conversion parameters to start convert the model before build your object This will allow you to print one of the list of the files currently on the SD card (7) in your machine Convert your Gcode file to an s3g file and save it Opens up the Generate Gcode window...
- Page 29 The left of the screen is a sketch of your machine, on the sketch exist several arrow buttons of the Jog Controls of the XYZ axis. Click the corresponding button of each axis, the motor will operate accordingly. The right boxes beside the sketch show Jog Mode control, you can choose the movement distance of every click.
- Page 30 Center Center Move the object to the center of the platform Move the object to Put on platform Place the object so its bottom rests on the build platform Note: Be sure to use the above two instructions to move the object to the center of the platform and place its bottom on the build platform when converting the GCode, otherwise it may damage the nozzle.
- Page 31 5.2.6. Generate GCode Click the “Generate GCode” button at the lower right, the following parameter setting window pops up. 1.Slicing Profile. You can choose ABS or PLA from the dropdown menu. 2.Use Raft/Support. You can choose whether you need a raft or support in this checkbox.
- Page 32 The conversion time will take about 15-30s according to the size of the Gcode file. The conversion time will take about After this process, insert the SD card (5) into the SD card slot (6) on the card reader and connect it to the USB interface on the computer. Copy the saved x3gfile to the root directory and then eject the SD reader (6).
-
Page 33: Peration Panel Setting
6. Operation Panel Setting There is SD card slot at the right side of 3D printer, which can directly print the model file in the SD card.The filament-replacement, debugging and other operation can be controlled on the touch panel. 6.1. Operation Panel Introduction The menu tree of touch screen panel is shown in the figure below, the menu is divided into three layers, and menu structure may be adjusted for firmware upgrades.The left-side is the start menu, right side is submenu.Click to enter the... -
Page 34: The Common Operation On The Operation Panel
6.2. THE COMMON OPERATION ON THE OPERATION PANEL 6.2.1. Print... - Page 35 33 34 In the start menu, choose “Print”to enter the SD Card file list.This machine support English and Chinese file name models.The list is displayed with x3g format file in the SD card (5) root directory in the way of reverse chronological order. Use up and down arrow buttons to choose the files needed to print, the left top arrow button is to return to previous menu.
- Page 36 Preheat setting,Language switching,Automatic shutdown and advanced function Preheat setting Language switching A can be set here. Broken wire detection and LED color can be set in “Advanced function” 6.2.3. ADJUST Level build plate Press “Level build plate” in the “Adjust” menu, the printer will automatically level the build plate.
- Page 37 35 36 Change filament Press “Change filament” to enter the submenu and enter the manual filament replacement interface. Press “Right retreat wire nozzle” to enter to the filament return program. Nozzle is heated to preset temperature, and then start nozzle motor to return filament back. Press “Right into wire nozzle”...
- Page 38 RSTORE FACTORY RSTORE FACTORY Press “Restore factory”, the printer will Restore the factory default Settings. After pressing “Restore factory”,you had better turn off the printer and restart. 6.2.4. INFORMATION Equipment information Press"equipment information" to enter running time statistics interface.It shows the cumulative printing time, The last print time-consuming and filament length, etc.
-
Page 39: The Print Seettings For Dual-Extruder Printer
6.3 The print settings for dual-extruder printer The Cura Software is suitable for the print parameter settings of single and dual- extruder printer. Contrast to the single extruder printer, the parameter settings for the second printing extruder is added to the print settings for dual-extruder printer. - Page 40 6.3.2. Two-color print settings Prepare for two-color printing model and load the model. The model can be directly dragged into the Cura Software (or use the Load button to load ) After right-click the printing platform and select "Dual extrusion merge" from the window that pops up, then the model merger is complete.
- Page 41 6.3.3. Parameter settings of two-color printing Click on "Expert" from the menu bar and select "Switch to full settings ..." in the pop-up dialog box. In the full settings mode interface, you need to pay attention to the following parameters: ◆2nd extruder temperature (C) For two-color printing, you can set this value directly according to the printing temperature.
-
Page 42: Regular Repair And Maintance
7.Regular Repair and Maintenance 3D Printer needs to perform the regular maintenance, as well as some daily maintenance, in order to ensure the printer can maintain the high performance to run stably. 7.1. Printer Regular Maintenance Guide The regular maintenance mainly contains: clean printer nozzle, replace the printer platform sticker (1), printer platform regular check and leveling, replace air filtration core, optical shaft and screw rod maintenance and others. - Page 43 41 42 Tear out tape sticker (1) on the printing platform from the bottom of left side, strip slowly, don't leave any residuals, and then paste the new stickers (1). Note that it doesn't leave gap between the stickers (1). 7.1.3.
- Page 44 When we want to change a new nozzle,firstly, Press “Level build plate” in the “Adjust” When we want to change a new nozzle first menu.DO with what the machine tell you to do,after we finished the Level build plate. We need to press “Axes gap adjustment” ,then the nozzle will move to the plate,at this time we use Hex wrench 2.0mm(11) to adjust the height of the nozzle make sure the nozzle on the surface of the plate.When all of these things done.We can print.
- Page 45 43 44 Offset adjustment steps: Open the ReplicatorG printing software, select "Machine " → " Machine Type ( Driver ) " on the menu bar, then select a machine that matches your model. Connect the printer to the ReplicatorG printing software, select "Machine " → " Onboard Preferences"...
- Page 48 Then, take out the whole motor and feed gear from right back side Then, take out the whole motor and The filament debris on the motor gear is performed with cleaning by tweezers (8) , and installed is performed according reverse procedures after cleaning. Note: Finally plug in the motor connection line.
- Page 49 The throat pipe part of new nozzle is inserted into the aluminum block from the bottom, the top of throat pipe closely contacts with the bottom of motor gear (note: Motor position can’t be moved); and then Use Hex wrench 2mm (11) to screw down the screw of fixed throat pipe.
-
Page 50: Frequently Asked Questions And Troubleshooting(Faq)
8.Frequently Asked Questions and Troubleshooting (FAQ) Should the filament replacement operation be run for operating the printer each time? The filament replacement operation should not be run for startup of printer each time, but only be used in the filament replacement. After the model is completed with printing, can it be taken down the model by hand immediately? Please do not get model by hand immediately, please wait the model... - Page 51 49 50 5.The printing nozzle is blocked and unable to feed filament material, how do we deal? Please check whether the filament material is used up on the reel support, 1) The filament materials are used up, which shows the filament material is left in the printer nozzle.
- Page 52 ,and then re-install ReplicatorG; If user has installed Python and ,and then re-install Replic ReplicatorG, Please Uninstall original Python and ReplicatorG, and re-install them. The default installation path is C drive. After installing the print software driver, connect Print cable (3) and point out not connect to the printer? First make sure the printer is on, the USB connection is already seated, the printer USB port is correct, and check whether has clicked "connect the...
- Page 53 51 52 The figure below displays a standard interface of netfabb studio Red box is model size. Before using ReplicatorG for model slice, you can view the model size by Netfabb. When model size exceeds the maximum print size, it is unable for model sliced. Blue box is these is a error for model.
- Page 54 Model repair is successful, the model of the yellow lines disappear. Click “Apply repair” after repair model will replace the original model. Click “Yes” Right click on the model in the model name list. Export the model to STL file.
- Page 55 Sales receipt number/Date (please mark with a cross) (Please also attach a copy of the sales receipt) Purchased at WEEDO store Which error occurred (please specify) (Please describe the problem or malfunction of your device as accurately as possible. This allows us to process your complaint more quickly and efficiently. An imprecise description with terms like "device is not working"...
- Page 56 TECHNICAL DRAWING TECHNICAL DRAWING SPARE PARTS LIST 9. Touch Screen 1. Top decorative door 10. Motherboard 2. Top decorative panel 11. Cover 3. Right decorative panel 12. Relay module 4. Front decorative panel 13. Prnting plate 5. Front decorative door 14. Left decorative panel 6.
- Page 57 55 56 Fitting Quantity Tape sticker Reel support Print cable Power Cable SD Card SD Reader Knife Tweezers Metal Wrench Hex wrench 1.5mm Hex wrench 2.0mm Hex wrench 2.5mm Plastic Scraper X Moter line X Switch line Z Switch...
Need help?
Do you have a question about the F192 and is the answer not in the manual?
Questions and answers