Felix printers Pro Series Quick Start Manual
Hide thumbs
Also See for Pro Series:
- User manual (51 pages) ,
- Troubleshooting manual (21 pages) ,
- Firmware update (15 pages)

Related Manuals for Felix printers Pro Series


Summary of Contents for Felix printers Pro Series
- Page 1 Quick Start Guide FELIX BIOprinter www.FELIXprinters.com/support support@felixprinters.com Zeemanlaan 15 3401MV IJsselstein The Netherlands...
-
Page 2: Safety
Safety General safety Ventilate - Keep children under the age of 14 out of reach of the printer - Depending on the printed material, proper ventilation - FELIXprinters are only suitable for professional use. while printing advised. some cases small concentrations of harmfull vapor can be released. -
Page 3: Table Of Contents
2 Introduction Thank you for choosing FELIXprinters! IMPORTANT: READ THIS MANUAL AND SAVE COUNTLESS HOURS OF YOUR TIME. We know you can’t wait to start using the product and not many people like to read. For most household appliences this might work, but taking this strategy will most likely set you up for failure and frustration. So please follow this manual, we made it as short and understandable as possible to enjoy your BIOprinter. -
Page 4: Printer Specifications
4 Printer specifications System specifications Bed addon module Temperature controllable from 0 – 50 °C. Printer dimensions (L, W, H) 430 x 390 x 550 mm Easy to use petri dish from 30 up to 110mm diameter Weight 12.5 kg Standardized well plates Power requirements: 110 - 220 V Interface... -
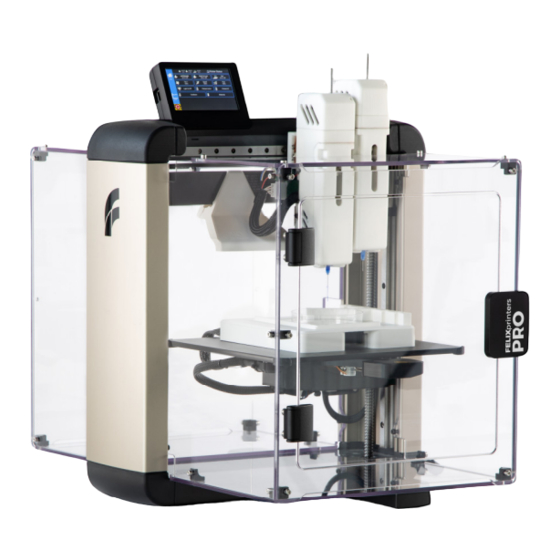
Page 5: Felix Bioprinter At A Glance
5 FELIX BIOprinter at a glance Display unit Camera UV module Dual Extruder assembly Cooled bed add-on Heated bed Power switch Power plug Foot bracket Quick Start Guide FELIX BIOprinter Page... -
Page 6: Contents
6 What’s in the box? 1x Allen Key 1x Foot bracket 1x Tweezers 1x Power cable 1x MicroSD card + 1x Power unit USB reader 2x M4x12 bolts 1x USB cable 10x syringes 1x Display Unit Syringe needle set 10x Petri Dishes Recommended tools 100mm NB: The box could contain extra materials like you have ordered. -
Page 7: Unboxing
6.1 Unboxing Remove top foam block Take printer out of the Box and put on a stable table. Quick Start Guide FELIX BIOprinter Page... - Page 8 Take out foam block Place foot of printer on a sturdy table and place printer onto the foot bracket Quick Start Guide FELIX BIOprinter Page...
- Page 9 Fix printer onto foot with supplied M4 x 12 Do the same on the rear side bolt and Allen key Quick Start Guide FELIX BIOprinter Page...
-
Page 10: Install Display Unit
6.2 Install Display Unit IMPORTANT: Make sure the power is turned off when connecting the display. Failing to do so could cause serious damage to the screen Ethernet External (USB stick or other printers) Webcam Ribbon cable USB internal Quick Start Guide FELIX BIOprinter Page... - Page 11 Connect cables on designated positions . 2. Slide the screen onto metal pins. NOTE: Watch out that the cables are not pinched when putting the screen in place Quick Start Guide FELIX BIOprinter Page...
-
Page 12: Preparing The Print Bed
6.3 Preparing the print bed Flip the lever open Turn the spindle as shown in such a way 2. Firmly push on bolt head to loosen the that the black block moves upwards mechanism. Quick Start Guide FELIX BIOprinter Page... - Page 13 Turn upto here Rotate the bed assembly 90 degrees. This Move black z-axis block up to the indicated might require a little force. point by rotating the spindle by hand Quick Start Guide FELIX BIOprinter Page...
- Page 14 Move down bed assembly about 5cm for Ensure the edges align next step 2. Flip back the lever to lock the mechanism Quick Start Guide FELIX BIOprinter Page...
- Page 15 If you have ordered the print bed add-on, please continue at chapter 6.4. Place one edge of the flex plate gently on the indicated edge. 2. Drop the flex plate gently on base. NOTE: It is recommended to print on the flex plate as it can be easily cleaned. Place petri dishes or other items onto the flex plate.
-
Page 16: Optional: Install The Print-Bed Add-On
6.4 OPTIONAL: Install the print-bed add-on It should snap onto the magnetic base. Place print-bed add-on in the middle of the build plate. Quick Start Guide FELIX BIOprinter Page... - Page 17 Place push-arm onto the cooled bed addon base. Connect the bed-addon connector onto the It can be placed on 5 positions, depending on the connector on the bottom of the bed. Watch the size petri dish used. This will be explained later. orientation and push them together.
-
Page 18: Optional: Install The Uv Module
6.5 OPTIONAL: Install the UV module The UV module emits UV light at 365nm. The input power of the module is 2W. In the print software you can define the exposure time and distance from the printed object. This way you can change the intensity and duration of exposure. - Page 19 Take the UV light module and loosen the clamp Move the extruder assembly to the left and with the bolt on the rear side. (Turn connect the UV module to the cable sticking out of counterclockwise) the black horizontal beam. Quick Start Guide FELIX BIOprinter Page...
- Page 20 Fix the UV module onto the beam by fixing the Slide the UV module onto the beam. And hold it in clamp. Turn the bolt clockwise place by hand Quick Start Guide FELIX BIOprinter Page...
- Page 21 Check if the UV module is properly aligned with the bed module Quick Start Guide FELIX BIOprinter Page...
-
Page 22: Optional Install Cover Unit
6.6 OPTIONAL Install Cover Unit The Cover unit ensures better temperature stability during the print. And also provides UV protection when installed and using the UV module. The material is made from PMMA and filters minimally 95% of the UV light. The cover unit is pre-assembled. - Page 23 Place the t-slot nuts on the right side Place 4 t-slot nuts at the indicated positions on the left side of the frame. Quick Start Guide FELIX BIOprinter Page...
- Page 24 Use the Allen key to position the t-slot nut if Place the rear cover onto the frame. Note necessary the opening of the top-side. And fix the cover onto the frame. Quick Start Guide FELIX BIOprinter Page...
- Page 25 Take the front cover assembly and place angled Place the side panel and fix it with (5x) M4 x 10 brackets with the M4 x 10 bolts. bolts Quick Start Guide FELIX BIOprinter Page...
- Page 26 Place the front cover assembly onto the frame and fix it with the M4 bolts onto the frame. Move the t-slot nuts to align them with the holes of the cover Quick Start Guide FELIX BIOprinter Page...
- Page 27 6.7 Power on Insert the power cable. USB – NOT used for Power Power touchscreen Switch Cable screen NOTE: 2. Flip the power switch of the printer. in some occasions if there is 3. The lights of the print-head should turn on and immediately after a firm pull exerted onto the power cable,...
-
Page 28: Display Overview
7 Display Overview Shutdown button: To properly shutdown the printer. First press the shutdown button before turning the power switch off. This ensures proper shutting down of the operating system on the Display unit. Quick Start Guide FELIX BIOprinter Page... -
Page 29: Preparation For Printing
8 Preparation for printing 8.1 The Basics Below is the workflow described from design to successful 3D printing with some pointers to ensure a successful print. This manual only covers the last step in the process. 3. Print Design 2. Slice Mechanically prepare printer Follow the construction rules Choose correct settings... -
Page 30: Load Syringes
8.2 Load Syringes IMPORTANT: To operate the printer, syringes must be loaded. If there are no syringes the printer might get damaged. Ensure the syringe is filled till maximally 5ml. We supplied 2 syringes of 5ml filled with Vaseline grease for test purpose and to get familiar with the machine. - Page 31 This is a switch which changes the mode of the extruder Open the front cover. By turning it to 45 between heating and cooling. From the factory the degrees and switches are set in cooling mode. 2. Then lift the cover, under that angle. When using different brand syringes, they might differ slightly in length.
- Page 32 To load the syringe into the extruder body. Go to the change filament menu Select the desired extruder 2. Choose a temperature. If it is not important, set it to 0 degrees C to disable it. 3. Leave the distances to 0 mm 4.
- Page 33 Press Start and the extruder will cool or heatup to the set temperature. And the next menu will display. Repeat pressing the extrude or retract button until you can push in the syringe. Note that the syringe should slide in at 3 locations. NOTE: A movement of 1mm corresponds to 1.13 e- which is equal to 0.113 ml Select the desired distance, pressing a button will move...
-
Page 34: Load Syringes - Alternative Method
8.3 Load Syringes – Alternative method An alternative method to move the extruder. Press the MOVE button in the main menu 2. Press the Extrude icon in the side bar. 3. Select the left or right extruder. 4. Select the movement distance. Change it to maximally 1ml! A movement of 1mm corresponds to 1.13 e-7 m is equal to 0.113 ml. -
Page 35: Load Petri Dish
8.4 Load petri dish Slide the petri dish in the direction indicated To ensure optimal contact with the printbed till the push arm starts to move. Then push it surface and flatness gently push down petri dish down after the ledge so it stays in place on the sides as indicated. -
Page 36: Calibration
Calibration IMPORANT: CALIBRATION MUST BE DONE WITH AT LEAST THE LEFT SYRINGE AND NOZZLE INSTALLED 8.5.1 Bed leveling: This physically tilts the bed so the distance between needle and bed is the same over the whole print surface. When to do this? After unboxing/moving printer. - Page 37 8.5.3 FINE tuning and First layer Z-offset. In some occasions, it might be needed to do finetuning of the calibration. You can do that in the finetune menu First layer Z-offset The printer is factory tested and finetuned for a 90mm petri dish with a certain thickness. In the case of a different type of petri dish which is thicker or thinner, the first layer z-offset needs to be adjusted.
- Page 38 4. Manually move syringe to middle of the petri dish where you will print the object. 5. Set the Distance to 1mm or 0.1mm. 6. Move bed closer to nozzle. Stop when the nozzle touches the print-surface. 7. Note that z-axis coordinate and add 0.2mm. 8.
-
Page 39: Print From Usb Stick
9 Print from USB stick Insert the USB stick supplied with the printer and press refresh and press USB stick button A file-list should appear. Select a *.gcode file for direct printing. When you press the gcode file, you get two options. You can save it to the library of the device or 2. -
Page 40: Print And Control Printer Via Wifi Or Lan
10 Print and Control printer via WIFI or LAN 10.1 Connect via WIFI Go to Settings in main menu -> Press WLAN A list of available networks appears, select your network and insert credentials. 10.2 Wired LAN Plug in cable on the side of touchscreen and the printer should automatically obtain an IP address in the network. -
Page 41: Remote Control
10.3 Remote control After connecting printer to a local network, navigate to Settings -> Network. And type in the shown IP http-address in your web browser or scan the QR code on the device which is connected to the same network. -
Page 42: Print Via Web Interface
10.4 Print via web interface. Overview of the dashboard Click Go to printer Quick Start Guide FELIX BIOprinter Page... - Page 43 Press Upload G-Code, to upload a gcode for printing to the library After Uploading the touchscreen will render an Image for printing. 2. Press the print icon, the print will start. Webcam monitoring You can conveniently monitor a print-job via the webcam. For now this is only enabled on the internal network.
-
Page 44: Maintenance
11 Maintenance A 3D printer is a quite complex motion system and requires maintenance. TIP: Check our YouTube channel to see instruction video’s about maintenance. https://www.youtube.com/user/FELIXprinters 11.1 Motion system The linear bearings require almost no maintenance. Recommended is that you put a little some grease on them every 3-4 months. -
Page 45: Display Messages
12 Display messages Warning firmware requested pause. – Empty syringe detection The empty syringe detection system is triggered – the printer moves to its idle position waiting for user action. This happens when syringe is empty and the syringe pusher is on its bottom position. Refill the syringe and restart the print. Z-sensor error The z-sensor triggered message should appear only when the tip of the hot-end touches the print bed. - Page 46 Quick Start Guide FELIX BIOprinter Page...
- Page 47 Quick Start Guide FELIX BIOprinter Page...
- Page 48 Review our products Help us to improve our products and services. It only takes a few minutes! www.felixprinters.com/survey (a small reward is waiting for you) Manuals & tutorials FELIX Community www.felixprinters.com/support www.felixprinters.com/community Quick Start Manual FELIX BIOprinter V1 – 2020 Zeemanlaan 15 www.felixprinters.com/support 3401MV IJsselstein...
Need help?
Do you have a question about the Pro Series and is the answer not in the manual?
Questions and answers