Table of Contents
Advertisement
Quick Links
Advertisement
Table of Contents
Troubleshooting

Related Manuals for Verathon BladderScan i10


Summary of Contents for Verathon BladderScan i10
- Page 1 Operations & Maintenance Manual...
- Page 2 0900‑5005 REV‑00...
- Page 3 Operations & Maintenance Manual Effective: March 12, 2021 Caution: Federal (United States) law restricts this system to sale by or on the order of a physician. 0900‑5005 REV‑00...
- Page 4 , Verathon, and the Verathon Torch MODE symbol are trademarks of Verathon Inc. All other brand and product names are trademarks or registered trademarks of their respective owners. Information in this manual may change at any time without notice. For the most up‑to‑date information, see the documentation available at verathon.com/product‑documentation.
-
Page 5: Table Of Contents
TABLE OF CONTENTS IMPORTANT INFORMATION ..........................1 OVERVIEW ................................1 Product Description ............................1 Statement of Intended Use ..........................1 Notice to All Users ............................1 Essential Performance ..........................1 Environments of Intended Use ........................1 HIPAA Privacy ..............................2 SAFETY INFORMATION ............................2 Ultrasound Energy Safety ..........................2 Contraindications ............................2 Warnings &... - Page 6 SETTING UP .................................21 ASSEMBLING THE SYSTEM ..........................21 Procedure 1. Perform the Initial Inspection ..................21 Procedure 2. Assemble the Workstation and Attach the System ............22 Procedure 3. Insert a Battery .........................23 Procedure 4. Charge the Battery ......................25 Procedure 5. Install the Printer (Optional) ....................27 CONFIGURING SETTINGS ..........................28 Procedure 1.
- Page 7 REPROCESSING ..............................50 CLEANERS & DISINFECTANTS ........................50 Disinfection Efficacy ...........................50 Compatibility ............................... 51 BEST PRACTICES & INSTRUCTIONS .......................52 Procedure 1. Clean & Disinfect the Console, Probe, & Cable ...............52 Procedure 2. Clean the Printer (Optional) .....................53 MAINTENANCE & SAFETY ..........................54 REGULAR INSPECTIONS ..........................54 CALIBRATION ..............................54 SYSTEM SOFTWARE ............................55 DEVICE DISPOSAL ............................55...
- Page 8 DEVICE REPAIR ...............................65 TROUBLESHOOTING PROCEDURES .......................65 Procedure 1. Troubleshoot Console Battery Issues ................65 Procedure 2. Troubleshoot Probe Connection Issues................66 Procedure 3. Troubleshoot Probe Aiming Issues ...................66 Procedure 4. Restore Factory Defaults ....................68 Procedure 5. Troubleshoot Irregular Printouts (Optional) ..............69 Procedure 6. Clear a Paper Jam (Optional) ...................71 Procedure 7.
-
Page 9: Important Information
The console includes a bay for a rechargeable lithium‑ion battery. When the console is connected to external power, it charges the battery. STATEMENT OF INTENDED USE The BladderScan i10 system is an ultrasound device intended to be used for measuring the urine volume in the bladder noninvasively. NOTICE TO ALL USERS The BladderScan i10 system should be used only by individuals who have been trained and authorized by a physician or the institution providing patient care. -
Page 10: Hipaa Privacy
For more information on ALARA, refer to the American Institute of Ultrasound in Medicine publication, Medical Ultrasound Safety. The ultrasound output power of the BladderScan i10 system is not user adjustable and is limited to the minimum level necessary for effective performance. For more information about acoustic output levels, see the chapter “Product Specifications”... - Page 11 WARNING This product may only be cleaned and disinfected by using the approved processes provided in this manual. Cleaning and disinfection methods listed are recommended by Verathon based on compatibility with component materials. WARNING Cleaning is critical to ensuring the component is ready for disinfection.
- Page 12 Do not use accessories, transducers, or cables other than those specified or provided by Verathon. Use of other such devices may cause this system to emit excessive electromagnetic energy or to pick up unwanted electromagnetic signals or noise from its surroundings. These malfunctions may cause improper operation, procedure delays, or both.
- Page 13 • Put insulating tape, such as cellophane tape, on the electrodes during transportation. WARNING To maintain electrical safety, use only the battery, power adapter, and power cord supplied with the system. Use only Verathon‑recommended accessories and peripherals, including the accessory battery charger. WARNING To reduce the risk of electrical shock, do not attempt to open the system components.
- Page 14 • Do not touch the printer mechanism or print head, which may be hot from recent printing. • Do not touch the edge of the paper cutter. WARNING Never use the BladderScan i10 system to display the image of anatomical features other than the bladder. WARNING This system is intended as a measuring tool only.
- Page 15 CAUTIONS CAUTION Statement of Prescription: Federal (United States) law restricts this device to sale by or on the order of a physician. CAUTION Before scanning a patient, make sure that a battery is installed and properly charged. The system cannot scan while connected to external power. CAUTION To avoid damage to cables and accessories, do not excessively twist or bend cables associated with the system.
- Page 16 CAUTION Medical electrical equipment requires special precautions regarding electromagnetic compatibility (EMC) and must be installed and operated according to the instructions in this manual. For more information, see the “Electromagnetic Compatibility” section. This device can radiate radio frequency energy and is very unlikely to cause harmful interference with other devices in the vicinity.
-
Page 17: Introduction
INTRODUCTION SYSTEM OVERVIEW BladderScan i10 is a 3D ultrasound system that measures bladder volume noninvasively. The core components of the system are a console with a touchscreen display and a probe containing the ultrasound transducer. The system also includes a rechargeable battery. Available accessories and configuration options for the system include a mobile workstation, a printer, an external battery charger, and extra rechargeable batteries. -
Page 18: Components & Accessories
COMPONENTS & ACCESSORIES Table 1. Included System Components & Accessories INCLUDED SYSTEM COMPONENTS & ACCESSORIES Console Probe Battery In‑service USB flash drive Power adapter Power cord Note: Plug may vary by region 0900‑5005 REV‑00... - Page 19 Printer Calibration Kit Thermal Paper Additionally, quick reference materials and ultrasound gel may be available for order in your region. For more information, contact Verathon Customer Care or your local representative or visit verathon.com/global‑support. Operations & Maintenance Manual: Introduction 0900‑5005 REV‑00...
-
Page 20: System Features
SYSTEM FEATURES CONSOLE FEATURES Read the “Warnings & Cautions” section before using the system. The console’s primary feature is a touchscreen display that allows you to perform scans, manage scan results, and customize settings. A rechargeable battery is inserted into one side of the console, and the bottom surface includes a selection of ports for connecting system components and accessories such as external, removable media storage devices. - Page 21 Table 3. Console Feature Descriptions PART NAME PURPOSE Main display Features touchscreen controls of the system user interface. Battery door Opens to access and replace the rechargeable battery. Turns the system on or off. When the system is turned on or charging a battery, an On/Off button LED next to the On/Off button is illuminated.
-
Page 22: Probe Features
PROBE FEATURES The probe contacts the patient and transmits and receives ultrasound waves, automatically moving its internal transducer to scan twelve planes to produce a three‑dimensional image of the bladder. The probe is attached to the console by a cable. Figure 3. -
Page 23: Battery Features
The system is powered by a lithium‑ion battery. Additional or replacement batteries can be ordered if needed. The BladderScan i10 console serves as the main battery charger. To charge a battery, the console must be connected to a wall outlet using the power adapter and power cord provided. Use only the console or the optional Verathon battery charger to charge the battery;... - Page 24 ICON FUNCTION B‑Mode—View the ultrasound image as pairs of two‑dimensional, orthogonal planes from the three‑dimensional scan. The contours of detected features are overlaid on the image. Note: You may disable the display of the detected contours. For more information, see “Configure Exam Settings”...
- Page 25 ICON FUNCTION Next—While viewing B‑mode images on the Results screen, advance to the next scan plane or angle. Brightness—Adjust the brightness of the touchscreen. The icon shows the current setting. Volume—Adjust the volume of sounds played through the console’s speaker. The icon shows the current setting.
-
Page 26: Console Information Icons
CONSOLE INFORMATION ICONS The icons in Table 6 provide information about the status of the system, but tapping them does not affect the system. Table 6. Information Icons ICON FUNCTION The printer is charging, but it does not have enough charge left in its built‑in internal battery to operate correctly. -
Page 27: Battery Indicator Led Colors
If the battery is overheating or drawing excessive current, turn the system off and disconnect external power immediately. Allowing overheating or excess current draw to continue can start a fire or cause an electrical injury. For help with battery malfunctions, contact Verathon Customer Care. -
Page 28: Console Battery Level Icons
CONSOLE BATTERY LEVEL ICONS The battery level icon is displayed in the status bar at the top of the touchscreen. The icon and the percentage value next to it indicate the remaining battery power. For information about charging the battery, see the procedure “Charge the Battery”... -
Page 29: Setting Up
2. Remove the contents and verify that you have received the appropriate components for your system. 3. Inspect the components for damage. 4. If any of the components are missing or damaged, notify the carrier and Verathon Customer Care or your local representative. -
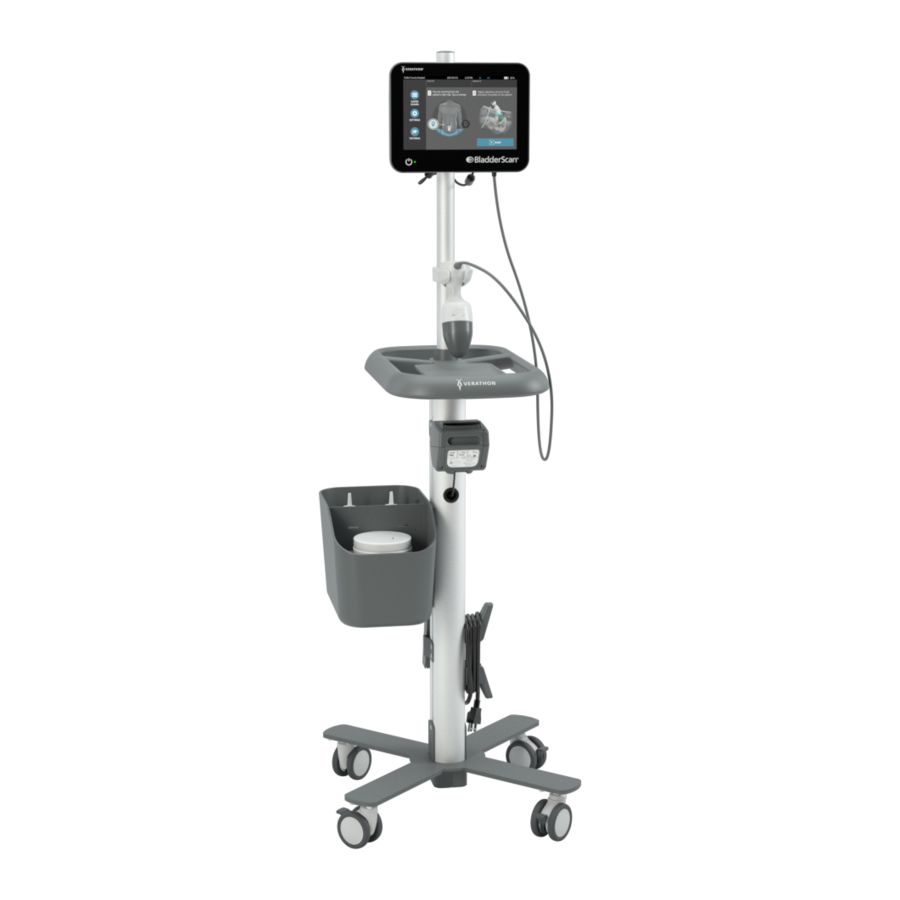
Page 30: Procedure 2. Assemble The Workstation And Attach The System
PROCEDURE 2. ASSEMBLE THE WORKSTATION AND ATTACH THE SYSTEM Refer to the BladderScan i10 Workstation Assembly Quick Start Sheet (part number 0900‑5007) for instructions on how to perform these tasks: • Assemble the workstation • Install the power adapter in the workstation •... -
Page 31: Procedure 3. Insert A Battery
PROCEDURE 3. INSERT A BATTERY 1. Slide the latch away from the battery well door on the console, and then open the door. 2. Move the door away from the battery well. Operations & Maintenance Manual: Setting Up 0900‑5005 REV‑00... - Page 32 3. If a battery is already in the console, remove it by pulling the strap. 4. Slide a charged battery into the battery well, and then push gently until the battery is completely seated. Note: The battery is designed to prevent incorrect installation. If the battery does not slide into the battery well easily, remove the battery, reorient it, and try again.
-
Page 33: Procedure 4. Charge The Battery
CHARGING WITH THE EXTERNAL CHARGER (OPTIONAL) 1. Before each use, inspect the battery charger, the battery or batteries, the power adapter, and the power cord for damage. If a component is damaged, do not use it. Contact Verathon Customer Care or your local representative. - Page 34 Note: To ensure that each battery is properly connected to the charger, make sure that its Verathon logo and its contacts face right as seen from the front of the charger.
-
Page 35: Procedure 5. Install The Printer (Optional)
PROCEDURE 5. INSTALL THE PRINTER (OPTIONAL) An optional printer is available for BladderScan i10 systems. This printer is mounted on the base of the workstation and communicates with the console through a standard USB connection. If your organization has purchased the printer as part of its initial BladderScan i10 system order, follow the instructions in the BladderScan i10 Workstation Assembly Quick Start Sheet (part number 0900‑5007) to... -
Page 36: Configuring Settings
CONFIGURING SETTINGS The system is configured with default settings that are appropriate for many users. This section contains instructions for modifying the settings for your facility’s needs. PROCEDURE 1. CONFIGURE GENERAL SETTINGS This procedure helps you configure your regional and facility preferences, such as an asset tag for your system, the language in which the system operates, and your formatting preferences for the time, date, currency, and numbers. - Page 37 5. Tap Date, Time and Currency Format. The Date, Time and Currency screen appears. 6. In the Time field, tap the hour or minutes, vertically swipe to view a value, and then tap the value to select it. 7. In the Time field, tap the time format. The time format scrolls through AM, PM, and 24‑hour displays. If you select a new time format, the hours and minutes values are updated as necessary.
-
Page 38: Procedure 2. Configure Administrative Settings
PROCEDURE 2. CONFIGURE ADMINISTRATIVE SETTINGS 1. On the Home screen, tap Settings, then Admin. 2. If a keypad appears, key in the PIN for Settings, and then tap Enter. 3. On the Admin tab, in the Auto‑Shutdown field, tap the arrow and then select the number of minutes the system should remain on but inactive before it turns itself off. - Page 39 6. From the Encoded Value list, select the amount of information to include in the barcode for each exam. Where the selection allows it, a > symbol precedes the measured volume if the bladder extends outside the scan area or if the pubic bone obstructs a portion of the bladder. SELECTION INFORMATION INCLUDED EXAMPLE...
-
Page 40: Procedure 3. Configure Exam Settings
PROCEDURE 3. CONFIGURE EXAM SETTINGS You may configure these exam settings: • Display of B‑Mode images • Live B‑mode aiming • Time‑out interval for the live B‑mode aiming feature • Bladder outline on B‑mode images • Display of exam results in barcode format •... -
Page 41: Procedure 4. Configure Printed And Pdf Report Settings
PROCEDURE 4. CONFIGURE PRINTED AND PDF REPORT SETTINGS If a printer is attached to the console, you can print scan results. Reports are printed vertically, like a receipt. Scan reports are made up of a number of sections. Some of the sections are optional. You can also export saved exams to an external USB drive. -
Page 42: Procedure 5. Customize Cost Savings Calculations
PROCEDURE 5. CUSTOMIZE COST SAVINGS CALCULATIONS The system provides default values for calculating the cost savings that result from scanning rather than catheterizing patients. The default settings can be customized to reflect the rates and costs at your facility. To change the currency used for cost savings calculations, see “Configure General Settings”... -
Page 43: Procedure 6. Configure A Pin For Saved Exams
PROCEDURE 6. CONFIGURE A PIN FOR SAVED EXAMS If it is necessary to restrict access to saved patient and exam information, you can create a PIN to protect that information. After you create the PIN, the system does not display saved exams unless the PIN is entered. Deleting the PIN deactivates this requirement. -
Page 44: Procedure 7. Configure A Pin For System Settings
If you need to change the PIN for Settings, you must enter the existing PIN before you create the new one. If you have forgotten the existing PIN, contact Verathon Customer Care for assistance in clearing it. 1. At the Home screen, tap Settings. -
Page 45: Using The System
USING THE SYSTEM Read the “Warnings & Cautions” section before performing the following tasks. MEASURING BLADDER VOLUME PROCEDURE 1. PREPARE FOR THE EXAM Make sure you are familiar with the console’s icons and screens. For more information about the system components and user interface, see the chapter “Introduction”... -
Page 46: Procedure 2. Input Patient Information Or Operator Id (Optional)
PROCEDURE 2. INPUT PATIENT INFORMATION OR OPERATOR ID (OPTIONAL) The system lets you enter the following patient information, which will be saved with the exam and can be printed on the exam report: • Patient ID • • First name •... -
Page 47: Procedure 3. Measure Bladder Volume
PROCEDURE 3. MEASURE BLADDER VOLUME The system has several features designed to help with locating and identifying the bladder. These features may be enabled or disabled according to the instructions in “Configure Exam Settings” on page 32: • Live B‑Mode Aiming—The system displays a real‑time B‑mode ultrasound view of the patient’s abdomen, allowing you to aim the probe and locate the bladder before scanning. - Page 48 4. Hold the probe by grasping it with the probe cable running up your wrist and forearm. 5. Gently press the probe onto the lower abdomen through the gel. The probe cable should be oriented at 90 degrees to the sagittal plane of the patient. Sagittal plane 90°...
-
Page 49: Procedure 4. Review Exam Results
9. Press the probe button or tap Scan on the Home screen. • If live B‑mode aiming is enabled, continue to Step 10. • If live B‑mode aiming is disabled, hold the probe steady while the scan is in process, and then continue to the procedure “Review Exam Results”. - Page 50 1. When the Results screen appears, check whether a yellow greater than (>) symbol appears next to the recorded volume and the bladder is shown in yellow. If this occurs, a portion of the bladder was outside the ultrasound field of view, and the actual bladder volume may exceed the displayed result. You should aim the probe again and rescan the patient.
- Page 51 2. If you want to rescan the patient, on the Results screen, tap Scan. Repeat the scanning procedure as necessary to adjust your aim or confirm the initial measurement. 3. When you are finished scanning, you can review the results in B or C modes. (C‑mode is displayed by default.) You can save scan results, and you can print scan results if you have the printer installed.
- Page 52 6. If you want to show individual scan measurements, tap the Scan History arrow. 7. Tap the scan measurement number to see the scan display. 8. To discard the displayed scan, tap the Delete icon. 9. If you want to transfer the scan result to an EHR or EMR system using a barcode reader, continue to the procedure “Generate a Barcode containing an Exam Result”.
-
Page 53: Procedure 5. Generate A Barcode Containing An Exam Result
PROCEDURE 5. GENERATE A BARCODE CONTAINING AN EXAM RESULT Once the system has been configured to generate barcodes, you can display a barcode containing the largest scan result of the current exam on the console’s touchscreen. You can then use a barcode reader to collect the scan result and transfer it to your facility’s medical records system (which can be either an EHR or an EMR system). -
Page 54: Procedure 6. Print, Save, Or Exit An Active Exam
PROCEDURE 6. PRINT, SAVE, OR EXIT AN ACTIVE EXAM When the exam is complete, you can take several actions from the Results screen. If you want to… Tap… Record patient information Patient ID Print Print the exam results Save the exam results (the system stores the Save and Exit largest measurement) Exit without saving the exam results... -
Page 55: Managing Saved Exams
MANAGING SAVED EXAMS The system can store saved exams in its internal memory or on external devices such as USB flash drives. If you scan the patient multiple times during an exam, the system saves the largest measurement. If no external devices are attached, the system stores saved exams in its internal memory. If the system runs out of internal memory, it overwrites the oldest exams as needed to make space for new ones. -
Page 56: Procedure 2. Delete A Saved Exam
3. If you want to sort exams using a different value, tap a sortable field header. The field headers let you sort the exam list using the following fields. The columns may be sorted in ascending or descending order. The currently selected sorting field is highlighted in white, and an arrow icon indicating the direction of the sort is shown next to the column label. -
Page 57: Procedure 3. Export Saved Exams
PROCEDURE 3. EXPORT SAVED EXAMS Use this procedure to move exams from the system’s internal memory to an external USB drive. By default, saved exam results are retained in the system’s internal memory. When you insert a USB drive into the console, the system immediately begins reading the new drive for saved exam results. -
Page 58: Reprocessing
“Warnings & Cautions” section before performing the following tasks. Cleaning and disinfecting the BladderScan i10 system is an important part of using and maintaining it. Before each use, ensure all system components have been cleaned and disinfected according to the guidance provided in Table 10. -
Page 59: Compatibility
“Regular Inspections” on page 54. Availability of cleaning and disinfection products varies by country, and Verathon is unable to test products in every market. For more information, contact Verathon Customer Care or your local representative. For contact information, visit verathon.com/global‑support. Table 12. -
Page 60: Best Practices & Instructions
BEST PRACTICES & INSTRUCTIONS Cleaning is the removal of all visible soil or contaminants, and disinfection is the process of destroying pathogenic organisms or rendering them inert. When cleaning, make sure all foreign matter is removed. This allows the active ingredients of the disinfectant to reach all surfaces. When cleaning and disinfecting the system or its accessories, follow these best practices: •... -
Page 61: Procedure 2. Clean The Printer (Optional)
PROCEDURE 2. CLEAN THE PRINTER (OPTIONAL) 1. If the system is on, press the On/Off button . If prompted, confirm that you want the system to shut down, and then wait for it to do so. 2. Using a wet cloth or a wipe indicated for cleaning medical devices, wipe the printer according to the instructions provided by the wipe’s manufacturer. -
Page 62: Maintenance & Safety
Verathon offers certification services through authorized BladderScan service representatives or a Verathon service center. Certification service includes comprehensive inspection and testing of the system. For more information, contact your authorized Verathon Service Center, your local BladderScan distributor, or Verathon Customer Care. -
Page 63: System Software
WARRANTY Information about the manufacturer’s warranty is included with the product. Extended warranties may be available for your system. For more information, contact Verathon Customer Care or your local representative. Operations & Maintenance Manual: Maintenance & Safety 0900‑5005 REV‑00... -
Page 64: Maintenance Procedures
MAINTENANCE PROCEDURES PROCEDURE 1. LOAD THERMAL PAPER INTO THE PRINTER (OPTIONAL) Read the “Warnings & Cautions” section before performing the following task. 1. Slide the printer door upward to unlock it, and then rotate the door down to open. Placing your thumb on the outside of the printer and squeezing can make it easier to open the door. -
Page 65: Procedure 2. Run A Self-Test
Self‑Test tab, where the system completes the self‑test and displays the results. 2. Scroll through the on‑screen test results by vertically swiping with your finger on the touchscreen. 3. If the screen indicates any failed tests or abnormal results, contact Verathon Customer Care or your local representative. -
Page 66: Procedure 3. Update The Software
PROCEDURE 3. UPDATE THE SOFTWARE From time to time, Verathon may make software updates available for your system. To inquire about the availability of a software update, contact Customer Care or your local representative. 1. Export any exams you need to retain. For more information, see “Export Saved Exams”... -
Page 67: Procedure 4. Complete A Caliscan Test
This test can be used for preventative maintenance or as a diagnostic tool if a probe has been dropped or in storage for an extended amount of time. Note: The CaliScan test evaluates only the mechanical condition of the probe. The BladderScan i10 system does not require calibration as normal scheduled maintenance. -
Page 68: Procedure 5. Turn The System Off
PROCEDURE 5. TURN THE SYSTEM OFF 1. If you are performing an exam, save the exam information. Note: If you omit this step and attempt to turn off the system during an exam, the system prompts you to confirm that you want to continue without saving the exam results. 2. -
Page 69: Procedure 6. Perform An Unconditional Shutdown
PROCEDURE 6. PERFORM AN UNCONDITIONAL SHUTDOWN If it becomes necessary for emergency or troubleshooting reasons, you can shut down the system unconditionally. The system stops all running processes and shuts down immediately. The next time you press the On/Off button , there will be a wait of several seconds before the Home screen appears. -
Page 70: Procedure 7. Copy The System's Configuration To Other Systems
COPY THE SYSTEM’S CONFIGURATION TO OTHER SYSTEMS After you have set up a BladderScan i10 system with the configuration you want to use throughout your facility, you can copy the configuration from the first system to all of the others. -
Page 71: Procedure 8. Turn Off The Usb Ports
PROCEDURE 8. TURN OFF THE USB PORTS IMPORTANT If a printer is connected, it cannot operate unless the USB ports are active. Under normal circumstances, the three USB ports on the console are active and available for use. However, if necessary, you can deactivate them by following this procedure. -
Page 72: Help & Troubleshooting
PROCEDURE 1. WATCH THE ONBOARD TUTORIAL The BladderScan i10 system includes an onboard tutorial with instructions on how to scan and manage exams. It is recommended that you watch the tutorial before using the system. The tutorial does not include an audio track. -
Page 73: Device Repair
DEVICE REPAIR The system components are not user‑serviceable. Verathon does not make available any circuit diagrams, component parts lists, descriptions, or other information that would be required for repairing the device and related accessories. All service must be performed by a qualified technician. If you have any questions, contact Verathon Customer Care or your local representative. -
Page 74: Procedure 2. Troubleshoot Probe Connection Issues
4. If the message appears again and you have an extra battery, repeat Step 2. Replace the battery according to the instructions in the procedure “Insert a Battery” on page 23, and then repeat Step 3. 5. If the message still appears, contact Verathon Customer Care. PROCEDURE 3. TROUBLESHOOT PROBE AIMING ISSUES Use this procedure to troubleshoot the following problems: •... - Page 75 2. Hold the probe by grasping it with the probe cable running up your wrist and forearm. 3. With the probe midline on the patient, make sure the probe cable is oriented at 90 degrees to the sagittal plane. Sagittal plane 90°...
-
Page 76: Procedure 4. Restore Factory Defaults
PROCEDURE 4. RESTORE FACTORY DEFAULTS Use this procedure to restore the original settings for the system. Running this procedure removes all user information—including customized system settings, cost savings calculations, and saved exams—from the system. Do not restore factory defaults if you want to retain this information. 1. -
Page 77: Procedure 5. Troubleshoot Irregular Printouts (Optional)
PROCEDURE 5. TROUBLESHOOT IRREGULAR PRINTOUTS (OPTIONAL) Read the “Warnings & Cautions” section before performing the following task. If the printer is producing irregular printouts, you may need to clean the print head. 1. If necessary, press the On/Off button . When prompted, confirm that you want the system to turn off, and then wait for it to do so. - Page 78 8. Load the thermal paper and close the printer door according to the instructions in the procedure “Load Thermal Paper into the Printer (Optional)” on page 56. 9. If the printer continues to produce irregular printouts, contact Verathon Customer Care. 0900‑5005 REV‑00...
-
Page 79: Procedure 6. Clear A Paper Jam (Optional)
6. If the paper on the outside of the printer is ripped or torn, tear it off, pulling to one side to aid in cutting. 7. If you cannot clear the paper jam or the printer continues to jam, contact Verathon Customer Care. -
Page 80: Procedure 7. Replace The Printer Drive Roller (Optional)
6. Load the thermal paper and close the printer door according to the instructions in the procedure “Load Thermal Paper into the Printer (Optional)” on page 56. 7. If the printer continues to malfunction, contact Verathon Customer Care. 0900‑5005 REV‑00... -
Page 81: Procedure 8. Evaluate Console Error Messages
Table 14 lists the initial actions you should take if one of the error messages in the table appears on the system’s main display. If you are not able to correct the error, contact Verathon Customer Care for additional instructions. -
Page 82: Product Specifications
PRODUCT SPECIFICATIONS SYSTEM SPECIFICATIONS OVERALL SYSTEM SPECIFICATIONS Table 15. General System Specifications ITEM SPECIFICATION General Specifications Classification Internally powered, Type BF Expected product life 7 years Console IPX2 Probe IPX4 Ingress protection (IP) against Printer IPX0 water Power adapter IP22 Battery IPX0 Operating Conditions... - Page 83 Table 16. Ultrasound Acoustic Output Parameters (IEC Standard) INDEX LABEL BELOW BELOW AT SURFACE AT SURFACE SURFACE SURFACE Maximum index value 0.433 2.21×10 — — — ‑3 Index component value 2.21×10 2.21×10 — — ‑3 ‑3 (MPa) 0.652 at z r,α...
- Page 84 Verathon while scanning a tissue‑equivalent phantom. While the upper threshold of the accuracy range is 999 mL, the system is capable of detecting and displaying bladder volumes above 999 mL. Verathon cannot guarantee the accuracy of measurements outside of the stated specifications.
-
Page 85: Component Specifications
Weight 1800 g (3.97 lbs) Display 1280 x 800 pixels Electrical Specifications Input Verathon Supplied Battery, 10.8 V DC Output USB Ports, 5 V DC at 100 mA maximum from each port Insulation Type BF Table 20. BladderScan i10 Power Adapter (0400‑0156) - Page 86 Table 21. BladderScan i10 Probe (0570‑0413) ITEM SPECIFICATION General Specifications Height 194 mm (7.64 in) Width 61 mm (2.40 in) Depth 89 mm (3.50 in) Weight 470 g (1.04 lbs) Cable 1.88 m (6.17 ft) Table 22. BladderScan i10 Printer (0800‑0640) SPECIFICATION DESCRIPTION General Specifications Height 106 mm (4.17 in)
- Page 87 Adhere to the following recommendations and guidance: • Use only the console itself or the optional Verathon battery charger. Any other battery charger may damage the batteries. • Use only the battery model described in this section.
- Page 88 BATTERY CHARGER SPECIFICATIONS Note: The battery charger is an optional accessory. Table 24. Battery Charger (0400‑0157) SPECIFICATION DESCRIPTION General Specifications Height 58 mm (2.30 in) Width 124 mm (4.89 in) Depth 175 mm (6.89 in) Weight 385 g (0.85 lbs) Electrical Specifications Input voltage 24 V DC Input frequency Input current...
-
Page 89: Electromagnetic Compatibility
ELECTROMAGNETIC COMPATIBILITY The system is designed to be in compliance with IEC 60601‑1‑2, which contains electromagnetic compatibility (EMC) requirements for medical electrical equipment. The limits for emissions and immunity specified in this standard are designed to provide reasonable protection against harmful interference in a typical facility. The system complies with the applicable essential performance requirements specified in IEC 60601‑1 and 60601‑2‑37. - Page 90 ELECTROMAGNETIC IMMUNITY Table 27. Guidance and Manufacturer’s Declaration —Electromagnetic Immunity The system is intended for use in the electromagnetic environment specified below. The customer or the user of the system should ensure that it is used in such an environment. COMPLIANCE ELECTROMAGNETIC ENVIRONMENT –...
- Page 91 Table 27. Guidance and Manufacturer’s Declaration —Electromagnetic Immunity The system is intended for use in the electromagnetic environment specified below. The customer or the user of the system should ensure that it is used in such an environment. COMPLIANCE ELECTROMAGNETIC ENVIRONMENT – IMMUNITY TESTS IEC 60601 TEST LEVEL LEVEL...
-
Page 92: Accessory Conformance To Standards
ACCESSORY CONFORMANCE TO STANDARDS To maintain electromagnetic interference (EMI) within certified limits, the system must be used with the cables, components, and accessories specified or supplied by Verathon. For additional information, see the Components & Accessories section on page 10 and the Product Specifications section on page 74. -
Page 93: Glossary
This table provides definitions for specialized terms used in this manual or on the product itself. For a full list of caution, warning, and informational symbols used on this and other Verathon products, refer to the Verathon Symbol Glossary at verathon.com/symbols. - Page 94 TERM DEFINITION Spatial‑peak, temporal‑average intensity spta Meter Megahertz Mechanical index Milliliter Millimeter Megapascal Milliwatt μsec Microsecond Over current protection Automatic over voltage protection Ultrasonic power Pulse duration Derated peak rarefactional pressure Pulse repetition frequency Radio frequency Short circuit protection Thermal index (definition 3.56, IEC 62359:2010) Bone thermal index (definition 3.17, IEC 62359:2010) Cranial bone thermal index (definition 3.21, IEC 62359:2010) Soft tissue thermal index (definition 3.52, IEC 62359:2010)
Need help?
Do you have a question about the BladderScan i10 and is the answer not in the manual?
Questions and answers