Table of Contents
Advertisement
Quick Links
Advertisement
Table of Contents
Troubleshooting

Related Manuals for Verathon AORTASCAN AMI 9700


Summary of Contents for Verathon AORTASCAN AMI 9700
- Page 1 AORTASCAN AMI 9700 Operations & Maintenance Manual...
- Page 2 0900‑4411‑04‑60...
- Page 3 AORTASCAN AMI 9700 Operations & Maintenance Manual Effective: November 2, 2015 Caution: Federal (United States) law restricts this device to sale by or on the order of a physician.
- Page 4 Bluetooth SIG, Inc. and any use of such marks by Verathon is under license. All other brand and product names are trademarks or registered trademarks of their respective owners. Information in this manual may change at any time without notice. For the most up‑to‑date information, see the documentation...
-
Page 5: Table Of Contents
TABLE OF CONTENTS IMPORTANT INFORMATION ..........................1 Overview ................................1 Product Description ............................1 Notice to All Users ............................2 Statement of Prescription ..........................2 Statement of Intended Use ..........................2 Essential Performance ............................2 Safety Information ..............................3 Ultrasound Energy Safety ..........................3 Contraindications .............................3 Precautions & Warnings ...........................3 INTRODUCTION ..............................8 Components &... - Page 6 SETTING UP .................................33 Procedure 1. Perform the Initial Inspection ....................33 Procedure 2. Set Up the Battery .......................34 Procedure 3. Attach the Probe to the Console ..................36 Procedure 4. Program the Clinic Name ..................... 37 Procedure 5. Set the Date & Time ......................39 Procedure 6.
- Page 7 TROUBLESHOOTING ............................64 Help Resources ..............................64 Device Repair ..............................64 Troubleshooting Procedures ..........................65 Procedure 1. Troubleshoot ScanPoint Connection ..................65 Procedure 2. Troubleshoot Power Issues ....................66 Procedure 3. Instrument Too Hot ......................66 Procedure 4. Clear a Paper Jam ........................66 WARRANTY.................................67 PRODUCT SPECIFICATIONS ..........................68 Component Specifications ..........................68 Console &...
-
Page 9: Important Information
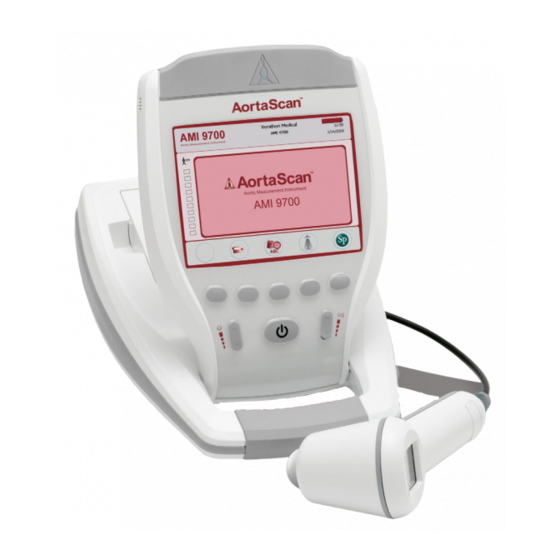
IMPORTANT INFORMATION OVERVIEW PRODUCT DESCRIPTION The AortaScan AMI 9700 is a portable ultrasound instrument that provides noninvasive measurements of abdominal aortic diameter. The device consists of an ultrasound probe that scans the patient’s aorta, and a compact, battery‑operated console that provides measurement‑related information. The AortaScan AMI 9700 can measure diameters ranging between 3 and 12.4 cm with a diameter accuracy of ± (15% + 0.5 cm). -
Page 10: Notice To All Users
Failure to comply with these instructions may compromise the performance of the device and the reliability of its measurements. For the most current version of this manual, please visit verathon.com. STATEMENT OF PRESCRIPTION Caution: Federal (United States) law restricts this device to sale by or on the order of a physician. -
Page 11: Safety Information
EN/IEC 60601‑1‑1. If you need assistance, contact your biomedical staff, Verathon representative, or Verathon Customer Care. ® Operations & Maintenance Manual: Important Information... - Page 12 To maintain electromagnetic interference (EMI) within certified limits, the AortaScan AMI 9700 system must be used with the cables, components, and accessories specified or supplied by Verathon . For additional information, see the System Components & Accessories ®...
- Page 13 CAUTION Use of the following cleaning methods or solutions may cause device damage not covered by the AortaScan AMI 9700 warranty. • Do not immerse the instrument in disinfectant solution. • Do not use Cidex Plus to disinfect the instrument. Cidex Plus will damage the plastic enclosure. ®...
- Page 14 WARNING Risk of explosion, fire, or serious injury. The AortaScan AMI 9700 is powered by a lithium‑ion battery. Failure to note the following when handling the battery may result in serious injury: • Never short‑circuit the battery by either accidentally or intentionally bringing the battery terminals into contact with any other conductive object.
- Page 15 WARNING Availability of cleaning and disinfection products varies by country, and Verathon is unable to test products in every market. For more information, please contact Verathon Customer Care at 1.800.331.2313 or your local representative. For additional contact information, visit verathon.com/contact‑us.
-
Page 16: Introduction
INTRODUCTION COMPONENTS & FEATURES The AortaScan AMI 9700 is designed for simple, intuitive operation. However, to ensure safe and effective operation, before using the device: • Familiarize yourself with the contents of this manual. • Watch the training video provided on the instrument. The AortaScan AMI 9700 has two main components: the console and the probe. -
Page 17: Probe Components
PROBE COMPONENTS The probe transmits and receives ultrasound waves, automatically moving its internal probe 360º to scan twelve different planes to produce a three‑dimensional image of the aorta. The probe is attached to the console by a cable. Figure 2. Probe Components Microphone (above aiming display) Aiming display... -
Page 18: Console Components
CONSOLE COMPONENTS The console provides all operating controls for the scanning process by means of five variable‑function buttons. The measured aortic diameter and target‑shaped aiming icons are clearly displayed on the LCD screen. The console also provides controls for adjusting brightness and volume, turning the power on/off, interfacing with a ScanPoint host computer (optional), and adjusting user settings and preferences. -
Page 19: Battery Charger/Wireless Hub
BATTERY CHARGER/WIRELESS HUB The AortaScan AMI 9700 is powered by a lithium‑ion battery. The battery charger provided with the AMI 9700 can charge two lithium‑ion batteries while simultaneously functioning as the wireless hub linking the AMI 9700 to the ScanPoint host computer. A battery icon on the instrument display is always present ®... -
Page 20: System Components & Accessories
QuickPrint software install CD (Optional) ScanPoint with QuickPrint user’s manual (Optional) Calibration kit (Includes calibration container, calibration target, etc.) (Optional) To order any of the above parts or accessories, contact your authorized Verathon sales representative or ® contact Verathon Customer Care. -
Page 21: Icons & Buttons
ICONS & BUTTONS The console LCD presents user information and prompts that vary depending on the current device function. The five buttons below the display have variable functions according to device mode. Button functions are indicated by icons in the display footer, immediately above each button. CONSOLE DISPLAY ICONS The following icons may appear on the console main display. -
Page 22: Variable Button Functions
VARIABLE BUTTON FUNCTIONS ICON PURPOSE Go to the Home screen. View the training video. Go to the Settings screen. Go to the Review screen. If there are no saved exams, this button is disabled. Initiate communication with the ScanPoint ® host computer. - Page 23 ICON PURPOSE Add and/or toggle characters, as appropriate. Remove and/or toggle characters, as appropriate. Select the Axis on which to manually measure the aorta. Go to the manual measurement tool and select appropriate cursor while manually measuring the aorta. No function. Operations &...
-
Page 24: Button Functions For Each Display Screen
BUTTON FUNCTIONS FOR EACH DISPLAY SCREEN The Power, Brightness, and Volume buttons are constant buttons on the body of the console and can be pressed at any time. The five buttons below the LCD have variable functions according to device mode. The Scan button is located on the underside of the probe. - Page 25 SCREEN/MODE ACTIVE BUTTONS (1) No function. (2) Play: plays selected video, changes to a pause button when video is playing. Video Viewing screen (3) Up Arrow: return to Tutorial screen. Plays the selected tutorial video. (4) No function. (5) Home: return to Home screen. (1) Down Arrow: select next setting in list.
-
Page 26: Display Screens
DISPLAY SCREENS HOME SCREEN The Home screen appears when the AortaScan is first powered on. It serves as a starting point for all of the main functions of the device. The Home screen displays: • In the header: Your clinic’s name, the battery status indicator and the current date and time. •... - Page 27 Table 7. Home Screen Button Functions BUTTON FUNCTION No function. View the training video. Go to the Settings screen (set the time, date, institution name, and user preferences). Review a previously saved exam. Initiate communication with the ScanPoint host computer. Saved and annotated exams will ®...
- Page 28 RESULTS SCREEN The Results screen appears automatically when an ultrasound scan is complete. The display presents the result of the exam: crosshairs, aorta outline, and the calculated aorta diameter. You may choose to print this result to the onboard printer and/or to record a voice annotation to save the exam. After the annotation is recorded, the Play and Review buttons become active, and the newly recorded exam appears on the main display as an yellow folder icon.
- Page 29 TUTORIAL SCREEN To open the Tutorial screen, press the Tutorial button from the Home screen. The Tutorial screen presents a menu of training modules. Note: When this screen is open, the Scan button on the probe is disabled. Table 9. Tutorial Screen Button Functions BUTTON FUNCTION...
- Page 30 VIDEO VIEWING SCREEN The Video Viewing screen is activated by pushing the Enter button on the Tutorial screen. Press the Play button to begin the desired tutorial. Note: When this screen is open, the Scan button on the probe is disabled. Table 10.
- Page 31 SETTINGS SCREEN To open the Settings screen, push the Settings button on the Home screen. The display presents a list of user‑configurable settings: Name, Date & Time, General Preferences, and Self Test. Note: When this screen is open, the Scan button on the probe is disabled. Table 11.
- Page 32 NAME SCREEN This screen allows you to select the appropriate alpha numeric characters for entering your health care institution’s name. For more information, see Program the Clinic Name on page 37. Table 12. Name Screen Button Functions BUTTON FUNCTION Move down in the grid. Move right in the grid.
- Page 33 DATE & TIME SCREEN This screen allows you to adjust the date and time. For more information see Set the Date & Time on page 39. Note: If the time display is set to show a 24‑hour clock, the hour units are 0–23. If the clock is set to show a 12‑hour clock, the hour units are 01‑12.
- Page 34 • Print Report Type: Toggle between C‑mode images (aorta in crosshairs) and B‑mode images (image of aorta and abdominal space below probe). • Enable ScanPoint : On (default), Off. Select “Off” to disable ScanPoint. ® AMI 9700 Verathon Medical 12:29 AMI 9700 06/10/2013 Aortic Measurement Instrument Language...
- Page 35 Table 14. General Preferences Screen Button Functions BUTTON FUNCTION Move down a setting in the list. Move up a setting in the list. Select the next option. Press and hold to move through options more quickly. Select the previous option. Press and hold to move through options more quickly. Save the current settings and return to the Setup screen.
- Page 36 SELF TEST SCREEN When you open the Self Test screen, testing begins automatically. Once testing is complete, data on the screen is printed automatically to the instrument’s onboard printer. Table 15. Self Test Screen Button Functions BUTTON FUNCTION No function. No function.
- Page 37 Please note that the scan counter feature is available only with software version 3.1.0.0 or higher. Some AortaScan consoles cannot be upgraded to run software version 3.0 or higher. Software updates may be performed by either logging on to ScanPoint , or by contacting Verathon Customer Care. ®...
- Page 38 TROUBLESHOOTING The scan counter feature is designed for redundancy, so the scan value is stored in multiple locations in the instrument’s internal memory. If one of the storage locations fails, the text “EEPROM Failed” will be added to the DSP status line. In the event of an EEPROM failure, the counter will continue to work but will not have a backup copy stored in the instrument.
- Page 39 SCANPOINT SCREEN Note: This screen is only available if the optional ScanPoint software is installed on a PC. ® Press the ScanPoint button on the Home screen. The ScanPoint screen displays information about the status of the link between the AortaScan instrument and the ScanPoint host computer. Figure 10.
-
Page 40: Sleep Mode
SLEEP MODE To conserve battery power, the AortaScan AMI 9700 goes into sleep mode by shutting itself down automatically when not in use. After four minutes of idle time, a sleep mode alert message displays for 15 seconds. While the message is displayed, press any button to keep the console awake and dismiss the message. -
Page 41: Setting Up
2. Remove the contents and verify that you have received the appropriate components for your system. 3. Inspect the components for damage. 4. If any of the components are missing or damaged, notify the carrier and Verathon Customer Care or your local representative. -
Page 42: Procedure 2. Set Up The Battery
PROCEdURE 2. SET UP THE BATTERY WARNING Risk of explosion, fire, or serious injury. The AortaScan AMI 9700 is powered by a lithium‑ion battery. Failure to note the following when handling the battery may result in serious injury: • Never short‑circuit the battery by either accidentally or intentionally bringing the battery terminals into contact with any other conductive object. - Page 43 3. Check the colored indicator lights on the battery charger to determine battery status: Solid green: Battery fully charged. Amber: Battery charging. The battery status indicator remains in the top right corner of the screen and indicates the charge level of the battery.
-
Page 44: Procedure 3. Attach The Probe To The Console
PROCEdURE 3. ATTACH THE PROBE TO THE CONSOLE 1. Locate the cable port on the back of the console. 2. Align the silver arrow on the probe cable connector to the top of the cable port. Arrow on cable connector 3. -
Page 45: Procedure 4. Program The Clinic Name
PROCEdURE 4. PROGRAM THE CLINIC NAME You can customize your AortaScan AMI 9700 by entering your facility’s name. This information will subsequently be included on the console display and all printouts of exam results. 1. Turn the AortaScan AMI 9700 on by pressing the Power button on the front of the console. - Page 46 4. On the Name screen, use the Right Arrow button and Down Arrow button to move to the desired character. When the desired character is highlighted, press the Plus button to add it to your text. Use the Minus button to delete characters.
-
Page 47: Procedure 5. Set The Date & Time
PROCEdURE 5. SET THE dATE & TIME 1. Turn on the device by pressing the Power button 2. From the Home screen, press the Settings button to open the Settings screen. 3. On the Settings screen, push either the Up Arrow button or Down Arrow button buttons until “Date &... -
Page 48: Procedure 6. Load The Thermal Paper
PROCEdURE 6. LOAd THE THERMAL PAPER If paper appears to be stuck in the printer, see the procedure Clear a Paper Jam on page 66. 1. Locate the paper compartment door on the base of the console, behind the display. 2. Slide the door to the right, then lift up. 3. -
Page 49: Procedure 7. Attach The Instrument To A Medical Cart (Optional)
PROCEdURE 7. ATTACH THE INSTRUMENT TO A MEdICAL CART (OPTIONAL) The AortaScan AMI 9700 is completely portable and can be easily moved and positioned for convenient use. Installing the AMI 9700 on the optional mobile cart will allow you to move the AortaScan along with related accessories to the patient examining area or bedside, as necessary. - Page 50 ASSEMBLE THE MEdICAL CART 1. Insert the five casters into the medical cart base, positioning the brake casters on opposite ends of the base. 2. Insert the post into the square relief on the underside of the medical tray. 3. Insert the four screws through the bracket on the top of the post into the molded inserts in the medical tray and tighten securely.
-
Page 51: Procedure 8. Install Scanpoint With Quickprint (Optional)
The training video provides an overview of how to perform an ultrasound scan of the aorta using the AortaScan AMI 9700. The video: • Is approximately 5 minutes long. • Is available at the Verathon Web site: http://verathon.com. ® • Is available for review anytime on the instrument by pushing the Tutorial button from the Home screen. -
Page 52: Using The Device
USING THE DEVICE WARNING The aortic diameter measurement function provides images that may be used for diagnosis and screening. If clinically indicated, appropriate patients should be referred for additional diagnostic testing. WARNING The AortaScan system is designed to detect the fluid (blood) filled region of the abdominal aorta only. - Page 53 WARNING Risk of explosion. If you use the AortaScan AMI 9700 in the presence of flammable anesthetics, the hazard of potential explosion exists. WARNING Do not use the AortaScan AMI 9700 on: • A patient who has open skin or wounds in the mid‑abdominal area. •...
-
Page 54: Procedure 1. Prepare For The Exam
AIMING dISPLAY The aiming display illustrates the location of the aorta relative to the ultrasound probe. The center of the two axes represents the center of the probe. The aorta is shown in red. The white lines represent areas of high reflection, most likely caused by bowel gas. -
Page 55: Procedure 2. Measure Abdominal Aortic Diameter
PROCEdURE 2. MEASURE ABdOMINAL AORTIC dIAMETER 1. Turn on the instrument by pressing the Power button 2. With the patient in the supine position, identify four equally spaced scan locations between the xiphoid process and the umbilicus. Figure 18. Four Scan Locations for Measuring Scan 1 Scan 2 Scan 3... - Page 56 8. Perform three more measurements and save and annotate the result of each exam. For more information, see Save, Review, & Print Exam Results on page 50. Figure 20. Results Screen 9. If you would like to perform another exam, press the Home button , and then repeat this procedure.
-
Page 57: Procedure 3. Measure Aortic Diameter Manually (Optional)
PROCEdURE 3. MEASURE AORTIC dIAMETER MANUALLY (OPTIONAL) To measure abdominal aortic diameter manually, you must perform a scan in B‑mode. For information about setting the instrument in B‑mode, see General Preferences Screen on page 26. 1. After completing the scan, press the Manual Mode button . -
Page 58: Procedure 4. Save, Review, & Print Exam Results
PROCEdURE 4. SAVE, REVIEW, & PRINT EXAM RESULTS IMPORTANT In order to save the scan, you must record an annotation. If you do not record an annotation, the scan result will be lost, and the next scan you perform will overwrite the non‑annotated scan. The AMI 9700 instrument does not automatically save each scan. -
Page 59: Procedure 5. Interpret The Aortic Measurement Results
PROCEdURE 5. INTERPRET THE AORTIC MEASUREMENT RESULTS WARNING The aortic diameter measurement function provides images that may be used for diagnosis and screening. If clinically indicated, appropriate patients should be referred for additional diagnostic testing. WARNING The AortaScan system is designed to detect the fluid (blood) filled region of the abdominal aorta only. - Page 60 An unobstructed scan has been achieved when the probe displays eight solid green arrows. When the scan is complete, the AortaScan AMI 9700 shows the aortic diameter and two displays on the console screen. Aorta Bowel gas Results display Aiming display The aiming display on the left side of the screen shows the location of the aorta relative to the probe, as viewed looking from the probe into the body.
- Page 61 MEASURING AORTIC dIAMETERS < 3 CM The AortaScan AMI 9700 can detect aortas with diameters between 3 cm and 12.4 cm. Diameters less than 3 cm occur in patients who have normal‑sized aortas. The round shadow at 6 cm depth in the results display is the patient’s abdominal aorta. Patients with aortas less than 3 cm in diameter will show no red outline around the aorta in the results display, as the diameter cannot be measured automatically.
- Page 62 SUBSTANTIAL GAS OBSTRUCTION A substantial amount of gas in the abdomen can block ultrasound from reaching the aorta and results in an unreadable or inappropriate scan. A red arrow on the console and a flashing green arrow on the probe indicate bowel gas has substantially obscured the aorta.
-
Page 63: Cleaning & Maintenance
Clean and disinfect the instrument before use and between patient exams. WARNING This product may only be cleaned and disinfected by using the approved processes provided in this manual. Cleaning and disinfection methods listed are recommended by Verathon based on compatibility with component materials. WARNING Availability of cleaning and disinfection products varies by country, and Verathon is unable to test products in every market. -
Page 64: Procedure 2. Disinfect The Instrument
6. Do not re‑use cloths or wipes. 7. If rinsing or removal of the disinfectant solution from the device is required by the disinfectant manufacturer’s instructions, wipe with a clean soft cloth dampened in sterile water. Verathon ® recommends wiping the device three separate times to remove all residual disinfectant. -
Page 65: Regular Inspections
AortaScan AMI 9700 be certified by an authorized Service Center once a ® year. Certification service includes comprehensive inspection and testing of the instrument to ensure proper performance in clinical use. For more information, please contact your authorized Verathon Service Center, your local Verathon distributor, or Verathon Customer Care. Note: ScanPoint Online customers can maintain device certification via the Internet by accessing their ®... -
Page 66: Procedure 2. Update The Software
PROCEdURE 2. UPdATE THE SOFTWARE 1. On the instrument, on the Home screen, press the ScanPoint button 2. On the computer, double‑click the ScanPoint with QuickPrint icon. ScanPoint ® opens. 3. On the computer, in the ScanPoint QuickPrint window, click Find New. QuickPrint establishes a connection with the instrument, and an icon for the device appears in the left pane. - Page 67 4. Select the 9000 Series device, verify that the serial number matches the device you are updating, and then click the Update Instrument button. 5. If any updates are available, the device downloads and installs them. The console displays a progress bar and automatically restarts when the installation is complete.
-
Page 68: Procedure 3. Calibrate The Probe Using The Scanpoint System
QuickPrint software, you must send your instrument to an authorized Verathon service center for calibration. Contact Verathon Customer Care for more information. ® At minimum, the AMI 9700 must be calibrated every 12 months in order to ensure appropriate results. - Page 69 5. Place the probe into the cutout in the lid. Ensure that the tip of the probe is submerged in the water. 6. On the computer, double‑click the ScanPoint with QuickPrint icon. ScanPoint opens. ® 7. On the console, on the Home screen, press the ScanPoint button 8.
- Page 70 9. Select the 9000 Series device, verify that the serial number matches the device you are calibrating, and then click the calibration tank icon. 10. Click the Calibrate button. ScanPoint begins to scan and analyze the data in order to ensure that it ®...
-
Page 71: Device Disposal
The AortaScan AMI 9700 and related devices may contain mineral oils, batteries, and other environmentally hazardous materials. When the AortaScan AMI 9700 has reached the end of its useful service life, return the device, battery charger/wireless hub, and related accessories to a Verathon Service Center for proper ®... -
Page 72: Troubleshooting
The AortaScan AMI 9700 console, probe, and battery charger/wireless hub are completely sealed. There are no user‑serviceable components. Verathon does not make available any type of circuit diagrams, component parts lists, descriptions, or other information that would be required for repairing the device and related accessories. -
Page 73: Troubleshooting Procedures
3. On the PC, click Find New. While the device is attempting to connect to ScanPoint, remove the battery. 4. Reinsert the battery, allow the device to power on, and then press the ScanPoint button 5. On the PC, click Find New. If the console does not connect, contact Verathon Customer Care. ®... -
Page 74: Procedure 2. Troubleshoot Power Issues
® two years. If the instrument has stopped responding even with a new battery, perform a full reset by removing and reinserting the battery. If the instrument still does not respond, contact Verathon Customer Care. PROCEdURE 3. INSTRUMENT TOO HOT The AMI 9700 displays the message “Too hot”... -
Page 75: Warranty
Pursuant to this warranty, a service center authorized by Verathon will repair or replace units that prove to be defective during the warranty period. -
Page 76: Product Specifications
PRODUCT SPECIFICATIONS COMPONENT SPECIFICATIONS CONSOLE & PROBE SPECIFICATIONS Table 20. General Specifications ITEM SPECIFICATION Input Lithium‑ion battery. Output No load to full load at rated voltage. Refer to unit label. Insulation The power supply is Class I with basic insulation to each terminal. Transient overvoltage Category II Weight... - Page 77 Diameter accuracy ± (15% + 0.5 cm) on a Verathon tissue‑equivalent phantom ® The accuracy specifications assume the instrument is being used according to the instructions provided by Verathon while scanning a tissue‑equivalent phantom. Table 23. Operating & Storage Conditions SPECIFICATION DESCRIPTION Operating Conditions...
-
Page 78: Battery Specifications
BATTERY SPECIFICATIONS The AortaScan AMI 9700 is provided with two lithium‑ion batteries. A battery icon on the instrument display is always present, indicating how much power remains and when the battery needs to be changed. You can change the battery whenever necessary. Removing a discharged battery and replacing it with a fresh battery should not erase any saved exams or user settings. -
Page 79: Battery Charger/Wireless Hub Specifications
BATTERY CHARGER/WIRELESS HUB SPECIFICATIONS The battery charger/wireless hub is powered from a standard wall outlet (adaptable to international power standards). The battery charger/wireless hub can charge two batteries simultaneously. Table 25. Battery Charger/Wireless Hub Specifications SPECIFICATION DESCRIPTION Operating Conditions Indoor Ambient temperature range 5–40ºC (41–104ºF) Atmospheric pressure range... -
Page 80: Bluetooth Wireless Technology
BLUETOOTH WIRELESS TECHNOLOGY The Bluetooth technology used in the AortaScan AMI 9700 is compliant with: ® • Bluetooth Specification as defined and approved by The Bluetooth Special Interests Group. • Logo certification with Bluetooth wireless technology as defined by The Bluetooth Special Interest Group. -
Page 81: Electromagnetic Immunity
ELECTROMAGNETIC IMMUNITY Table 27. Guidance and Manufacturer’s Declaration —Electromagnetic Immunity The AortaScan AMI 9700 system is intended for use in the electromagnetic environment specified below. The customer or the user of the AortaScan AMI 9700 system should assure that it is used in such an environment. - Page 82 Table 27. Guidance and Manufacturer’s Declaration —Electromagnetic Immunity The AortaScan AMI 9700 system is intended for use in the electromagnetic environment specified below. The customer or the user of the AortaScan AMI 9700 system should assure that it is used in such an environment.
-
Page 83: Recommended Separation Distances
ACCESSORY CONFORMANCE TO STANDARDS To maintain electromagnetic interference (EMI) within certified limits, the system must be used with the cables, components, and accessories specified or supplied by Verathon . For additional information, see ®... -
Page 84: Symbol Directory
SYMBOL DIRECTORY SYMBOL MEANING Warnings & Cautions Warning or Caution —Consult accompanying documents. Read instructions before connecting or operating. Risk of electric shock Flammable material Non‑ionizing, electromagnetic radiation Product Use & Specifications Refer to the operations & maintenance manual Manufacturer Date of manufacture Use‑by date Catalog (part) number... - Page 85 SYMBOL MEANING Electrical & Power Class II equipment Type BF applied part Energy Efficiency Level V Battery operated Connector polarity mark—positive Connect to power supply Limited power source Standards & Certifications CE —Marked in accordance with the Medical Device Directive (MDD) CSA—Canadian Standards Association mark of certification to applicable standards for electromedical equipment FCC—Tested to Federal Communications Commission requirements...
-
Page 86: Glossary
GLOSSARY TERM DEFINITION Ampere Celsius Centimeter Canadian Standards Association Direct current Electromagnetic compatibility Electromagnetic interference Essential performance The system performance necessary to achieve freedom from unacceptable risk Electrostatic discharge Fahrenheit Gram Gigahertz HIPAA Health Insurance Portability and Accountability Act Hectopascal Hertz International Electrotechnical Commission Image cone...