Table of Contents
Advertisement
Quick Links
Advertisement
Table of Contents

Related Manuals for Verathon GlideScope AVL Single-use


Summary of Contents for Verathon GlideScope AVL Single-use
- Page 1 GLIDESCOPE SYSTEM AVL SINGLE‑USE Operations & Maintenance Manual...
- Page 2 0900‑4200 REV‑10...
- Page 3 GLIDESCOPE SYSTEM AVL SINGLE‑USE Operations & Maintenance Manual Effective: June 2, 2020 Caution: Federal (United States) law restricts this device to sale by or on the order of a physician. For customers with GlideScope systems using the GlideScope Video Monitor (version 0570‑0338).
- Page 4 International: +61 2 9431 2000 Tel / +61 2 9475 1201 Fax 0413 Copyright © 2020 by Verathon Inc. All rights reserved. No part of this manual may be copied or transmitted by any method without the express written consent of Verathon Inc.
-
Page 5: Table Of Contents
TABLE OF CONTENTS IMPORTANT INFORMATION ..........................1 Product Information ............................1 Statement of Intended Use ..........................1 Essential Performance ............................1 Environments of Intended Use..........................1 Statement of Prescription ............................1 Notice to All Users ..............................1 Warnings & Cautions ............................2 Product Description ............................6 INTRODUCTION ..............................8 System Parts & Accessories ..........................8 Language Settings ............................ - Page 6 USING THE DEVICE .............................28 Procedure 1. Connect the Video Cable to the Monitor ................29 Procedure 2. Insert the Video Baton into the Stat..................30 Procedure 3. Prepare the GlideScope System ....................30 Procedure 4. Intubate Using a Video Baton and Stat ................. 31 Procedure 5.
-
Page 7: Important Information
NOTICE TO ALL USERS Verathon recommends that all users read this manual before using the system. Failure to do so may result in injury to the patient, may compromise the performance of the system, and may void the system warranty. -
Page 8: Warnings & Cautions
Do not use this product if the device appears damaged. Refer servicing to qualified personnel. Always ensure that alternative airway management methods and equipment are readily available. Report any suspected defects to Verathon Customer Care. For contact information, visit verathon.com/global‑support. 0900‑4200 REV‑10... - Page 9 Verathon. WARNING Electric shock hazard. Do not attempt to open the system components. This may cause serious injury to the operator or damage to the instrument and voids the warranty. Contact Verathon Customer Care for all servicing needs. WARNING No modification of this equipment is allowed.
- Page 10 WARNING WARNING Use of accessories and cables other than those specified or provided by Verathon may cause this Use of accessories and cables other than those specified or provided by Verathon may cause this system to experience electromagnetic malfunctions, including increased emissions or decreased system to experience electromagnetic malfunctions, including increased emissions or decreased immunity.
- Page 11 CAUTIONS CAUTION Medical electrical equipment requires special precautions regarding electromagnetic compatibility (EMC) and must be installed and operated according to the instructions in this manual. For more information, see the Electromagnetic Compatibility section. Avoid using the GlideScope system adjacent to or stacked with other equipment. If adjacent or stacked use is necessary, observe the system to verify normal operation in the configuration in which it will be used.
-
Page 12: Product Description
HDMI‑to‑DVI cable provided by Verathon to connect to an external monitor that is approved for medical use. You can operate the monitor by connecting it to the medical‑grade power supply provided by Verathon or by using the internal, rechargeable lithium‑ion battery. - Page 13 SINGLE‑USE SYSTEM The AVL single‑use system can be used with a choice of three video batons and multiple GVL Stats. Single‑use GVL Stats are offered in a comprehensive range of sizes, allowing clinicians to meet the particular requirements of patients of various sizes. The system may include the following components: •...
-
Page 14: Introduction
INTRODUCTION SYSTEM PARTS & ACCESSORIES The system consists of the following components. Table 1. System Components PARTS & ACCESSORIES Required Components GlideScope Video Monitor Video batons GVL Stat sizes 0, 1, 2, 2.5, 3, and 4 (single‑use) 0900‑4200 REV‑10... - Page 15 PARTS & ACCESSORIES Video monitor 12 V DC Smart Cable power adapter (for Video Baton 2.0) Note: Cable shortened for illustration purposes. In‑service USB flash drive Power cable Note: Contains instructions for use. Operations & Maintenance Manual: Introduction 0900‑4200 REV‑10...
- Page 16 PARTS & ACCESSORIES Optional Components Premium cart Universal accessory basket Mobile stand Note: For use with AVL portable stand Media storage USB flash drive Cradle for video baton IV pole mounting kit HDMI‑to‑DVI cable 0900‑4200 REV‑10...
-
Page 17: Language Settings
The GlideScope Video Monitor software is available in a variety of languages. To change the language used on your system, you must install a new software version via a USB flash drive. For more information, contact Verathon Customer Care or your local representative. For contact information, visit verathon.com/global‑support. -
Page 18: Video Laryngoscope Components
VIDEO LARYNGOSCOPE COMPONENTS The following diagram shows the individual parts of an AVL video laryngoscope (a reusable video baton with a single‑use Stat). Figure 3. AVL Video Laryngoscope Components Smart Cable Video baton Camera and light Single‑use Stat Video cable (permanently attached) 0900‑4200 REV‑10... -
Page 19: Buttons, Icons, & Connections
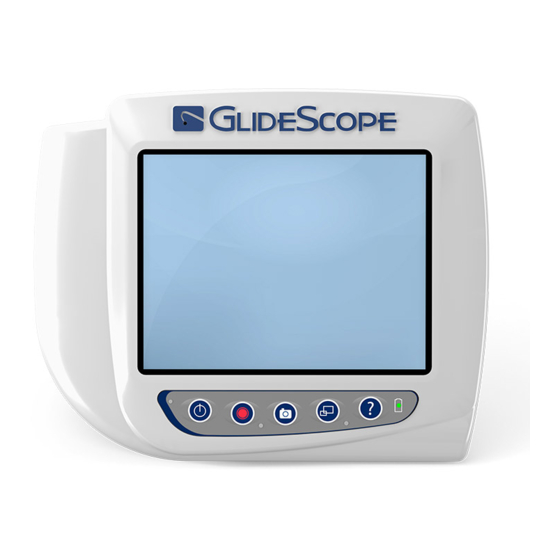
USB flash drive is inserted in the monitor. Battery Indicator: LED is: Green: Unit fully charged Red: Unit charging Flashing Red: Indicates a problem with the battery. Charge for 6 hours, and if still flashing, contact Verathon Customer Care. Operations & Maintenance Manual: Introduction 0900‑4200 REV‑10... - Page 20 Table 3. On‑Screen Icons ICON FUNCTION Battery Status: The remaining battery power is indicated by the Battery Status icon and the percentage above the icon. If the icon is red, the battery should be charged as soon as possible. (See Charge the Monitor Battery.) While the battery is being charged, a lightning bolt will be displayed alongside the Battery Status...
- Page 21 ICON FUNCTION Hourglass: Please wait while the system prepares for the next action. Audio Recording is Active: Audio is being recorded on the video. Note: The default for audio recording is OFF, so audio recording on the video occurs only if the default has been changed to ON in user settings. Back Arrow: Exit to previous screen.
-
Page 22: Setting Up
1. Verify that you have received the appropriate components for your system by referring to the packing list included with the system. 2. Inspect the components for damage. 3. If any of the components are missing or damaged, notify the carrier and Verathon Customer Care or your local representative. For contact information, visit verathon.com/global‑support. 0900‑4200 REV‑10... -
Page 23: Procedure 2. Mount The Glidescope Video Monitor (Optional)
PROCedURe 2. MOUNT THe GLIdeSCOPe VIdeO MONITOR (OPTIONAL) If you choose to mount the system, you may use either of the following configurations: • Mount it on a premium cart or mobile stand (Figure 6 Figure 7). These solutions make it easy for you to move the system from one location to another. - Page 24 ATTACH THe MONITOR TO THe MOBILe STANd OR IV POLe 1. If you are using the GlideScope premium cart or AVL portable stand, assemble it according to the instructions included with the component. 2. If you are using an IV pole mount, place the mounting bracket on the IV pole, and then tighten the bracket attachment knob until the IV pole mount is secure.
- Page 25 5. Using the orientation shown in the following images, screw the quick‑release locking plate to the back panel of the monitor. Quick‑release locking plate 6. Seat the locking plate of the monitor on the quick‑release mount. When properly situated, the monitor sits securely on the mount, and the quick‑release lever automatically snaps into the locked (down) position.
-
Page 26: Procedure 3. Attach The Video Baton Cradle (Optional)
AdJUST THe MONITOR ANGLe Before you start using the video monitor, adjust the angle of the monitor for optimal viewing. The ideal angle minimizes glare and maximizes visibility. 1. Turn the angle adjustment knob counterclockwise. Angle adjustment knob 2. Tilt the monitor to the desired angle. 3. -
Page 27: Procedure 4. Charge The Monitor Battery
Warnings & Cautions section before performing the following task. The GlideScope Video Monitor includes an internal lithium‑ion battery. Verathon recommends that you charge the battery fully prior to first use. Under normal operating conditions, a fully charged battery lasts approximately 90 minutes or longer before it needs to be recharged. -
Page 28: Procedure 5. Connect The Video Cable Or Smart Cable To The Monitor
PROCedURe 5. CONNeCT THe VIdeO CABLe OR SMART CABLe TO THe MONITOR This procedure connects the video cable or Smart Cable to the monitor, which displays the image transmitted from the camera. Ensure that the video monitor is turned off prior to connecting or disconnecting the video cable or Smart Cable. -
Page 29: Procedure 6. Connect The Smart Cable To The Video Baton (Video Baton 2.0 Only)
PROCedURe 6. CONNeCT THe SMART CABLe TO THe VIdeO BATON (VIdeO BATON 2.0 ONLY) If you want to use GlideScope Video Batons 2.0 with the GlideScope Video Monitor, you can use a Smart Cable to connect them. Note: Video Batons 2.0 require system software version 3.9 or later. For more information, refer to System Software page 37. -
Page 30: Procedure 7. Connect To An External Monitor (Optional)
By using an HDMI‑to‑DVI cable, you can connect the GlideScope Video Monitor to an external monitor that is approved for medical use. For more information, please contact your Verathon Customer Care representative. Note: Image quality on the external monitor may vary according the resolution of the external monitor. -
Page 31: Procedure 8. Configure User Settings
PROCedURe 8. CONFIGURe USeR SeTTINGS You may configure the following settings directly on the unit: • Date and Time • Audio Recording • Date and Time Format • Auto Recording • Key Click Sound • Auto External Video • Auto Power Off •... -
Page 32: Procedure 9. Perform A Functional Check
Before you use the device for the first time, perform the following functional check to ensure that the system is working properly. Please contact your local Verathon representative or Verathon Customer Care if your system does not function as described below. For contact information, visit verathon.com/global‑support. - Page 33 8. To stop recording, press the Record button again. 9. Wait until the Saving File icon has disappeared from the screen, and then remove the USB flash drive from the monitor. 10. On a computer, verify that the recorded video (.avi) file can be played. Note: If you are viewing the recorded file on a Windows operating system (OS), use an application such as Windows Media Player.
-
Page 34: Using The Device
USING THE DEVICE Prior to using the device, set up the device according to the instructions in the previous chapter, and verify the setup by completing the procedure Perform a Functional Check. Please read the Warnings & Cautions section before performing the following tasks. AVL video laryngoscopes are equipped with the Reveal anti‑fog feature, which reduces camera fogging during the intubation procedure. -
Page 35: Procedure 1. Connect The Video Cable To The Monitor
PROCedURe 1. CONNeCT THe VIdeO CABLe TO THe MONITOR Ensure that the video monitor is turned off prior to connecting or disconnecting the video cable. 1. Ensure the video laryngoscope and other system components have been properly cleaned and disinfected. For more information, refer to the GlideScope and GlideRite Products Reprocessing Manual (part number 0900‑5032). -
Page 36: Procedure 2. Insert The Video Baton Into The Stat
PROCedURe 2. INSeRT THe VIdeO BATON INTO THe STAT 1. Open the GVL Stat pouch, but do not remove the Stat from the packaging. 2. Ensure that the logo on the side of the baton and the logo on the side of the Stat are aligned. 3. -
Page 37: Procedure 4. Intubate Using A Video Baton And Stat
Warnings & Cautions section before performing the following task. To perform an intubation, Verathon recommends using the technique outlined in this procedure. Prior to beginning this procedure, verify that the monitor is receiving an accurate image from the video laryngoscope. -
Page 38: Procedure 5. Use The Record & Snapshot Features (Optional)
PROCedURe 5. USe THe ReCORd & SNAPSHOT FeATUReS (OPTIONAL) Please read the Warnings & Cautions section before performing the following tasks. The system is equipped with video and audio recording features and the ability to save a snapshot of the live display on the monitor. - Page 39 6. If you would like to review the recorded files on the video monitor, complete the following procedure, Use the Playback Feature (Optional). If you would like to review the recorded files on a computer, insert the USB flash drive into the PC, and then view the .avi or .jpg files.
-
Page 40: Procedure 6. Use The Playback Feature (Optional)
PROCedURe 6. USe THe PLAYBACK FeATURe (OPTIONAL) Recorded videos and snapshots on a USB flash drive can be viewed on the GlideScope Video Monitor. This feature is only available if your GlideScope Video Monitor is running software version 3.4 or higher. For more information about upgrading the software, see System Software on page 37. -
Page 41: Tips For Using The Glidescope Avl System
TIPS FOR USING THE GLIDESCOPE AVL SYSTEM • The GlideScope video laryngoscope is designed to be inserted down the midline of the tongue to the epiglottis. • Intubations using the GlideScope video laryngoscope only require approximately 0.5–1.5 kg (1–3.5 lbs) of lifting force. -
Page 42: Reprocessing
For information about the cleaning, disinfection, and sterilization requirements for these components, refer to the GlideScope and GlideRite Products Reprocessing Manual (part number 0900‑5032), which is available at verathon.com/product‑documentation. 0900‑4200 REV‑10... -
Page 43: Maintenance & Safety
The battery is not user‑replaceable. In case of battery malfunction, do not attempt to replace the monitor battery. Any attempts to replace the battery by unauthorized service technicians may cause serious harm to the user and will void the warranty. Please contact your Verathon Customer Care Representative for more information on battery replacement. -
Page 44: Device Repair
DEVICE REPAIR The system components are not user‑serviceable. Verathon does not make available any type of circuit diagrams, component parts lists, descriptions, or other information that would be required for repairing the device and related accessories. All service must be performed by a qualified technician. -
Page 45: Warranty
Product to Verathon (cleaned and disinfected as appropriate) immediately upon receiving the loaner unit from Verathon. Buyer shall return the loaner unit within two (2) business days of receipt of the repaired Product. All exchanged parts become property of Verathon. - Page 46 European Customers, any terms herein limiting Verathon’s liability shall not apply insofar as they conflict with mandatory statutory provisions of the Product Liability Act.
-
Page 47: Product Specifications
PRODUCT SPECIFICATIONS COMPONENT SPECIFICATIONS Table 4. GlideScope Video Monitor (0570‑0338) GENERAL SPECIFICATIONS Classification: Electrical Class II, Applied Part BF Range: 100–240 VAC, 50 and 60 Hz. Connect to a medical‑grade power supply (If Line voltage: the provided power cord has a third prong, it is used as a functional ground). DC power supply: 12 V DC, 3.33 A max Ingress protection:... - Page 48 Table 5. Spectrum Smart Cable (0800‑0543) GENERAL SPECIFICATIONS Ingress protection: IPX8 OPERATING & STORAGE SPECIFICATIONS Operating Conditions Shipping & Storage Conditions Temperature: 10–40°C (50–104°F) ‑20–45°C (‑4–113°F) Relative humidity: 10–95% 10–95% Atmospheric pressure: 700–1060 hPa 440‑1060 hPa COMPONENT SPECIFICATIONS Length (A) 1417 ±...
- Page 49 Table 7. Mobile Stand (0800‑0410) OPERATING & STORAGE SPECIFICATIONS Operating Conditions Shipping & Storage Conditions Temperature: 10–40°C (50–104°F) ‑20–45°C (‑4–113°F) Relative humidity: 10–95% 10–95% Atmospheric pressure: 700–1060 hPa 440‑1060 hPa COMPONENT SPECIFICATIONS Wheelbase diameter (A) 61 cm B–C Minimum height (B) 76 cm Maximum height (C) 122 cm...
- Page 50 Table 9. AVL Video Baton 1‑2 (0570‑0306) GENERAL SPECIFICATIONS Ingress protection: IPX8 Expected product life: 2 years or 1000 cycles OPERATING & STORAGE SPECIFICATIONS Operating Conditions Shipping & Storage Conditions Temperature: 10–40°C (50–104°F) ‑20–45°C (‑4–113°F) Relative humidity: 10–95% 10–95% Atmospheric pressure: 700–1060 hPa 440‑1060 hPa COMPONENT SPECIFICATIONS...
- Page 51 Table 11. AVL Video Baton 2.0 Large (3‑4; 0570‑0382) GENERAL SPECIFICATIONS Ingress protection: IPX8 Expected product life: 2 years or 2000 cycles OPERATING & STORAGE SPECIFICATIONS Operating Conditions Shipping & Storage Conditions Temperature: 10–40°C (50–104°F) ‑20–45°C (‑4–113°F) Relative humidity: 10–95% 10–95% Atmospheric pressure: 700–1060 hPa...
- Page 52 Table 13. GVL Stat 1 (0574‑0026) GENERAL SPECIFICATIONS Expected product life: Refer to the “use by” date indicated by the symbol on the package label. OPERATING & STORAGE SPECIFICATIONS Operating Conditions Shipping & Storage Conditions Temperature: 10–40°C (50–104°F) 0–45°C (32–113°F) Relative humidity: 10–95% 10–95%...
- Page 53 Table 15. GVL Stat 2.5 (0574‑0110) GENERAL SPECIFICATIONS Expected product life: Refer to the “use by” date indicated by the symbol on the package label. OPERATING & STORAGE SPECIFICATIONS Operating Conditions Shipping & Storage Conditions Temperature: 10–40°C (50–104°F) 0–45°C (32–113°F) Relative humidity: 10–95% 10–95%...
- Page 54 Table 17. GVL Stat 4 (0574‑0101) GENERAL SPECIFICATIONS Expected product life: Refer to the “use by” date indicated by the symbol on the package label. OPERATING & STORAGE SPECIFICATIONS Operating Conditions Shipping & Storage Conditions Temperature: 10–40°C (50–104°F) ‑20–45°C (‑4–113°F) Relative humidity: 10–95% 10–95%...
-
Page 55: Battery Specifications
BATTERY SPECIFICATIONS Table 18. Battery Specifications CONDITION DESCRIPTION Battery type Lithium‑ion Under normal operating conditions, a fully charged battery lasts approximately Battery life 90 minutes Charging time off line will take no more than 6 hours from an empty battery to Charging time a full charge Rated capacity 2150 mAh... -
Page 56: Electromagnetic Compatibility
ELECTROMAGNETIC COMPATIBILITY The system is designed to be in compliance with IEC 60601‑1‑2, which contains electromagnetic compatibility (EMC) requirements for medical electrical equipment. The limits for emissions and immunity specified in this standard are designed to provide reasonable protection against harmful interference in a typical medical installation. - Page 57 ELECTROMAGNETIC IMMUNITY Table 20. Guidance and Manufacturer’s Declaration —Electromagnetic Immunity The system is intended for use in the electromagnetic environment specified below. The customer or the user of the system should ensure that it is used in such an environment. COMPLIANCE ELECTROMAGNETIC ENVIRONMENT IMMUNITY TESTS...
-
Page 58: Accessory Conformance To Standards
ACCESSORY CONFORMANCE TO STANDARDS To maintain electromagnetic interference (EMI) within certified limits, the system must be used with the cables, components, and accessories specified or supplied by Verathon. For additional information, see the System Parts & Accessories Component Specifications sections. -
Page 59: Glossary
The following table provides definitions for specialized terms used in this manual or on the product itself. For a full list of caution, warning, and informational symbols used on this and other Verathon products, please refer to the Verathon Symbol Glossary (part number 0900‑4757) at verathon.com/symbols. - Page 60 TERM DEFINITION OSHA Occupational Safety and Health Administration (federal agency in U.S.) Ounce Parts per million Radio frequency Relative humidity Volt Vrms Voltage root mean squared WEEE Waste electrical and electronic equipment 0900‑4200 REV‑10...
Need help?
Do you have a question about the GlideScope AVL Single-use and is the answer not in the manual?
Questions and answers