PSG CADDY ADVANCED PF01020 Installation And Operating Instructions Manual
Hide thumbs
Also See for CADDY ADVANCED PF01020:
Table of Contents
Advertisement
Quick Links
Installation and operating instructions
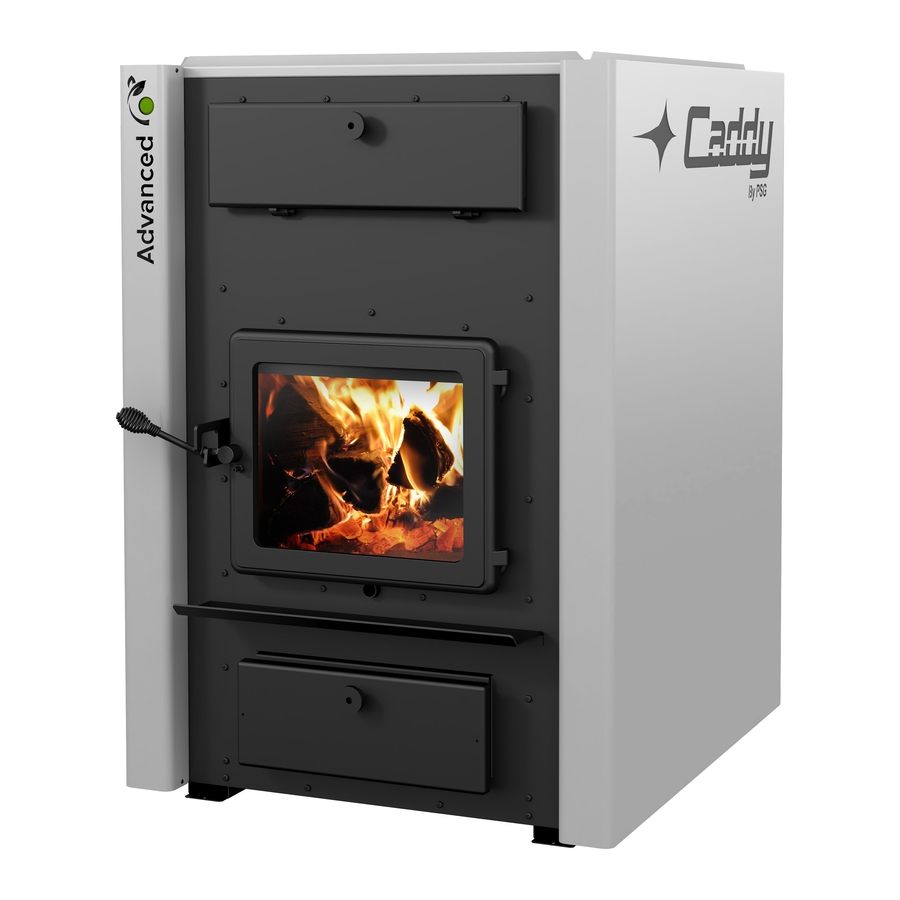
for the CADDY ADVANCED wood furnace
FURNACE MODELS INCLUDED IN THIS MANUAL
Read these instructions carefully before installing
You have purchased one of the finest wood furnace available on the
market. We are confident that your furnace will provide years of comfort
Verified and tested for Canada and the United States
by an accredited laboratory.
Printed in Canada
Certified according to CSA B415.1-10, CSA B366.1, UL391.
WOOD ONLY | Parallel WOOD ADD-ON
and operating your furnace.
CONGRATULATIONS!
and safe operation.
Please keep this document!
Eco-energy at the
hearth of your home
(PF01020)
(Allowed only in the USA)
This manual is available for free download
on the manufacturer's web site. It is a
copyrighted document. Re-sale is strictly
prohibited. The manufacturer may update
this manual from time to time and cannot be
responsible for problems, injuries, or
damages arising out of the use of
information
contained in any
obtained from unauthorized sources.
Caddy
250, de Copenhague,
St-Augustin-de-Desmaures (Quebec)
CANADA G3A 2H3
manual
46245A
11-06-2021
Advertisement
Table of Contents

Subscribe to Our Youtube Channel
Related Manuals for PSG CADDY ADVANCED PF01020


Summary of Contents for PSG CADDY ADVANCED PF01020
- Page 1 Installation and operating instructions for the CADDY ADVANCED wood furnace (PF01020) Certified according to CSA B415.1-10, CSA B366.1, UL391. FURNACE MODELS INCLUDED IN THIS MANUAL WOOD ONLY | Parallel WOOD ADD-ON (Allowed only in the USA) Read these instructions carefully before installing and operating your furnace.
-
Page 3: Table Of Contents
TABLE OF CONTENT INTRODUCTION ..................................5 APPLIANCE PERFORMANCE ............................... 6 GENERAL FEATURES ................................7 SPECIFICATIONS ..................................8 LABELS ...................................... 9 BLOWER TECHNICAL DATA ..............................11 FURNACE DIMENSIONS ................................. 11 CHIMNEY AND DRAFT ................................12 SAFETY RULES ..................................12 GENERAL REQUIREMENTS ............................12 ODOUR FROM THE PAINT ............................. - Page 4 15.2 PROLONGED POWER OUTAGE ............................ 38 FURNACE MAINTENANCE ..............................39 16.1 ASH REMOVAL ................................39 16.2 CLEANING DOOR GLASS .............................. 40 16.3 DOOR ADJUSTMENT ..............................40 16.4 REPLACEMENT OF THE GLASS AND GASKETS ......................41 16.5 CLEANING AND PAINTING THE FURNACE ........................42 16.6 HEAT EXCHANGERS CARE ............................
-
Page 5: Introduction
IMPORTANT NOTE This furnace and its hot air duct system must be sold and installed by a professional. In the absence of a professional installer, the manufacturer reserves the right not to apply its warranty or to refuse any technical support. REGISTER YOU WARRANTY ONLINE To receive full warranty coverage, you will need to show evidence of the date you purchased your furnace. -
Page 6: Appliance Performance
APPLIANCE PERFORMANCE Fuel type Dry cordwood Recommended heating area[*] 1,000 to 2,500 ft² (93 à 232 m²) Firebox volume 3.6 ft³ (0.102 m³) Maximum burn time[*] 10 h Maximum input capacity (dry cordwood) 310,000 BTU Overall heat output rate (min. to max.) 19,354 BTU/h to 47,052 BTU/h (5.6 kW to 13.8 kW) Average overall efficiency 76.6% (HHV) -
Page 7: General Features
GENERAL FEATURES Maximum log length 21 in (533 mm) / north-south** Diameter of the flue collar 6 in (152 mm) Recommended connector pipe diameter 6 in (152 mm) Recommended chimney diameter 6 in (152 mm) Required type of chimney CAN/ULC S629, UL 103 HT (2100 °F) Baffle material C-Cast or equivalent Alcove installation... -
Page 8: Specifications
SPECIFICATIONS Color Grey and black Thermostatic control Door type Single, glass with cast iron frame Glass type Ceramic glass Air return plenum - dimensions (Depth or Height) 15 3/4 in Air return plenum - dimension (Width) 24 3/4 in Hot air plenum - dimensions (Depth or Height) 28 5/8 in Hot air plenum - dimension (Width) 24 1/2 in... -
Page 9: Labels
LABELS... -
Page 11: Blower Technical Data
BLOWER TECHNICAL DATA THEORETICAL TEMPERATURE STATIC MODEL (DIRECT DRIVE) FILTER DEBIT VARIATION PRESSURE CADDY BLOWER MOTOR SPEED (CFM) (°F) MIN. MAX. ADVANCED WITH BLOWER / 1/3 PSC ADD-ON DD-10 25" x 14" x 1" 1/2 ECM (PARALLEL) FURNACE DIMENSIONS CADDY ADVANCED WITH BLOWER... -
Page 12: Chimney And Draft
CHIMNEY AND DRAFT This furnace must be connected to a chimney certified for use with wood burning heating appliances, a 6-inch diameter chimney is recommended. The unit is not to be connected to a chimney flue serving another appliance. If the chimney draft exceeds 0.06 IN.W.C., a barometric draft control should be installed on the smoke pipe. -
Page 13: Odour From The Paint
ODOUR FROM THE PAINT It is normal that smoke and odours emanate from the unit when you first light it. It is recommended to burn it at high rate and ventilate the building until the odours disappear. The smoke is not toxic. This should be done before the ducts are connected to the furnace to prevent smoke dispersion in the house. -
Page 14: Ash Grate
ASH GRATE You must replace the ash grate if it is damaged and a replacement may be obtained from your dealer. ADDITIONAL FRESH AIR SUPPLY When the furnace and the chimney are completely cold, it may be necessary to provide fresh air by opening a door or a window for a few minutes while lighting the fire. -
Page 15: Firewood
10 FIREWOOD What is good firewood? Good firewood has been cut to the correct length for the furnace, split to a range of sizes and stacked in the open until its moisture content is reduced to 15% to 20%. Tree species The tree species the firewood is produced from is less important than its moisture content. - Page 16 How to dry firewood? Firewood that is not dry enough to burn is the cause of most complaints about wood burning appliances. Continually burning green or unseasoned wood produces more creosote and involves lack of heat and dirty glass door. See section 16 FURNACE MAINTENANCE for concerns about creosote.
-
Page 17: Caddy Advanced Wood Furnace Or Parallel Add-On Pf01020
INSTALLATION AND OPERATION INSTRUCTIONS CADDY ADVANCED WOOD FURNACE OR PARALLEL ADD-ON PF01020... -
Page 18: Installation Instructions
11 INSTALLATION INSTRUCTIONS Installation must be made in accordance with the CSA B.365 « Installation code for solid-fuel-burning appliances and equipment » standard in Canada and NFPA 90B « Standard for the installation of warm air heating and air conditioning system »... -
Page 19: Unit Location
STEP 5: Connect the RTD probe (B) to the furnace block terminal identified with a “R”. STEP 6: Use the wire grommets (C) supplied with the manual to attach the wires from the RTD to the furnace. 11.3 UNIT LOCATION ... -
Page 20: Minimum Clearances To Combustible Materials
11.4.1 MINIMUM CLEARANCES TO COMBUSTIBLE MATERIALS The clearances shown in this section have been determined by safety tests under normal and even abnormal operating conditions according to procedures set out in standards CSA B366.1 (Canada) and UL 391 (U.S.A.). Respecting the minimum clearances is mandatory to prevent risk of fire. 6’... -
Page 21: Floor Protection
11.4.4 FLOOR PROTECTION If the floor is made of non-combustible material (like concrete), no floor protector is required. If the floor is made of combustible material, a non-combustible material floor protector is required (see table below). Top view FLOOR PROTECTION* CANADA 18"... -
Page 22: The Stove Pipe
11.5 THE STOVE PIPE Before connecting the stove pipe, make sure you have removed any accessory from the flue pipe such as the scraper, shovel, and the poker. The flue outlet on the Caddy Advanced furnace is 6" in diameter and it may be installed with a 6" chimney approved for use with wood burning heating appliances (2100°F). - Page 23 Use 45° elbows where possible, rather than 90° elbows. Alternative installations with 90° elbow or tee.
-
Page 24: Electrical Connections
11.6 ELECTRICAL CONNECTIONS The following instructions do not replace those of the local code. Installation and verification of this appliance must be done by a qualified service man. The furnace is fully assembled at the factory and no electrical connection is required other than plugging the power cord into an outlet, connecting the RTD and thermostat. -
Page 25: Fresh Air Supply Installation
11.8 FRESH AIR SUPPLY INSTALLATION Additional combustion air can be provided with the following methods, provided that they satisfy chapter 5 of the CSA B365: Direct combustion air supply: Heating units requires specific certification to be connected directly with fresh air supply. ... -
Page 26: Tool Holder Installation
11.9 TOOL HOLDER INSTALLATION The furnace is provided with a tool holder which can be install on a wall closed to your furnace. Components provided with the furnace are: 1x tool holder (A) 1x shovel (B) 1x poker (C) 1x scraper (D) 1. -
Page 27: Hot Air Plenum
11.10 HOT AIR PLENUM 20” 508mm MIN. The hot air plenum coming out of the furnace is to have a minimum height of 24" (610 mm) if the top of the first vertical section is not flush with the first horizontal section. Otherwise, the minimum height is 20" (508mm). These dimensions for all hot air furnaces are in accordance with the standards CSA B140.4, UL 391m. - Page 28 To ensure a safe installation, the two furnaces must not, at any time, run simultaneously. To do so, the thermostat controlling the existing furnace must be connected to your Caddy Advanced interlock terminal. This way, when a heating signal is sent to the existing furnace, the Caddy Advanced receives the same signal.
-
Page 29: Thermostat Installation
13 THERMOSTAT INSTALLATION 13.1 WOOD FURNACE ONLY The furnace must be connected to a thermostat. You can use the one provided with the unit or use one that is already installed in your home. The thermostat must be installed on an inside wall and located where it is not likely to be affected by the draft coming from an air outlet. -
Page 30: Add-On Furnace
Example of thermostat wiring: Connect one wire to "RH" and the other wire to "W". The red jumper can be left in place. For more information, refer to the manufacturer's instructions. 13.2 ADD-ON FURNACE This furnace may be installed in parallel as an add-on to an existing furnace in the USA only. Such an installation requires that the furnace’s controls be interlocked to prevent both furnaces from heating at maximum rate simultaneously. - Page 31 2- From the thermostat connected to the existing furnace, connect 2 new wires (B) to the R and W terminals of your thermostat of your existing furnace and fix them to the terminal block identified "I" (interlock) of the Caddy Advanced parallel add-on furnace.
-
Page 32: Furnace Operation
14 FURNACE OPERATION 14.1 HOW IT WORKS The Caddy Advanced furnace is equipped with a self-regulated combustion air supply control system. Using two temperature sensors in the combustion chamber that measure the temperature in real time, your furnace will automatically adjust the amount of combustion air required for the cleanest and most efficient combustion. Coupled with the thermostat, the furnace will automatically modulate the combustion rate according to the thermostatic demand. -
Page 33: How To Light And Reload The Furnace
14.3 HOW TO LIGHT AND RELOAD THE FURNACE? Always keep a maximum of 4 inches of ash in the firebox. Weekly empty the ash drawer to ensure the correct operation of the furnace. For a clean and efficient combustion always keep some space between the logs and leave at least 4 inches of space in front of the logs. -
Page 34: Cold Start And Coal Ember Bed (The Led Button Light Is Off)
14.3.1 COLD START AND COAL EMBER BED (The led button light is OFF) 1. Press reload button before opening the door. 2. Place paper and kindling on top of the ash grate. 3. Place two logs North&South on each side of the kindling. 4. -
Page 35: Hot Ember Bed Reload (The Led Button Light Is On Or Slowly Blinking)
14.3.2 HOT EMBER BED RELOAD (The led button light is ON or slowly blinking) 1. Press reload button before opening the door. 2. Open the door and bring hot embers to the front. 3. Load two logs North&South at the back. -
Page 36: Lighting Fires
14.5 LIGHTING FIRES Each person who heats with wood develops their own favorite method to light fires. Whatever method you choose, your goal should be to get a hot fire burning quickly. A fire that starts fast produces less smoke and deposits less creosote in the chimney. -
Page 37: Maintaining Wood Fires
15 MAINTAINING WOOD FIRES 15.1 GENERAL ADVICE Wood heating is very different than other forms of heating. Do not expect steady heat output from your furnace. It is normal for its temperature to rise after a new load of wood is ignited and for its temperature to gradually decline as the fire progresses. -
Page 38: Firing Each New Load Hot
15.1.2 FIRING EACH NEW LOAD HOT Press the reload button, place the new load of wood on and behind the charcoal. Close the door. Firing each load of wood hot accomplishes a few things: Drives the surface moisture from the wood. ... -
Page 39: Furnace Maintenance
16 FURNACE MAINTENANCE Your new furnace will give many years of reliable service if you use and maintain it correctly. Some of the internal components of the firebox, such as firebricks, baffles and air tubes, will wear over time under intense heat. You should always replace defective parts with original parts (see section 18 EXPLODED DIAGRAM AND PARTS LIST). -
Page 40: Cleaning Door Glass
16.2 CLEANING DOOR GLASS Under normal conditions, your door glass should stay relatively clear. If your firewood is dry enough and you follow the operating instructions in this manual, a whitish, dusty deposit will form on the inside of the glass after a week or so of use. -
Page 41: Replacement Of The Glass And Gaskets
16.4 REPLACEMENT OF THE GLASS AND GASKETS After a year or more of use, the gasket of the door will compress and become hard which can allow air to pass. You can check the air tightness of your door gasket by closing and locking the door on a piece of paper. Check all around the door. -
Page 42: Cleaning And Painting The Furnace
8. Install the new gasket on the glass. Remove a part of the paper covering the gasket adhesive. Center the gasket on the edge of the glass so that when folded and glued, the gasket is equal on both sides. Do not stretch the gasket during installation. -
Page 43: Heat Exchangers Care
16.6 HEAT EXCHANGERS CARE Heat exchangers must be cleaned thoroughly at the end of every heating season. During summer, the air in basements is damp with minimal air circulation within the furnace, it can mix with creosote and/or sooth deposits in the exchangers to form an acid that could accelerate the corrosion process and induce premature decay of the steel. - Page 44 3. Use the tool provided, clean the three exchanger pipes. 4. Dirt in the lateral exchangers (1 and 3) fall into the combustion chamber at the rear. 5. Dirt in the central exchanger (2) will be removed from the front or the rear of the furnace. If you remove dirt from the central exchange to the back of the furnace, remove the black pipe connector to dispose of the deposit.
- Page 45 7. Close the exchanger access door and secure it using the washer (C) and wing nut (B). 8. If you have performed the cleaning process by removing the chimney connector in the back of the furnace, be sure to reinstall the chimney connector with three screws at each connection.
-
Page 46: Thermocouples Care
16.7 THERMOCOUPLES CARE 1. Move the baffle (A) of the combustion chamber forward. 2. With a brush, carefully clean the thermocouples. -
Page 47: Chimney Maintenance
3. Then, reposition the baffle in its original position towards the back of the combustion chamber. Important to note that the furnace will not burn correctly if the baffle is out of place during use. 16.8 CHIMNEY MAINTENANCE Wood smoke can condense inside the chimney connector and chimney, forming a combustible deposit called creosote. If creosote is allowed to build up in the venting system, it can ignite when a hot fire is burned in the furnace and a very hot fire can progress to the top of the chimney. -
Page 48: Blower Motor Maintenance
16.11 BLOWER MOTOR MAINTENANCE Periodic cleaning of the blower housing, impeller and louver as well as blower and blower blades using a vacuum cleaner provided for this purpose, is necessary in order not to affect performance and cause overheating of the system. 16.12 INSTALLATION OF SECONDARY AIR TUBES AND BAFFLE The secondary air tubes can be replaced without removing the baffle board. -
Page 49: Troubleshooting
17 TROUBLESHOOTING When you have issues with your furnace, your first reaction may be to call technical support. This section will help you save time and money by enabling you to solve simple problems by yourself. Most common problems are generally caused by the following five factors: ... -
Page 50: Exploded Diagram And Parts List
18 EXPLODED DIAGRAM AND PARTS LIST... - Page 58 IMPORTANT: THIS IS DATED INFORMATION. When requesting service or replacement parts for your furnace, please provide the model and the serial number. We reserve the right to change parts due to technology upgrade or availability. Contact an authorized dealer to obtain any of these parts. Never use substitute materials. Use of non-approved parts can result in poor performance and safety hazards.
- Page 59 ITEM DESCRIPTION PL36116 3 1/2" X 5 1/8'' X 1 1/4'' REFRACTORY BRICK PL36266 3 1/2" X 8 1/2" X 1 1/4" REFRACTORY BRICK PL66191 1 1/4'' X 6'' X 1 1/4'' HD REFRACTORY BRICK 24089 CAST IRON ASH GRATE 4 1/2" X 9" SE66237 CONTROL BOARD ASSEMBLY SE44137...
- Page 60 ITEM DESCRIPTION 51018 BAROMETRIC DAMPER 6", 7" AND 8" SE46245 CADDY ADVANCED MANUAL KIT 44189 THERMOSTAT PL66268 TOOL HOLDER...
-
Page 61: Electrical Diagram
19 ELECTRICAL DIAGRAM 19.1 BLOWER BOX WITH REGULAR MOTOR... -
Page 62: Blower Box With Ecm Motor
19.2 BLOWER BOX WITH ECM MOTOR... -
Page 63: Why Purchase Through An Authorized Caddy Dealer
20 WHY PURCHASE THROUGH AN AUTHORIZED CADDY DEALER? To make sure your Caddy furnace provides comfort and energy savings in your home for many years, your choice of installer is extremely important. An authorized Caddy dealer will ensure that the system is optimized and installed according to standards. -
Page 64: Caddy Limited Lifetime Warranty (Privilege)
CADDY LIMITED LIFETIME WARRANTY (PRIVILEGE) The warranty of the manufacturer extends only to the original consumer purchaser and is not transferable. This warranty covers brand new products only, which have not been altered, modified nor repaired since shipment from factory and purchased through an authorised dealer.
Need help?
Do you have a question about the CADDY ADVANCED PF01020 and is the answer not in the manual?
Questions and answers