Axis 7000 User Manual
Network document servers
Hide thumbs
Also See for 7000:
- User manual (170 pages) ,
- Application integration (11 pages) ,
- Installation information (1 page)
Table of Contents
Advertisement
Quick Links
Advertisement
Table of Contents

Subscribe to Our Youtube Channel
Related Manuals for Axis 7000


Summary of Contents for Axis 7000
- Page 1 AXIS 70U/7000 Network Document Servers User’s Guide...
-
Page 2: About This Document
(AXIS 7000) and subsequent releases until otherwise notified. The document provides introductory information as well as instructions on how to set up and manage the AXIS 70U/7000. It is intended for anyone involved in installing and using the AXIS 70U/7000. For more detailed instructions, refer to applicable parts of the AXIS 70U/7000 User’s Manual that is available from the... -
Page 3: Table Of Contents
Configuring the AXIS 70U/7000 ........ -
Page 4: Introduction
Important! Online help is available on every page within the AXIS 70U/7000 Web interface. This is of particular relevance when configuring the unit and should be used as a first point of reference for any administration queries. The help system is stored internally in the AXIS 70U/7000. -
Page 5: Product Overview
• AXIS 7000 — SCSI connection Note: The AXIS 70U does not support USB hubs or USB converters and can only be connected to one scanning device at a time. The AXIS 70U supports USB 1.1 and USB 2.0 Full Speed. -
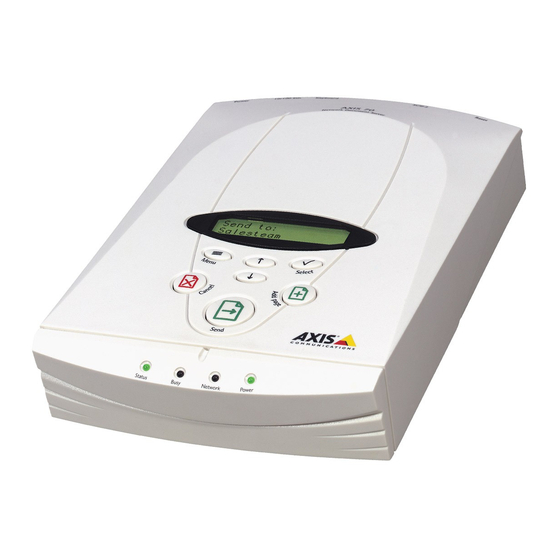
Page 6: Physical Description
Select Send • You can connect a standard PC-AT Keyboard to the AXIS 70U/7000. This allows you to enter temporary e-mail addresses at the scanner and easily search long e-mail listings. See also Add- ing E-mail Destinations, on page 21. -
Page 7: Indicators
Indicators Status Indicator The Status indicator flashes during startup and remains lit when the AXIS 70U/7000 is ready for use. If the Status indicator turns off, this may indicate an error. Busy Indicator The Busy indicator turns on when the AXIS 70U/7000 is allocated for use and remains on during the scanning process. -
Page 8: Connectors
AXIS 70U/7000 User’s Manual for further details. Network Connector The AXIS 70U/7000 is designed for 10 Mbps and 100 Mbps Ethernet networks and connects to the network via a twisted pair category 5 cable (10baseT and 100baseTX) or better. The AXIS 70U/7000 automatically switches between 10 Mbps and 100 Mbps. -
Page 9: Basic Installation
AXIS 70U/7000 User’s Guide Basic Installation Installation Summary The AXIS 70U/7000 is installed in the following stages: • Checking the Hardware Inventory. • Connecting the AXIS 70U/7000 to a scanner. • Connecting the AXIS 70U/7000 to the network. • Assigning an IP address to the AXIS 70U/7000. -
Page 10: Connecting The Scanner To The Axis 70U/7000
Connecting the Scanner to the AXIS 70U/7000 Caution! • Check that the power supply included with your AXIS 70U/7000 is marked with the correct mains voltage. AXIS 70U 1. Switch off the scanning device and disconnect the AXIS 70U external power supply. -
Page 11: Assigning An Ip Address To The Axis 70U/7000
• The IP address for your product can also be set using the AXIS IP Installer (available at the Axis Web site at http://www.axis.com), or the ARP, RARP, BOOTP or DHCP methods. Please refer to the AXIS 70U/7000 User’s Manual for further details. - Page 12 The AXIS 70U/7000 then completes the startup sequence. 16. Write the name or IP address of the AXIS 70U/7000 on the supplied instructions label and attach it to the top cover. The unit is ready for use when the Status indicator stops flashing and remains lit.
-
Page 13: Verifying The Network Settings
AXIS 70U/7000 User’s Guide Verifying the Network Settings Access the Advanced menu from the AXIS 70U/7000 control panel to verify that your chosen network settings are correct, as described below: 1. To access the Advanced menu, press and hold down Menu simultaneously. -
Page 14: Using A Browser To Verify The Installation
1. Place a document in the scanning device. 2. Start your Web browser. 3. Enter the name or IP address of your AXIS 70U/7000 in the loca- tion/address field. Example: http://192.168.0.90 The AXIS 70U/7000 home page is displayed. -
Page 15: Configuring The Axis 70U/7000
Refer to applicable parts of the AXIS 70U/7000 User’s Manual for information on the settings for profiles. • It is possible to enable user authentication to restrict use of the AXIS 70U/7000 to validated users only. For more information, please refer to the AXIS 70U/7000 User’s Manual at the Axis Web site http://www.axis.com... -
Page 16: Specifying The Network Settings
Configuring the AXIS 70U/7000 3. Click the Admin button to display the This AXIS 70U/7000 Web page. Enter username and password (by default set to root and pass respec- tively). Specifying the Network Settings Referring to the information services table below, use the Wizard to configure the TCP/IP and SMTP settings. -
Page 17: Specifying Destinations
However, only manually loaded e-mail des- tinations are shown in the AXIS 70U/7000 Destinations page. • For more information, please refer to the AXIS 70U/7000 User’s Manual at the Axis Web site http://www.axis.com Specifying a Destination Manually 1. -
Page 18: Adding New Destinations
Follow the instructions below to set System information, Administrator password, Password protected user privileges, Language etc. 1. Click This AXIS 70U/7000. The system settings are displayed. 2. Click Edit to change any of the system parameters. It is recommended that you set a Server Password for protecting the Administration pages. - Page 19 If you lose the Server password, you will need to restore the factory default settings. Refer to the AXIS 70U/7000 User’s Manual on how to do that. Note that all your current settings will be lost. Configuring the AXIS 70U/7000 Description Enter Server Password and confirm.
-
Page 20: Using The Axis 70U/7000
Where xxxxxx is the destination name. Note: If the AXIS 70U/7000 asks for a User Name, your administrator has enabled authentication and you must enter your user name and password. For further information, please refer to the AXIS 70U/7000 User’s Manual at the Axis Web site http://www.axis.com 2. -
Page 21: Adding E-Mail Destinations
AXIS 70U/7000 is released for other users. Note: The AXIS 70U/7000 keeps all temporary settings in memory for one minute after the last scanning job or until user has logged out, and then returns to its default settings. -
Page 22: Using A Standard Pc Keyboard
Using the AXIS 70U/7000 Using a Standard PC Keyboard Connecting a standard keyboard to your AXIS 70U/7000 will allow you to quickly search for any destination names within the resident list. You can do this by simply typing in the first couple of characters of the destination name you wish to search. -
Page 23: Receive Your Own Copy
Receive your Own Copy If the Administrator has enabled the Cc-feature you will receive a copy of the e-mail if: • You are logged in to the AXIS 70U/7000 and have received a valid e-mail address from the authentication server. - or - •... -
Page 24: Axis 70U/7000 Parameter Checklist
This table is a summary of the AXIS 70U/7000 network settings. For future reference, you can enter the unique configuration values of your document server in the My AXIS 70U/7000 column. This will also be of help in the configuration process. - Page 26 AXIS 70U/7000 User’s Guide v3.0 September 2005 Copyright © Axis Communications AB, 2000-2005 Part No. 25281...
Need help?
Do you have a question about the 7000 and is the answer not in the manual?
Questions and answers