Axis 7000 User Manual
Network document servers
Hide thumbs
Also See for 7000:
- User manual (134 pages) ,
- Application integration (11 pages) ,
- Installation information (1 page)
Table of Contents
Advertisement
Quick Links
Download this manual
See also:
Installation Manual
Advertisement
Table of Contents

Subscribe to Our Youtube Channel
Related Manuals for Axis 7000


Summary of Contents for Axis 7000
- Page 1 AXIS 70U/7000 User’s Manual AXIS 70U AXIS 7000 Network Document Servers User’s Manual...
-
Page 2: Maintenance
Axis office. Axis Communications AB cannot be held responsible for any technical or typographical errors and reserves the right to make changes to the product and manuals without prior notice. Axis Communications AB makes no warranty of any kind with regard to the material contained within this document, including, but not limited to, the implied warranties of merchantability and fitness for a particular purpose. -
Page 3: Table Of Contents
Scan Counter (AXIS 7000 only) ........ - Page 4 Index ..............168 AXIS 70U/7000 User’s Manual...
-
Page 5: Preface
Download user documentation and firmware updates Find answers to previously resolved problems in the FAQ database. Search by product, category or phrase Report problems to Axis support staff by logging in to your private support area Visit the Axis support Web at www.axis.com/techsup... -
Page 6: Product Comparison
Paper size A3/11”x17” and larger PDF format TIFF, JPEG, PCL format and duplex Send-to-e-mail Send-to-file, print and Web XML support User authentication Corporate address book SCSI-2 scanner device connection USB scanner device connection Scan counter AXIS 70U/7000 User’s Manual AXIS 70U AXIS 7000... -
Page 7: Introduction
TIFF, JPEG and PDF format. Flexibility From the AXIS 70U/7000 control panel, you can send or copy directly to e-mail addresses, FTP servers or desktop directories, and even to network printers. You can also use a standard Web browser to trigger and save scanned documents. - Page 8 Security Upgrading Connections The AXIS 70U/7000 is designed for quick and easy installation on your network and your scanner device. It has a number of interesting features that will help you to simplify the distribution of your paper-based information, including: •...
-
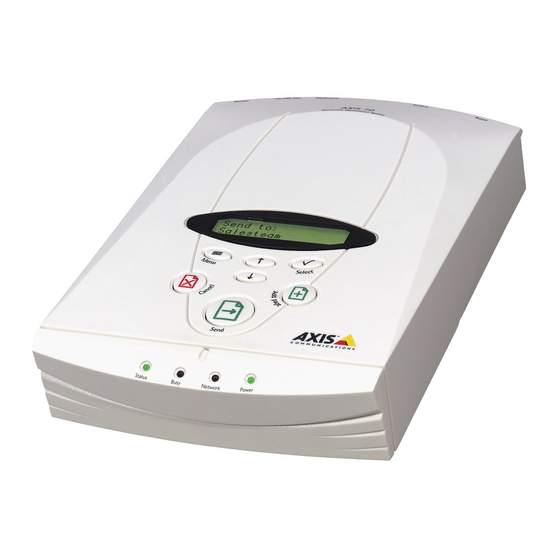
Page 9: Physical Description
The Push button is used for restoring the Document Server parameters. See “Restoring Factory Default Settings” on page 127. Connector AXIS 70U: a USB connector for connection to the scanner device. AXIS 7000: a SCSI-2 connector for connection to the scanner device. - Page 10 Network Indicator Power Indicator A Mini-DIN connector for connection of a standard PC compatible keyboard. For use only with Axis power supply. See “Power Supply” on page 16. Status Busy The Status indicator flashes during startup and remains lit when the Document Server is ready for use.
-
Page 11: Control Panel
AXIS 70U/7000 User’s Manual Control Panel The Document Server Control panel has user keys (described below) and a message display that describes the selected menu options and current status of the unit. The message display consists of 2 lines of 16 characters indicating status and menu options. -
Page 12: External Keyboard
Note: Be sure to disconnect the Document Server’s power supply before connecting the keyboard. AXIS 70U/7000 User’s Manual keys scroll and select menu options. while simultaneously displays the Advanced menu. scroll keys to select:... - Page 13 AXIS 70U/7000 User’s Manual The Instruction label supplied with the Document Server can be attached to your keyboard for quick reference to the function of the main keys. Keys The function of each key is described below: The F1 key scans the material in the scanner device. Use this key to scan each page of bound materials, for example, books and magazines.
- Page 14 Press Home to go to the first entry in the “Send to:” or “Sent by:” list. Press End to go to the last entry in a list. Press Ctrl+A to access the advanced menu. Use Page Up/Down to scroll and select menu options. AXIS 70U/7000 User’s Manual...
-
Page 15: Basic Installation
Instructions for installing the Document Server into your networking environment Instructions for setting the IP address using the Document Server’s control panel, DHCP, RARP, BOOTP and AXIS IP Installer Instructions for setting a host name Instructions on how to verify your installation... - Page 16 AXIS 70U Europe 0162-xxx-01 Australia AXIS 7000 USA/Japan 0094-xxx-03 Korea 0094-xxx-04 Europe AXIS 7000 0094-xxx-01 0094-xxx-02 Australia Japan AXIS 70U/7000 User’s Manual Power Supply Power Supply Type Part no. AXIS PS-H 19108 19109 19111 19110 19112 AXIS PS-E 15507 15509 15510...
-
Page 17: Connecting Scanners And Digital Copiers
• Check that the power supply provided with your Document Server is marked with • Make sure the scanner device is switched off and the Document Server power sup- • AXIS 7000: The SCSI bus may become damaged if you connect or disconnect units Connecting... -
Page 18: Connecting The Document Server To The Network
• flashing yellow - indicating network activity on a 10MB Ethernet net- work. • flashing green - indicating network activity on a 100MB Ethernet net- work. • red - if there is no network connection. • Not lit - indicates that there is no network activity. AXIS 70U/7000 User’s Manual... -
Page 19: Assigning An Ip Address
Note: the administrator can disallow this function from the Web based Ad- ministration pages. For further details, refer to “User Options” on page 35. Supplied on the Axis Web site, this Axis tool simplifies the setting of IP ad- dresses for all Axis document servers, print servers and video servers. - Page 20 8. Press Select to edit the default router address: Edit router: 000.000.000.000 9. To change the value, repeat steps 4 - 6 above. 10. Press Menu to display the subnet mask setting: Net mask: 000.000.000.000 AXIS 70U/7000 User’s Manual when this...
- Page 21 AXIS 70U/7000 User’s Manual 11. Press Select 12. To change the value, repeat steps 4 - 6 above. 13. Press Menu 14. Press Menu 15. Press Select 16. Write the name or IP address of the Document Server on the...
- Page 22 • Press Home or End to go to the first or last three-digit group. • Press Enter to save and exit. • Press Esc to cancel. The instructions above also apply for editing the router address and subnet mask setting. AXIS 70U/7000 User’s Manual...
- Page 23 AXIS 70U/7000 User’s Manual Using DHCP, ARP, Use DHCP, ARP, RARP and BOOTP as an alternative to setting the RARP and BOOTP IP address from the control panel or keyboard. Follow the appropriate instructions for the preferred method below. Important! The IP addresses given here are just examples.
- Page 24 -s <host name> <Ethernet or node address> temp ping <host name> The Ethernet address or node address equals the Document Server serial number with each pair of digits separated by a colon. Example: arp -s spserv 00:40:8c:11:00:86 temp ping spserv AXIS 70U/7000 User’s Manual...
- Page 25 AXIS 70U/7000 User’s Manual The host will return spserv is alive or a similar message. This indicates that the address has been set and that communication is established. Notes: • ARP is enabled by default but can be disabled by an Administrator using the System •...
- Page 26 3. Start the BOOTP daemon, if it is not already running. This is typically performed using the command bootpd -a 4. Restart the Document Server to download the IP address, default router address and subnet mask. AXIS 70U/7000 User’s Manual...
-
Page 27: Mapping A Host Name To The Ip Address
AXIS 70U/7000 User’s Manual Note: BOOTP is enabled by default but can be disabled by an Administrator using the System Settings page. Mapping a Host Name to the IP Address If you are using host names, you can map a unique host name to the acquired IP address. -
Page 28: Verifying Your Installation
AXIS 70U). Document Server’s IP 4. Click Scan. Depending on the image format specified by the profile, the Web browser will display the scanned image in an associated image viewer, or ask you to save the file. AXIS 70U/7000 User’s Manual... -
Page 29: Configuring The Document Server
AXIS 70U/7000 User’s Manual Configuring the Document Server This section is targeted specifically to users responsible for the administration of the Document Server. The Administrator is granted high-level privileges denied to the ordinary user. Important! To access the Document Server configuration file, you must first set the IP address as described in “Assigning an IP Address”... -
Page 30: Overview Of The Administration Tools
1. Start the Web browser. 2. Enter the name or IP address of the Document Server on the location/address line, e.g. 3. This brings you to the Document Server Home Page. Document Server’s IP Example from AXIS 70U AXIS 70U/7000 User’s Manual http://192.168.0.90... - Page 31 At the prompt, log on as root and use the default password pass. It is recommended that you change the password of your Document Server as soon as possible, since all Axis products are shipped with the same default password. Configuring the Document Server...
-
Page 32: Specifying The System Settings
Lists the current parameter settings in the configuration file. Restart Server Restarts the Document Server. Removes all previously loaded temporary destinations and profiles from the memory. Factory Defaults Restores the factory default settings and restarts the Docu- ment Server. AXIS 70U/7000 User’s Manual... - Page 33 • If you lose the Server password, you must restore the factory default set- • An asterisk * is displayed for each alphanumeric character that comprises Server as soon as possible, since all Axis products are shipped with the same password as default.
- Page 34 If you are using time synchronization, specify the time zone in which the Document Server operates. The AXIS 7000 has a built-in real time clock with a back-up battery which will keep the time when the power supply is disconnected.
- Page 35 AXIS 70U/7000 User’s Manual Automatically using the Network Time Protocol (NTP) AXIS 70U/7000 Click here to obtain date and time information from a time synchronization source. Time stamps are used in the event log. NTP Server Specify the name or IP address of the NTP server used for time synchronization.
- Page 36 XML DD file. The user is prompted to enter the information at the moment of scanning, using the connected keyboard. For more information, please refer to “Meta Data” on page 101. AXIS 70U/7000 User’s Manual...
-
Page 37: Specifying Network Settings
AXIS 70U/7000 User’s Manual Specifying Network Settings Click Network Settings to view and modify the configuration parameters for all supported protocols: • • • • TCP/IP - defines the: • Automatic download method (BOOTP, RARP or DHCP) • IP Address •... - Page 38 View Settings Lists the current parameter settings in the configuration file. The Wizard provides a convenient way to set up the Document Server in your networking environment. Follow the instructions below to configure the supported networking protocols: AXIS 70U/7000 User’s Manual...
- Page 39 AXIS 70U/7000 User’s Manual Important! • An SMTP server address must be specified by the Administrator before • In order to prevent conflicts with other network devices please be sure to • The Online help button 1. Click Network Settings.
- Page 40 Defines an external e-mail address book on an LDAP server or desti- Address Book nations list on an FTP server. Note: The AXIS 70U/7000 configuration parameters are fully described in “The Parameter List” on page 146. AXIS 70U/7000 User’s Manual...
- Page 41 AXIS 70U/7000 User’s Manual Configuring the TCP/IP Follow the instructions below to configure the TCP/IP settings: Settings 1. From the Protocols dialog, click the TCP/IP tab. 2. Check the appropriate checkbox to define your preferred method Notes: 3. Enter the IP address of your Document Server, e.g.
- Page 42 10. Specify the IP address of the Primary WINS server. 11. Optionally specify the IP address of a Secondary WINS server. The secondary WINS server will be used in case the primary WINS server is disconnected or unavailable. AXIS 70U/7000 User’s Manual...
- Page 43 AXIS 70U/7000 User’s Manual Web (HTTP) Select Web (HTTP) to add a customized link to the Document Server Home Page: • • Note: Note that the width of the image can not exceed 117 pixels. Leave blank to use a standard button.
- Page 44 5. Define the Connection Timout period, i.e. how long the Document Server is to wait before timing out when connecting to the e-mail (SMTP) server. This must be greater than 5 but no more than 65535 seconds. AXIS 70U/7000 User’s Manual...
- Page 45 Document Server: “The attached document was sent to you using a Document Server. Please visit www.axis.com for more information” characters maximum and no line breaks allowed) in the text field. This message will be included in each e-mail sent from the Document Server.
- Page 46 • Make sure that your Document Server has a valid SMTP reply address to avoid rejection by spam filters. • To be able to receive mail from the Document Server you may need to configure the IP address or host name of the Document Server in the mail server. AXIS 70U/7000 User’s Manual...
- Page 47 AXIS 70U/7000 User’s Manual External Address Book A Destination Address Book can be retrieved from an LDAP (Lightweight Directory Access Protocol) server or from a specified file on an FTP server. Alternatively, you can choose not to retrieve an address book.
- Page 48 Confirm - Enter the password again to make sure it was spelled correctly. Specify the directory on the FTP server where the file is stored. Example: /pub/axis7000/address If left blank, the root directory on the FTP server will be used. Specify the name of the file. AXIS 70U/7000 User’s Manual...
- Page 49 AXIS 70U/7000 User’s Manual The file containing the destination information must be a text file using the following syntax: [Destination-<destination name>] Description= <destination name> Transfer method= Scan-to-e-mail (SMTP)/Scan-to-URL (SMTP & FTP)/Scan-to-file (FTP)/Scan-to-print (LPD) /Scan-to-print (TCP) Destination= <e-mail address>/<directory>/<queue>/ <port> Information level= Nothing/Basic/Complete Profile= <profile>...
-
Page 50: Specifying Authentication Settings
“Windows NT Server authentication” on page 2. Click Apply to save your changes, then click OK to return to the This Document Server page. If you want to return to the This Document Server page without saving your changes click Cancel. AXIS 70U/7000 User’s Manual... - Page 51 AXIS 70U/7000 User’s Manual Note: The SMTP authentication method is also available, refer to “Specifying Network Settings” on page 37 for information on how to configure the Document Server to use this method. LDAP Server Authentication Parameter LDAP Server Port Number...
- Page 52 If the parameter Authenticated only when e-mail address is • retrieved is not set, and the user’s e-mail address is not found, he may still be authenticated, but the default reply e-mail address is used. AXIS 70U/7000 User’s Manual...
-
Page 53: Specifying Destinations
AXIS 70U/7000 User’s Manual Specifying Destinations A destination is used when sending scanned images from the Document Server control panel and is defined as one of the following: Click Destinations from the admin page to display the Destinations page: Configuring the Document Server... - Page 54 • create copies of existing destinations • selectively delete destinations • set a Quick Destination which is a specific permanent destination to be accessible through the F9 key on the keyboard AXIS 70U/7000 User’s Manual...
-
Page 55: Services Overview
AXIS 70U/7000 User’s Manual Services Overview The table below provides an overview of the information and services provided by each button on this page Button E-mail Destination New >> File Destination New >> Printer Destination New >> URL for e-mail >>... - Page 56 7. From the drop-down Profile list, select the profile to be used as the default for this destination. Note: The user can specify another profile from the Document Server control panel at the moment of scanning. <Default-xx> is the default value specified on the Destination Defaults page. AXIS 70U/7000 User’s Manual...
- Page 57 AXIS 70U/7000 User’s Manual 8. With reference to the table below, select the amount of 9. The e-mail can include the scanned image as an e-mail Important! 10. To complete this task, do one of the following: Notes: information to be attached with the image:...
- Page 58 Destination Name link and proceed to step 2. • If you want to copy an existing destination and modify it, click and proceed to step 2. • Click File Destination New >> to add a new destination to the list. AXIS 70U/7000 User’s Manual button.
- Page 59 AXIS 70U/7000 User’s Manual 2. Specify a descriptive name for the file destination in the 3. From the drop-down Profile list, select the profile to be used as Note: 4. With reference to the table below, select the amount of 5.
- Page 60 For a directory with many files, performance increases if you store the sequence number on the FTP server. However, to do that, the FTP user must be permitted to overwrite/delete files in the specified directory. AXIS 70U/7000 User’s Manual . The next time the filename01 etc.
- Page 61 AXIS 70U/7000 User’s Manual The table below summarizes the available sequence numbers and extensions: Option Append sequence number to file name Start sequence with: Store sequence number on FTP server: Append file extension to file name: Information File Extension: Creating and Editing...
- Page 62 • Select the PCL image format as it is primarily for use with printer destinations. 9. Check the Include Page Header check box only if you want date, time, destination, sent by, and page number to appear on your printer output. AXIS 70U/7000 User’s Manual...
- Page 63 Destination Name link and proceed to step 5. Destination Page. field. on the server. Optionally, enter a username to identify ownership of the print job. buttons, namely, Axis Compatible Print Server, Windows Queue, Unix Queue or Other. Configuring the Document Server...
- Page 64 Configuring the Document Server Notes: • Click Other if your destination printer server is not Axis compatible. • Click the Unix Queue button only if you wish to distribute the file to a dedicated LPD server on your network. 9. From the drop-down Profile list, select the profile to be used as the default for this destination.
-
Page 65: Specifying Profiles
AXIS 70U/7000 User’s Manual Specifying Profiles A profile defines the scanner device and image parameters to be used when scanning and is optionally part of the destination definition. Note: Click Profiles for: • • • • • • Although a profile is normally associated with a destination, the user can override that setting by choosing another profile from the control panel at the moment of scanning. - Page 66 Restore Predefined Profiles. • The Document Server will display an error message if the selected set- tings combination is not valid as some combinations of settings are incompatible. AXIS 70U/7000 User’s Manual...
- Page 67 AXIS 70U/7000 User’s Manual 1. Click Profiles. 2. The previously added profiles are listed in the table. The Profile 3. Click Profile New >> to add a new profile to the list. 4. In accordance with the information provided in the Profiles 5.
- Page 68 0 - 100 (%) Enter the level of intensity as a percentage ratio. 0 - 100 (%) Enter the level of contrast as a percentage ratio. Black and White Select the appropriate data type Grayscale Color AXIS 70U/7000 User’s Manual...
- Page 69 AXIS 70U/7000 User’s Manual Parameter Format - Compression Dithering Method (b/w only) JPEG Quality Level Color Dropout Configuring the Document Server Options Instructions TIFF - No compression Choose your combination of image format TIFF - CCITT G.3 - one dim and compression from the methods dis- TIFF - CCITT G.3 - two dim...
- Page 70 If the Administrator allows users to add temporary profiles, the five most recently added profiles will appear in the profiles list. The Administrator can make temporary profiles permanent by clicking the Make Permanent button. AXIS 70U/7000 User’s Manual Type Image format 24-bit color JPEG...
- Page 71 AXIS 70U/7000 User’s Manual Guidelines for Format In editing or creating a new profile it is necessary to specify the and Compression format and compression techniques that are to be employed. The table below highlights the significant benefits of each method.
- Page 72 • If you have added a new profile, click Add To List. Once your profile additions are complete, click Done. • Click Reset only if you wish to clear the current profile settings. • If you have edited or copied an existing profile, click OK. AXIS 70U/7000 User’s Manual...
- Page 73 AXIS 70U/7000 User’s Manual Image Enhancement Select the image type that is compatible with your device driver. Types The available image enhancement types are Fujitsu DTC, Fujitsu IPC and Fujitsu Static Threshold. Each type has a specific set of optional settings. Refer to the table below for a list of the available...
- Page 74 Extracts the edges from images and is used for image effects and image sensing. Mirror Used to reverse the image. Automatic Automatically dithers photos and digitizes texts in one Separation scanning. Useful for scanning documents containing both text and photos. AXIS 70U/7000 User’s Manual...
-
Page 75: Specifying Paper Sizes
AXIS 70U/7000 User’s Manual Specifying Paper Sizes The Paper Sizes parameter defines the size of the scanned image and is optionally part of the profile. Note: A user can override the Paper Size setting used by a profile by choosing another paper size from the Document Server control panel at the moment of scanning. - Page 76 PDF rotation and TIFF rotation are automatic for scanners with an RADF (Reversing Automatic Document Feeder). However, the image viewer must also support rotated images. See the documentation supplied with your image viewer for more information. AXIS 70U/7000 User’s Manual...
-
Page 77: Configuring Using A Text Editor And Ftp
AXIS 70U/7000 User’s Manual Configuring Using a Text Editor and FTP The Document Server configuration file includes all the system parameter settings regarding network protocols, profiles, paper sizes and destinations. As an alternative to Web based configuration, you can edit the configuration file directly using a text editor and upload the file to the Document Server using FTP. - Page 78 • If you upload the config.ini file the passwords will be represented by ‘*****’. These ***** must be changed to the actual password before down- loading the config.ini file to an Document Server. The passwords can also be changed via the Web interface after downloading the config.ini file. AXIS 70U/7000 User’s Manual...
-
Page 79: Scan Counter (Axis 7000 Only)
To access the Service pages, follow these instructions: 1. Type ‘service’ after the internet address of the AXIS 7000 in the 2. You will be prompted to enter User Name and Password. At the... - Page 80 Note: The e-mail address is set by the authorized service user on the service page. See “Service Page (AXIS 7000)” on page 79 for details. The printers are added from Destinations > Printer Destination New>> The scan counter report contains the following information: •...
-
Page 81: Using The Document Server
Using the Document Server This section describes how to use the Document Server and includes the following information, given from the perspective of a user: Note: The information in this manual applies to all Axis Document Server models unless otherwise stated. • •... - Page 82 Using the Document Server AXIS 70U/7000 User’s Manual AXIS 7000 The Document Server allows document information from network attached document distribution devices, such as scanners or digital copiers to be distributed to e-mail, file and printer destinations. AXIS 70U The Document Server allows scanned documents to be distributed to e-mail, file and printer destinations.
- Page 83 AXIS 70U/7000 User’s Manual Send-to-E-mail This allows document images to be distributed to any e-mail address defined in the destination list. This service is often referred to as Internet faxing. E-mail transfer uses the Simple Mail Transfer Protocol (SMTP) whereby the document image is sent as a MIME-encoded e-mail attachment, or stored on a file server as an accessible hyperlink within an e-mail notification.
-
Page 84: Authentication
Simply place the document in your scanner device and access the AXIS 70U/7000 from a standard Web browser. Scanning is triggered directly from your Web browser and the image is saved within the Web browser dialog. The Web browser displays the image in an associated viewer or asks you to save the file, depending on the associated image format. -
Page 85: Sending To Destinations
AXIS 70U/7000 User’s Manual 5. If the following message appears the authentication process has 6. If the authentication process is successful the following message 7. To continue press any key or wait until the following message Note: Sending to Destinations... - Page 86 Press the Cancel button to reset all temporary settings to the default values. 6. Insert a single page into the flatbed or a stack of paper into the sheet feeder of the attached scanner device. AXIS 70U/7000 User’s Manual to change the default settings for to select the...
- Page 87 AXIS 70U/7000 User’s Manual Note: 4. When you have pressed Send Notes: Multipage Image Files By scanning multiple pages, you can accumulate several pages into one image file. Multipage documents are by default, collated and output into a single PDF or TIFF image file.
-
Page 88: Adding Temporary Destinations
A job separation sheet inserted in a stack of paper will divide the scanning job into separate image files. Other separation pages will be ignored. Visit the Axis Web site at http://www.axis.com/techsup for a comprehensive list of supported scanner devices with this feature. - Page 89 AXIS 70U/7000 User’s Manual Note: The Administrator can disable the option for users to add temporary destinations in which case the New Destination button will not appear. Using a standard PC Connecting a standard keyboard to your Document Server will Keyboard allow you to quickly search any destination within the resident list.
- Page 90 To go alphabetically to the previous entry with a different first character in the “Send to:” or “Sent by:” list Home To go to the first entry in a list To go to the last entry in a list AXIS 70U/7000 User’s Manual...
- Page 91 AXIS 70U/7000 User’s Manual From a Web browser Follow the instructions below to remotely add temporary e-mail addresses to the address list: 1. Start the Web browser. 2. Enter the name or IP address of your Document Server on the 3.
-
Page 92: Adding Temporary Profiles
• Only the five most recently added temporary profiles will appear in the profile list. Contact your Administrator if you want to add a pro- file permanently. • All temporary profiles will be erased when the Document Server is shut down or re-started. AXIS 70U/7000 User’s Manual... -
Page 93: Changing The Name Of The Scanned Image Files
AXIS 70U/7000 User’s Manual Changing the Name of the Scanned Image Files To change the name of the scanned image file perform these instructions from the Document Server control panel and keyboard: 1. Select one or more file destinations. 2. Press Tab and use the Left and Right arrows on the keyboard to Note: 3. -
Page 94: Adding A Temporary E-Mail Subject
If a keyboard is connected, press Tab and use the UP/Down arrow keys to find the desired value or search the menu by typing the parameter name (or the first letters in the parameter name). AXIS 70U/7000 User’s Manual to scroll to find the desired value. - Page 95 AXIS 70U/7000 User’s Manual The table below describes the available parameters for each destination type: Parameter Send to Sent by Subject Enter file name Number of copies no Profile Paper size Double-sided Note: If you do not specify anything, the default settings will be used.
- Page 96 Double-sided to scan both sides of a page in one operation. This option is also known as duplex and may be referred to by that term in the scanner device documentation. Note: By default the double-sided (Duplex) parameter is set to off. AXIS 70U/7000 User’s Manual...
-
Page 97: Sending To Your Web Browser
AXIS 70U/7000 User’s Manual Sending to your Web Browser Follow these steps to scan to your Web browser: 1. Place the material in your scanner device. 2. Start the Web browser. 3. Enter the name or IP address of the Document Server on the Example: 4. - Page 98 • When scanning to your Web browser (scan-to-Web) and using the Color Low or Color High profile, multipage documents in JPEG format are not supported, i.e. you can only scan one page at a time. AXIS 70U/7000 User’s Manual again. Repeat and the transfer of the scanned...
-
Page 99: Viewing Image Files
AXIS 70U/7000 User’s Manual Viewing Image Files The Document Server generates standard TIFF, JPEG/JFIF and PDF formats that are supported by most image-related applications; and PCL format, that is supported by most printers. Although the Document Server does not rely on any product-specific software installed on the client, tools for viewing and manipulating the images are required. - Page 100 Server, we would like to know about it. For information on how to contact us see “Preface” on page 5. • For further information, including recommendations for specific tools and sample images created by the Document Server, see the Axis Web site at http://www.axis.com Applications are typically associated with a file format automatically during the installation procedure.
-
Page 101: Meta Data
AXIS 70U/7000 User’s Manual Meta Data The Meta Data functionality allows the Developer, System Integrator, Administrator etc. of the Document Server to define a list of information to be requested (it can be required or optional information) from the user at the moment of scanning. The user will be prompted for this information before the document is scanned and sent over the network. - Page 102 The file is limited to a size of 50 000 bytes. The AXIS MetaData DTD defines the syntax of the XML DD file. For more information see “Meta Data DTD” on page 140.
-
Page 103: Example: Archiving
AXIS 70U/7000 User’s Manual Example: You have an electronic archive (file server) for your scanned Archiving documents and you want to store certain information together with each document. The administrator can, for example, request the following information before scanning the document:... -
Page 104: Required Information
• See “Regular Expressions” on page 122 for a list of the defined expressions. 2. Name of Document: (Required information) <MetaData Required = "yes" Id = "DOC_NAME" Prompt = "Doc Name:" DefaultValue = "DEFAULT_NAME" Pattern = ".+" /> AXIS 70U/7000 User’s Manual... - Page 105 AXIS 70U/7000 User’s Manual 3. Name of the Issuer: 4. Document Version Number: 5. The user will not see the classification (This information is not required) <MetaData Required = "no" Id = "DOC_ISSUER" Prompt = "Doc Issuer:" DefaultValue = "DEFAULT_ISSUER"...
- Page 106 The information file will be sent to the “Archiving System” destination with the entered value — in this case the archiving system would be set to archive the document corresponding to the specified level of importance. <Output FileName="$DOC_IMPORTANCE$"> <To><Destination Description="Archiving System"/></To> AXIS 70U/7000 User’s Manual...
- Page 107 AXIS 70U/7000 User’s Manual Information File The destination selected by the user will receive the image and the information file. The “Archiving System” destination will receive the following information file containing the information entered by the user. <?xml version = ”1.0”?>...
- Page 108 Doc Name: 3. The user is prompted to enter the name of the person who issued the document. This information is not required and can be ignored by pressing Menu. Doc Issuer: AXIS 70U/7000 User’s Manual...
- Page 109 AXIS 70U/7000 User’s Manual Note: 4. The user is prompted to enter the version number of the document. 5. The user is prompted to enter the level of importance by which The Menu button scrolls through the list of Meta Data. The Enter button validates the entered information against the pattern defined in the XML DD file.
- Page 110 Editable = "no" DefaultValue = "Medium"> <Value>Really high</Value> <Value>High</Value> <Value>Low</Value> <Value>Really Low</Value> </MetaData> <Output FileName="$DOC_IMPORTANCE$"> <To><Destination Description="Archiving System"/></To> <Format><!CDATA<?xml version="1.0"?> <!DOCTYPE NewArchiveDocument SYSTEM "newarchivedoc.dtd"> <NewArchiveDocument> <DOC_ID>$DOC_ID$</DOC_ID> <DOC_IMPORTANCE>$DOC_IMPORTANCE$</DOC_IMPORTANCE> <DOC_NAME>$DOC_NAME$</DOC_NAME> <DOC_ISSUER>$DOC_ISSUER$</DOC_ISSUER> <DOC_VERSION>$DOC_VERSION$</DOC_VERSION> <DOC_CLASS>$DOC_CLASS$</DOC_CLASS> <HOST>$INT_HOST_ADDRESS$</HOST> </NewArchiveDocument> ]]> </Format></Output></AlwaysAsk> </MetaDataFile> AXIS 70U/7000 User’s Manual...
-
Page 111: Example: Invoice Handling
AXIS 70U/7000 User’s Manual Example: Invoice Handling Invoice The administrator wants to send the following information with the scanned image (as specified in the “Invoice” example above): The information is associated with the destination. When a destination with associated Meta Data is selected the user will be prompted to enter the requested information. - Page 112 <MetaData Required = ”yes” Id = ”DUE_DATE” Prompt = ”Due Date:” ErrorMessage = “Date: DD/MM/YY!” Pattern = “0-9]{2}/0-9]{2}/0-9]{2}” /> <MetaData Required = ”yes” Id = ”ORDERER” Prompt = ”Orderer name:” Pattern = “.+” /> </Ask> </MetaDataFile> AXIS 70U/7000 User’s Manual...
- Page 113 AXIS 70U/7000 User’s Manual Entering the Required The user selects the Orderer or Accounts destination: Meta Data Invoice Handling The Meta Data in this example is associated with these destinations and the following messages will be displayed: 1. The user is requested to enter the number of the invoice and...
-
Page 114: Example: Job Applications
ErrorMessage = "Wrong Job Ref!" Pattern = "[0-9]{2}-[a-zA-Z]{2}-[0-9]{5}" DefaultValue = "00-aa-00000" /> 2. Arrival Date: (Required information) <MetaData Required = "yes" Id = "ARRIVAL_DATE" Prompt = "Arrival date:" DefaultValue = "00/00/0000" ErrorMessage = "DD/MM/YYYY" Pattern = "[0-9]{2}/[0-9]{2}/[0-9]{4}" /> AXIS 70U/7000 User’s Manual... - Page 115 AXIS 70U/7000 User’s Manual 3. Personal Details of Applicant - name: 4. Personal Details of Applicant - date of birth: 5. The user will be prompted to enter the type of job. There are listed (Required information) <MetaData Required = "yes"...
- Page 116 The administrator has the option to specify the extension of the Information File when saving the file on the FTP server under admin > Destinations > new File Destination. If the extension is not specified the default value will be used. AXIS 70U/7000 User’s Manual...
- Page 117 AXIS 70U/7000 User’s Manual Entering the Required When the user wants to scan and send a document a destination is Meta Data selected from the list: Job Applications Note: This example describes a scenario where the user is prompted to add the information on selecting the “Job Applications”...
- Page 118 Applied Job Type: Note: The Menu button scrolls through the list of Meta Data. The Enter button validates the entered information against the defined pattern. AXIS 70U/7000 User’s Manual...
- Page 119 AXIS 70U/7000 User’s Manual XML DD file Here is the same XML DD file in full: <?xml version = "1.0"?> <!DOCTYPE MetaDataFile SYSTEM "http://192.168.0.90/admin/support/xml_parser.shtml?GetDTD=yes"> <MetaDataFile> <Ask><When><Destination Description="Job Applications" /></When> <MetaData Required = "yes" <MetaData Required = "yes" <MetaData Required = "yes"...
-
Page 120: Retrieving The Xml Dd File
3. This brings you to the Document Server’s Home Page. Click admin. Log on as described in “Accessing the Tools” on page 30. 4. Click the Edit button on the This AXIS 70U/7000 page and then click the Meta Data tab to display the page where you specify the Meta Data parameter settings. - Page 121 If enabled, the Document Server will not reuse the values en- tered by the User for additional scanning. This AXIS 70U/7000 page. If you want to return to the This AXIS 70U/7000 page without saving your changes click Cancel. Meta Data...
- Page 122 (i.e. 0, 1 or 2 times). matches at beginning of line matches at end of line "a|b" "a" or "b" (infix) alternative between two expressions (...) grouping and naming of the enclosed expression AXIS 70U/7000 User’s Manual...
- Page 123 AXIS 70U/7000 User’s Manual “0-9]” "a-z]+" "abcd?" "A-Z]" "i{1,3}" "i{5}" "i{2,}" "i{,2}" "^qwerty" "qwerty$" Notes: • infix notation: • postfix notation: • *The upper limit for repetitions is set to 48. (This limitation does not apply the text matched by the first (...) expression...
- Page 124 "[0-9]{2}/[0-9]{2}/[0-9]{4}" "([a-zA-Z]+)|([a-zA-Z]+.[a-zA-Z] +)@[a-zA-Z]+.[a-z]{2,3}" "(\([0-9]{3}\))?[0-9]{3}[-]{,1}[ 0-9]{4}" "[a-zA-Z ]+" "[0-9]{2} ?[0-9]{3}" "(1|2|3|4|5|6|7|8|9|10|11|12):[0 -9]{,2}(:[0-9]{0,2})?(AM|am|Am|P M|pm|Pm)" "^(http://|ftp://|https://|go- pher://)?([a-zA-Z0-9]+.)*[a-zA-Z 0-9]+(/([a-zA-Z0-9]|-|.)+)*" AXIS 70U/7000 User’s Manual Description Date: DD/MM/YYYY E-mail address: name@example.com name@example.se Telephone number: "(123) 123-1234" "(123)1231234" "(123) 123 1234" Name: "John Doe" "John" ZIP code: "12345"...
- Page 125 AXIS 70U/7000 User’s Manual Internally Defined There are several internal variables defined by the Document Server Variables that can be output in the Information File. These internal variables are listed below. Example: <Format> The image is located at $INT_FILE_URL$ The time at the moment of scanning was $INT_TIME$ </Format>...
- Page 126 Specifies the selected subject. Specifies the e-mail address of the user. Specifies the description of the user. Specifies the MAC address of the Axis Network Document Server that produced the image file. The date when the counter was last reset.
-
Page 127: Troubleshooting
If you have forgotten the previously installed server password, the push button provides the only method available for resetting the unit to factory default. Restore factory default settings to the AXIS 70U/7000 Interpret the Document Server’s front panel indicators Interpret the Document Server’s error messages... - Page 128 2. Enter the name or the IP address of the Document Server in the location/address field. The Document Server Home Page is displayed. 3. Click admin. 4. Click Factory Defaults. The Document Server will now restart with the factory default settings. AXIS 70U/7000 User’s Manual Example AXIS 7000...
-
Page 129: Front Panel Indicator Conditions
AXIS 70U/7000 User’s Manual Follow these steps to restore the default settings using FTP: 1. Log in to the Document Server with the command 2. You will be prompted for user id and password. Use the user id 3. Issue the command get defaults to restore the default settings. -
Page 130: Network Connection
The Network indicator flashes when there is network traffic. If it remains off and you know there is network activity, check the network connection. AXIS 70U/7000 User’s Manual Network Remarks Check SCSI cable to scanner device. -
Page 131: Error And Warning Messages
Error and Warning Messages This table lists the error and warning messages that might appear on the Document Server message display. Some error messages are applicable to the AXIS 7000 only: Message A timeout has occurred on the scan- ner, the job has been canceled... - Page 132 Scanner not connected Scanner disconnected Scanner not ready, please check scanner and retry AXIS 70U/7000 User’s Manual Description The user could not be authenticated by the LDAP server. Change the LDAP settings and try again. Incorrect FTP server password specified for the file destination.
- Page 133 AXIS 70U/7000 User’s Manual Message Scanner not ready, please check scanner and restart the scan server Scanner not supported Scanner warming up, please retry Scanning failed SCSI command sequence illegal (AXIS 7000) SCSI parameter length illegal (AXIS 7000) SMTP Authentication is not sup-...
-
Page 134: Displaying The Log File
2. Enter the name or IP address of the Document Server in the location/address field: Example http://192.168.0.90 3. The Document Server Home Page is displayed. Click admin. 4. Click Event Log. The event log is displayed. AXIS 70U/7000 User’s Manual simultaneously to display the... -
Page 135: Ldap
AXIS 70U/7000 User’s Manual LDAP Introduction LDAP (Lightweight Directory Access Protocol) is used to program directory-enabled applications. It is a directory service that allows people to locate other users, resources, services and information. LDAP allows resources and services to be selected with ease and accessed with location-independence. - Page 136 <attribute><operator><value> format. Complex search filters can easily be constructed by combining these basic search filters and other complex filters using the Boolean operations AND, OR and NOT. The six basic filter components are presented in the table below: AXIS 70U/7000 User’s Manual...
- Page 137 AXIS 70U/7000 User’s Manual Filter Type Format Equality (<attr>=<value>) Approximate (<attr>~=<value>) Substring (<attr>=<leading>]*<any>] *<trailing>]) Greater (<attr>>=<value>) than or equal Less or (<attr><=<value>) equal than Presence (<attr>=*) Using the Boolean operators and a prefix notation, the basic filters can be combined to form more complex ones. The ‘&’ character represents AND, the ‘|’...
-
Page 138: Ldap Test Tools
Smith. All persons at Axis Marketing in Sweden. All persons with a common name contain- ing “bert” at Axis Marketing or Sales. All Axis e-mail addresses in USA and Swe- den (but not e.g. France). LDAP Test Tools Note: It is wise to create filters that sort out unwanted entries based on their object class. - Page 139 AXIS 70U/7000 User’s Manual LDAP Address Book To test your LDAP address book settings, click the addressbook Test Tool link. LDAP Authentication To test your LDAP authentication settings, click the authentication Test Tool link. LDAP...
-
Page 140: Meta Data Dtd
: MD_DOMAIN DESCRIPTION : This entity contains the domain of this DTD. =================================================== --> <!ENTITY MD_DOMAIN 'XML meta data'> <!-- ================================================== ELEMENT : MetaDataFile PARENT : None CHILD : AlwaysAsk (optional) ATTRIBUTES : None AXIS 70U/7000 User’s Manual (zero or more) - Page 141 AXIS 70U/7000 User’s Manual DESCRIPTION : This element is the root element. It allows the Administrator to define meta data that will always be requested (gathered in the 'AlwaysAsk' section) regardless of the destination, and meta data that will be requested only when a particular destination is selected (gathered in the 'Ask' section).
- Page 142 This attribute contains the regular expressions that describe the expected format in the value entered by the User. For more details on the Regular Expression syntax see the User's Manual. The default value for this attribute is the match-everything pattern ('.*'). Editable: AXIS 70U/7000 User’s Manual...
- Page 143 AXIS 70U/7000 User’s Manual This attribute is an enumerated value that defines if the User is allowed to enter a value different from the one proposed in the list of value defined for this Meta Data. The User will be allowed if the attribute is set to...
- Page 144 CDATA #IMPLIED Description CDATA #IMPLIED> <!-- ================================================= ELEMENT : To PARENT : Output CHILD : Destination ATTRIBUTES : None DESCRIPTION : This element contains the particular destination to which the output file should be sent. =================================================== --> AXIS 70U/7000 User’s Manual...
- Page 145 AXIS 70U/7000 User’s Manual <!ELEMENT To (Destination)> <!-- ================================================== ELEMENT PARENT CHILD ATTRIBUTES DESCRIPTION : This element contains the custom declaration that defines the output format defined by the Administrator for this specific destination. =================================================== --> <!ELEMENT Format (#PCDATA)> : Format...
-
Page 146: The Parameter List
(NTP). Time can also be set manually in hh:mm:ss format using the 24 hour clock. Note: The AXIS 7000 contains a real time clock which means that the time will be kept even if the power is turned off. Set this parameter to Note that all current settings will be lost. - Page 147 AXIS 70U/7000 User’s Manual Parameter name Value WebScanning =yes SpecifySender FrontPanelConfiguration =yes PDFRotation SpecifyFileName SpecifySubject =yes QuickDestination [IP] InternetAddress =0.0.0.0 DefaultRouter =0.0.0.0 NetMask =0.0.0.0 BOOTPEnable =yes DHCPEnable RARPEnable =yes DomainName =company.se PrimaryDNS =0.0.0.0 SecondaryDNS =0.0.0.0 Description Specifies if users are allowed to use the Scan Document facility.
- Page 148 Optional entry which should be in plain text and may be used to show the location of the system. =disabled Enables or disables the SNMP authentication failure traps. It corresponds to the snmpenableAuthenTraps (MIB-II) SNMP object. AXIS 70U/7000 User’s Manual nnnnnn where are the last six digits of the...
- Page 149 AXIS 70U/7000 User’s Manual Parameter name Value [Clients] InformationLevel =Basic FTPDefaultUser =anonymous FTPDefaultPassword =AXIS_7000@any.com If not set for a destination, this password will be used. This FTPDefaultFileName =img%3i.%e SMTPReplyAddress SMTPSubject =A scanned image SMTPSendBcc SMTPBccAddress =name@example.com Specifies the e-mail address of the recipient of the Bcc...
- Page 150 If left blank no authorization will be attempted. Specify the password for logging on to the LDAP server. If the User Field is left blank, this setting will be ignored. AXIS 70U/7000 User’s Manual U.S. English Spanish inches...
- Page 151 AXIS 70U/7000 User’s Manual Parameter name Value LDAP Search Base LDAP Name Field LDAP Mail Field =mail LDAP Filter LDAP Reload Interval [SMTP] Primary Mail Server =mail Secondary Mail Server Connection Timeout SMTP Port [Authentication] Authentication Method =None Authentication TimeOut...
- Page 152 Document Server message display. =Scan-to-e-mail Specifies how the scanned image should be sent; that is by (SMTP), which protocol. Scan-to-e-mail (URL), Scan-to-file (FTP), Scan-to-Print (TCP) and Scan-to-print (LPD) AXIS 70U/7000 User’s Manual...
- Page 153 AXIS 70U/7000 User’s Manual Parameter name Value Destination =Directory Profile =Text Server =ftp.axis.se User =name Password =***** File name =FTPImage Index file [Destination-name(URL)] Description =name(URL) Transfer method =Scan-to-URL (SMTP & FTP) Destination =name@company.com Defines the E-mail address of the e-mail recipient (SMTP).
- Page 154 A Scanned Image Specifies the text that will be used in the subject field when scanning to e-mail destinations. =Profile-Color high =Profile-Color low =Profile-Color PDF =Profile-Gray high =Profile-Gray low =Profile-Text =Profile-Text high =Profile-Text low =Profile-Text PDF =Profile-Text/Photo AXIS 70U/7000 User’s Manual...
- Page 155 AXIS 70U/7000 User’s Manual Parameter name Value Description =Text X-Resolution =300 Y-Resolution =300 Data type =Black & White Paper size =Executive, Letter, Legal, Ledger, A4, A3 Paper orientation =Portrait Image compression =CCITT G.4 File format =JFIF Double-sided =Off Document mode...
- Page 156 Data file. =axis7000.xml Specifies the file that contains the Meta Data. Specifies the reload interval in hours. Specifies the number of image enhancement profiles defined in the Document Server. =ImageEnhancement - =ImageEnhancement - =ImageEnhancement - Static Threshold AXIS 70U/7000 User’s Manual...
- Page 157 AXIS 70U/7000 User’s Manual Parameter name Value Description =DTC Enhancement Type =Fujitsu DTC Gamma =Sharp White Level Follower =Auto DTC Scan Mode =Image DTC Curve =Image Darkest DTC Gradation =Ordinary DTC Smoothing =Image DTC Filtering =Ball-Point Pen DTC Equal to...
-
Page 158: Updating The Firmware
Contact your dealer to check if there is a new version of the firmware available. You should have your current version numbers ready to compare against the latest firmware version from Axis. Check the support section on the Axis Web site at http://www.axis.com where you can download the latest versions... - Page 159 Fetch, you must rename the new file <software file> to flash before downloading. put <software name> FLASH AXIS 7000 rev. 1 only: Downgrading to a software version lower than 2.22 is not possible if the current software version is 2.22 or above. Updating the Firmware pass.
-
Page 160: Technical Specifications
Scanner devices with built-in compression provide optimum performance. For a detailed list of supported scanners and digital copiers, check the Document Server support pages at http://www.axis.com or contact your local dealer. AXIS 70U: USB 1.1 and USB 2.0 AXIS 7000: SCSI-2 TCP/IP with Raw TCP or LPD printing supported. - Page 161 AXIS 70U/7000 User’s Manual Supported LDAP • Server Software • • • • Supported Image Document Server - Adobe PDF 1.2: The created PDF file contains Formats compressed or uncompressed bit images in CCITT G.3/G.4 packbits or JPEG (24 bit) formats TIFF 6.0: CCITT G.3 and G.4 for bilevel images, Packbits for...
- Page 162 10baseT (twisted pair) and 100baseTX for Ethernet. AXIS 70U/7000: Mini Keyboard AXIS 7000: SCSI cable: 50 pin high-density shielded (micro-D) SCSI cable: 50 pin high-density shielded to 50 pin shielded low-density (Centronics) AXIS 70U: 5.1 V, 2A, via external power unit (PS-H) AXIS 70U/7000 User’s Manual...
- Page 163 AXIS 70U/7000 User’s Manual AXIS 7000 revision 3 and 4: 5.1 V, 2A, via external power unit (PS-H) AXIS 7000 revision 1 and 2: 12V DC, 13.6 VA, via external power unit (PS-E) Dimensions Height: 1.7 in (4.3 cm) Width: 5.9 in (14.9 cm) Depth: 8.8 in (22.4 cm)
-
Page 164: Glossary
Dynamic Host Configuration Protocol. A system based on network interface card addresses, which is used to allocate IP addresses and other configuration information for networked systems. A method to obtain a rasterized effect for pictures, especially scanned photos. AXIS 70U/7000 User’s Manual... - Page 165 AXIS 70U/7000 User’s Manual Domain Name System. A hierarchical naming system that uses a combination of text names separated by periods to create a unique name. Delivery Status Notifications. A method used to confirm the delivery of e-mails. duplex A scanner/printer with the capability to scan/print both sides of a page in one operation.
- Page 166 Small Computer System Interface. A high-speed parallel interface, used to connect a computer to peripheral devices using just one port. Simple Mail Transfer Protocol. The TCP/IP protocol for exchanging e-mail. AXIS 70U/7000 User’s Manual...
- Page 167 AXIS 70U/7000 User’s Manual SNMP Simple Network Management Protocol. A TCP/IP protocol used to manage and monitor nodes on a network. Transmission Control Protocol. The connection-oriented, transport-level protocol used in the TCP/IP suite of protocols. TIFF Tagged Image File Format. Format for storing bit-mapped images.
-
Page 168: Index
Authentication settings ....50 Axis WWW Home Page ... . 158 Bcc Address ....40, 45 BOOTP . - Page 169 AXIS 70U/7000 User’s Manual FTP server......121 Grayscale ..... . 70, 99 Host Name .
- Page 170 Updating the Firmware ... . . 158 AXIS 70U/7000 User’s Manual URL for e-mail..... 57 USB .
Need help?
Do you have a question about the 7000 and is the answer not in the manual?
Questions and answers