Datamax M-Class Mark II Operator's Manual
Hide thumbs
Also See for M-Class Mark II:
- Operator's manual (100 pages) ,
- Maintenance manual (94 pages) ,
- Manual (10 pages)
Table of Contents
Advertisement
Quick Links
Advertisement
Table of Contents

Related Manuals for Datamax M-Class Mark II


Summary of Contents for Datamax M-Class Mark II
- Page 1 Ope r a t or ’s M a n u a l...
- Page 3 Copyr igh t I n for m a t ion CG Trium virat e is a t radem ark of Agfa Corporat ion. CG Tim es based upon Tim es New Rom an under license from t he Monot ype Corporat ion. Windows is a regist ered t r adem ark of t he Microsoft Corporat ion.
- Page 4 I m por t a n t Sa fe t y I n st r u ct ion s This print er has been carefully designed t o provide m any years of safe, reliable perform ance. As wit h all t ypes of elect rical equipm ent , however, t here are a few basic precaut ions you should t ake t o avoid hurt ing yourself or dam aging t he equipm ent : •...
-
Page 5: Table Of Contents
Ge t t in g St a r t e d I nt roduct ion ..............1 Unpacking ..............1 Pr in t e r Se t u p Print er Connect ions ............3 Loading Media ..............6 Media Sensor Adj ust m ent ..........8 Loading Ribbon ............... - Page 6 M a in t e n a n ce a n d Adj u st m e n t s Cleaning I nt ervals ............47 Cleaning t he Print head ............. 48 Media Widt h Adj ust m ent ..........49 Print head Burn Line Adj ust m ent ........
-
Page 7: Ge T T In G St A R T E D
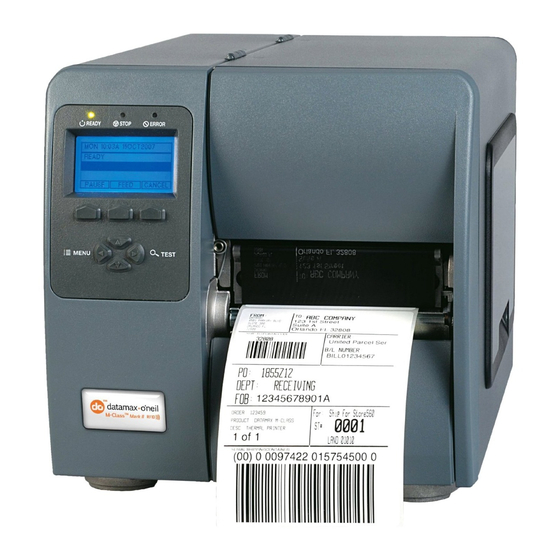
Congrat ulat ions on your M- Class Mark I I print er purchase. The M- Class Mark I I print er fam ily, hereaft er referred t o as ‘t he print er’, blends t he rugged durabilit y of die- cast const ruct ion wit h st at e- of- t he- art elect ronics and user- friendly feat ures t o redefine t he st andard in indust rial t herm al print ers. - Page 8 Ch a pt e r 1 – Ge t t in g St a r t e d...
-
Page 9: Pr In T E R Se T U P
Pow e r Con n e ct ion Before connect ing t he AC Power Cord or int erface cables t o t he print er, ensure t he Power On/ Off Swit ch is in t he ‘Off’ posit ion. Place t he print er on a firm , level surface. - Page 10 I n t e r fa ce Con n e ct ion The print er can be connect ed t o t he host via t he parallel, USB, serial, or opt ional net work int erface. The print er will aut om at ically connect t o t he first port t hat delivers valid dat a. Once est ablished, t he print er’s power m ust be cycled ‘Off’...
- Page 11 SD I O Con n e ct ion s - When inst alling an SDI O Card, t urn OFF t he print er t hen slide t he card int o t he slot . Module “ F” will be recognized by t he print er. When rem oving a card, t urn OFF t he print er t hen press inward on t he card t o release it .
-
Page 12: Loading Media
To print dir ect ly from st ored files at power- up; see Sect ion 4.5, Syst em Set t ings, User Label Mode. To print a previous label form at t hat is st ored in m em ory: Press t he M EN U but t on t hen select Pr in t e r Opt ion s. - Page 13 Roll Media Media Hanger Guide Media Sensor Media Guide Close t he Print head Assem bly and press down unt il it locks int o place. Close t he cover and press t he FEED but t on several t im es t o posit ion t he m edia and ensure proper t racking.
-
Page 14: Media Sensor Adj Ust M Ent
The Media Sensor needs t o be posit ioned so t hat t he print er can det ect t he pr esence of m edia and t he t op- of- form ( except for cont inuous st ock, where t he TOF is set t hrough t he front panel. To adj ust : Wit h m edia loaded, as described in Sect ion 2.2, grasp t he Slide Tab and m ov e t he Sensor Eye Mark int o posit ion over m edia according t o t he t able below. -
Page 15: Loading Ribbon
Ribbon is required wit h t herm al t ransfer m edia. I t is recom m ended t hat t he widt h of t he ribbon be slight ly wider t han t he m edia being used. The print er can use eit her ribbons wit h t he ‘coat ing side in’... - Page 16 Ribbon Rou t in g D ia gr a m s ( CSI ) ‘Coat ing Side I n’ Ribbon Rout ing ( CSO) ‘Coat ing Side Out ’ Ribbon Rout ing Ch a pt e r 2 - Pr int e r Se t u p...
- Page 17 Rout e t he ribbon under t he Ribbon I dler and t hen out t he front of t he print er approxim at ely 12 inches. Ribbon Roll Ribbon Supply Hub Ribbon I dler Close t he Print head Assem bly and press down unt il it locks int o place. ...
- Page 18 Rout e t he ribbon up and t hen around t o t he Ribbon Take- Up Hub, winding it several t im es in a clockwise direct ion t o secure it in place. Ribbon Take- up Hub Close t he cover and press t he Feed but t on several t im es t o posit ion t he ribbon and ensure proper t racking.
-
Page 19: Pr In T E R Ope R A T Ion
The Front Panel consist s of t hree indicat or light s and t hree funct ion but t ons. The funct ions of t hese light s and cont rols are list ed in t he following sect ions. Non- display print ers can be configured using t he DMXConfig Ut ilit y ( see Sect ion 3.4) . - Page 20 3 .1 .2 Bu t t on s , and CANCEL perform different funct ions based on t he operat ional m ode. PAUSE FEED Re a dy M ode Fun ct ions These funct ions can be perfor m ed at any t im e when t he print er is at idle. Fu n ct ion Bu t t on ( s) D e scr ipt ion...
-
Page 21: Front Panel ( Display- Equipped Models)
The Cont rol Panel is an event - driven int erface com posed of a graphic display and keyboar d. I n addit ion t o providing current print er inform at ion, t he m ode- dependent panel allow s t he it em s in t he Main Display Area and t he keyboard funct ions t o change as operat ional event s require. -
Page 22: Windows Driver
The Windows driver is locat ed on t he Accessories CD- Rom included wit h your print er. For t he lat est version please visit our web sit e at www.dat am ax- oneil.com I n st a llin g t h e W in dow s D r ive r : Place t he Accessories CD- Rom included wit h your print er int o your com put ers CD- Rom drive. - Page 23 I m por t a n t N ot e s: The Windows driver funct ions t he sam e as any ot her Windows print er. A built in help file is available for com plet e inform at ion on all set t ings; however, t here are som e im port ant set t ings t hat should be observed for t rouble free print ing.
-
Page 24: Print Er Configurat Ion Ut Ilit Y
DMXConfig ( locat ed on t he Accessories CD- ROM) is a Windows based configurat ion ut ilit y t hat allows you t o m ake changes t o t he exist ing print er set up via a direct connect ion t o t he host com put ers serial and parallel connect ion. -
Page 25: Media Calibrat Ion
3 .5 .1 Qu ick Ca libr a t ion Quick Calibrat ion should be perform ed as part of t he m edia loading rout ine t o fine- t une t he sensing param et ers. ( 1) This calibrat ion is not necessary when using cont inuous st ock. ... - Page 26 3 .5 .3 St a n da r d Ca libr a t ion The St andard Calibrat ion can be perfor m ed using t he DMXConfig Ut ilit y ( see Sect ion 3.4) and using t he front panel but t ons ( see Appendix C) . On display- equipped print ers t he St andard Calibrat ion rout ine can also be init iat ed via t he print er’s m enu, see Sect ion 4.5.
- Page 27 7. The Calibrat ion Wizard will now prom pt you t o ‘Load Backing’. Peel off a few labels and posit ion t he backing m at erial in t he m edia sensor. Close t he print head and click “...
-
Page 28: User Defined Label ( Display- Equipped Models)
The User- Defined Label allows a t em plat e t o be populat ed by variable dat a ( via t he print er’s cont rol panel or a USB QWERTY keyboard) . The t em plat e is a st ored label form at , where fields delim it ed by an am persand ( &) becom e variable. -
Page 29: M E N U Syst E M
The Menu Syst em cont ains t hree prim ary branches, each wit h a differing level of access t o secondary m enus or funct ions: The User Menu accesses basic print er set t ings and funct ions; ... -
Page 30: The User Menu
The User Menu cont ains basic select ions in t hese m enus: Media Set t ings Print Cont rol Print er Opt ions Syst em Set t ings ( 1) Som e set t ing changes will only becom e effect ive ( and saved) aft er select ing YES at t he Save ... -
Page 31: The Test Menu
The Test Menu cont ains t est and inform at ional label select ions: Print Qualit y Label Ribbon Test Label Test Label Validat ion Label Print Configurat ion Print Last Label User Defined Label I nt ernally generat ed, t hese labels are print ed at pre- select ed m edia t ype, speed, and heat set t ings. - Page 32 D I SPLAYED I TEM I TEM D ESCRI PTI ON MEDI A TYPE Select s t he m et hod used t o print labels and should be set according t o t he t ype of m edia being used, where: DI RECT THERMAL Set s use for m edia t hat is heat react ive t o produce an im age.
- Page 33 SENSOR Select s t he m edia sensor calibrat ion m et hod, where: CALI BRATI ON PERFORM Set s t he values via int ernal print er calculat ions, as described in t he STANDARD CALI BRATI ON CALI BRATI ON procedure. ADVANCED ENTRY Set s t he values via m anual ent ry ( t ypically for hard t o calibrat e label st ocks) , as described in t he ADVANCED ENTRY CALI BRATI ON where:...
- Page 34 Pr in t Con t r ol The Print Cont rol m enu cont ains print ing t hroughput , offset and cust om set up funct ions: Heat Print Speed Feed Speed Reverse Speed * ...
- Page 35 PRESENT DI STANCE Set s t he label st op posit ion ( 0 - 4.00 inches) past t he st art of print posit ion upon out put . When subsequent label form at s are received, t he print er will aut om at ically back up t he label t o posit ion it at t he st art of print posit ion, where: AUTO I s t he default set t ing ( Aut o Mode) .
- Page 36 Pr in t e r Opt ion s The Print er Opt ions m enu cont ains file- handling, m odule, and opt ional equipm ent set t ings: Modules Present Sensor Cut t er RFI D ...
- Page 37 FORMAT Select s from a list of m odules available for form at t ing by t he print er; see Sect ion MODULE * 5.10, File Handling Messages. Choosing FORMAT MODULE will erase exist ing dat a in t he select ed m odule DELETE FI LE * Select s from t he list of available files for delet ing;...
- Page 38 HF SETTI NGS * Set s HF t ag param et ers, as follows: TAG TYPE Set s t he t ag t ype: I SO 15693 ( I s t he default set t ing.) PHI LI PS ST LRI 512 ST LRI 64 AFI VALUE Applicat ion Fam ily I dent ifier value ( 00 - FF) , where 00 is t he default value.
- Page 39 SET DEFAULTS * Depending upon t he RFI D MODULE, select ing YES will ret urn t hese set t ings: I f MODE = HF, t hen: RFI D POSI TI ON = 1.10 HF SETTI NGS: TAG TYPE = I SO 15693 RETRY ATTEMPTS = 3 - - - - - - - - - - - - - - - - - - - - - - - - - - - - - - - - - - - - - - - - - - - - - - - - - - - - - - - - - - - - - - - - - - - - - - - - - - - - - - - - - - - - - - - - - - - - - - - -...
- Page 40 Syst e m Se t t in gs The Syst em Set t ings m enu cont ains label form at t ing, operat ion, and cont rol funct ions: Menu Mode Configurat ion File I nt ernal Module * ...
- Page 41 I NTERNAL MODULE D Set s t he num ber of 1KB blocks ( 100 - 5120) allocat ed for t he int ernal DRAM ‘D’ m odule, where: 1024 I s t he Default Set t ing. DEFAULT MODULE Designat es t he m em ory m odule t o be used for file st orage when none are specified, where: I s t he Default Set t ing ( DRAM m odule) .
- Page 42 DOUBLE BYTE Select s t he opt ional I LPC code page used t o print double byt e font s, where: SYMBOLS JI S Japanese I ndust ry St andard SHI FT JI S Shift Japanese I ndust ry St andard Ext ended UNI X Code UNI CODE Unicode ( including Korean) .
- Page 43 SET FACTORY Ret urns t he print er set t ings t o t he fact ory- program m ed values ( except CUSTOM DEFAULTS ADJUSTMENTS and calibrat ions) ; or, if select ed, t o t he Fact ory Set t ing File, where select ing YES at t he prom pt causes t he configurat ion t o be rest ored.
- Page 44 UNI TS OF MEASURE Set s t he m easurem ent st andard used, where: I MPERI AL Uses inches. ( Default Set t ing) METRI C Uses m illim et ers and cent im et ers. I NPUT MODE Defines t he t ype of processing t hat will occur when dat a is received, where: Dat am ax- O’Neil program m ing language processing will be used.
- Page 45 COLUMN Allows t he colum n dot s per inch t o be adj ust ed ( 153 - 203 dot s) , so t hat num bers EMULATI ON sm aller t han t he print head resolut ion reduce t he print ed out put from right t o left , where: XXX Dot s ROW EMULATI ON...
- Page 46 FAULT HANDLI NG Det erm ines t he int ervent ion required and t he disposit ion of t he label in process when a fault occurs, where: LEVEL Select s t he user act ion and t he reprint st at us upon declarat ion of a fault , where: NO REPRI NT Print ing st ops and a fault m essage is displayed.
- Page 47 Com m u n ica t ion s The Com m unicat ions m enu cont ains int erface and host cont rol funct ions: Serial Port A Parallel Port A NI C Adapt er ( Et hernet ) ...
- Page 48 WLAN Cont rols t he com m unicat ions set t ings for t he net work int erface, where: MODE Select s bet ween wired and wireless operat ion, where: ENABLED Enables t he wireless int erface. ( This is t he Default Set t ing.) DI SABLED Enables t he wired int erface.
- Page 49 HOST SETTI NGS Cont rols t he com m unicat ions wit h a host device, where: The " ignore host " set t ings for ESC SEQUENCES, HEAT, SPEED, TOF SENSI NG, SYMBOL SET, CNTRL- CODES, STX- V SW SETTI NGS, and MAX LENGTH will be unaffect ed when PL- Z Mode is select ed ( see I nput Mode for det ails) .
- Page 50 STX- V SW Det erm ines t he way in which t he DPL < STX> V com m and is handled, where: SETTI NGS ENABLED Processes com m ands norm ally. ( Default Set t ing) DI SABLED I gnores t he opt ion- enable com m and; inst ead, t he opt ion select ions are cont rolled via m enu set t ings.
- Page 51 D ia gn ost ics The Diagnost ics m enu cont ains t est ing funct ions and print head report ing select ions: Hex Dum p Mode Opt ions Test ing Print Test Rat e ( m in) ...
- Page 52 SENSOR Displays t he values ( 0 – 255) from t he print er sensors, where: READI NGS TRAN RI BM RANK THR = Pr int head t her m ist or sensor; TRAN = Gap m edia sensor ( REFL when set t o reflect ive) ; RI BM = Ribbon sensor;...
-
Page 53: M A In T E N A N Ce A N D Adj U St M E N T S
This sect ion det ails t he cleaning, adj ust ing, and t roubleshoot ing t ips for t he print er. The following t able out lines t he recom m ended m aint enance schedule for t he various print er part s. Ar e a M e t hod I n t e r va l... -
Page 54: Cleaning T He Print Head
I f print qualit y declines ( sym pt om s include non- com pliant bar codes, print dropout s, and st reaks; see sam ple label below) , t he t ypical cause is debris build- up on t he print head. Furt herm ore, when t he build- up is not rem oved it m ay lead t o elem ent failure, great ly reducing t he service life of t he print head. -
Page 55: Media Widt H Adj Ust M Ent
Au t om a t e d Pr in t h e a d Cle a n in g ( Display- equipped print ers, only) Rem ove m edia and ribbon. Place a Dat am ax- O’Neil Cleaning Card, part num ber 70- 2013- 01 under t he print head. Lower and lock t he print head. -
Page 56: Print Head Burn Line Adj Ust M Ent
Ex a m ple 1 – Ove r Ex a m ple 2 – Cor r e ct a dj u st m e n t : a dj u st m e n t : Too m uch adj ust m ent The proper adj ust m ent produces an im age produces a com plet e... -
Page 57: Print Head Pressure Adj Ust M Ent
Locking Screws Adj ust m ent Screws To accom m odat e a variet y of m edia t ypes, print head pressur e is adj ust able. This pressure is fact ory set t o work wit h m ost m edia t ypes, so t his adj ust m ent should only be perform ed aft er at t em pt ing t o im prove print qualit y t hrough t he use of t he ( 1) heat and/ or ( 2) print speed. -
Page 58: Print Head Replacem Ent
To replace a dam aged print head, follow t he procedure below. Print heads are fragile; use ext rem e car e when handling and never use a sharp obj ect on t he surface. I f you have quest ions, cont act a qualified t echnician or Dat am ax- O’Neil Technical Support before proceeding. -
Page 59: Darkness Adj Ust M Ent
N on - displa y pr in t e r s: The Darkness Adj ust m ent allows t he oper at or t o m at ch t he print cont rast following a print head replacem ent . Turning t he Darkness Adj ust m ent clockwise will darken t he print , while t urning it count erclockwise will light en t he print . -
Page 60: Reset T Ing T He Print Er
Depending upon t he m et hod used, t her e are t hree r eset levels possible: Soft Re se t - To reset t he print er and clear any t em porary host set t ings: Wit h t he print er ‘On’, press and hold t he PAUSE and CAN CEL but t ons for approxim at ely four seconds. -
Page 61: Downloading Firm Ware And Font S
The operat ing program s and font s for t he print er are st ored in Flash m em ory on t he Main PCB. When program updat es and/ or new feat ures are added, t hey can be downloaded t o t he pr int er as follows: I dent ify t he new version for your m odel of print er from t he Dat am ax- O’Neil Web sit e at www.dat am ax- oneil.com and download it ont o your com put er’s hard drive or a floppy disk. -
Page 62: File Handling Messages ( Display- Equipped Models)
Copying Tr u e Type Fon t s ( Display- equipped print ers wit h SDI O/ USB Host ) To copy TrueType font s ( .TTF) t o an ext ernal m odule for use by t he print er: Use Windows Explorer t o download t he font t o t he m odule. - Page 63 File H a n dlin g M e ssa ge s ( Cont inued) D ispla ye d D e scr ipt ion Possible Solu t ion ( s) M e ssa ge Ensure t he file is present : •...
- Page 64 Ch a pt e r 5 – M a in t e n a n ce a n d Adj u st m e n t s...
-
Page 65: Tr Ou Ble Sh Oot In G
Should a problem arise, t he inform at ion in t his sect ion w ill help you resolve it . The following t able list s problem s t hat m ay not necessarily generat e an error condit ion. I t em s denot ed wit h an ast erisk ( * ) are only for display- equipped print ers. - Page 66 Tr y t h is solu t ion … I f e x pe r ie n cin g t h is pr oble m … • Check t he label form at for charact er placem ent out side t he dim ensions of t he label;...
- Page 67 Tr y t h is solu t ion … I f e x pe r ie n cin g t h is pr oble m … Exam ine t he used ribbon for an im age: I f t h e r e is a n im a ge on t h e u se d r ibbon : ...
- Page 68 Tr y t h is solu t ion … I f e x pe r ie n cin g t h is pr oble m … • The print head m ay need cleaning; see Sect ion 5.2. • Adj ust t he Heat and Print Speed set t ings t hrough t he Front Panel or by host com m ands ( non- display print ers, see Sect ion 3.4;...
-
Page 69: Fault And Warning Messages ( Display- Equipped Models)
All print er funct ions are int ernally m onit ored. I f a problem ( Fault ) or a pot ent ial problem ( Warning) is det ect ed, t he Error I ndicat or will be illum inat ed. A corresponding m essage will be displayed. - Page 70 Pr in t e r Fa u lt M e ssa ge s ( cont inued) D ispla ye d M e ssa ge D e scr ipt ion Possible Solu t ion ( s) Consist ent ly high sensor Press any key t o cont inue.
- Page 71 Pr in t e r Fa u lt M e ssa ge s ( cont inued) D ispla ye d M e ssa ge D e scr ipt ion Possible Solu t ion ( s) Consist ent ly low sensor Press any key t o cont inue.
- Page 72 Pr in t e r Fa u lt M e ssa ge s ( cont inued) D ispla ye d M e ssa ge D e scr ipt ion Possible Solu t ion ( s) The print er could not find I f m e dia is m ovin g: ...
- Page 73 W a r n in g M e ssa ge s: Warning Messages are displayed for a period of five seconds. I f m ult iple warnings are det ect ed, t he display will reflect t he highest priorit y m essage. Pr in t e r W a r n in g M e ssa ge s D ispla ye d M e ssa ge D e scr ipt ion...
-
Page 74: Hex Dum P Mode
The Hex Dum p Mode is a useful t ool for diagnosing problem s, including com m unicat ion and DPL synt ax errors, allowing a com parison of input st rings ( sent by host ) t o out put dat a ( received by print er) . -
Page 75: Appe N Dix A - Spe Cifica T Ion S
M e ch a n ica l Widt h 9.8” ( 24.9 cm ) Dept h 18.06” ( 45.9 cm ) Height 10.3” ( 26.2 cm ) Weight 27.0 lbs. ( 12.2 kg) Operat ing Tem perat ure 40° F t o 95° F ( 4° C t o 35° C) Hum idit y 10% −... - Page 76 M e dia / Ribbon Media Types Roll- Fed, Die- Cut , Cont inuous, Fan- Fold Max. Media Widt h 4.65" ( 118 m m ) Min. Media Widt h 1.0" ( 25 m m ) Max. Print Widt h 4.25”...
- Page 77 Appr ove d M e dia To achieve opt im um print qualit y and m axim um print head life, Dat am ax- O’Neil specifies t he use of Dat am ax- O’Neil brand m edia and ribbons. These supplies are specially form ulat ed for use in our print ers;...
- Page 78 Appe n dix A – Spe cifica t ion s...
- Page 79 The print er can easily be program m ed t o int erface wit h m ost applicat or devices. The GPI O funct ions can be enabled and configured via t he m enu syst em of t he print er via t he DMXConfig program or on t hrough t he front panel on display equipped print ers.
- Page 80 Each GPI O pin funct ion is det ailed in t he t able below: GPI O Por t Conn e ct ions a nd Fu nct ion s Sign a l Sign a l Sign a l [ 2 ] Pin # Signa l D e scr ipt ion [ 1 ]...
- Page 81 I n ‘Print er Set up’ m ode, t he but t ons cont rol t he set t ing of t he print er’s operat ional it em s such as m edia set t ings, com m unicat ions, and opt ions as det ailed below. Before ent ering Set up Mode, exit Peel Mode ( or, if equipped, disable t he opt ional Present Sensor) as unpredict able result s can ot herwise occur.
- Page 82 Pr in t e r Se t u p M e n u List The Print er Set up Menu List label, shown below, cont ains t he print er’s current values for each m enu it em t hat can be m odified via t he front panel. The Menu I t em Num bers correspond t o t he it em ’s posit ion in t he Menu List for select ion when pressing t he FEED...
- Page 83 M e n u I t e m s a n d Va lu e s The t able below det ails t he Print er Set up Menu List it em s wit h a brief descript ion of t he it em ’s funct ion, and t he possible values.
- Page 84 1 3 ) LABEL W I D TH 1 4 ) SCALABLE FON T 1 5 ) I N TERN AL M OD ULE Set s t he label widt h. Set s t he num ber of m em ory Set s t he num ber of m em ory blocks t o allocat e for scalable blocks t o allocat e for t he int ernal...
- Page 85 2 1 ) H EAT 2 2 ) I M AGI N G M OD E Cont rols t he ‘burn- t im e’ of t he print head. This is This com m and inst ruct s t he print er whet her t o pre- t he equivalent of Heat Set t ing on m ost label im age t he label form at : soft ware program s.
- Page 86 St e p by St e p M odifica t ion of t h e Pr in t e r Se t u p The following is an exam ple of Print er Set up m odificat ion. Alt hough t his exam ple will det ail how t o m odify t he serial Baud Rat e, t he sam e m et hod can be used t o change any of t he print er’s m enu it em set t ings.
- Page 87 To confirm t hat your changes have been m ade press t he but t ons FEED CANCEL sim ult aneously, t his will print t he Dat abase Configurat ion Label. The label should show t he new Baud Rat e value of 19200. Label 1 Label 2 WED NOVEMBER 10, 2003 21:41:31 323...
- Page 88 The Label Alignm ent funct ion is int ended for use w hen t he label lengt h is less t han t he dist ance bet ween t he print head and t he m edia sensor or where label wast e at power- up is a concern. Label Alignm ent ( see t able below) is not recom m ended for label lengt hs great er t han 6.5 inches or for m edia cont aining 2 or m ore form lengt hs.
- Page 89 La be l Align m e n t = AUTO I n t his m ode, t he print er aut om at ically calculat es t he ‘ALI GN LENGTH’ t hus elim inat ing t he need t o physically m easure t he label.
- Page 90 La be l Align m e n t Tr ou ble sh oot in g I f you experience label alignm ent problem s, t he following t able offers possible causes and solut ions. Pr oble m Possible Ca u se Solu t ion ...
- Page 91 Pr oble m Possible Ca u se Solu t ion Label Alignm ent is Label Alignm ent Set Label Alignm ent t o AUTO. Press and hold incorrect . Pressing Lengt h is not correct . unt il paper m oves for aut om at ic Label FEED The default Label FEED...
- Page 92 – – – I n ‘Calibrat ion’ m ode, t he but t ons allow t he print er t o adj ust t o t he m edia being used. Calibrat ion can be perfor m ed eit her aut om at ically or m anually, as det ailed below. Before calibrat ing, ensure t hat t he Print head Carrier Assem bly is lat ched down, t hat t he cover is closed, and t hat t he m edia sensor has been set for t he appropriat e m edia t ype.
- Page 93 Au t o M e dia Se n sor Ca libr a t ion Aut o Media Sensor Calibrat ion aut om at ically est ablishes t he opt im um sensing values for t he m edia you are using. ...
- Page 94 M a n u a l M e dia Se n sor Ca libr a t ion The Manual Media Sensor Calibrat ion procedure should be used in cases where t he print er cont inues t o suffer from m edia sensing problem s aft er perform ing or at t em pt ing t o perform t he Aut o Media Sensor Calibrat ion.
- Page 95 Different languages and / or Dat am ax- O’Neil- provided t ranslat ions can be downloaded t o replace t he st andard ( English) m enu of t he print er by changing t he spreadsheet t hat defines t he syst em dict ionary.
- Page 96 B. Click t he “ Enable Macro” box. The following screen appears: C. Click on Colum n J and ent er t he new language, or m odify an exist ing one. Som e t ips on t his process: •...
- Page 97 Download t he generat ed files t o t he print er – one m et hod is t he DOS copy com m and: copy small.ls lpt1: /b G. Reset t he print er by pressing and holding t he CANCEL Key for approxim at ely four seconds. H.
- Page 98 • The st andard print er leaves t he fact ory wit h EFI GS loaded int o Module Y. At t his point , Module Y is LOCKED and will only accept addit ional language downloads. • Aft er downloading a language updat e, Module Y is left UNLOCKED unt il t he print er is reset or power is cycled.
- Page 99 • The screen shot below is an exam ple of Unicode defined languages, Chinese & Russian. Not e t he only addit ional inform at ion required is t he “ double” in row 1. Appe n dix D – Ch a n gin g t he La n gu a ge...