Table of Contents
Advertisement
Quick Links
Air-Conditioners
PSH-3GJHA, 4, 5, 6GJHSA
PS-3GJA, 4, 5, 6GJSA
INSTALLATION MANUAL
E
For safe and correct use, please read this installation manual thoroughly before installing the air-conditioner unit.
INSTALLATIONSHANDBUCH
D
Zum sicheren und ordnungsgemäßen Gebrauch der Klimaanlage das Installationshandbuch gründlich durchlesen.
MANUEL D'INSTALLATION
F
Veuillez lire le manuel d'installation en entier avant d'installer ce climatiseur pour éviter tout accident et vous assurer d'une utilisation correcte.
MANUAL DE INSTALAÇÃO
PR
Para segurança e utilização correctas, leia atentamente este manual de instalação antes de instalar a unidade de ar condicionado.
ES
MANUAL DE INSTALACIÓN
Para un uso seguro y correcto, lea detalladamente este manual de instalación antes de montar la unidad de aire acondicionado.
I
MANUALE DI INSTALLAZIONE
Per un uso sicuro e corretto, leggere attentamente questo manuale di installazione prima di installare il condizionatore d'aria.
FOR INSTALLER
FÜR INSTALLATEURE
POUR L'INSTALLATEUR
PARA O INSTALADOR
PARA EL INSTALADOR
PER L'INSTALLATORE
Advertisement
Table of Contents

Related Manuals for Mitsubishi Electric Mr.Slim PSH-3GJHA


Summary of Contents for Mitsubishi Electric Mr.Slim PSH-3GJHA
- Page 1 Air-Conditioners PSH-3GJHA, 4, 5, 6GJHSA PS-3GJA, 4, 5, 6GJSA FOR INSTALLER FÜR INSTALLATEURE POUR L’INSTALLATEUR PARA O INSTALADOR PARA EL INSTALADOR PER L’INSTALLATORE INSTALLATION MANUAL For safe and correct use, please read this installation manual thoroughly before installing the air-conditioner unit. INSTALLATIONSHANDBUCH Zum sicheren und ordnungsgemäßen Gebrauch der Klimaanlage das Installationshandbuch gründlich durchlesen.
-
Page 2: Table Of Contents
Contents Inhaltsverzeichnis Index 1. Safety Precautions ..............4 1.1. Before installation and electric work ......4 1.2. Before starting the trial run .......... 20 2. Indoor unit installation location ..........24 2.1. Outline dimensions ............24 2.2. Service space .............. 26 2.3. - Page 3 Índice Contenido Indice 1. Precauções de Segurança ............5 1. Medidas de Seguridad ..............5 1.1. Antes da instalação e do trabalho de electricidade ..5 1.1. Antes de la instalación y del trabajo eléctrico ....5 1.2. Antes do arranque da marcha de ensaio ....21 1.2.
-
Page 4: Sicherheitsvorkehrungen
1. Safety Precautions 1. Sicherheitsvorkehrungen 1. Consignes de sécurité 1.1. Before installation and electric work s Since this unit contains rotating parts and parts which could cause an electric shock, be sure to read all of the “Safety Precautions” before operating the unit. s The “Safety Precautions”... -
Page 5: Precauções De Segurança
1. Precauções de Segurança 1. Medidas de Seguridad 1. Misure di sicurezza 1.1. Antes da instalação e do trabalho de 1.1. Antes de la instalación y del trabajo electricidade eléctrico s Como a unidade contém peças rotativas e peças que s La unidad contiene partes giratorias y partes que pueden podem causar choques eléctricos, leia as “Precauções producir una descarga eléctrica, por lo tanto, lea todas... - Page 6 • Use only accessories authorized by Mitsubishi Electric and ask the dealer or an authorized technician to install them. If accesso- ries are installed improperly, water leakage, electric shock or fire may result.
- Page 7 • Utilize só acessórios autorizados pela Mitsubishi Electric e peça descarga eléctrica o fuego. ao seu distribuidor ou a uma empresa autorizada que os instale.
- Page 8 1. Safety Precautions 1. Sicherheitsvorkehrungen 1. Consignes de sécurité 1.1. Before installation and electric work Warning: • The unit must be securely installed on a structure that can sus- tain its weight. If the unit is mounted on an unstable structure, it may fall down causing injuries.
- Page 9 1. Precauções de Segurança 1. Medidas de Seguridad 1. Misure di sicurezza 1.1. Antes da instalação e do trabalho de 1.1. Antes de la instalación y del trabajo electricidade eléctrico Aviso: Atención: • O aparelho deve ser instalado com segurança numa estrutura •...
- Page 10 1. Safety Precautions 1. Sicherheitsvorkehrungen 1. Consignes de sécurité 1.1. Before installation and electric work Warning: • All electric work must be performed by a licensed technician, ac- cording to local regulations and the instructions given in this manual. The units should be powered by dedicated power lines. Power lines with insufficient capacity or improper electrical work may result in electric shock or fire.
- Page 11 1. Precauções de Segurança 1. Medidas de Seguridad 1. Misure di sicurezza 1.1. Antes da instalação e do trabalho de 1.1. Antes de la instalación y del trabajo electricidade eléctrico Aviso: Atención: • Todo o trabalho eléctrico deve ser executado por um técnico au- •...
- Page 12 1. Safety Precautions 1. Sicherheitsvorkehrungen 1. Consignes de sécurité 1.1. Before installation and electric work Caution: • Do not install the equipment where combustible gas may leak and accumulate resulting in fire. • Do not keep food, plants, caged pets, artwork or precision instru- ments in the indoor unit’s direct airflow or too close to the unit, as these items can be damaged by temperature changes or drip- ping water.
- Page 13 1. Precauções de Segurança 1. Medidas de Seguridad 1. Misure di sicurezza 1.1. Antes da instalação e do trabalho de 1.1. Antes de la instalación y del trabajo electricidade eléctrico Cuidado: Cuidado: • Não instale o equipamento onde possa haver fugas de gás com- •...
- Page 14 1. Safety Precautions 1. Sicherheitsvorkehrungen 1. Consignes de sécurité 1.1. Before installation and electric work Fuse or breaker A Fuse or breaker B Main power switch C Power supply wiring Disconnection must be incorporated in the fixed wiring. Caution: • When installing the power lines, do not apply tension to the ca- bles, as this could loosen the connections, generate heat and cause a fire.
- Page 15 1. Precauções de Segurança 1. Medidas de Seguridad 1. Misure di sicurezza 1.1. Antes da instalação e do trabalho de 1.1. Antes de la instalación y del trabajo electricidade eléctrico Fusível ou disjuntor Fusible o interruptor A Fusível ou disjuntor A Fusible o interruptor B Interruptor principal de corrente B Interruptor principal de red...
- Page 16 1. Safety Precautions 1. Sicherheitsvorkehrungen 1. Consignes de sécurité 1.1. Before installation and electric work Drain piping Caution: • Install drain piping according to this Installation Manual to en- sure proper drainage. Place thermal insulation on the pipes to prevent condensation. Improper drain piping may cause water leakage and damage to furniture or other possessions.
- Page 17 1. Precauções de Segurança 1. Medidas de Seguridad 1. Misure di sicurezza 1.1. Antes da instalação e do trabalho de 1.1. Antes de la instalación y del trabajo electricidade eléctrico Tubagem de drenagem Tubería de drenaje Cuidado: Cuidado: • Instale a tubagem de drenagem segundo este Manual de Instala- •...
- Page 18 1. Safety Precautions 1. Sicherheitsvorkehrungen 1. Consignes de sécurité 1.1. Before installation and electric work Caution: • Be extremely careful when transporting the units. Two or more persons are needed to handle the unit, as it weighs 20 kg or more. Do not grasp the bands of the crate.
- Page 19 1. Precauções de Segurança 1. Medidas de Seguridad 1. Misure di sicurezza 1.1. Antes da instalação e do trabalho de 1.1. Antes de la instalación y del trabajo electricidade eléctrico Cuidado: Cuidado: • Seja extremamente cauteloso ao transportar os aparelhos. São •...
-
Page 20: Vor Beginn Des Versuchslaufs
1. Safety Precautions 1. Sicherheitsvorkehrungen 1. Consignes de sécurité 1.2. Before starting the trial run Caution: • Before starting operation, check that all panels, guards and other protective parts are correctly installed. Rotating, hot or high volt- age parts can cause injuries. •... -
Page 21: Antes Do Arranque Da Marcha De Ensaio
1. Precauções de Segurança 1. Medidas de Seguridad 1. Misure di sicurezza 1.2. Antes do arranque da marcha de en- 1.2. Antes de llevar a cabo la prueba de saio funcionamiento Cuidado: Cuidado: • Antes de iniciar a operação, verifique que todos os painéis, res- •... - Page 22 1. Safety Precautions 1. Sicherheitsvorkehrungen 1. Consignes de sécurité 1.2. Before starting the trial run Caution: • Do not touch any switch with wet fingers, as this can cause an electric shock. • Do not operate the air conditioner without the air filter set in place. Dust may accumulate, and cause a failure.
- Page 23 1. Precauções de Segurança 1. Medidas de Seguridad 1. Misure di sicurezza 1.2. Antes do arranque da marcha de en- 1.2. Antes de llevar a cabo la prueba de saio funcionamiento Cuidado: Cuidado: • Não toque em nenhum interruptor com os dedos molhados para •...
-
Page 24: Aufstellort Der Innenanlage
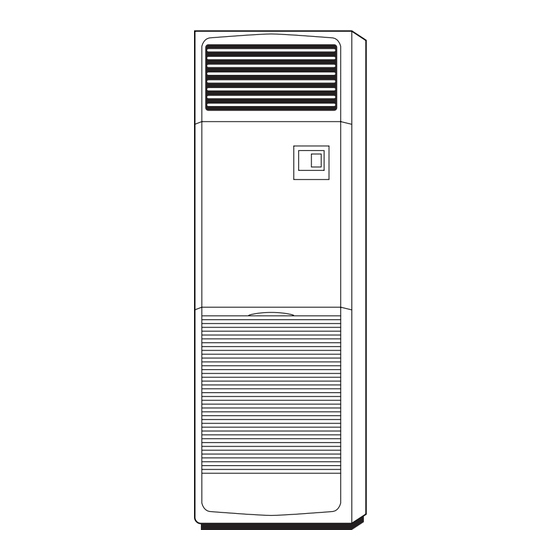
2. Indoor unit installation location 2. Emplacement pour l’installation de l’ap- 2. Aufstellort der Innenanlage pareil intérieur 2.1. Outline dimensions (mm) Models PSH-3 1900 PS-3 PSH-4, 5, 6 1900 PS-4, 5, 6 • Mount the indoor unit on a wall strong enough to withstand the weight of the unit. -
Page 25: Localização Da Instalação Da Unidade Interior
2. Localização da instalação da unidade 2. Lugar en que se instalará la unidad in- interior terior 2. Luogo in cui installare la sezione inter- 2.1. Dimensões globais 2.1. Dimensiones exteriores (mm) (en mm) Modelos Modelos PSH-3 PSH-3 1900 1900 PS-3 PS-3 PSH-4, 5, 6... -
Page 26: Freiraum Für Bedienung/Handhabung
2. Indoor unit installation location 2. Emplacement pour l’installation de l’ap- 2. Aufstellort der Innenanlage pareil intérieur 2.2. Service space Leave as much space as possible between the unit and the wall. This will make any future work easier and safer. Piping and wiring maintenance can be done from the front, but consider- ing ease of working and safety at the time of installation, this space is necessary. -
Page 27: Espaço De Manutenção
2. Localização da instalação da unidade 2. Lugar en que se instalará la unidad in- interior terior 2. Luogo in cui installare la sezione inter- 2.2. Espaço de manutenção 2.2. Espacio para acceso del servicio téc- nico Deixe o maior espaço possível entre a unidade e a parede. Isto torna mais fácil e mais seguro qualquer trabalho futuro. -
Page 28: Rohrleitung Für Kältemittel
2. Indoor unit installation location 2. Emplacement pour l’installation de l’ap- 2. Aufstellort der Innenanlage pareil intérieur 2.3. Refrigerant pipes s Check that the difference between the heights of the indoor and outdoor units, the length of refrigerant pipe, and the number of bends in the pipe are within the limits shown below. -
Page 29: Tubos De Refrigerante
2. Localização da instalação da unidade 2. Lugar en que se instalará la unidad in- interior terior 2. Luogo in cui installare la sezione inter- 2.3. Tubos de refrigerante 2.3. Tuberías de refrigerante s Verifique se a diferença entre as alturas das unidades interior e s Compruebe que la diferencia de altura entre las unidades interior exterior, o comprimento da tubagem de refrigerante e o número y exterior, la longitud del tubo de refrigerante y la cantidad de... -
Page 30: Aufstellort Der Außenanlage
3. Outdoor unit installation location 3. Emplacement pour l’installation de l’ap- 3. Aufstellort der Außenanlage pareil extérieur 3.1. Outline dimensions (mm) Models PUH-3 PU-3 PUH-4 1258 PU-4 PUH-5, 6 1258 PU-5, 6 1258 • Avoid locations where combustible gas may leak, settle or be gener- ated. -
Page 31: Localização Da Instalação Da Unidade Exterior
3. Localização da instalação da unidade 3. Lugar en que se instalará la unidad ex- exterior terior 3. Luogo in cui installare la sezione ester- 3.1. Dimensões globais 3.1. Dimensiones exteriores (mm) (mm) Modelos Modelos PUH-3 PUH-3 PU-3 PU-3 PUH-4 PUH-4 1258 1258... -
Page 32: Freiraum Für Belüftung Und Bedienung
3. Outdoor unit installation location 3. Emplacement pour l’installation de l’ap- 3. Aufstellort der Außenanlage pareil extérieur 3.2. Ventilation and service space When installing a single outdoor unit 1 Service space Maintain an easily accessible service space in front of the unit as shown in the diagram. -
Page 33: Ventilação E Espaço De Manutenção
3. Localização da instalação da unidade 3. Lugar en que se instalará la unidad ex- exterior terior 3. Luogo in cui installare la sezione ester- 3.2. Ventilação e espaço de manutenção 3.2. Ventilación y espacio de servicio Quando instalar uma só unidade exterior Al instalar una unidad exterior simple 1 Espaço de manutenção 1 Espacio para los técnicos... - Page 34 3. Outdoor unit installation location 3. Emplacement pour l’installation de l’ap- 3. Aufstellort der Außenanlage pareil extérieur 3.2. Ventilation and service space 4 Obstacles in the front (blowing side) only If there are obstacles in front of the unit, keep the back, left/right, & top unobstructed.
- Page 35 3. Localização da instalação da unidade 3. Lugar en que se instalará la unidad ex- exterior terior 3. Luogo in cui installare la sezione ester- 3.2. Ventilação e espaço de manutenção 3.2. Ventilación y espacio de servicio 4 Obstáculos do lado da frente (lado do sopro) unicamente 4 Obstáculos en la parte frontal (salida de aire) Se houver obstáculos do lado da frente, mantenha os lados de trás, da Si hay obstáculos en la parte frontal, mantenga las partes trasera, dere-...
- Page 36 3. Outdoor unit installation location 3. Emplacement pour l’installation de l’ap- 3. Aufstellort der Außenanlage pareil extérieur 3.2. Ventilation and service space 6 Obstacles at the front & rear This unit cannot be used if the following conditions are met: 7 Obstacles on 4 surrounding sides The unit cannot be used if there are obstacles on all 4 surrounding sides, even if there is more than the prescribed amount of space around the...
- Page 37 3. Localização da instalação da unidade 3. Lugar en que se instalará la unidad ex- exterior terior 3. Luogo in cui installare la sezione ester- 3.2. Ventilação e espaço de manutenção 3.2. Ventilación y espacio de servicio 6 Obstáculos à frente e atrás 6 Obstáculos en la parte delantera y trasera Esta unidade não pode ser utilizada no caso de: Esta unidad sólo se podrá...
- Page 38 3. Outdoor unit installation location 3. Emplacement pour l’installation de l’ap- 3. Aufstellort der Außenanlage pareil extérieur 3.2. Ventilation and service space When installing many outdoor units 1 Side-by-side arrangement Remove the side screw on the pipe cover. Keep the top unobstructed. •...
- Page 39 3. Localização da instalação da unidade 3. Lugar en que se instalará la unidad ex- exterior terior 3. Luogo in cui installare la sezione ester- 3.2. Ventilação e espaço de manutenção 3.2. Ventilación y espacio de servicio Quando instalar muitas unidades exteriores Cuando instale varias unidades exteriores 1 Disposição lado-a-lado 1 Instalación una al lado de la otra...
- Page 40 3. Outdoor unit installation location 3. Emplacement pour l’installation de l’ap- 3. Aufstellort der Außenanlage pareil extérieur 3.2. Ventilation and service space 4 Parallel arrangement (with air outlet guides) (The numbers in parentheses apply to the PUH-4, 5, 6, PU-4, 5, 6 model.) Fit an optional outdoor air outlet guide on each unit.
- Page 41 3. Localização da instalação da unidade 3. Lugar en que se instalará la unidad ex- exterior terior 3. Luogo in cui installare la sezione ester- 3.2. Ventilação e espaço de manutenção 3.2. Ventilación y espacio de servicio 4 Disposição paralela (com conduta de saída de ar) 4 Instalación en paralelo (con guías de salida de aire) (Os números entre parêntesis aplicam-se ao Modelo PUH-4, 5, 6, PU-4, (Los números entre paréntesis son para los modelos PUH-4, 5, 6, PU-4,...
- Page 42 3. Outdoor unit installation location 3. Emplacement pour l’installation de l’ap- 3. Aufstellort der Außenanlage pareil extérieur 3.2. Ventilation and service space Installation on a rooftop or other windy places When installing the unit on a rooftop or other location unprotected from the wind, situate the unit’s air outlet so that it is not directly exposed to strong winds.
- Page 43 3. Localização da instalação da unidade 3. Lugar en que se instalará la unidad ex- exterior terior 3. Luogo in cui installare la sezione ester- 3.2. Ventilação e espaço de manutenção 3.2. Ventilación y espacio de servicio Instalação no telhado ou noutros lugares ventosos Instalación en el tejado o en otros lugares expues- tos al viento Se instalar a unidade no topo do telhado ou noutros locais desprotegidos...
-
Page 44: Anbringung Der Innenanlage
4. Installing the indoor unit 4. Anbringung der Innenanlage 4. Installation de l’appareil intérieur 4.1. Check the indoor unit accessories and parts Check that the following parts and accessories are provided with the indoor unit. Part number Accessory Quantity Setting location Tip-over prevention bracket The top surface of the unit. -
Page 45: Instalação Da Unidade Interior
4. Instalação da unidade interior 4. Instalación de la unidad interior 4. Installazione della sezione interna 4.1. Verifique as peças e os acessórios da 4.1. Compruebe los accesorios y las pie- unidade interior zas de la unidad interior Verifique se as peças e os acessórios seguintes foram fornecidos com a Compruebe que junto con la unidad interior recibe las piezas y los acce- unidade interior. -
Page 46: Klammer, Die Das Umkippen Verhindert
4. Installing the indoor unit 4. Anbringung der Innenanlage 4. Installation de l’appareil intérieur 4.2. Tip-over prevention bracket To prevent the unit from tipping over attach the tip-over prevention bracket to the wall. 1 Tip-over prevention bracket A Tapping screws 4 × 10 B The long edge of the unit C The short edge of the unit The tip-over prevention bracket 1 is set on the top surface of the unit. -
Page 47: Suporte De Prevenção De Queda
4. Instalação da unidade interior 4. Instalación de la unidad interior 4. Installazione della sezione interna 4.2. Suporte de prevenção de queda 4.2. Soporte antibasculante Para evitar que a unidade caia, fixe o suporte de prevenção de queda Para evitar que la unidad bascule y caiga, fije el soporte à... -
Page 48: Montage Der Klammer, Die Das Umkippen Verhindert
4. Installing the indoor unit 4. Anbringung der Innenanlage 4. Installation de l’appareil intérieur 4.3. Mounting the tip-over prevention bracket • Select one of the following mounting methods, depending on the height of the frieze inside the wall above the floor. •... -
Page 49: Montagem Do Suporte De Prevenção De Queda
4. Instalação da unidade interior 4. Instalación de la unidad interior 4. Installazione della sezione interna 4.3. Montagem do suporte de prevenção 4.3. Montaje del soporte antibasculante de queda • Elija uno de los métodos de montaje sugeridos, según la altura del entrepaño en la pared y sobre el suelo. -
Page 50: 4.4. Montage Am Boden
4. Installing the indoor unit 4. Anbringung der Innenanlage 4. Installation de l’appareil intérieur 4.3. Mounting the tip-over prevention bracket • First, mount the bracket on the wall and then tighten the screw so that the bracket can slide up and down. 1 Tip-over prevention bracket 2 Tapping screw a Frieze... -
Page 51: Montagem No Chão
4. Instalação da unidade interior 4. Instalación de la unidad interior 4. Installazione della sezione interna 4.3. Montagem do suporte de prevenção 4.3. Montaje del soporte antibasculante de queda • Monte primero el soporte a la pared y luego apriete los tornillos de forma que el soporte pueda moverse hacia arriba y hacia abajo. -
Page 52: Einbau Der Außenanlage
5. Installing the outdoor unit 5. Einbau der Außenanlage 5. Installation de l’appareil extérieur Caution: • It is best to transport the unit in its original packaging to the in- stallation site. B, C • Since the centre of gravity of the unit is off-centre, caution is nec- essary when lifting the unit using a rope, etc. -
Page 53: Instalação Da Unidade Exterior
5. Instalação da unidade exterior 5. Instalación de la unidad exterior 5. Installazione della sezione esterna Cuidado: Cuidado: • Tente o mais possível transportar a unidade para o local de insta- • Haga todo lo posible por transportar la unidad en su embalaje lação na embalagem original. -
Page 54: Kühl- Und Ablaßrohre
6. Cooling pipe and drain pipe 6. Tuyaux de refroidissement et tuyaux 6. Kühl- und Ablaßrohre d’écoulement Notes: • Cooling pipes are available as an option. Read the manual before beginning their installation. • Place insulation materials over cooling pipes and drain pipes to prevent condensation. -
Page 55: Tubo De Arrefecimento E Tubo De Drenagem
6. Tubo de arrefecimento e tubo de dre- 6. Tubo del refrigerante y tubo de dre- nagem naje 6. Tubo di raffreddamento e tubo di dre- naggio Notas: Notas: • Os tubos de arrefecimento estão disponíveis à opção. Leia o ma- •... -
Page 56: Lage Der Kältemittel- Und Auslauf-/Dränagerohrleitungen
6. Cooling pipe and drain pipe 6. Tuyaux de refroidissement et tuyaux 6. Kühl- und Ablaßrohre d’écoulement 6.2. Refrigerant and drainage pipe loca- (120) tions Dimensions in parentheses are for Models PSH-4, 5, 6, PS-4, 5, 6. Where knockout holes are indicated, use a saw blade to cut along the groove. -
Page 57: Localização Das Tubagens De Refrigerante E De Drenagem
6. Tubo de arrefecimento e tubo de dre- 6. Tubo del refrigerante y tubo de dre- nagem naje 6. Tubo di raffreddamento e tubo di dre- naggio 6.2. Localização das tubagens de refrige- 6.2. Ubicación de los tubos de refrigeran- rante e de drenagem te y drenaje As dimensões entre parênteses referem-se aos modelos PSH-4, 5 e 6... -
Page 58: Kältemittelrohrleitung
6. Cooling pipe and drain pipe 6. Tuyaux de refroidissement et tuyaux 6. Kühl- und Ablaßrohre d’écoulement 6.3. Refrigerant piping 1) Indoor unit • This unit has the flared connections on both indoor and outdoor sides. 1.1. When using separately purchased refrigerant pipes: a) Piping connection procedures See that stop valve on outdoor unit is fully shut (unit is shipped with valve shut). -
Page 59: Tubagem De Refrigerante
6. Tubo de arrefecimento e tubo de dre- 6. Tubo del refrigerante y tubo de dre- nagem naje 6. Tubo di raffreddamento e tubo di dre- naggio 6.3. Tubagem de refrigerante 6.3. Tubos de refrigerante 1) Unidade interior 1) Unidad interior •... - Page 60 6. Cooling pipe and drain pipe 6. Tuyaux de refroidissement et tuyaux 6. Kühl- und Ablaßrohre d’écoulement 6.3. Refrigerant piping 1) Indoor unit 1.2. When using commercially available copper pipes: See that stop valve on outdoor unit is fully shut (unit is shipped with valve shut).
- Page 61 6. Tubo de arrefecimento e tubo de dre- 6. Tubo del refrigerante y tubo de dre- nagem naje 6. Tubo di raffreddamento e tubo di dre- naggio 6.3. Tubagem de refrigerante 6.3. Tubos de refrigerante 1) Unidade interior 1) Unidad interior 1.2.
- Page 62 6. Cooling pipe and drain pipe 6. Tuyaux de refroidissement et tuyaux 6. Kühl- und Ablaßrohre d’écoulement 6.3. Refrigerant piping 1) Indoor unit 1.3. Refrigerant piping connection Remove the screw from the air intake grill handle and then remove the air intake grill by pulling it up and forward . Remove the tapping screw that holds the pipe support in place and then remove the pipe support.
- Page 63 6. Tubo de arrefecimento e tubo de dre- 6. Tubo del refrigerante y tubo de dre- nagem naje 6. Tubo di raffreddamento e tubo di dre- naggio 6.3. Tubagem de refrigerante 6.3. Tubos de refrigerante 1) Unidade interior 1) Unidad interior 1.3.
- Page 64 6. Cooling pipe and drain pipe 6. Tuyaux de refroidissement et tuyaux 6. Kühl- und Ablaßrohre d’écoulement 6.3. Refrigerant piping 1) Indoor unit Insulate flare joints 4 and 5 of the gas and refrigerant pipes completely. If any part of the joints are exposed, condensation can drip down. a Liquid pipe b Gas pipe c Frame...
- Page 65 6. Tubo de arrefecimento e tubo de dre- 6. Tubo del refrigerante y tubo de dre- nagem naje 6. Tubo di raffreddamento e tubo di dre- naggio 6.3. Tubagem de refrigerante 6.3. Tubos de refrigerante 1) Unidade interior 1) Unidad interior Isole completamente as juntas de alargamento 4 e 5 dos tubos de gás Aísle completamente las uniones abocardadas 4 y 5 de los tubos de e de refrigerante.
- Page 66 6. Cooling pipe and drain pipe 6. Tuyaux de refroidissement et tuyaux 6. Kühl- und Ablaßrohre d’écoulement 6.3. Refrigerant piping 2) Outdoor unit 1 Pipe take-in direction The pipe can be passed in any of the four directions: front, rear, right and lower side.
- Page 67 6. Tubo de arrefecimento e tubo de dre- 6. Tubo del refrigerante y tubo de dre- nagem naje 6. Tubo di raffreddamento e tubo di dre- naggio 6.3. Tubagem de refrigerante 6.3. Tubos de refrigerante 2) Unidade exterior 2) Unidad exterior 1 Direcção sinuosa do tubo 1 Dirección de los tubos O tubo pode ser dirigido em qualquer das quatro direcções: para a frente,...
- Page 68 6. Cooling pipe and drain pipe 6. Tuyaux de refroidissement et tuyaux 6. Kühl- und Ablaßrohre d’écoulement 6.3. Refrigerant piping 3) Specified tightening torques (use a torque wrench) Torque specifications Outer dia. of copper tube (mm) Tightening torque (kg/cm) ø9.52 350 - 420 ø15.88 750 - 800...
- Page 69 6. Tubo de arrefecimento e tubo de dre- 6. Tubo del refrigerante y tubo de dre- nagem naje 6. Tubo di raffreddamento e tubo di dre- naggio 6.3. Tubagem de refrigerante 6.3. Tubos de refrigerante 3) Binários de aperto específicos (utilize uma cha- 3) Pares de apriete especificados ve dinamométrica) (utilice una llave con limitador del par de apriete)
- Page 70 6. Cooling pipe and drain pipe 6. Tuyaux de refroidissement et tuyaux 6. Kühl- und Ablaßrohre d’écoulement 6.3. Refrigerant piping 4) Addition of refrigerant PSH-3, 4, 5, 6 1 Refrigerant amount This product needs no additional charging of refrigerant for a pipe length of 30 m or less.
- Page 71 6. Tubo de arrefecimento e tubo de dre- 6. Tubo del refrigerante y tubo de dre- nagem naje 6. Tubo di raffreddamento e tubo di dre- naggio 6.3. Tubagem de refrigerante 6.3. Tubos de refrigerante 4) Adição de refrigerante 4) Añadido de refrigerante PSH-3, 4, 5, 6 PSH-3, 4, 5, 6 1 Quantidade de refrigerante...
- Page 72 6. Cooling pipe and drain pipe 6. Tuyaux de refroidissement et tuyaux 6. Kühl- und Ablaßrohre d’écoulement 6.3. Refrigerant piping 4) Addition of refrigerant PS-3, 4, 5, 6 It is not necessary to adjust the amount of refrigerant if the piping length is within 20 m.
- Page 73 6. Tubo de arrefecimento e tubo de dre- 6. Tubo del refrigerante y tubo de dre- nagem naje 6. Tubo di raffreddamento e tubo di dre- naggio 6.3. Tubagem de refrigerante 6.3. Tubos de refrigerante 4) Adição de refrigerante 4) Añadido de refrigerante PS-3, 4, 5, 6 PS-3, 4, 5, 6 Não é...
-
Page 74: Verlegung Der Auslauf-/Dränagerohrleitung
6. Cooling pipe and drain pipe 6. Tuyaux de refroidissement et tuyaux 6. Kühl- und Ablaßrohre d’écoulement 6.4. Drainage Piping Work • Install the drain pipe so that it slopes downward (1/100 or more). • Use VP-20 (O.D. ø26 PVC TUBE) for the drain pipes. •... -
Page 75: Trabalho De Tubagem De Drenagem
6. Tubo de arrefecimento e tubo de dre- 6. Tubo del refrigerante y tubo de dre- nagem naje 6. Tubo di raffreddamento e tubo di dre- naggio 6.4. Trabalho de tubagem de drenagem 6.4. Trabajo de tubo de drenaje • Instale a tubagem de drenagem com uma inclinação descendente de •... -
Page 76: Überprüfung Der Dränage
6. Cooling pipe and drain pipe 6. Tuyaux de refroidissement et tuyaux 6. Kühl- und Ablaßrohre d’écoulement 6.5. Drainage check • After installing the pipes, make sure that the waste water is being drained out properly and that water is not leaking from the joints (also perform these checks if installation is done during the heating season). -
Page 77: Verificação Da Drenagem
6. Tubo de arrefecimento e tubo de dre- 6. Tubo del refrigerante y tubo de dre- nagem naje 6. Tubo di raffreddamento e tubo di dre- naggio 6.5. Verificação da drenagem 6.5. Comprobación del drenaje • Após a instalação dos tubos, verifique se a água residual está a ser •... -
Page 78: Elektroarbeiten
7. Electrical work 7. Elektroarbeiten 7. Installations électriques 7.1. Precautions s Supply power from independently branched circuit. s Wiring should conform to applicable standards. s Route wires connecting indoor and outdoor units and power sup- ply wires separately so that they do not contact each other out- side of the unit. -
Page 79: Trabalho De Electricidade
7. Trabalho de electricidade 7. Trabajo eléctrico 7. Collegamenti elettrici 7.1. Precauções 7.1. Precauciones s Fonte de alimentação do circuito ligado independentemente. s La alimentación eléctrica debe ser una línea dedicada. s A cablagem deve ser conforme às normas aplicáveis. s El cableado debe cumplir los estándares aplicables. -
Page 80: Innenanlage
7. Electrical work 7. Elektroarbeiten 7. Installations électriques 7.2. Indoor unit 1. Remove the tapping screws a and then remove the electrical equip- ment cover b. 2. Connect the power supply wire and the control wire. For the terminal block positions, see page 56. 3. -
Page 81: Unidade Interior
7. Trabalho de electricidade 7. Trabajo eléctrico 7. Collegamenti elettrici 7.2. Unidade interior 7.2. Unidad interior 1. Retire os parafusos de derivação a e depois a tampa do equipamen- 1. Extraiga los tornillos a y saque la tapa del equipo eléctrico b. to eléctrico b. -
Page 82: Außenanlage
7. Electrical work 7. Elektroarbeiten 7. Installations électriques 7.3. Outdoor unit 1) PUH-3, 4, 5, 6, PU-3, 4, 5, 6 Warning: Tighten terminal screws securely. 1 Remove the service panel (2 screws). A Earth terminal (Do not forget to install earth.) B Service panel C Indoor/Outdoor unit connecting terminals D Power supply terminals (with earth terminal) -
Page 83: Unidade Exterior
7. Trabalho de electricidade 7. Trabajo eléctrico 7. Collegamenti elettrici 7.3. Unidade exterior 7.3. Unidad exterior 1) PUH-3, 4, 5, 6, PU-3, 4, 5, 6 1) PUH-3, 4, 5, 6, PU-3, 4, 5, 6 Aviso: Atención: Aperte bem os parafusos do terminal. Fije los tornillos de bornes firmemente. - Page 84 7. Electrical work 7. Elektroarbeiten 7. Installations électriques 7.3. Outdoor unit 1) PUH-3, 4, 5, 6, PU-3, 4, 5, 6 3 Use the accompanying “conduit holder” when wiring using the wiring conduit in the rear. L Wiring conduit holder (Not necessary in other cases) Fix power source wiring to control box by using buffer bushing for tensile force ( PG connection or the like.) connect transmission wiring to trans- mission terminal block through the knockout hole of control box using or-...
- Page 85 7. Trabalho de electricidade 7. Trabajo eléctrico 7. Collegamenti elettrici 7.3. Unidade exterior 7.3. Unidad exterior 1) PUH-3, 4, 5, 6, PU-3, 4, 5, 6 1) PUH-3, 4, 5, 6, PU-3, 4, 5, 6 3 Utilize o “suporte da conduta” de acompanhamento, quando uti- 3 Utilice el conducto portacables cuando haga la conexión mediante liza a cablagem pela conduta de cablagem no lado de trás.
-
Page 86: Schaltplan Für Stromversorgung (Beispiel)
7. Electrical work 7. Elektroarbeiten 7. Installations électriques 7.4. Power supply wiring diagram (exam- ple) Electric wiring should be done according to the appropriate wiring dia- gram for the model being installed. For electric wire specifications, see page 100. Be sure to comply with those specifications. -
Page 87: Diagrama De Cablagem Da Fonte De Alimentação (Exemplo)
7. Trabalho de electricidade 7. Trabajo eléctrico 7. Collegamenti elettrici 7.4. Diagrama de cablagem da fonte de 7.4. Diagrama de los cables de alimenta- alimentação (exemplo) ción (ejemplo) A cablagem eléctrica deve ser ligada de acordo com o diagrama de El cableado eléctrico se tiene que realizar de acuerdo con el diagrama de cablagem adequado ao modelo a instalar. -
Page 88: Testlauf
8. Trial run 8. Testlauf 8. Essai de fonctionnement 1) Before the trial run s After completing installation and the wiring and piping of the in- door and outdoor units, check for refrigerant leakage, looseness in the power supply or control wiring, and wrong polarity. s Use a 500-volt megohmmeter to check that the resistance between the power supply terminals and ground is at least 1.0 MΩ... -
Page 89: Marcha De Ensaio
8. Marcha de ensaio 8. Prueba de funcionamiento 8. Prova di funzionamento 1) Antes da marcha de ensaio 1) Antes de hacer la prueba de funcionamiento s Após a instalação, a cablagem e a tubagem das unidades interior s Después de la instalación de tubos y cables en las unidades inte- e exterior ficam completas. - Page 90 8. Trial run 8. Testlauf 8. Essai de fonctionnement 2) Test run procedures PSH-3, 4, 5, 6 Caution: Before starting test run, read “Safety Precautions” in the Operation Manual. 1 Turn ON the main POWER switch. 2 Leaving the unit in suspension (or with the TIMER indicator glow- TIMER TEMP.
- Page 91 8. Marcha de ensaio 8. Prueba de funcionamiento 8. Prova di funzionamento 2) Método de operação de ensaio 2) Procedimientos del funcionamiento de prueba PSH-3, 4, 5, 6 PSH-3, 4, 5, 6 Cuidado: Cuidado: Antes de iniciar o teste de funcionamento, leia as “Precauções de Antes de ponerlo en marcha para probarlo, lea “las precauciones de Segurança”...
- Page 92 8. Trial run 8. Testlauf 8. Essai de fonctionnement 2) Test run procedures PS-3, 4, 5, 6 Caution: Before starting test run, read “Safety Precautions” in the Operation Manual. 1 Turn ON the main POWER switch. 2 Leaving the unit in suspension (or with the TIMER indicator glow- TIMER TEMP.
- Page 93 8. Marcha de ensaio 8. Prueba de funcionamiento 8. Prova di funzionamento 2) Método de operação de ensaio 2) Procedimientos del funcionamiento de prueba PS-3, 4, 5, 6 PS-3, 4, 5, 6 Cuidado: Cuidado: Antes de iniciar o teste de funcionamento, leia as “Precauções de Antes de ponerlo en marcha para probarlo, lea “las precauciones de Segurança”...
- Page 94 8. Trial run 8. Testlauf 8. Essai de fonctionnement 2) Test run procedures If the unit fails to correctly work even by following the above described procedures, refer to the table below to locate and remove possible causes. (The indication of trouble in the table only applies to the test run mode.) Possible Cause Indication of Trouble 1) Incorrect cable connection be-...
- Page 95 8. Marcha de ensaio 8. Prueba de funcionamiento 8. Prova di funzionamento 2) Método de operação de ensaio 2) Procedimientos del funcionamiento de prueba Se a unidade não funcionar correctamente, mesmo seguindo as instruções Si la unidad no funciona correctamente incluso siguiendo los procedi- acima descritas, consulte a tabela infracitada para localizar e eliminar as mientos antes descritos, consulte la tabla siguiente para localizar y elimi- possíveis causas.
- Page 96 8. Trial run 8. Testlauf 8. Essai de fonctionnement 3) Self-diagnosis TIMER TEMP. Inspection mode If either unit encounters any trouble while in operation, the air conditioner will be automatically shut down and the trouble causing part in the unit is indicated in the TIMER REMAINING TIME (TEMPERATURE) display on the remote controller with the green indicator lit.
- Page 97 8. Marcha de ensaio 8. Prueba de funcionamiento 8. Prova di funzionamento 3) Autodiagnóstico 3) Autodiagnóstico Modo de inspecção Modo de inspección Se a unidade detectar qualquer problema durante o funcionamento, o ar Si alguna de las unidades sufre un problema durante el funcionamiento, condicionado pára automaticamente e indica no visor de temperatura el acondicionador de aire se parará...
- Page 98 8. Trial run 8. Testlauf 8. Essai de fonctionnement Indication of Trouble Possible Cause Corrective Action Piping sensor • Faulty thermister • Check connectors. TIMER TEMP. trouble • Poor contact of con- • Check thermisters. →When found cor- nector rect: →Replace in- door unit microcon- troller board.
- Page 99 8. Marcha de ensaio 8. Prueba de funcionamiento 8. Prova di funzionamento Indicação de avaria Causa possível Acção correctiva Indicación de problema Posible causa Acción de corrección Avaria do sensor • Termístor avariado • Verifique os conec-tores Problema • Resistencia térmica •...
-
Page 100: Field Electrical Wiring (Power Wiring Specifications)
9. Field electrical wiring (Power wiring specifications) Models PSH-3GJHA PSH-4GJSA PSH-3GJHA PSH-4GJHSA PSH-5GJHSA PSH-6GJHSA Power supply Phase ~/N (Single) Frequency & 50 Hz, 220-240 V 60 Hz, 220 V 50 Hz, 380/220-415/240 V (4 Wires) Voltage Input capacity Indoor unit (A) 15/15 15/15 15/15... -
Page 101: Elektrische Feldverdrahtung (Technische Daten Der Netzstromverdrahtung)
9. Elektrische Feldverdrahtung (Technische Daten der Netzstromverdrahtung) Modelle PSH-3GJHA PSH-4GJSA PSH-3GJHA PSH-4GJHSA PSH-5GJHSA PSH-6GJHSA Stromversorgung Phase ~/N (Eine) Frequenz und 50 Hz, 220-240 V 60 Hz, 220 V 50 Hz, 380/220-415/240 V (4-adrig) Spannung Eingangskapazität Innenanlage (A) 15/15 15/15 15/15 30/20 30/20 30/20... -
Page 102: Câblage Des Champs Électriques (Spécifications Du Câblage Des Circuits D'alimentation)
9. Câblage des champs électriques (Spécifications du câblage des cir- cuits d’alimentation) Modèles PSH-3GJHA PSH-4GJSA PSH-3GJHA PSH-4GJHSA PSH-5GJHSA PSH-6GJHSA Alimentation Phase ~/N (Monophasée) Fréquence et 50 Hz, 220-240 V 60 Hz, 220 V 50 Hz, 380/220-415/240 V (4 fils) tension Capacité... -
Page 103: Cablagem Eléctrica (Especificações Da Cablagem Eléctrica)
9. Cablagem eléctrica (Especificações da cablagem eléctrica) Modelos PSH-3GJHA PSH-4GJSA PSH-3GJHA PSH-4GJHSA PSH-5GJHSA PSH-6GJHSA Corrente Fase ~/N (monofásica) Frequência e 50 Hz, 220-240 V 60 Hz, 220 V 50 Hz, 380/220-415/240 V (4 fios) voltagem Potência de entrada Unidade interior (A) 15/15 15/15 15/15... -
Page 104: Conexión Eléctrica De Campo (Especificaciones De Conexión De Energía)
9. Conexión eléctrica de campo (especificaciones de conexión de energía) Modelos PSH-3GJHA PSH-4GJSA PSH-3GJHA PSH-4GJHSA PSH-5GJHSA PSH-6GJHSA Alimentación Fase ~/N (monofase) Frecuencia y 50 Hz, 220-240V 60Hz, 220V 50Hz, 380/220-415/240V (4 cables) voltaje Capacidad de entrada Unidad interior (A) 15/15 15/15 15/15 30/20... -
Page 105: Collegamenti Elettrici Locali (Specifiche Dei Cablaggi Dell'alimentazione)
9. Collegamenti elettrici locali (Specifiche dei cablaggi dell’alimentazione) Modelli PSH-3GJHA PSH-4GJSA PSH-3GJHA PSH-4GJHSA PSH-5GJHSA PSH-6GJHSA Alimentazione Fase ~/N (Monofase) Frequenza e 50 Hz, 220-240 V 60 Hz, 220 V 50 Hz, 380/220-415/240 V (4 fili) tensione Potenza assorbita Sezione interna (A) 15/15 15/15 15/15... - Page 106 This product is designed and intended for use in the residential, commercial and light-industrial environment. • Low Voltage Directive 73/23 EEC The product at hand is • Electromagnetic Compatibility Directive 89/ based on the following EU regulations: 336 EEC • Machinery Directive 89/392 EEC Please be sure to put the contact address/telephone number on the operation manual before handing it to the customer.
Need help?
Do you have a question about the Mr.Slim PSH-3GJHA and is the answer not in the manual?
Questions and answers